Cách cài đặt XAMPP trên Windows 10
- Thứ hai - 15/03/2021 00:56
- In ra
- Đóng cửa sổ này
XAMPP là phần mềm mã nguồn mở miễn phí cung cấp một cách dễ dàng giúp các nhà thiết kế và phát triển web cài đặt những thành phần để chạy phần mềm dựa trên PHP, như WordPress, Drupal, Joomla và các phần mềm khác trên Windows 10, Linux và macOS.
Nếu bạn là nhà phát triển web hoặc ai đó đang cố gắng tham gia viết blog, XAMPP sẽ tiết kiệm thời gian và giảm bớt sự phiền toái khi phải cài đặt, cấu hình Apache, MySQL, PHP và Perl theo cách thủ công trên máy tính để tạo môi trường thử nghiệm.
Trong hướng dẫn này, bạn sẽ tìm hiểu các bước cài đặt XAMPP trên Windows 10 cũng như những hướng dẫn để cấu hình môi trường web và khắc phục một số sự cố thường gặp sau khi thiết lập.
Điều gì tạo nên sự đặc biệt cho XAMPP?
Ở đây chúng ta đang nói về vấn đề cài đặt Apache trong Windows. Bạn dành nhiều thời gian để thiết lập tất cả mọi thứ và bắt đầu chạy trang web của mình. Vấn đề là bạn không thể làm được bất cứ điều gì với một trang web tĩnh, trừ khi sử dụng SQL server. Sau đó việc cần làm là cài đặt ứng dụng SQL server nhưng lại thiếu mất PHP. Một danh sách các thứ còn thiếu sẽ khiến chúng ta mất nhiều thời gian và phức tạp, nhất là đối với người mới bắt đầu.
Đối với XAMPP, ở đó bạn có một ứng dụng giúp cài đặt tất cả những gì cần thiết để chạy một website hoàn hảo, quá trình cài tương tự ứng dụng trong Windows. Dịch vụ này cho phép máy tính chạy Apache và mọi thứ khác bất cứ khi nào khởi động máy, các ứng dụng sẽ chạy âm thầm trong chế độ nền và không tiêu tốn nhiều tài nguyên hệ thống.
Cách cài đặt XAMPP trên Windows 10
Để tải xuống và cài đặt XAMPP trên Windows 10, hãy làm theo các bước sau:
Lưu ý nhanh: Nếu bạn có yêu cầu phiên bản đặc biệt cho PHP, thì hãy tải xuống phiên bản bạn cần. Nếu bạn không có yêu cầu về phiên bản, hãy tải xuống phiên bản cũ nhất vì nó có thể giúp bạn tránh các sự cố khi cài đặt phần mềm dựa trên PHP. Ngoài ra, các hướng dẫn này đã được kiểm tra và hoạt động cho phiên bản XAMPP 7.3.22, cũng như các phiên bản trước đó, nhưng bạn cũng có thể sử dụng chúng để cài đặt những phiên bản sau này.
2. Nhấp đúp vào file đã tải xuống để khởi chạy trình cài đặt.
3. Nhấp vào nút OK.
4. Nhấp vào nút Next.
5. XAMPP cung cấp nhiều thành phần khác nhau mà bạn có thể cài đặt, chẳng hạn như MySQL, phpMyAdmin, PHP, Apache, v.v... Trong hầu hết các trường hợp, bạn sẽ sử dụng hầu hết những thành phần này, vì vậy, bạn nên để các tùy chọn mặc định.
6. Nhấp vào nút Next.
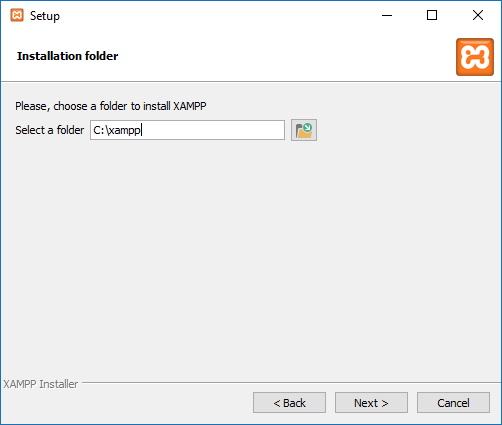
7. Sử dụng vị trí được cài đặt mặc định. (Hoặc chọn một thư mục khác để cài đặt phần mềm trong trường Select a folder).
8. Nhấp vào nút Next.
9. Chọn ngôn ngữ cho XAMPP Control Panel.
10. Nhấp vào nút Next.
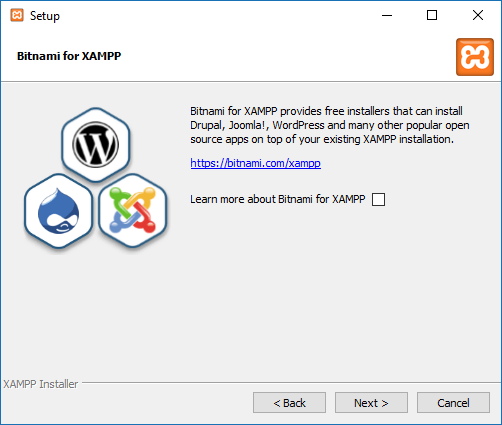
11. Xóa tùy chọn Learn more about Bitnami for XAMPP.
12. Nhấp vào nút Next 2 lần.
13. Nhấp vào nút Allow access để cho phép ứng dụng thông qua Windows Firewall (nếu có).
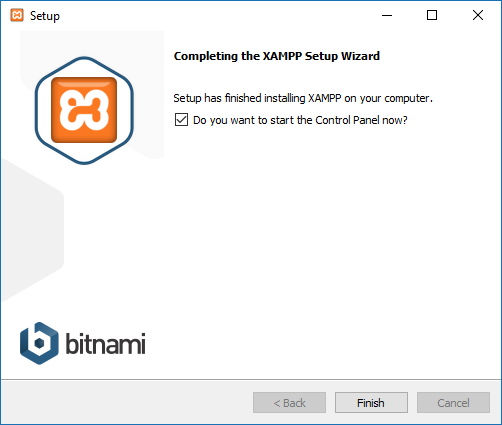
14. Nhấp vào nút Finish.
Sau khi bạn hoàn thành các bước, XAMPP Control Panel sẽ khởi chạy và bạn có thể bắt đầu cấu hình môi trường web server.
Cách cấu hình XAMPP trên Windows 10
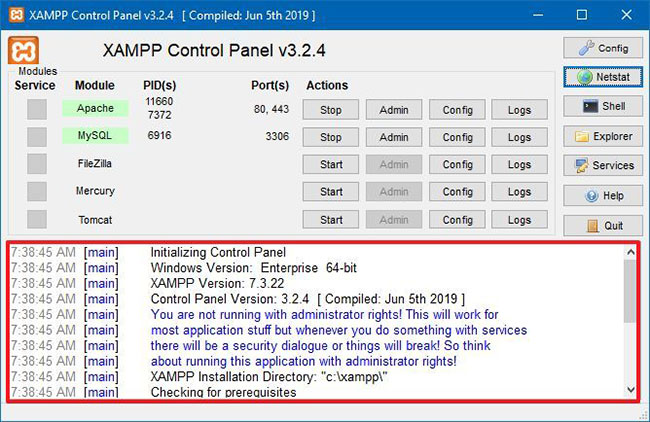
XAMPP Control Panel bao gồm 3 phần chính. Trong phần Modules, bạn sẽ tìm thấy tất cả các web service có sẵn. Bạn có thể bắt đầu từng service bằng cách nhấp vào nút Start.
Khi bạn khởi động một số service, bao gồm Apache và MySQL, ở phía bên phải, bạn cũng sẽ thấy số ID tiến trình (PID) và số cổng TCP/IP (Port) mà mỗi service đang sử dụng. Ví dụ, theo mặc định Apache sử dụng cổng TCP/IP 80 và 443, trong khi MySQL sử dụng cổng TCP/IP 3306.
Bạn cũng có thể nhấp vào nút Admin để có quyền truy cập vào trang tổng quan quản trị cho từng service và xác minh rằng mọi thứ đang hoạt động chính xác.
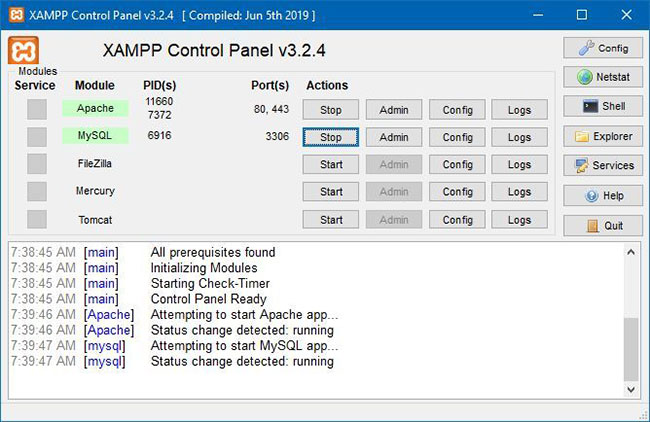
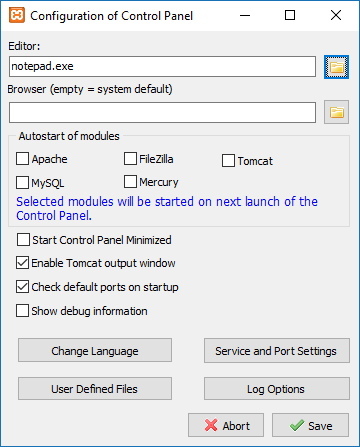
Ở bên phải có danh sách các nút để cấu hình những khía cạnh khác nhau của bảng điều khiển, bao gồm nút Config để cấu hình mô-đun nào sẽ tự động khởi động khi bạn khởi chạy XAMPP.
Nhấp vào nút Netstart sẽ cung cấp cho bạn danh sách các service hiện đang truy cập mạng, bao gồm địa chỉ TCP/IP và cổng, cũng nhự thông tin ID tiến trình.

Ngoài ra, từ bảng điều khiển, cũng có các nút truy cập nhanh để mở tiện ích dòng lệnh shell, thư mục cài đặt XAMPP, các service và đóng ứng dụng.
Cuối cùng, bạn sẽ thấy phần nhật ký, nơi bạn có thể xem qua những gì sẽ xảy ra mỗi khi bạn khởi động mô-đun hoặc thay đổi cài đặt. Đây cũng là nơi đầu tiên cần xem xét khi có thứ gì đó không hoạt động.
Cài đặt mặc định sẽ phù hợp với hầu hết mọi người sử dụng XAMPP để tạo môi trường thử nghiệm chạy trang web. Tuy nhiên, tùy thuộc vào cấu hình thiết lập của bạn, bạn có thể cần thay đổi số cổng TCP/IP cho máy chủ Apache, dung lượng upload lên cơ sở dữ liệu hoặc đặt mật khẩu cho phpMyAdmin.
Để thay đổi các cài đặt này, bạn cần sử dụng nút Config cho service tương ứng. Ví dụ, bạn sẽ cần mở file httpd.conf để thay đổi cài đặt trên máy chủ Apache và file my.ini để thay đổi cài đặt MySQL.
Cách tăng dung lượng upload phpMyAdmin trên XAMPP
Một vấn đề phổ biến khác với XAMPP là giới hạn upload cơ sở dữ liệu mặc định. Ví dụ, nhiều khi các nhà phát triển sẽ tạo một bản sao của một trang web cho mục đích khắc phục sự cố hoặc làm việc trên trang web mà không làm gián đoạn trang web đang hoạt động. Tuy nhiên, những người sử dụng WordPress hoặc một phần mềm quản lý nội dung khác sẽ nhanh chóng phát hiện ra rằng họ không thể upload cơ sở dữ liệu vì nó vượt quá kích thước upload tối đa cho phép, theo mặc định là 2048KB.
Để tăng giới hạn upload cơ sở dữ liệu trên phpMyAdmin, hãy làm theo các bước sau:
1. Mở XAMPP Control Panel.
2. Nhấp vào nút Explorer.
3. Mở thư mục php.
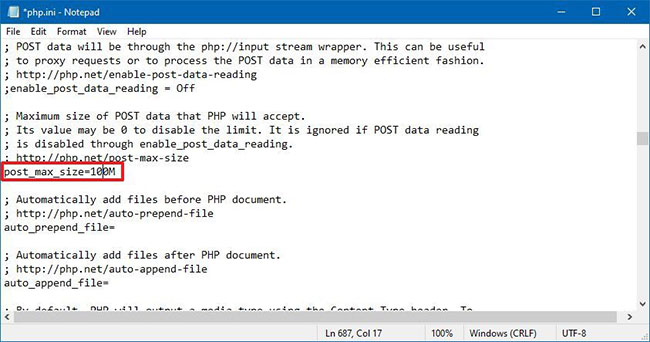
4. Mở file php.ini bằng bất kỳ trình soạn thảo văn bản nào.
5. Thay đổi giá trị cho upload_max_filesize và post_max_size thành kích thước bạn muốn. Ví dụ: post_max_size=100M và upload_max_filesize=100M để nhập các file cơ sở dữ liệu lên đến 40MB.
6. Nhấp vào nút Stop cho MySQL và Apache.
7. Nhấp vào nút Start để khởi động lại Apache và MySQL.
Sau khi hoàn thành các bước, bây giờ bạn có thể nhập các file cơ sở dữ liệu lớn trên phpMyAdmin.
