Xóa tận gốc các file "cứng đầu" nhất trên Windows
- Thứ năm - 13/11/2025 01:06
- In ra
- Đóng cửa sổ này
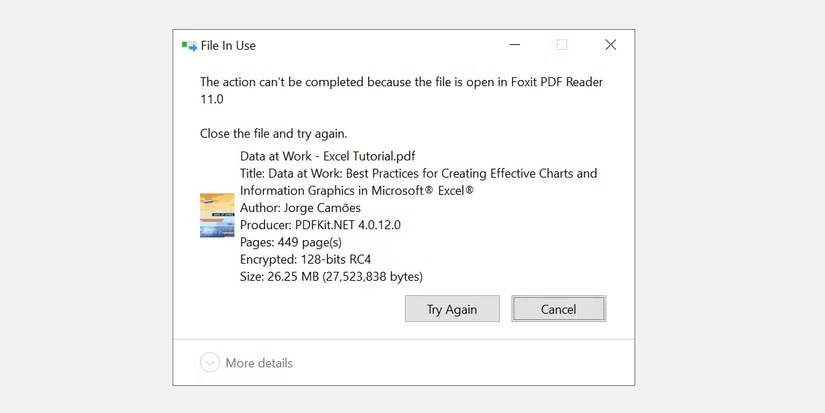
Khi bạn không thể mở, chỉnh sửa hoặc xóa file trong Windows File Explorer, file đó vẫn mở trong một chương trình đang chạy ở chế độ nền hoặc có thứ gì đó không đóng đúng cách. May mắn thay, bạn có thể buộc xóa, đóng hoặc chỉnh sửa file bằng một vài thủ thuật đơn giản.
1. Đóng chương trình bạn đã mở file bằng
Chúng ta hãy bắt đầu với điều hiển nhiên. Bạn vừa mở file và không đóng file? Nếu file đã đóng nhưng chương trình vẫn đang chạy, hãy đóng ứng dụng, sau đó thử lại.
Bạn cũng nên kiểm tra khay hệ thống để đảm bảo file không chỉ được thu nhỏ ở đó.
2. Kết thúc ứng dụng thông qua Task Manager
Task Manager có thể giúp kết thúc thủ công tiến trình hoặc ứng dụng giữ file của bạn làm con tin. Đây là một trong những phương pháp hứa hẹn nhất để khắc phục lỗi "File is open in another program", vì bạn có thể không phải lúc nào cũng nhận ra rằng file không đóng đúng cách.
Nhấn Ctrl + Shift + ESC trên bàn phím để mở Task Manager. Ngoài ra, bạn có thể nhấn Ctrl + Alt + Del để đến menu hoặc nhấp chuột phải vào Taskbar và chọn Task Manager. Nếu bạn đang sử dụng Windows 11, nhấp chuột phải vào Taskbar sẽ không hoạt động.
Nếu bạn thấy phiên bản Task Manager nhỏ gọn, hãy nhấp vào More details ở góc dưới bên trái và đảm bảo rằng bạn đang ở trong tab Processes.
Duyệt tìm ứng dụng mà bạn đã sử dụng để mở "file đang sử dụng". Ví dụ, nếu bạn đang xem tài liệu, hãy tìm Microsoft Word.
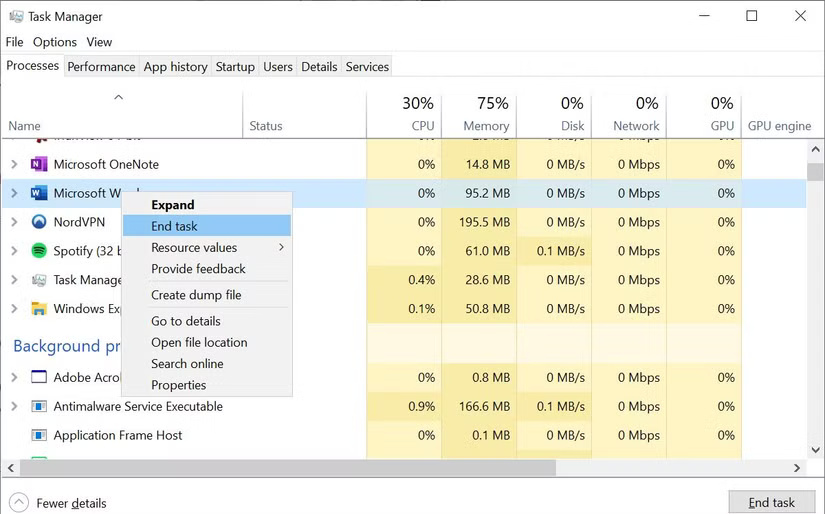
Khi bạn tìm thấy tiến trình, hãy chọn tiến trình đó và nhấp vào End task ở góc dưới bên phải. Thao tác này sẽ đóng tất cả các phiên bản của chương trình.
3. Thay đổi cài đặt tiến trình của File Explorer
Theo mặc định, File Explorer khởi chạy tất cả các cửa sổ của nó trong một tiến trình duy nhất (explorer.exe). Tuy nhiên, có thể cài đặt của bạn buộc File Explorer phải khởi chạy các tiến trình riêng biệt, điều này có thể gây ra xung đột giữa những tiến trình khác nhau.
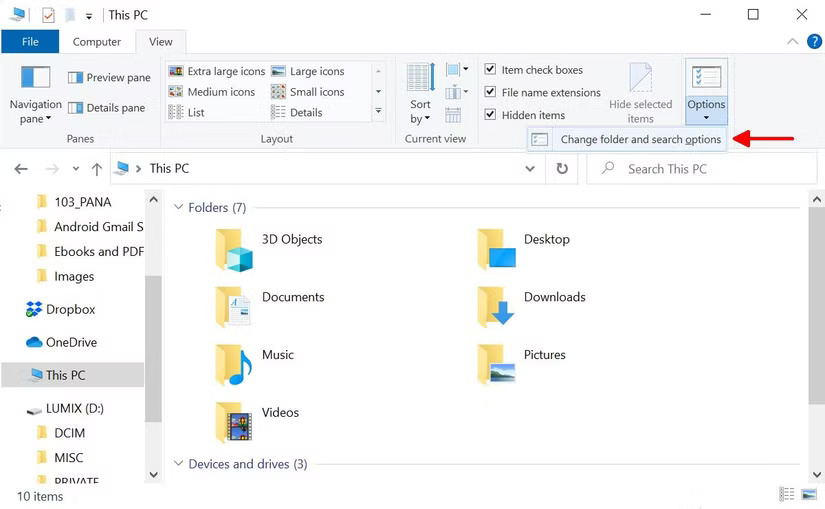
Nhấn phím Windows + E để mở File Explorer. Trong Windows 10, hãy vào View > Options > Change folder and search options.
Trong Windows 11, hãy nhấp vào biểu tượng See more có ba dấu chấm bên cạnh View, sau đó chọn Options.
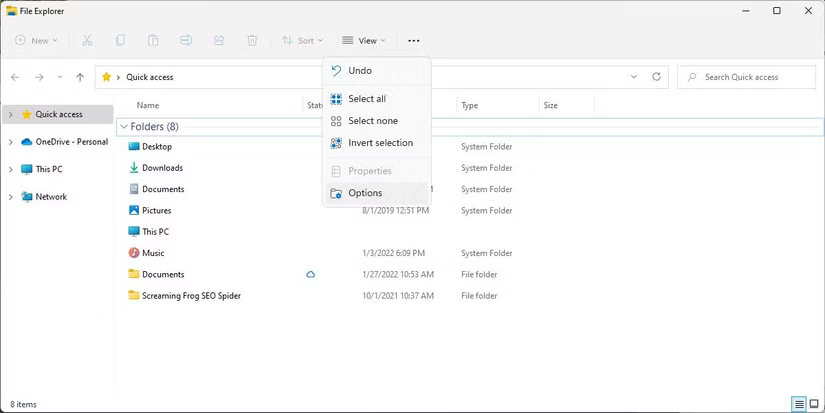
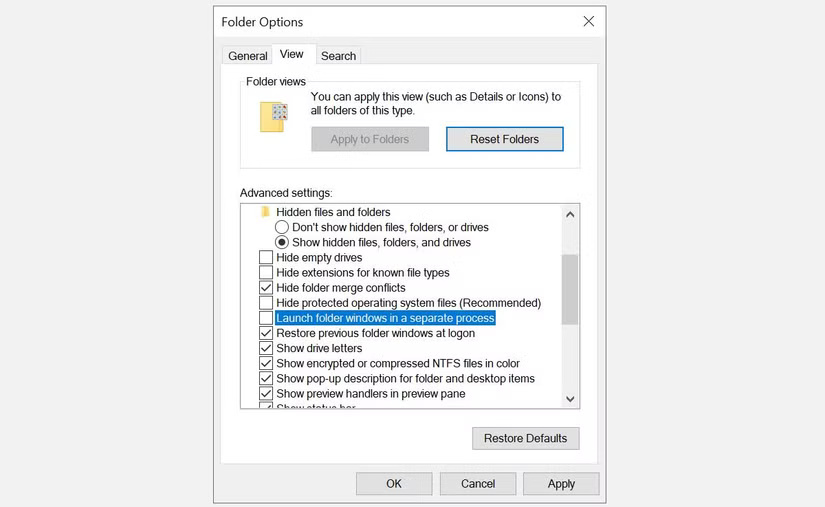
Trong cửa sổ Folder Options, hãy chuyển sang tab View và tìm tùy chọn Launch folder windows in a separate process. Đảm bảo rằng tùy chọn này không được chọn. Nhấp vào Apply để lưu bất kỳ thay đổi nào.
Nếu tùy chọn này không được chọn ngay từ đầu, bạn nên kiểm tra xem điều này có giải quyết được sự cố của mình không.
4. Vô hiệu hóa ngăn File Explorer Preview
Previews trong File Explorer cũng có thể gây ra xung đột, chẳng hạn như lỗi "File is open in another program".
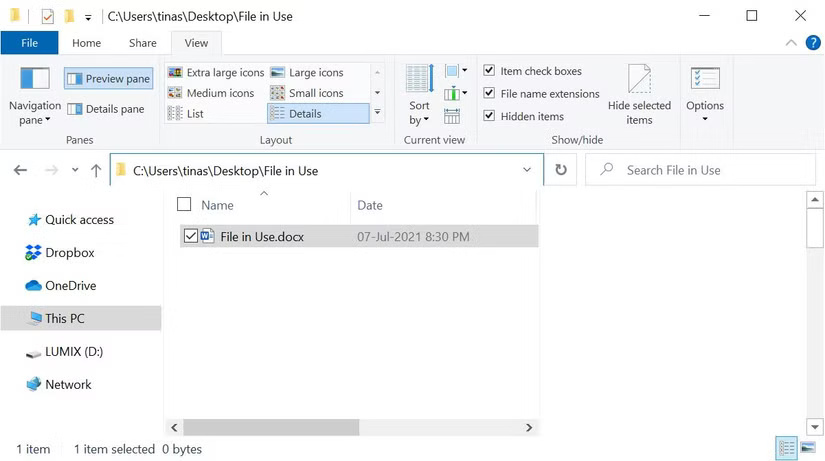
Trong Windows 10, hãy nhấn phím Windows + E, chuyển sang tab View và nhấn Alt + P để đóng ngăn xem trước.
Trong Windows 11, hãy mở File Explorer (phím Windows + E), sau đó vào View > Show và nếu bạn thấy dấu kiểm bên cạnh ngăn Preview, hãy nhấp vào đó để đóng bản xem trước.
Ảnh chụp màn hình bên dưới hiển thị một ngăn preview mở ở bên phải.
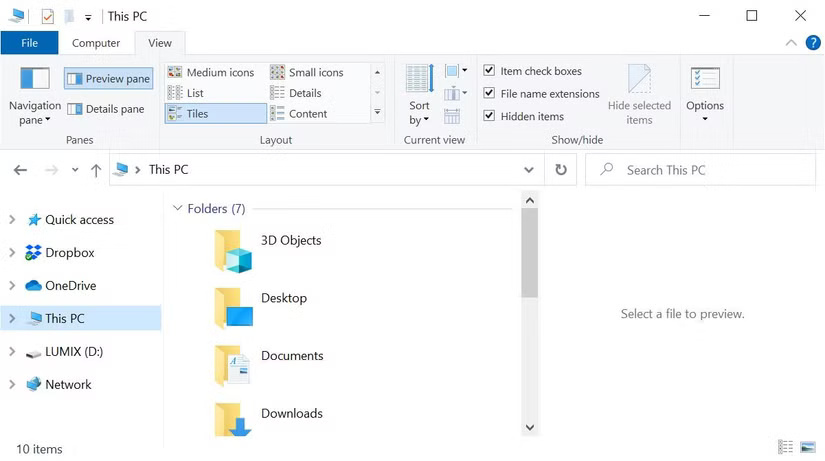
Sau khi đóng ngăn preview, hãy thử lại thao tác và xem lỗi "file in use" đã biến mất chưa.
5. Buộc xóa file qua Command Prompt
Bạn có thể bỏ qua File Explorer và buộc xóa file bằng Command Prompt.
Trước tiên, chúng ta cần theo dõi thư mục đường dẫn file trong File Explorer. Nhấn phím Windows + E để mở File Explorer, định vị file bị ảnh hưởng và sao chép đường dẫn file từ thanh địa chỉ ở đầu cửa sổ.
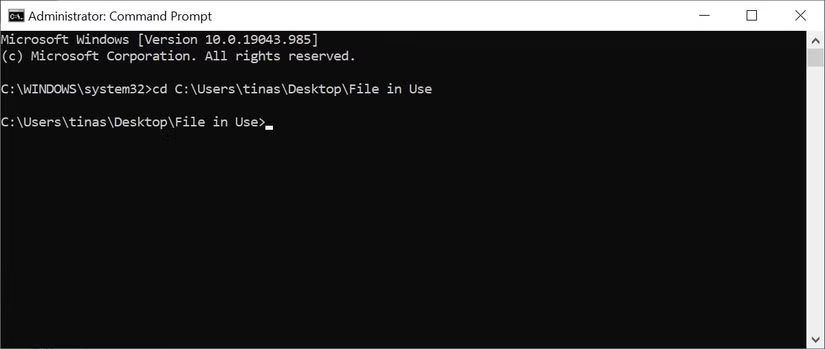
Bây giờ, hãy nhấp chuột phải vào nút Windows Start và chọn Command Prompt (Admin) hoặc Windows Terminal (admin). Để điều hướng đến thư mục file của file đang sử dụng, hãy nhập cd [đường dẫn thư mục bạn đã sao chép] và nhấn Enter.
Tuy nhiên, trước khi có thể buộc xóa file đang sử dụng, chúng ta phải tạm thời tắt tiến trình File Explorer. Thao tác này sẽ khiến Taskbar, hình nền và các thư mục đang mở của bạn biến mất. Nhưng đừng lo, bạn có thể dễ dàng khởi động lại File Explorer và lấy lại mọi thứ sau đó.
- Để đóng File Explorer, hãy nhấn Ctrl + Shift + ESC để mở Task Manager.
- Tìm Windows Explorer trong danh sách và nhấp chuột phải vào tiến trình. Chọn End task.
- Quay lại cửa sổ Command Prompt nơi bạn đã nhập lệnh trước đó.
- Nhập lệnh bên dưới để xóa file, thay thế mọi thứ giữa dấu ngoặc kép bằng tên file thực tế:
del "file name"
Bây giờ, để khởi động lại File Manager, tất cả những gì bạn cần làm là mở Task Manager (Ctrl + Shift + ESC). Sau đó, nhấp vào File > Run new task, nhập explorer.exe và nhấp vào OK. Thao tác này sẽ khôi phục desktop của bạn về giao diện thông thường.
6. Mở khóa file đang sử dụng bằng công cụ
Nếu việc cố gắng xóa file theo cách thủ công không hiệu quả hoặc bạn không thoải mái khi sử dụng Command Prompt, bạn luôn có thể sử dụng Process Explorer của Microsoft
Đây là phiên bản mạnh mẽ hơn của Task Manager có thể hiển thị cho bạn tiến trình nào đã chiếm giữ file của bạn.
Mở cửa sổ Search của Process Explorer bằng cách nhấp vào Find > Find Handle or DLL (hoặc nhấn Ctrl + Shift + F), nhập tên file và đợi danh sách các tiến trình truy cập file của bạn.
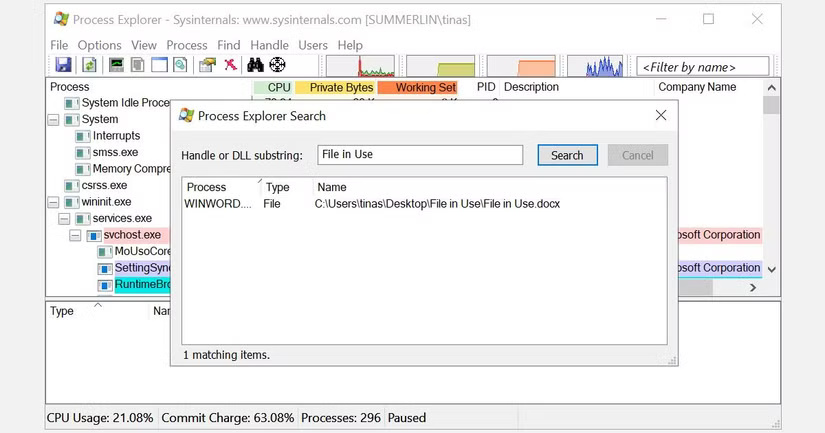
Bạn không thể đóng tiến trình từ cửa sổ Search, nhưng bạn có thể sử dụng Process Explorer hoặc Windows Task Manager để đóng ứng dụng vi phạm. Ngoài ra còn có các giải pháp thay thế, chẳng hạn như Unlocker và LockHunter, có thể giúp bạn xác định các tiến trình gây phiền nhiễu.
7. Khởi động vào Safe Mode
Đôi khi, file bạn đang cố gắng xóa có thể tự động được load bởi một ứng dụng khác. Các ứng dụng như Unlocker vẫn có thể hoạt động trong trường hợp đó. Tuy nhiên, nếu có phần mềm độc hại hoặc nếu bạn không muốn xử lý các công cụ của bên thứ ba, thì khởi động vào Safe Mode là lựa chọn tốt nhất tiếp theo của bạn.
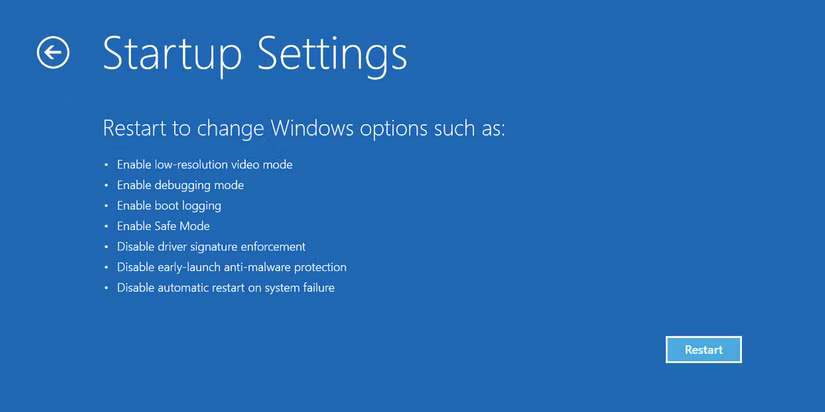
Trong Windows 10 hoặc 11, hãy nhấn phím Win trên bàn phím và nhấp vào biểu tượng nguồn. Giữ phím Shift và chọn tùy chọn Restart. PC của bạn sẽ khởi động vào trang Windows Recovery Environment (WinRE).
Từ màn hình tiếp theo, chọn Troubleshoot > Advanced Options > Startup Settings > Restart. Khi máy tính khởi động lại, bạn sẽ thấy màn hình Startup Settings. Chọn Safe Mode và đợi Windows khởi động.
Khi bạn ở Safe Mode, hãy điều hướng đến file đang đề cập và thử truy cập hoặc xóa file đó.
Bây giờ, lần tiếp theo Windows thông báo cho bạn biết một file đang được sử dụng, bạn sẽ biết cách giải phóng file đó hoặc buộc PC của mình xóa file đó. Nếu không thoải mái với các công cụ của bên thứ ba, bạn luôn có thể sử dụng Command Prompt hoặc khởi động vào Safe Mode để giúp xóa mọi sự cố với file đang đề cập.
Chúc các bạn thành công!
