PowerPoint 2019 (Phần 3): Lưu bài thuyết trình
- Thứ tư - 30/03/2022 01:37
- In ra
- Đóng cửa sổ này
Bất cứ khi nào tạo một bài thuyết trình mới trong PowerPoint, bạn sẽ cần biết cách lưu để truy cập và chỉnh sửa nó sau này. Như với các phiên bản trước của PowerPoint, bạn có thể lưu file vào máy tính của mình. Nếu muốn, bạn cũng có thể lưu file vào đám mây với OneDrive. Bạn thậm chí có thể xuất và chia sẻ bài thuyết trình trực tiếp từ PowerPoint.
Save và Save As
PowerPoint cung cấp hai cách để lưu file: Save và Save As. Các tùy chọn này hoạt động theo những cách tương tự, với một vài điểm khác biệt quan trọng.
- Save: Khi tạo hoặc chỉnh sửa bài thuyết trình, bạn sẽ sử dụng lệnh Save để lưu các thay đổi của mình. Bạn sẽ sử dụng lệnh này trong hầu hết mọi trường hợp. Khi lưu file, bạn sẽ chỉ cần chọn tên và vị trí file trong lần đầu tiên. Sau đó, bạn chỉ cần nhấp vào lệnh Save để lưu file với cùng tên và vị trí.
- Save As: Bạn sẽ sử dụng lệnh này để tạo bản sao của bài thuyết trình trong khi vẫn giữ bản gốc. Khi sử dụng Save As, bạn sẽ cần chọn một tên và/hoặc vị trí khác cho phiên bản đã sao chép.
Giới thiệu về OneDrive
Hầu hết các tính năng trong Microsoft Office, bao gồm PowerPoint, đều hướng tới việc lưu và chia sẻ tài liệu trực tuyến. Điều này được thực hiện với OneDrive, không gian lưu trữ trực tuyến cho các tài liệu và file. Nếu muốn sử dụng OneDrive, hãy đảm bảo rằng bạn đã đăng nhập vào PowerPoint bằng tài khoản Microsoft của mình.
Cách lưu bài thuyết trình
Điều quan trọng là phải lưu bài thuyết trình bất cứ khi nào bạn bắt đầu một dự án mới hoặc thực hiện các thay đổi đối với một dự án hiện có. Lưu sớm và thường xuyên có thể giúp công việc của bạn không bị mất nếu gặp sự cố. Bạn cũng sẽ cần phải chú ý đến nơi bạn lưu bài thuyết trình để có thể dễ dàng tìm thấy sau này.
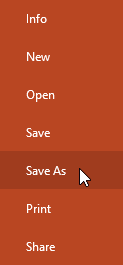
1. Định vị và chọn lệnh Save trên Quick Access Toolbar.
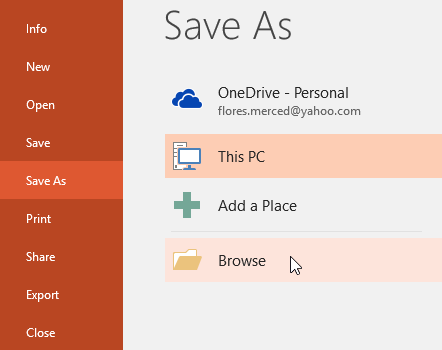
2. Nếu bạn đang lưu file lần đầu tiên, bảng điều khiển Save As sẽ xuất hiện trong Backstage view.
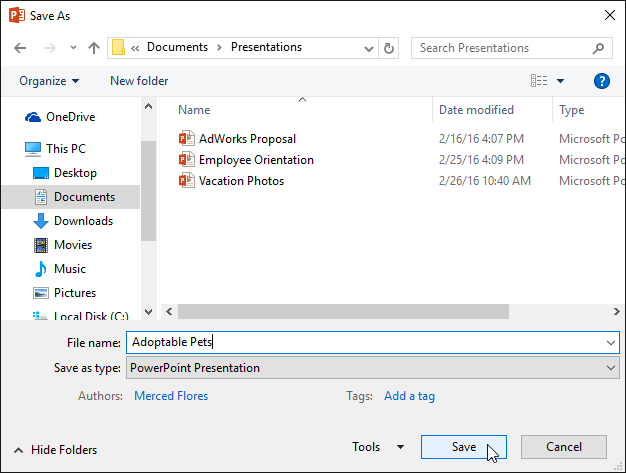
3. Sau đó, bạn sẽ cần chọn nơi lưu và đặt tên file. Nhấp vào Browser để chọn một vị trí trên máy tính. Bạn cũng có thể bấm OneDrive để lưu file vào bộ nhớ đám mây.
4. Hộp thoại Save As sẽ xuất hiện. Chọn vị trí bạn muốn lưu bài thuyết trình.
5. Nhập tên cho bài thuyết trình, sau đó bấm Save.
6. Bài thuyết trình sẽ được lưu. Bạn có thể bấm lại vào lệnh Save để lưu các thay đổi của mình khi sửa đổi bài thuyết trình.
Bạn cũng có thể thực hiện lệnh Save bằng cách nhấn Ctrl + S trên bàn phím.
Sử dụng Save As để tạo một bản sao
Nếu muốn lưu một phiên bản khác của bài thuyết trình trong khi vẫn giữ nguyên bản gốc, bạn có thể tạo một bản sao. Ví dụ, nếu bạn có một file mang tên là Client Presentation, bạn có thể lưu nó dưới dạng Client Presentation 2 để bạn có thể chỉnh sửa file mới và vẫn tham chiếu trở lại phiên bản gốc.
Để thực hiện việc này, bạn sẽ cần nhấp vào lệnh Save As trong Backstage view. Giống như khi lưu file lần đầu tiên, bạn sẽ cần chọn nơi lưu và đặt tên file mới.
Cách thay đổi vị trí lưu mặc định
Nếu không muốn sử dụng OneDrive, bạn có thể bực bội vì OneDrive được chọn làm vị trí mặc định khi lưu. Nếu bạn thấy điều này bất tiện, bạn có thể thay đổi vị trí lưu mặc định để This PC được chọn thay vì OneDrive.
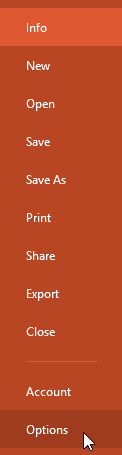
1. Bấm vào tab File để truy cập Backstage view.

2. Nhấp vào Options.
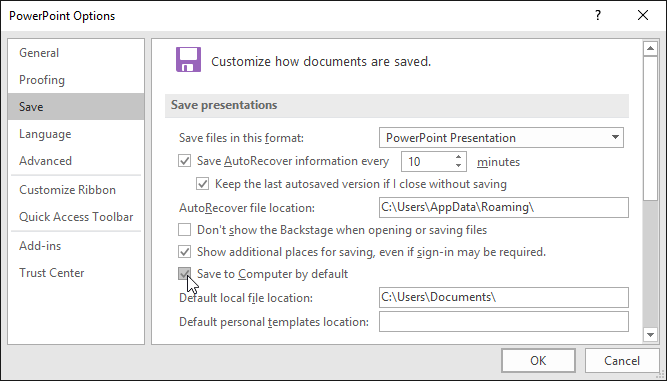
3. Hộp thoại PowerPoint Options sẽ xuất hiện. Chọn Save, chọn hộp bên cạnh Save to Computer by default, sau đó bấm OK. Vị trí lưu mặc định sẽ được thay đổi.
Sử dụng AutoRecover
PowerPoint tự động lưu bài thuyết trình của bạn vào một thư mục tạm thời trong khi bạn đang làm việc trên chúng. Nếu bạn quên lưu các thay đổi của mình hoặc nếu PowerPoint bị treo, bạn có thể khôi phục file bằng cách sử dụng AutoRecover.
Cách sử dụng AutoRecover
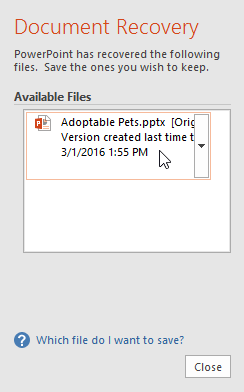
1. Mở PowerPoint. Nếu tìm thấy các phiên bản được lưu tự động của file, bảng điều khiển Document Recovery sẽ xuất hiện.
2. Bấm để mở một file có sẵn. Bài thuyết trình sẽ được khôi phục.
Theo mặc định, PowerPoint tự động lưu 10 phút một lần. Nếu bạn đang chỉnh sửa bài thuyết trình dưới 10 phút, PowerPoint có thể không tạo phiên bản tự động lưu.
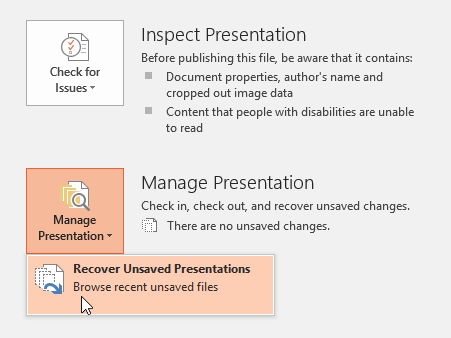
Nếu không thấy file mình cần, bạn có thể duyệt qua tất cả các file được lưu tự động từ Backstage view. Chỉ cần chọn tab File, nhấp vào Manage Presentation, sau đó chọn Recover Unsaved Presentations.
Xuất bài thuyết trình
Theo mặc định, bài thuyết trình PowerPoint được lưu ở định dạng file .pptx. Tuy nhiên, đôi khi bạn cần sử dụng loại file khác, chẳng hạn như bài thuyết trình PDF hoặc PowerPoint 97-2003. Thật dễ dàng để xuất bài thuyết trình từ PowerPoint sang nhiều loại file khác nhau.
- PDF: Thao tác này sẽ lưu bài thuyết trình dưới dạng tài liệu PDF thay vì file PowerPoint.
- Video: Thao tác này sẽ lưu bài thuyết trình dưới dạng video.
- Package for CD: Tính năng này lưu bài thuyết trình trong một thư mục cùng với Microsoft PowerPoint Viewer, một trình phát slideshow đặc biệt mà bất kỳ ai cũng có thể tải xuống.
- Handouts: Tùy chọn này sẽ in một phiên bản tài liệu chứa các slide để người xem tham khảo.
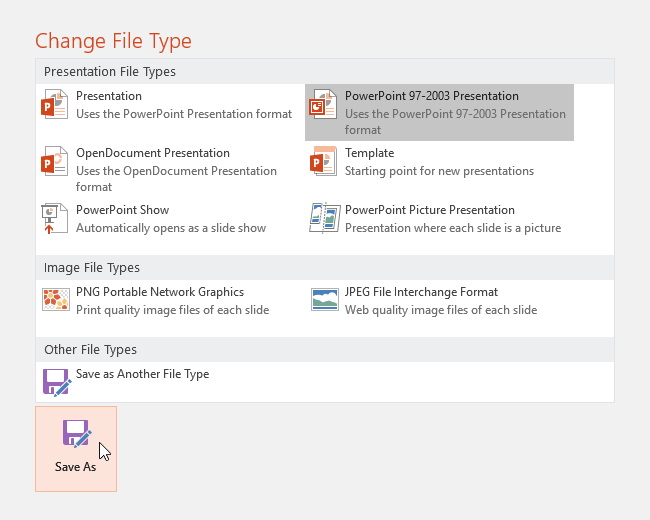
- Other file type: Tùy chọn này lưu file ở những định dạng file khác, bao gồm PNG và PowerPoint 97-2003.
Cách xuất bài thuyết trình
Ví dụ sẽ lưu bài thuyết trình dưới dạng file PowerPoint 97-2003.
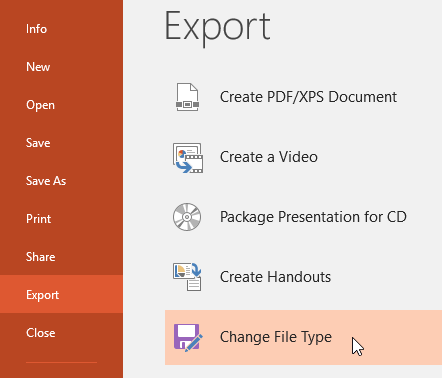
1. Bấm vào tab File để truy cập Backstage view.
2. Nhấp vào Export, sau đó chọn tùy chọn mong muốn. Ví dụ sẽ chọn Change File Type.
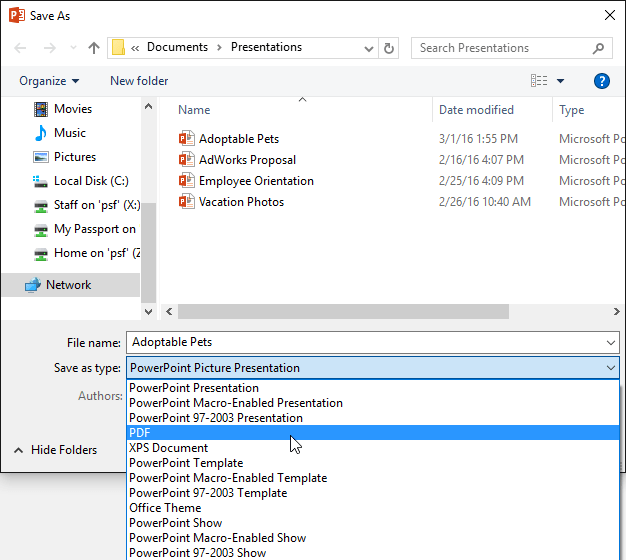
3. Chọn loại file, sau đó nhấp vào Save As.
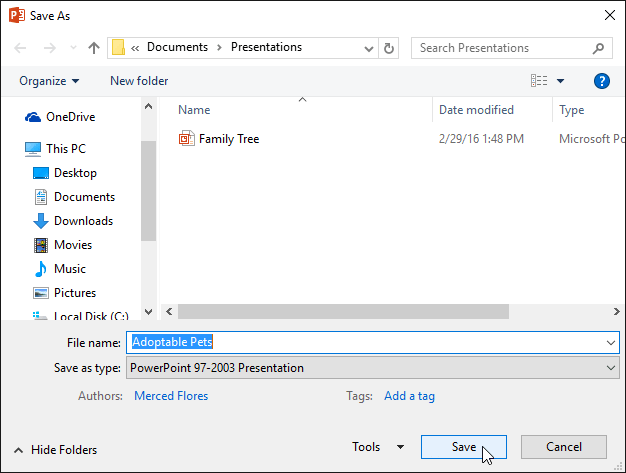
4. Hộp thoại Save As sẽ xuất hiện. Chọn vị trí bạn muốn xuất bài thuyết trình, nhập tên file, sau đó bấm Save.
Bạn cũng có thể sử dụng menu drop-down Save As type trong hộp thoại Save As để lưu bài thuyết trình ở nhiều loại file khác nhau. Hãy cẩn thận để chọn đúng loại file mà những người khác có thể mở được.
Chia sẻ bài thuyết trình
PowerPoint giúp bạn dễ dàng chia sẻ và cộng tác trên các bài thuyết trình bằng OneDrive. Trước đây, nếu bạn muốn chia sẻ file với ai đó, bạn có thể gửi file dưới dạng file đính kèm trong email. Mặc dù thuận tiện, hệ thống này cũng tạo ra nhiều phiên bản của cùng một file, làm mọi thứ khó sắp xếp.
Khi chia sẻ bài thuyết trình từ PowerPoint, bạn thực sự đang cấp cho người khác quyền truy cập vào cùng một file. Điều này cho phép bạn và những người bạn chia sẻ cùng chỉnh sửa cùng một bài thuyết trình không cần phải theo dõi nhiều phiên bản.
Để chia sẻ bài thuyết trình, trước tiên nó phải được lưu vào OneDrive. Để chia sẻ bài thuyết trình:
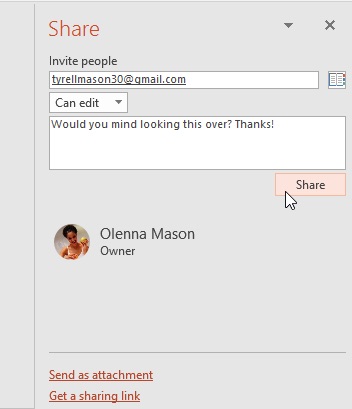
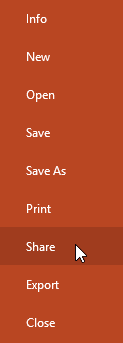
1. Bấm vào tab File để truy cập Backstage view, sau đó bấm Share.
2. PowerPoint sẽ trở lại Normal view và mở bảng điều khiển Share ở phía bên phải của cửa sổ. Từ đây, bạn có thể mời mọi người chia sẻ tài liệu của mình, xem danh sách những người có quyền truy cập vào tài liệu và cho họ quyền chỉnh sửa hoặc chỉ xem tài liệu.