Mất quyền Admin trên Windows 10, đây là cách khắc phục
- Thứ năm - 08/10/2020 00:50
- In ra
- Đóng cửa sổ này
Vì một lí do nào đó mà trên máy tính Windows 10 của bạn bị mất quyền Admin, mỗi khi mở một ứng dụng nào đó trên màn hình bạn nhận được thông báo lỗi. Vậy làm sao để khôi phục lại quyền Admin đã bị mất, mời các bạn cùng tham khảo bài viết dưới đây của Quản trị mạng.
Tùy chọn 1: Lấy lại quyền admin đã mất trong Windows 10 thông qua Safe Mode
Bước 1: Đăng nhập vào tài khoản Admin hiện tại mà bạn đã mất quyền quản trị.
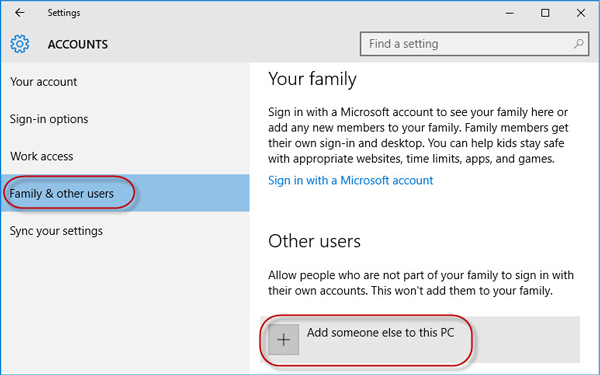
Bước 2: Mở bảng điều khiển PC Settings rồi chọn Accounts.
Bước 3: Chọn Family & other users, sau đó nhấp vào Add someone else to this PC.
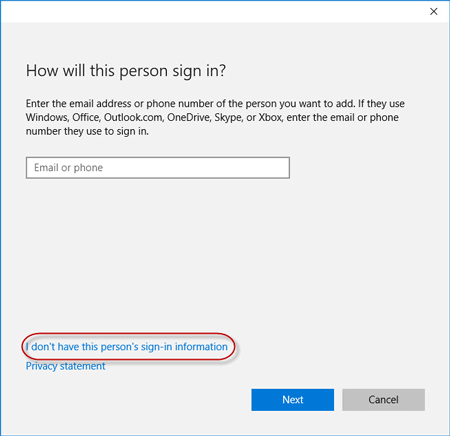
Bước 4: Nhấp vào I don't have this person’s sign-in information.
Bước 5: Nhấp vào Add a user without a Microsoft account.
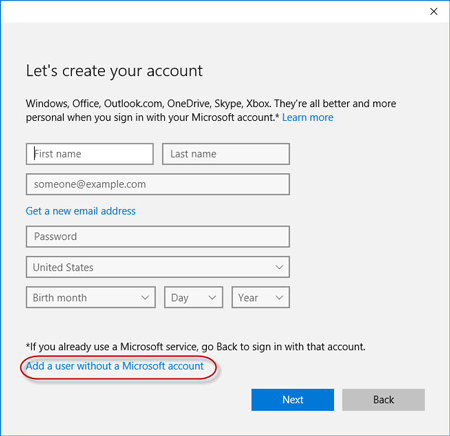
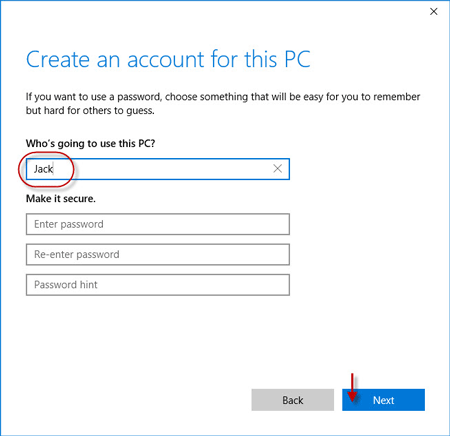
Bước 6: Nhập tên người dùng, sau đó bấm Next. Thao tác này sẽ thêm một tài khoản cục bộ mới trên PC của bạn.
Bước 7: Nhấn phím Win + R để làm xuất hiện hộp thoại Run, gõ cmd và nhấn Enter.
Bước 8: Sau khi cửa sổ Command Prompt mở ra, gõ shutdown /r /o và nhấn Enter.
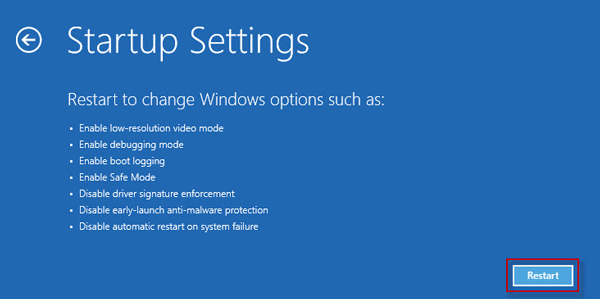
Bước 9: Sau khi Windows 10 khởi động lại vào màn hình "Choose an option", hãy nhấp vào Troubleshoot > Advanced options > Startup Settings. Sau đó nhấp vào Restart.
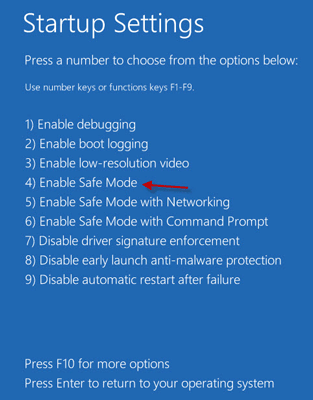
Bước 10: Trên màn hình Startup Settings, nhấn phím số 4 để bật Safe Mode.
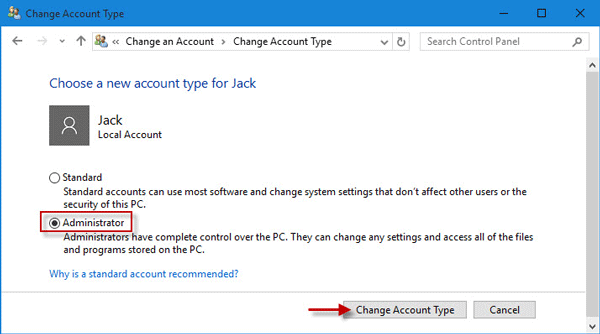
Bước 11: Sau khi Windows 10 bắt đầu ở Safe Mode, hãy mở Control Panel. Đi tới User Accounts > Manage another account, chọn tài khoản cục bộ mới mà bạn đã thêm ở bước 6, sau đó nhấp vào liên kết Change the account type. Chọn Administrator và nhấp vào Change Account Type để thay đổi tài khoản từ người dùng tiêu chuẩn thành admin.
Bước 12: Khởi động lại PC để đưa Windows 10 ra khỏi Safe Mode và quay trở lại chế độ bình thường. Đăng nhập Windows 10 bằng tài khoản admin mới. Bây giờ, bạn đã lấy lại quyền quản trị viên trong Windows 10 và có thể xóa tài khoản Admin đã cấp mà bạn làm mất quyền quản trị.
Tùy chọn 2: Lấy lại quyền Admin đã mất trên Windows 10 bằng công cụ iSumsoft Windows Password Refixer
Để sử dụng tùy chọn này, bạn cần mượn một PC mà bạn có thể truy cập với tư cách admin.
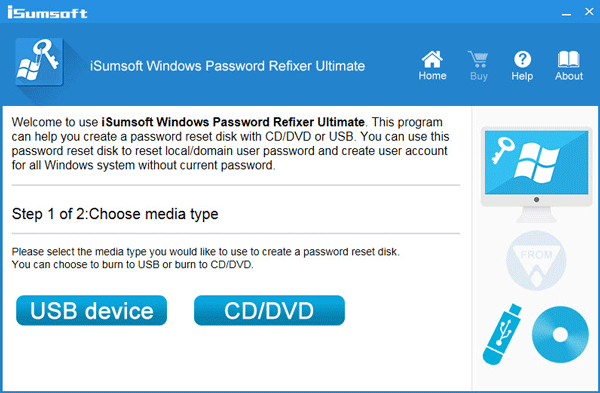
Bước 1: Trên một PC khác mà bạn có thể truy cập bằng quyền admin, hãy tải xuống và cài đặt iSumsoft Windows Password Refixer.
Bước 2: Khởi chạy công cụ này và làm theo các bước để ghi nó vào USB và tạo ổ đĩa boot.
Bước 3: Kết nối ổ USB có thể boot với PC chạy Windows 10 mà bạn đã mất quyền admin và thiết lập để PC boot từ USB.
Bước 4: Sau khi màn hình "Windows Password Refixer" xuất hiện, nhấp vào Add User. Sau đó, nhập tên người dùng vào hộp thoại và nhấp vào OK. Thao tác này sẽ thêm người dùng cục bộ mới có quyền admin trên Windows 10.
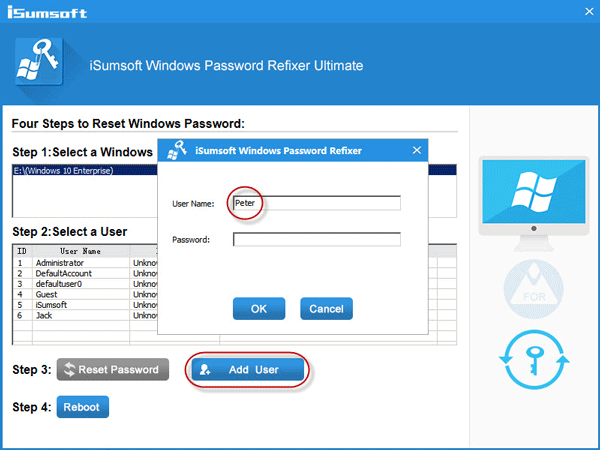
Bước 5: Nhấp vào Reboot và thoát khỏi ổ USB có khả năng boot để khởi động lại PC. Tài khoản admin mới sẽ xuất hiện trên màn hình đăng nhập Windows 10. Đăng nhập vào đó và bạn đã lấy lại được quyền admin.
Chúc các bạn thành công!
