Mất quyền Admin trên Windows 10, đây là cách khắc phục
- Thứ tư - 23/07/2025 23:00
- In ra
- Đóng cửa sổ này
Vì một lí do nào đó mà trên máy tính Windows 10 của bạn bị mất quyền Admin, mỗi khi mở một ứng dụng nào đó trên màn hình bạn nhận được thông báo lỗi. Vậy làm sao để khôi phục lại quyền Admin đã bị mất, mời các bạn cùng tham khảo bài viết dưới đây của Quản trị mạng.
Tùy chọn 1: Lấy lại quyền admin đã mất trong Windows 10 thông qua Safe Mode
Bước 1: Đăng nhập vào tài khoản Admin hiện tại mà bạn đã mất quyền quản trị.
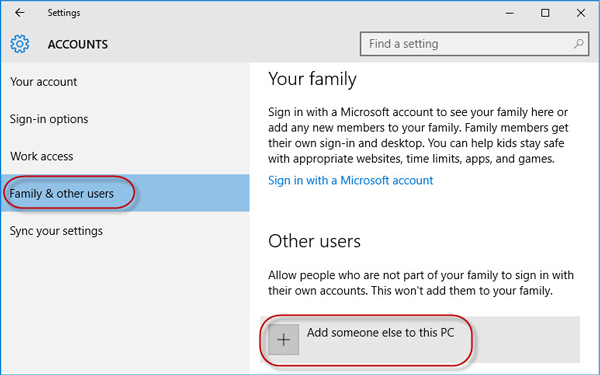
Bước 2: Mở bảng điều khiển PC Settings rồi chọn Accounts.
Bước 3: Chọn Family & other users, sau đó nhấp vào Add someone else to this PC.
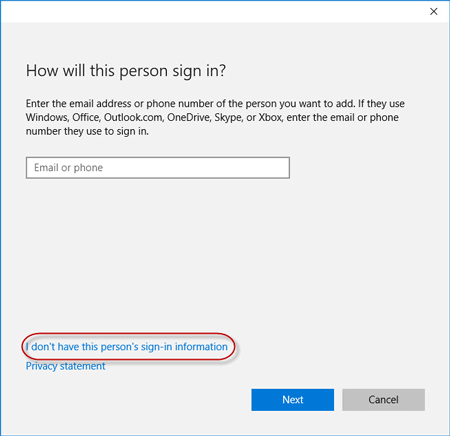
Bước 4: Nhấp vào I don't have this person’s sign-in information.
Màn hình rời máy tính
Bước 5: Nhấp vào Add a user without a Microsoft account.
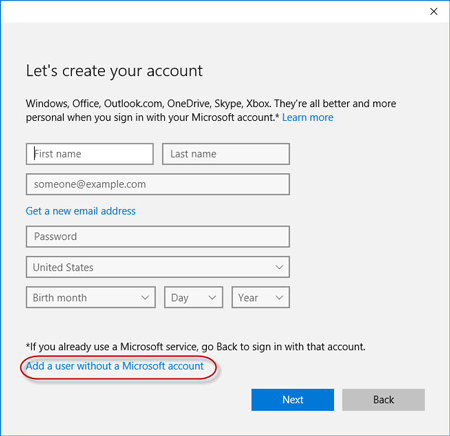
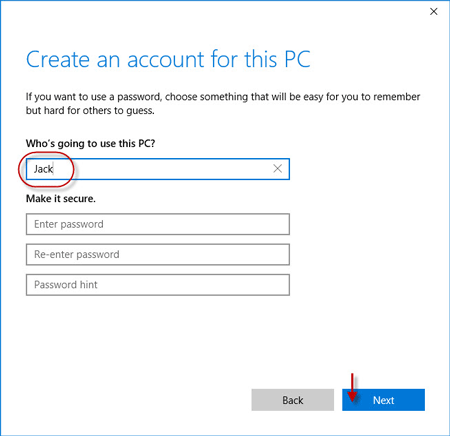
Bước 6: Nhập tên người dùng, sau đó bấm Next. Thao tác này sẽ thêm một tài khoản cục bộ mới trên PC của bạn.
Bước 7: Nhấn phím Win + R để làm xuất hiện hộp thoại Run, gõ cmd và nhấn Enter.
Bước 8: Sau khi cửa sổ Command Prompt mở ra, gõ shutdown /r /o và nhấn Enter.
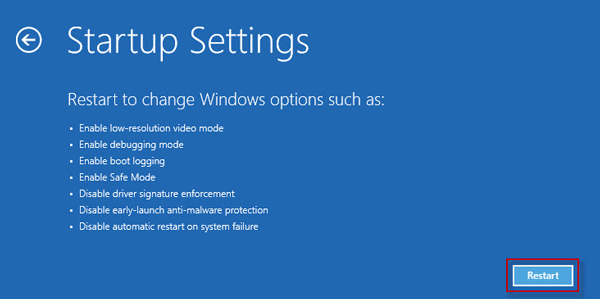
Bước 9: Sau khi Windows 10 khởi động lại vào màn hình "Choose an option", hãy nhấp vào Troubleshoot > Advanced options > Startup Settings. Sau đó nhấp vào Restart.
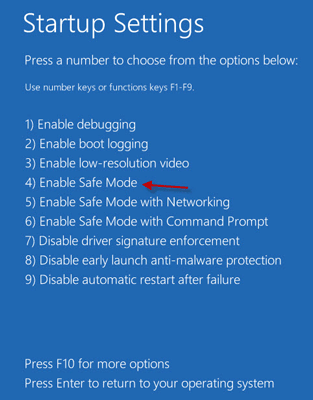
Bước 10: Trên màn hình Startup Settings, nhấn phím số 4 để bật Safe Mode.
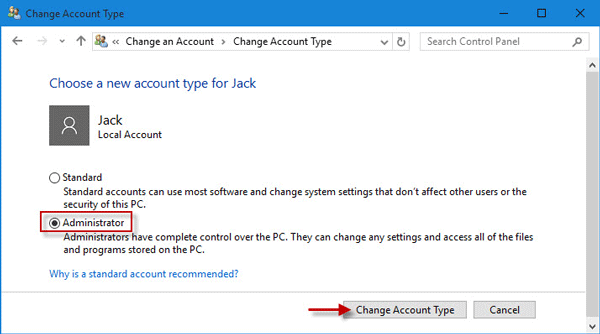
Bước 11: Sau khi Windows 10 bắt đầu ở Safe Mode, hãy mở Control Panel. Đi tới User Accounts > Manage another account, chọn tài khoản cục bộ mới mà bạn đã thêm ở bước 6, sau đó nhấp vào liên kết Change the account type. Chọn Administrator và nhấp vào Change Account Type để thay đổi tài khoản từ người dùng tiêu chuẩn thành admin.
Bước 12: Khởi động lại PC để đưa Windows 10 ra khỏi Safe Mode và quay trở lại chế độ bình thường. Đăng nhập Windows 10 bằng tài khoản admin mới. Bây giờ, bạn đã lấy lại quyền quản trị viên trong Windows 10 và có thể xóa tài khoản Admin đã cấp mà bạn làm mất quyền quản trị.
Tùy chọn 2: Sửa đổi cài đặt tài khoản từ Registry Editor
1. Mở Settings.
2. Sau đó, truy cập cài đặt “Update and Security”.
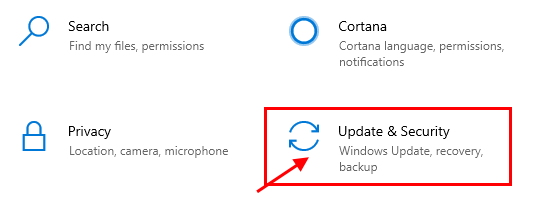
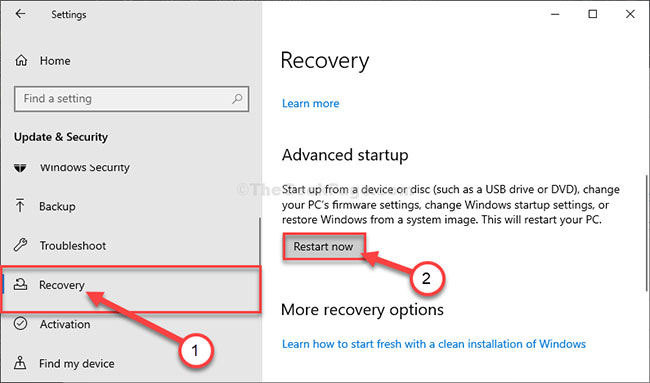
3. Sau đó, nhấp vào "Recovery".
4. Sau đó, trong phần “Advanced Startup”, hãy nhấp vào “Restart Now”.
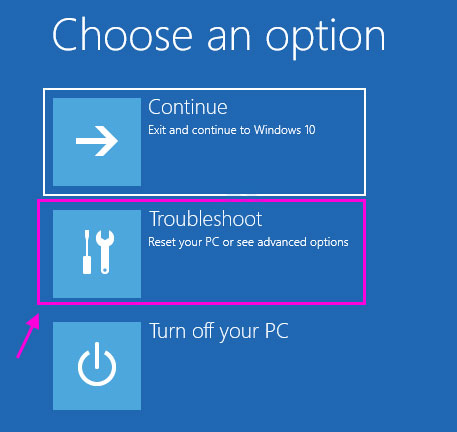
5. Bước tiếp theo là nhấp vào “Troubleshoot”.
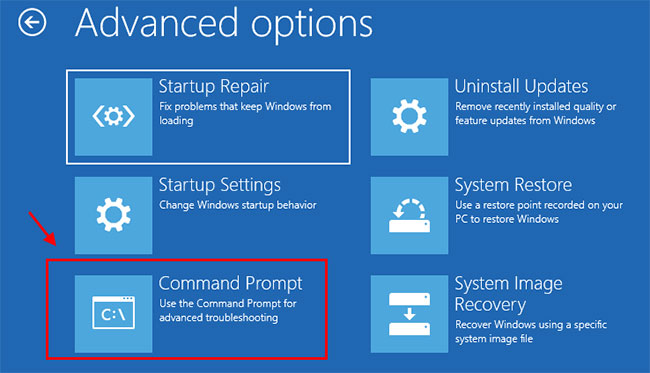
6. Để xem thêm các tùy chọn có sẵn, bạn phải nhấp vào "Advanced options".
7. Bạn cần truy cập "Command Prompt". Vì vậy, hãy nhấp vào nó.
8. Đặt mật khẩu tài khoản của bạn để truy cập vào terminal CMD. Nhấp vào “Continue”.
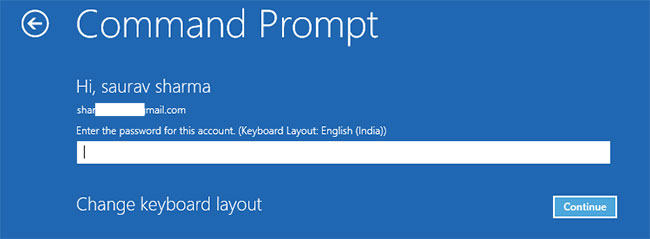
9. Trong cửa sổ Command Prompt, gõ hoặc sao chép "regedit" và nhấn Enter để mở Registry Editor trên máy tính.
GHI CHÚ: Bạn cần tạo một bản sao lưu Registry. Khi đã mở Registry Editor, bạn cần nhấp vào File và sau đó chọn Export từ thanh menu.
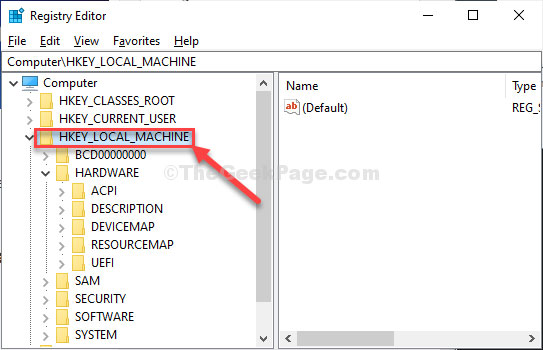
10. Trong cửa sổ Registry Editor, chọn nhánh "HKEY_LOCAL_MACHINE" để highlight nó.

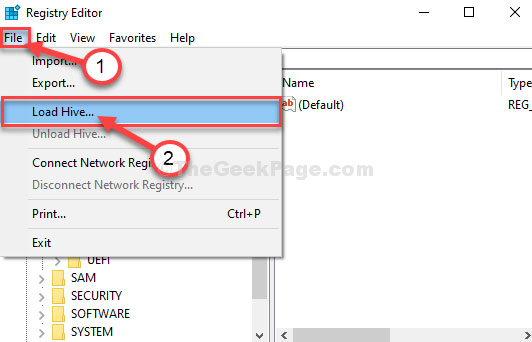
11. Bây giờ, nhấp vào “File” từ thanh menu và sau đó nhấp vào “Load Hive”.

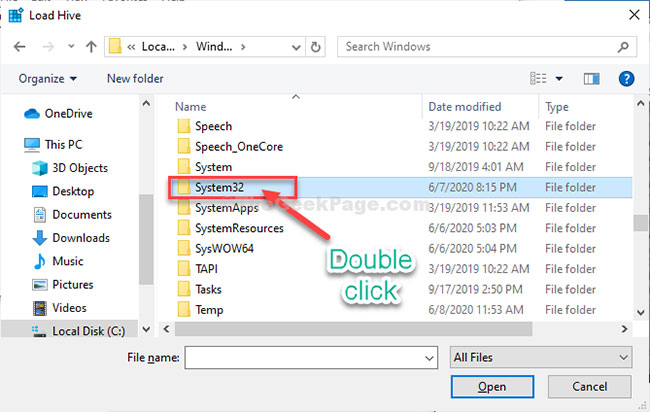
12. Trong cửa sổ Load Hive, điều hướng đến vị trí này:
system root drive > Windows > System32
13. Trong thư mục System32, nhấp đúp vào thư mục “config”.
14. Trong thư mục Config, cuộn xuống để tìm và chọn file “SAM”.
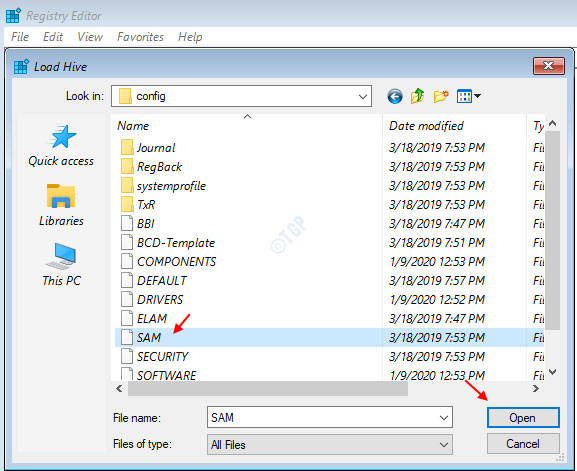
15. Bây giờ, nhấp vào Open để load hive trong nhánh registry..
16. Bạn cần cung cấp tên cho hive.
17. Đặt tên cho key là “REM_SAM”. Nhấp vào OK.
18. Trong cửa sổ Registry Editor, ở phía bên trái, điều hướng đến vị trí này:
HKEY_LOCAL_MACHINE\REM_SAM\SAM\Domains\Accounts\Users
HKEY_LOCAL_MACHINE\REM_SAM\SAM\Domains\Accounts\Users\000001F4
0001F4
19. Bây giờ, trong cùng một cửa sổ, ở phía bên tay phải, nhấp đúp vào giá trị nhị phân “F” để sửa đổi nó.
20. Trong cửa sổ Edit Binary Value, chuyển đến dòng “00000038".
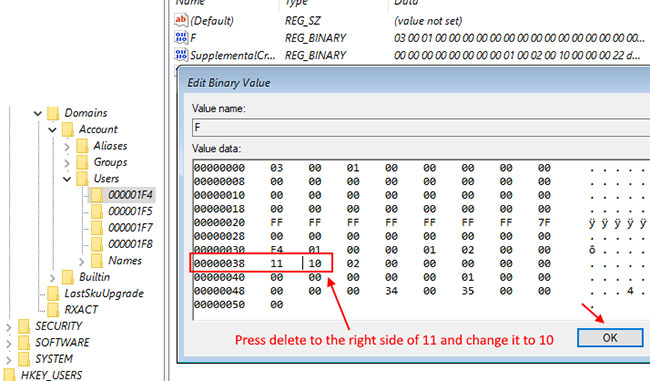
21. Đặt con trỏ của bạn ngay phía bên phải của “11” và nhấn Delete từ bàn phím.
22. Bây giờ, gõ “10” để thay đổi giá trị.
23. Cuối cùng, nhấp vào OK để lưu các thay đổi trên máy tính.
Đóng cửa sổ Registry Editor và Command Prompt.
24. Quay lại cửa sổ Choose an Option, nhấp vào Turn off your PC để tắt.
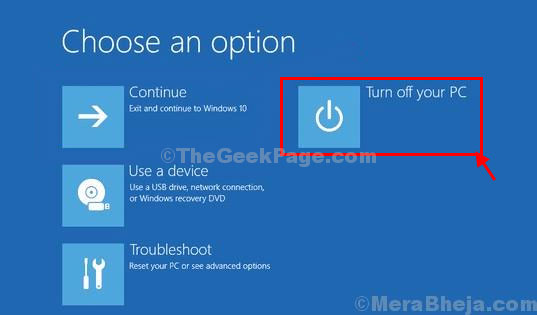
Khởi động lại máy tính của bạn.
Sau khi khởi động lại máy tính, bạn sẽ có lại quyền quản trị cho tài khoản của mình.
Ghi chú:
Cố gắng mở file “SAM”, bạn có thể thấy thông báo lỗi này “The process cannot access the file it is being used by another process” hoặc thông báo “File is in use”.
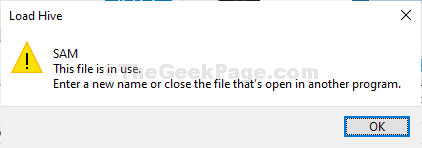
Để giải quyết vấn đề, hãy làm theo các bước sau:
1. Trong cửa sổ Registry Editor, chọn nhánh "HKEY_LOCAL_MACHINE" để bôi đậm nó.
2. Bây giờ, nhấp vào “File” từ thanh menu và sau đó nhấn vào “Load Hive”.
3. Bây giờ, hãy nhấp vào phần “Look in:” để mở menu drop-down.
Lưu ý: Bạn đang phải đối mặt với rắc rối vì bạn đang chọn ổ “BOOT (X:)” mà CMD đang chạy.
4. Chọn ổ root hệ thống trên máy tính (đối với máy tính này, đó là ổ “Local Disk (D:)”, thường là Local Disk (C :)) và sau đó nhấp vào “Open”.
5. Bây giờ, cuộn xuống và nhấp đúp vào thư mục “Windows”.
6. Theo cách tương tự, cuộn xuống, tìm thư mục “System32” và truy cập nó.
7. Bây giờ, nhấp đúp vào thư mục “Config” để truy cập nó.

Sau đó, làm theo các hướng dẫn còn lại (từ bước 13) để sửa đổi giá trị nhị phân và giải quyết vấn đề.
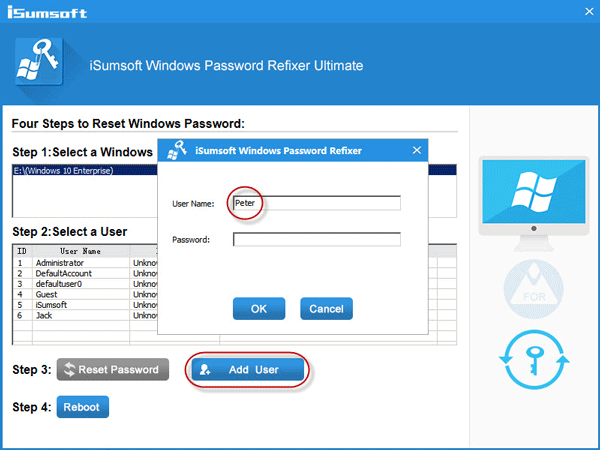
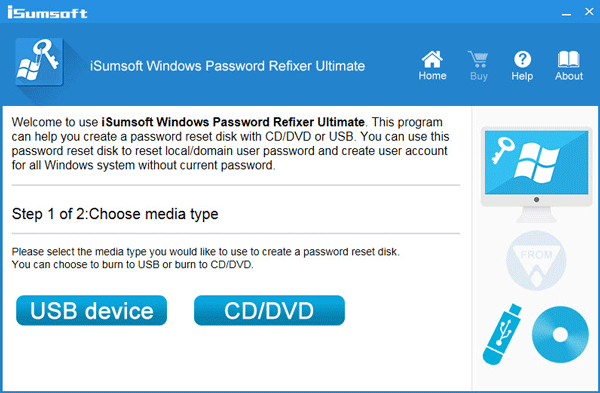
Tùy chọn 3: Lấy lại quyền Admin đã mất trên Windows 10 bằng công cụ iSumsoft Windows Password Refixer
Để sử dụng tùy chọn này, bạn cần mượn một PC mà bạn có thể truy cập với tư cách admin.
Bước 1: Trên một PC khác mà bạn có thể truy cập bằng quyền admin, hãy tải xuống và cài đặt iSumsoft Windows Password Refixer.
https://www.isumsoft.com/windows-password-refixer/
Bước 2: Khởi chạy công cụ này và làm theo các bước để ghi nó vào USB và tạo ổ đĩa boot.
Bước 3: Kết nối ổ USB có thể boot với PC chạy Windows 10 mà bạn đã mất quyền admin và thiết lập để PC boot từ USB.
Bước 4: Sau khi màn hình "Windows Password Refixer" xuất hiện, nhấp vào Add User. Sau đó, nhập tên người dùng vào hộp thoại và nhấp vào OK. Thao tác này sẽ thêm người dùng cục bộ mới có quyền admin trên Windows 10.
Màn hình rời máy tính
Bước 5: Nhấp vào Reboot và thoát khỏi ổ USB có khả năng boot để khởi động lại PC. Tài khoản admin mới sẽ xuất hiện trên màn hình đăng nhập Windows 10. Đăng nhập vào đó và bạn đã lấy lại được quyền admin.
