Hướng dẫn kích hoạt hoặc vô hiệu hóa bộ lọc SmartScreen trên Windows
- Thứ sáu - 06/06/2025 23:37
- In ra
- Đóng cửa sổ này
SmartScreen được thiết kế để tự động chặn các file đáng ngờ, nhưng thường đánh dấu những file tải xuống chính hãng là độc hại. Sau đây là cách bạn có thể tắt Windows Defender SmartScreen trên Windows 11 để tải xuống và chạy ứng dụng.
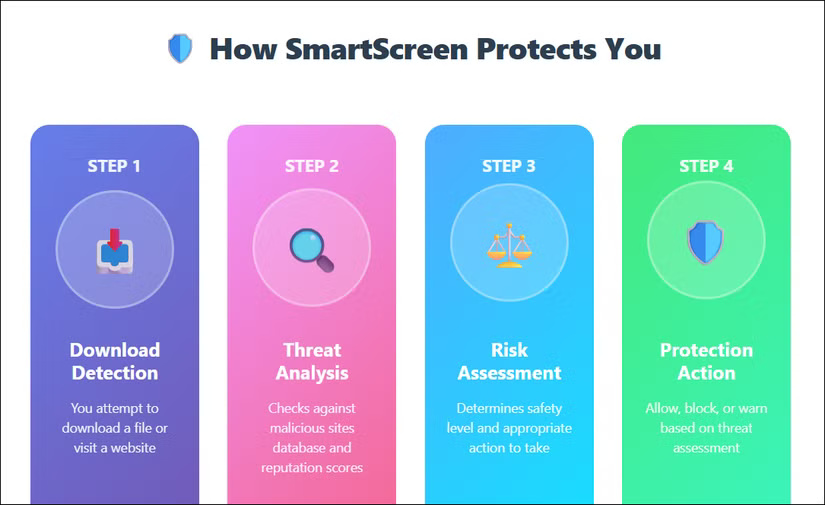
Bộ lọc Windows SmartScreen hoạt động như thế nào?
SmartScreen dựa vào bảo vệ dựa trên danh tiếng để bảo vệ thiết bị khỏi các ứng dụng và trang web độc hại hoặc có khả năng không mong muốn. Khi được bật, SmartScreen sẽ sàng lọc các file tải xuống với các trang web và nhà phát triển đáng ngờ đã biết. Nếu tìm thấy sự trùng khớp, nó sẽ chặn quyền truy cập tải xuống hoặc trang web và cảnh báo người dùng về hành động đã thực hiện.
Bạn có thể cấu hình để chặn các ứng dụng và file không được nhận dạng khỏi web. Nó cũng cung cấp thêm khả năng bảo vệ dựa trên danh tiếng cho các ứng dụng Microsoft Store và có thể chặn những ứng dụng của bên thứ ba có điểm danh tiếng thấp, được biết là gây ra hành vi không mong muốn.
Tuy nhiên, đôi khi, việc sàng lọc danh tiếng có thể chặn các ứng dụng, ngay cả khi chúng đến từ những nguồn đáng tin cậy. Nếu tin tưởng ứng dụng, bạn có thể tạm thời tắt bộ lọc SmartScreen để cài đặt và chạy ứng dụng, sau đó bật lại trong cài đặt Windows Security.
Tắt SmartScreen bằng ứng dụng Windows Security
Cách dễ nhất để tắt SmartScreen là sử dụng ứng dụng Windows Security. Hãy cùng xem cách thực hiện:
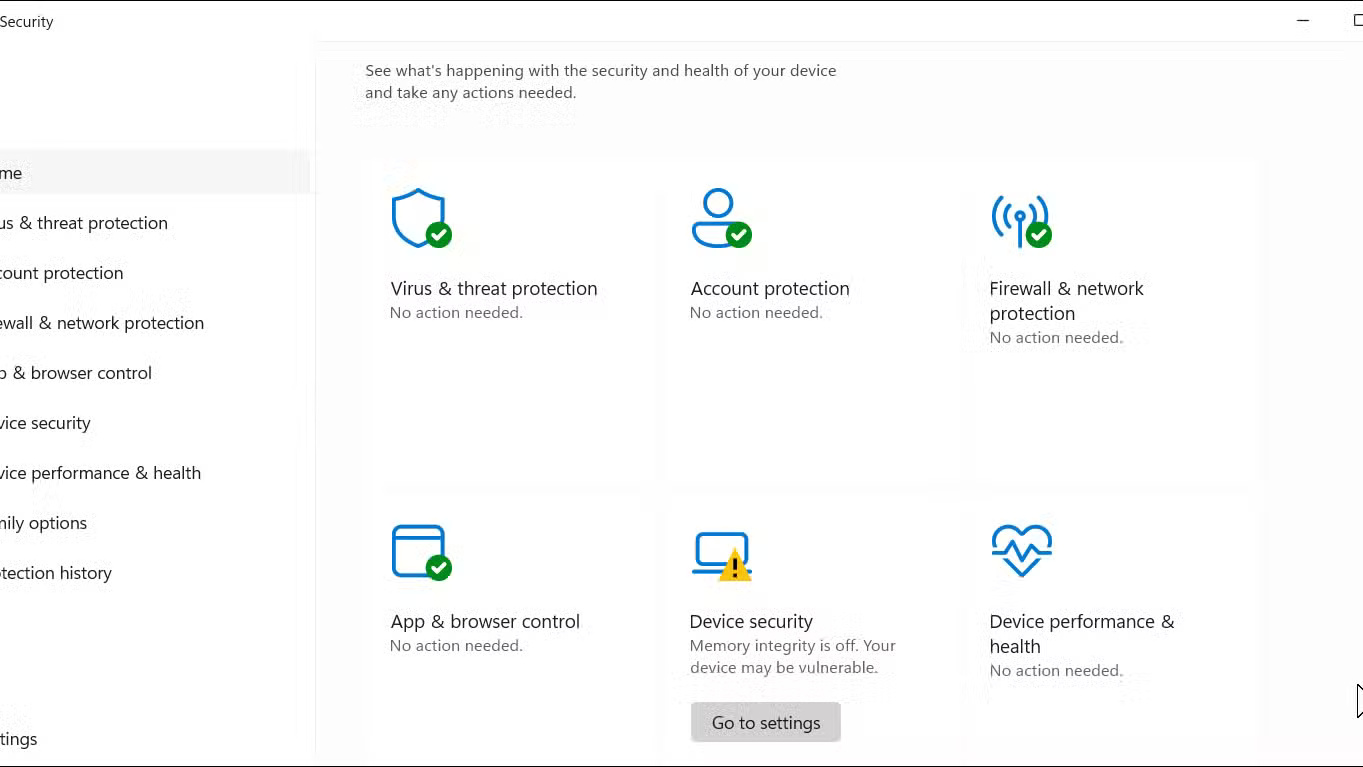
- Nhấp vào Start, nhập Windows Security và mở ứng dụng từ kết quả tìm kiếm.
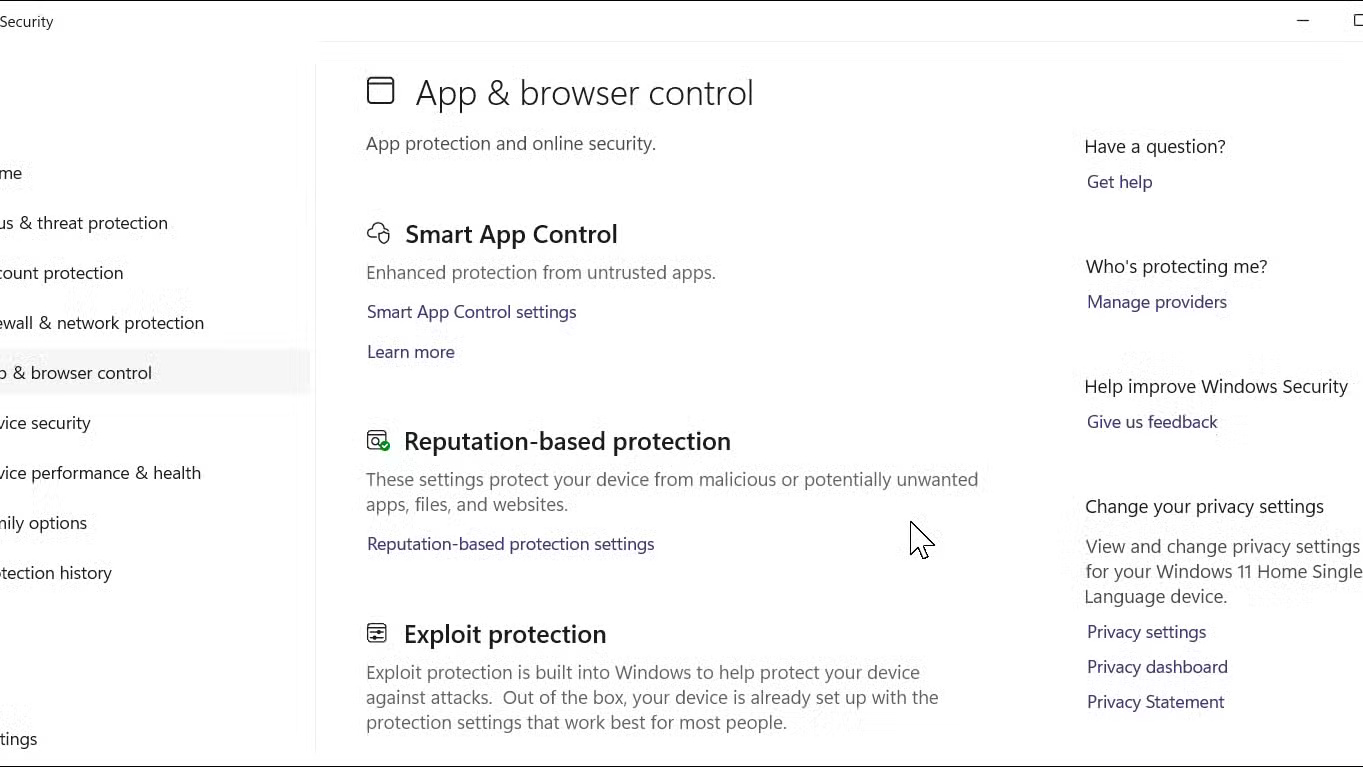
- Mở tab App & browser control ở ngăn bên trái.
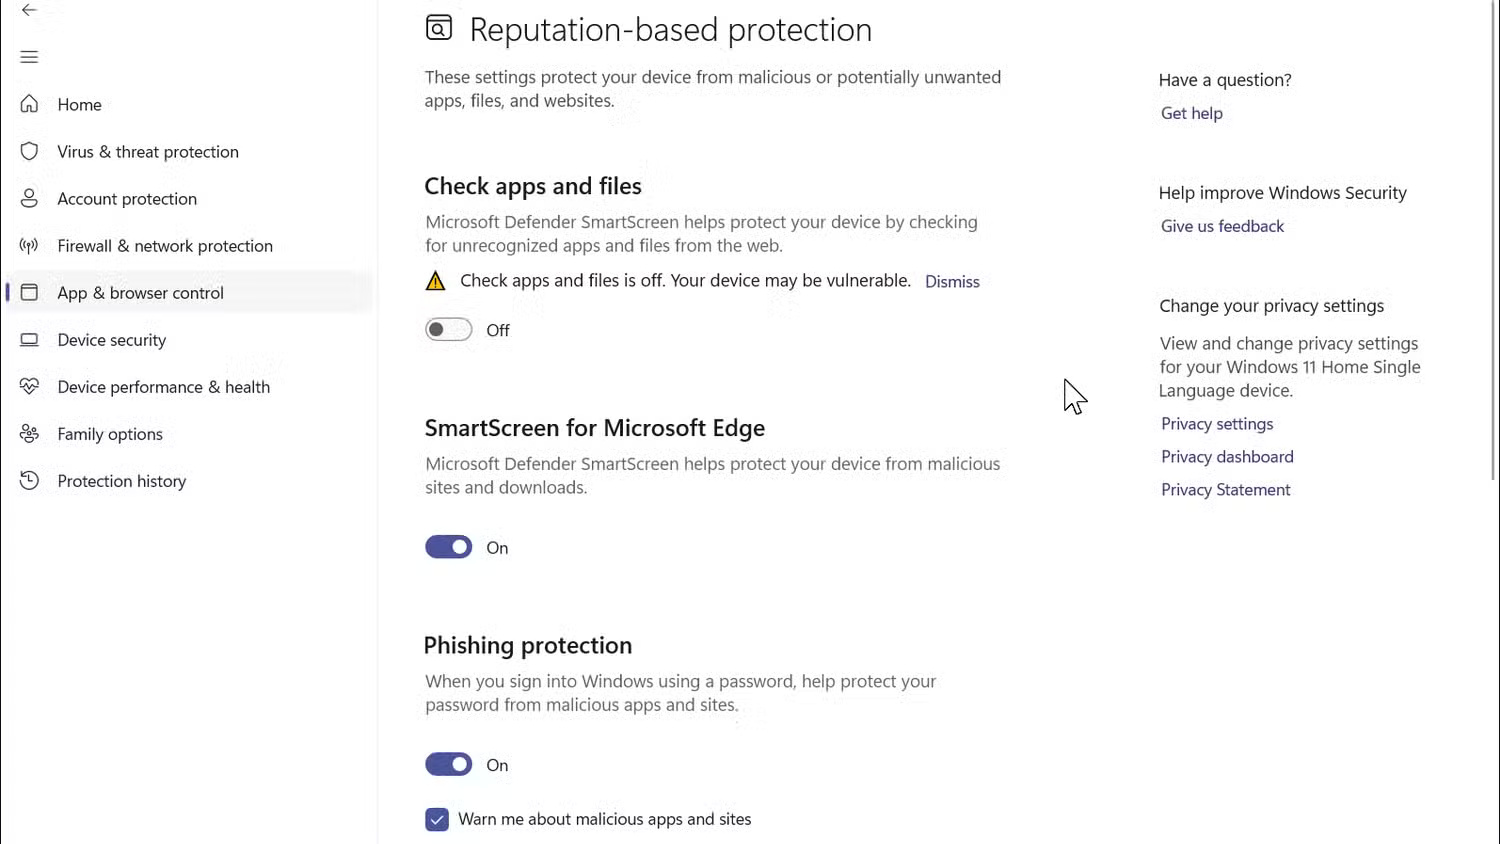
- Nhấp vào Reputation-based protection settings trong Reputation-based protection.
- Tại đây, bạn sẽ tìm thấy 4 bộ lọc SmartScreen khác nhau mà bạn có thể bật hoặc tắt riêng lẻ. Nếu bạn muốn tắt bộ lọc cho file và file thực thi, hãy tắt bộ lọc Check apps and files và Potentially unwanted app blocking. Hai bộ lọc còn lại dành cho Microsoft Edge và Microsoft Store apps.
- Nếu bạn muốn tắt hoàn toàn SmartScreen, hãy tắt cả 4 bộ lọc.
Nếu bất kỳ bộ lọc SmartScreen nào bị mờ đi với thông báo "This setting is managed by your administrator", bạn sẽ cần quản trị viên thực hiện thay đổi cho mình.
Tắt SmartScreen cho Microsoft Edge
Microsoft Edge có tùy chọn tích hợp để bật và tắt Microsoft Defender SmartScreen. Sau đây là cách truy cập tùy chọn này:
- Trong Microsoft Edge, hãy nhấp vào biểu tượng menu ba chấm ở góc trên bên phải và chọn Settings.
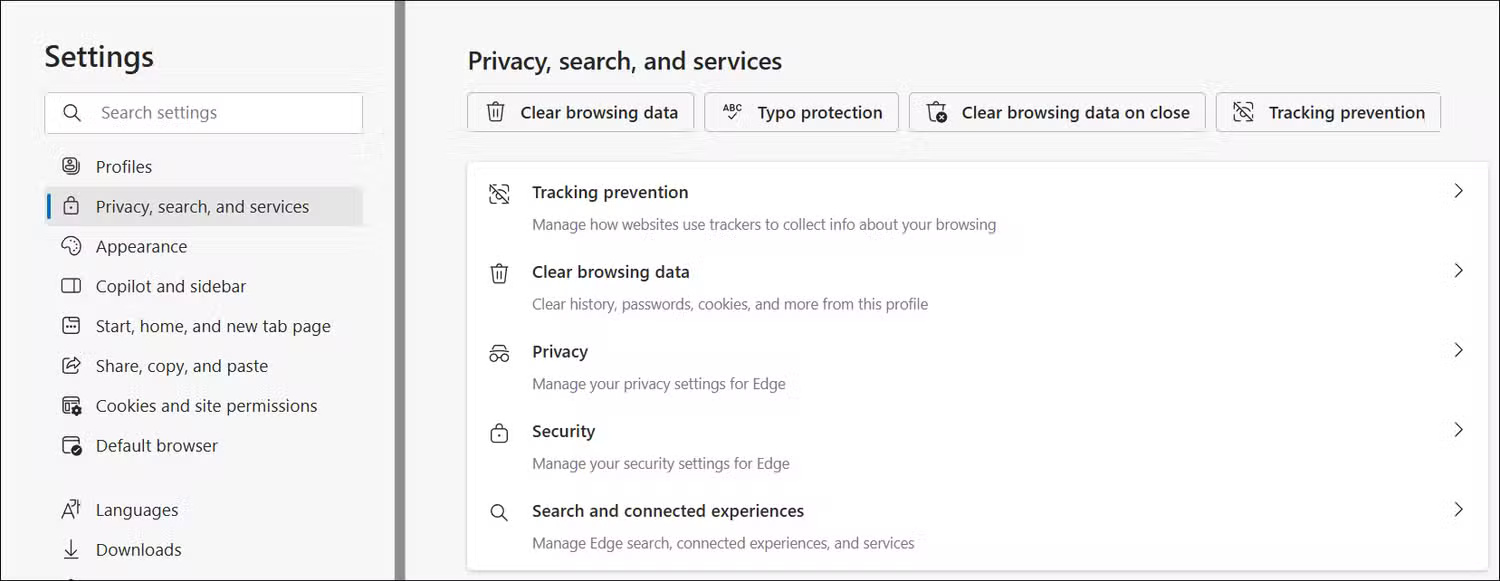
- Mở tab Privacy, search, and services ở ngăn bên trái.
- Sau đó, nhấp vào tùy chọn Security.
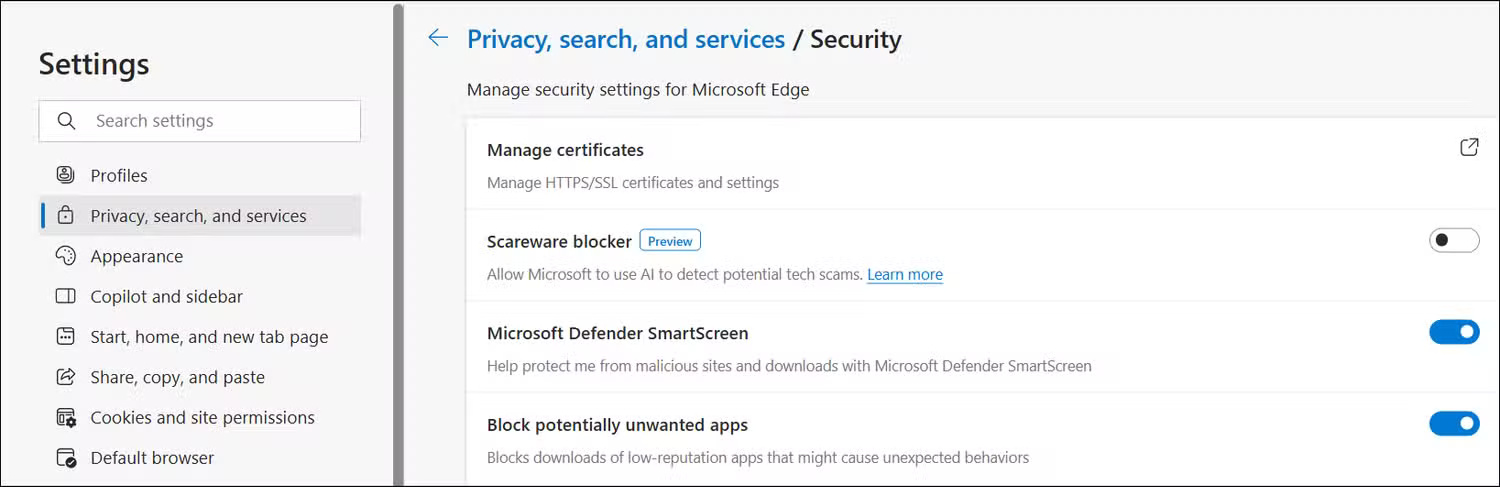
- Bật công tắc cho Microsoft Defender SmartScreen để tắt. Thao tác này cũng sẽ tắt tùy chọn Block potentially unwanted apps.
- Nếu chọn bật lại SmartScreen, bạn phải bật thủ công tính năng Block potentially unwanted apps.
Cách bật hoặc tắt SmartScreen bằng Registry Editor
Bạn cũng có thể bật hoặc tắt Windows Defender SmartScreen bằng Registry Editor. Phương pháp này hữu ích nếu bạn không thể truy cập từ ứng dụng Settings.
Lưu ý rằng việc sửa đổi không đúng mục nhập registry có thể khiến hệ thống bị trục trặc. Do đó, hãy tạo điểm khôi phục trước khi thực hiện các bước bên dưới.
- Nhấn Win + R để mở Run.
- Nhập regedit và nhấp vào OK để mở Registry Editor. Nhấp vào Yes nếu UAC nhắc cấp quyền admin.
- Trong Registry Editor, điều hướng đến vị trí sau:
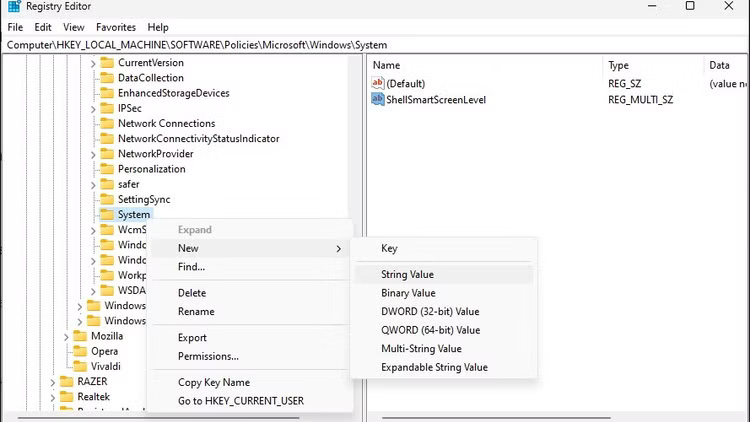
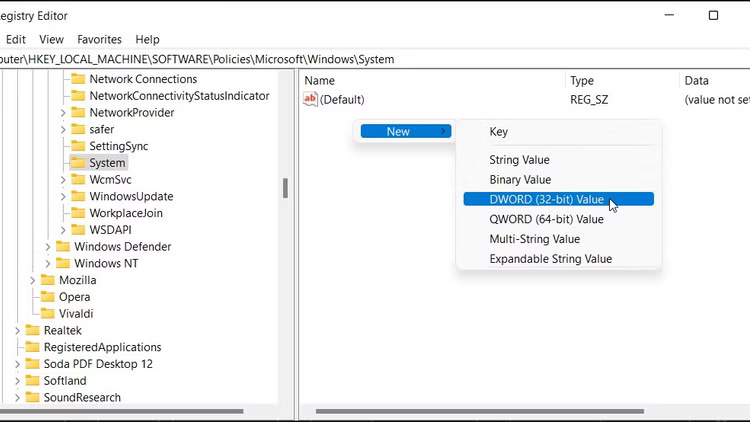
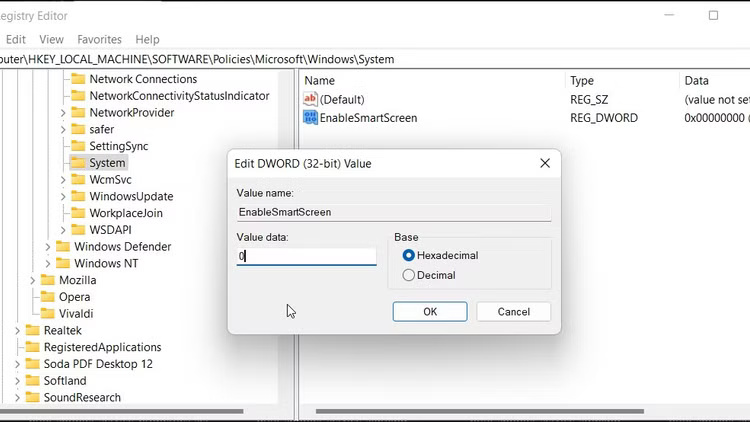
HKEY_LOCAL_MACHINE\SOFTWARE\Policies\Microsoft\Windows\System - Trong ngăn bên phải, hãy định vị giá trị bộ lọc EnableSmartScreen. Nếu giá trị không có, bạn sẽ cần tạo thủ công.
- Để tạo giá trị mới, hãy nhấp chuột phải vào key System và chọn New > DWORD (32-bit) Value.
- Đổi tên giá trị thành EnableSmartScreen.
- Tiếp theo, nhấp chuột phải vào giá trị EnableSmartScreen và chọn Modify.
- Nhập 0 vào trường Value data và nhấp vào OK để lưu các thay đổi.
- Để bật bộ lọc SmartScreen, hãy nhập 1 vào trường Value data và nhấp vào OK.
- Đóng Registry Editor và khởi động lại PC để áp dụng các thay đổi.
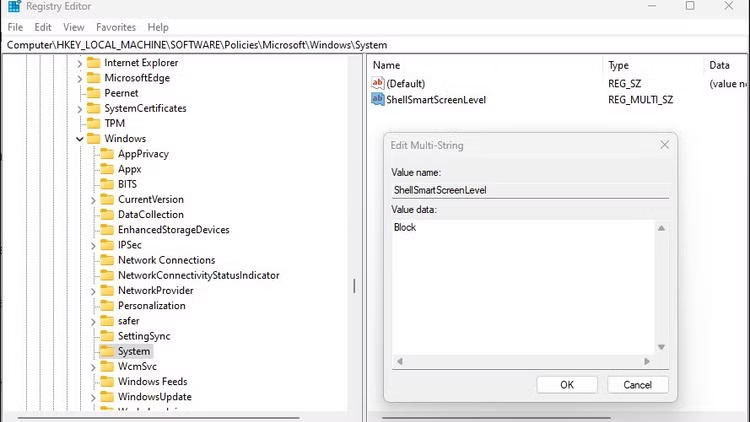
Bạn có thể tinh chỉnh thêm registry để tạo String Value mới để đặt mức chặn thành Warn hoặc Block. Sử dụng Warn sẽ hiển thị cảnh báo SmartScreen với tùy chọn để tiếp tục. Ngược lại, tùy chọn Block sẽ hiển thị cảnh báo và chặn ứng dụng chạy trên máy tính của bạn. Sau đây là cách thực hiện:
- Nhấp chuột phải vào subkey System và chọn New > String Value. Đổi tên giá trị thành ShellSmartScreenLevel. Tiếp theo, nhấp chuột phải vào ShellSmartScreenLevel và chọn Modify.
- Nhập Warn hoặc Block tùy thuộc vào mục đích bạn muốn SmartScreen Level thực hiện. Nhấp vào OK để lưu các thay đổi và đóng Registry Editor.
Cách bật hoặc tắt bộ lọc SmartScreen bằng Group Policy Editor
Nếu muốn quản lý bộ lọc SmartScreen cho nhiều máy tính trong tổ chức của mình, bạn có thể sử dụng Group Policy Editor để cấu hình, bật hoặc tắt cài đặt SmartScreen một cách tập trung, đảm bảo các chính sách bảo mật nhất quán trên tất cả những hệ thống được quản lý.
Lưu ý: Group Policy Editor chỉ khả dụng trên các phiên bản Pro, Edu và Enterprise của hệ điều hành Windows. Nếu bạn đang sử dụng Home, hãy khám phá hướng dẫn để bật Group Policy Editor trên phiên bản Windows Home.
Để cấu hình bộ lọc SmartScreen bằng GPEdit:
- Nhấn Win + R để mở Run.
- Nhập gpedit.msc và nhấp vào OK để mở Group Policy Editor.
- Tiếp theo, điều hướng đến vị trí sau trong Group Policy Editor:
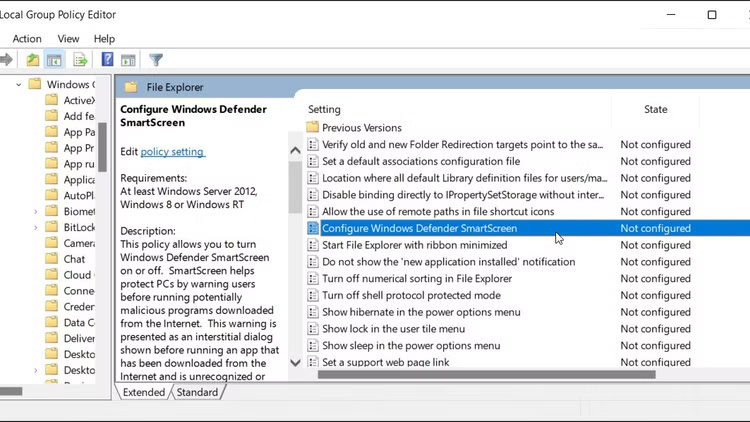
Computer Configuration > Administrative Templates > Windows Components > File Explorer. - Trong ngăn bên phải, nhấp chuột phải vào policy Configure Windows Defender SmartScreen và chọn Edit.
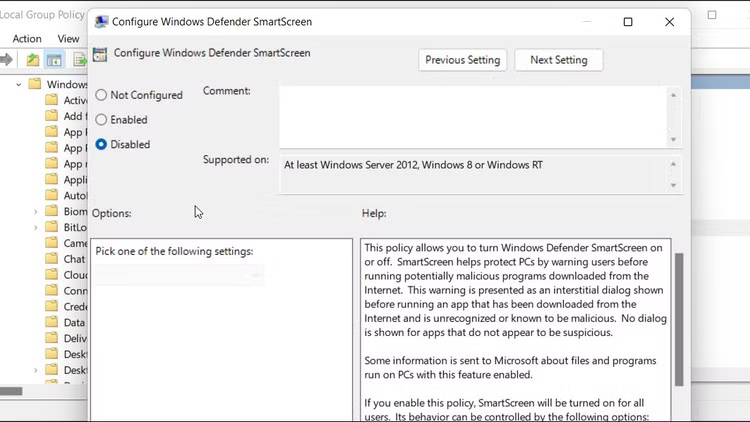
- Để tắt SmartScreen, hãy chọn Disabled.
- Nếu bạn muốn bật SmartScreen, hãy chọn Not Configured hoặc Enabled.
- Nhấp vào Apply > OK để lưu các thay đổi.
- Đóng Group Policy Editor và khởi động lại PC.
SmartScreen cung cấp khả năng bảo vệ thiết yếu chống lại các trang web tải xuống độc hại và lừa đảo. Do đó, bạn nên luôn đảm bảo bật SmartScreen sau khi cài đặt ứng dụng để tiếp tục nhận được sự bảo vệ dựa trên danh tiếng theo thời gian thực khỏi các ứng dụng xấu.
Chúc các bạn thành công!
