Format thẻ SD để sử dụng với Raspberry Pi
- Thứ năm - 07/11/2019 05:53
- In ra
- Đóng cửa sổ này
Sở hữu một Raspberry Pi hoàn toàn mới nghĩa là bạn sẽ có một bản cài đặt hệ điều hành yêu thích mới 100%. Cho dù đó là Raspbian được khuyến nghị hay một nền tảng IOT như Windows 10 IOT Core, bạn sẽ cần phải chuẩn bị thẻ SD để sử dụng với Raspberry Pi của mình trước khi khởi động.
Trước tiên, bạn sẽ cần một thẻ SD có dung lượng đủ lớn cho hệ điều hành - thường là 8GB hoặc lớn hơn. Đây là cách bạn có thể format thẻ SD cho Raspberry Pi.
Sử dụng Etcher để format và flash thẻ SD
Tùy chọn đơn giản nhất là sử dụng balenaEtcher để flash và format thẻ SD. Nó sẽ flash các file ISO của hệ điều hành, tạo bảng phân vùng chính xác trên thẻ SD giống như vậy. balenaEtcher có sẵn cho macOS, Linux và Windows.
1. Đầu tiên, tải xuống và cài đặt balenaEtcher. Bạn cũng cần chuẩn bị sẵn file ISO đã chọn. Bạn có thể tải xuống Raspbian từ Raspberry Pi Foundation.
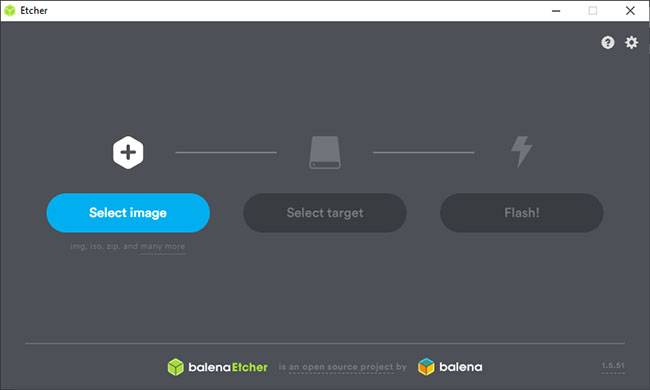
2. Mở balenaEtcher sau khi cài đặt. Trước tiên, chọn ISO hệ điều hành bằng cách nhấp vào “SelectImage”, sau đó chọn file ISO.
3. Nhấp vào “Select Target” và chọn thẻ SD.
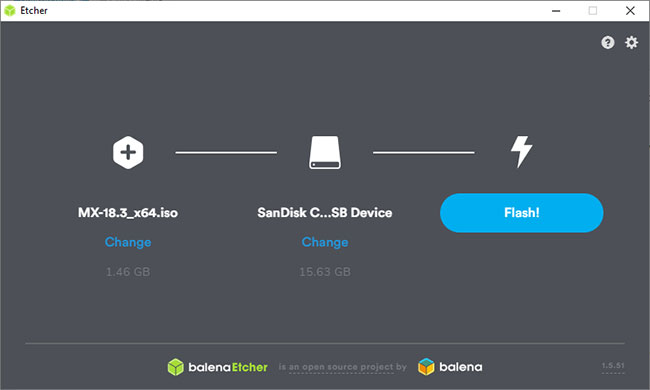
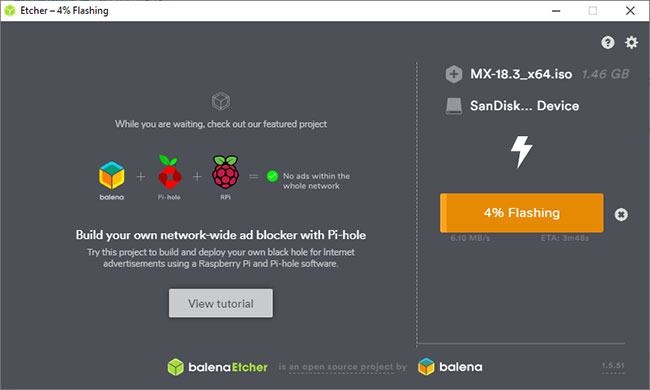
4. Nhấp vào Flash và chờ balenaEtcher hoàn tất quá trình tạo phân vùng, sao chép file và quá trình flash.
Bảng phân vùng hiện có của thẻ SD cũng bị xóa hoàn toàn. Dù mới hay cũ, nếu bạn muốn cài đặt hệ điều hành trên Raspberry Pi một cách dễ dàng, balenaEtcher là phương pháp tốt nhất.
Sử dụng dd để format và flash thẻ SD
Nếu đang chạy Linux hoặc macOS, bạn cũng có thể flash hệ điều hành của mình từ terminal bằng dd.
Để bắt đầu, xác nhận rằng thẻ SD được phát hiện. Mở một terminal và trên macOS, nhập diskutil list và định vị thẻ SD (ví dụ, disk4). Trên Linux, nhập lsblk và tìm thẻ SD (ví dụ: /dev/sdb), cũng như tất cả các phân vùng hiện tại trên ổ đĩa đó (ví dụ: /dev/sdb1, /dev/sdb2, v.v...).
Ngắt kết nối các thiết bị. Trên macOS, hãy nhập:
diskutil unmountDisk /dev/diskX
Thay thế “X” bằng số ổ đĩa, được định vị bằng diskutil. Trên Linux, hãy nhập:
sudo umount /dev/sdbX
Thay thế sdb bằng thẻ SD và X bằng số phân vùng.
Thực hiện hành động cho mọi phân vùng trên ổ đĩa đó (ví dụ: “/dev/sdb1,” “/dev/sdb2.”,v.v...).
Nếu có file ISO, trước tiên bạn cần tạo file IMG. Bạn có thể sử dụng dd để làm điều này. Trên macOS, hãy nhập:
hdiutil convert iso-file.iso -format UDRW -o img-file.img
Trên Linux, hãy nhập:
sudo dd if=iso-file.iso of=img-file.img
Đợi quá trình hoàn thành trước khi tiếp tục.
Sao chép nội dung của file IMG bằng dd. Đối với macOS, hãy nhập:
sudo dd bs=1m if=iso.img of=/dev/rdiskX conv=sync
Thay thế “rdiskX” bằng số ổ đĩa bạn đã tìm được bằng diskutil (và nhớ sử dụng rdiskthay vì disk ở đây). Đối với Linux, hãy nhập:
sudo dd bs=1m if=iso.img of=/dev/sdX conv=fsync
Thay thế sdX bằng chữ cái đại diện cho thẻ SD (ví dụ: sdb).
Sau khi hoàn thành, hãy ngắt kết nối các ổ bằng những hướng dẫn ở trên và thẻ SD sẽ sẵn sàng để sử dụng.
Format thẻ SD theo cách thủ công trên Windows và macOS
Một cách tiếp cận khác là format thủ công thẻ SD và sử dụng trình cài đặt đơn giản như NOOBS để cài đặt trực tiếp hệ điều hành. Bạn có thể làm điều đó bằng cách sử dụng công cụ SD Memory Card Formatter trên Windows và macOS.
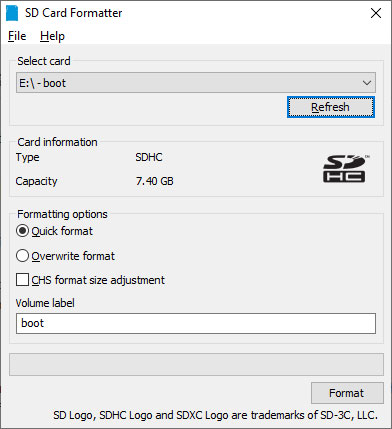
1. Tải xuống và cài đặt SD Memory Card Formatter cho hệ điều hành cụ thể của bạn, sau đó mở nó.
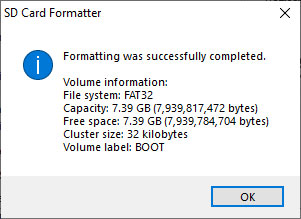
2. Chọn thẻ SD và nhấp vào “Format”, Chế độ nhấp vào “Yes” để xác nhận.
3. Sau khi hoàn tất các bước, bạn sẽ nhận được thông báo hoàn thành. Nhấp vào OK để thoát.
Sau đó, bạn có thể sao chép nội dung của kho lưu trữ zip NOOBS vào thẻ được định dạng FAT32. Lắp thẻ SD vào Raspberry Pi và cấp nguồn cho nó, sau đó làm theo các hướng dẫn trên màn hình để cài đặt hệ điều hành.
Format thẻ SD theo cách thủ công trên Linux
Cách tiếp cận tốt nhất để format thủ công trên Linux (nhằm sử dụng trình cài đặt NOOBs) là sử dụng GParted để tạo phân vùng.
1. Tải xuống và cài đặt GParted, rồi mở nó sau khi cài đặt. Từ menu drop-down ở góc bên phải, chọn thẻ SD.
2. Nếu bạn có nhiều hơn một phân vùng, chọn từng cái một, sau đó bấm vào nút “Delete”, sau đó chọn “Apply”. Kích vào “New” và chọn FAT32 làm hệ thống file của bạn, bấm vào nút “Add”, sau đó chọn “Apply” và xác nhận thay đổi.
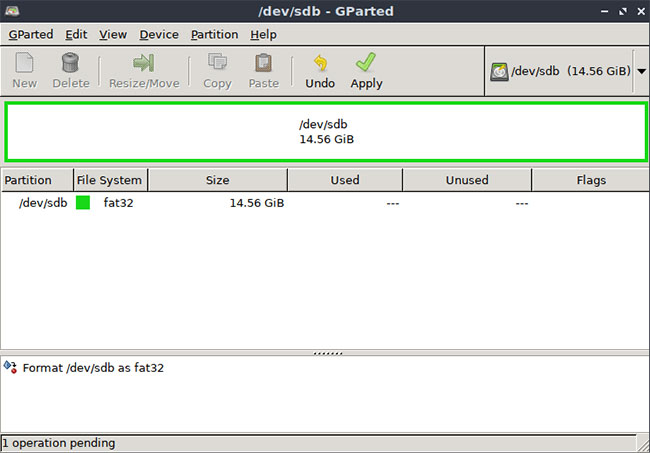
3. Nếu không, nhấp chuột phải, chuyển đến “Format to” và chọn FAT32, sau đó nhấp vào “Apply”.
Bây giờ, thẻ sẽ được định dạng là FAT32, sẵn sàng để bạn chuyển các file NOOBS sang đó theo cách thủ công.
Chuẩn bị Pi
Khi thẻ SD đã được format và flash, bạn có thể chuyển sang thiết lập Raspberry Pi. Sau đó, bạn có thể sử dụng nó làm trung tâm cho tất cả các loại dự án, từ game retro console đến máy chủ tự động hóa gia đình.
Bạn dự định sử dụng Raspberry Pi để làm gì? Hãy cho mọi người biết ý tưởng dự án trong phần bình luận dưới đây nhé!
Chúc bạn thực hiện thành công!
