Cách xem ID máy tính, check ID phần cứng
- Thứ hai - 13/02/2023 23:56
- In ra
- Đóng cửa sổ này
Việc kiểm tra thông tin máy tính, kiểm tra cấu hình laptop hay PC giúp người dùng nắm rõ được các phần cứng được trang bị trên máy tính. Ngoài thao tác kiểm tra những thông tin cơ bản đó thì việc tìm ID phần cứng (Hardware ID) cũng cần thiết để dễ dàng tra cứu thông tin của nhà sản xuất và model của các phần cứng. Điều này giúp chúng ta có thể kiểm tra bảo hành hoặc cập nhật driver cho máy tính.
Ngoài ra cũng nhờ thông tin ID phần cứng gồm thông tin về nhà sản xuất và model mà bạn có thể kiểm tra, chẩn đoán lỗi phần cứng bên cạnh việc sử dụng các công cụ chẩn đoán lỗi phần cứng như Memory Diagnostic Tool, CrystalDiskInfo,... Bài viết dưới đây sẽ hướng dẫn bạn xem ID của máy tính, check ID phần cứng.
1. Cách check ID máy tính
Trước hết bạn nhấn tổ hợp phím Windows + I để mở Windows Settings rồi nhấn tiếp vào System.
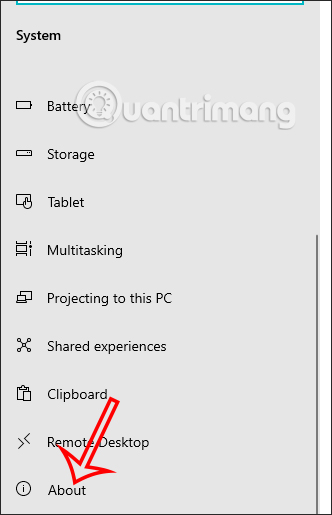
Chuyển sang giao diện mới người dùng nhấn vào mục About ở danh sách bên trái màn hình.
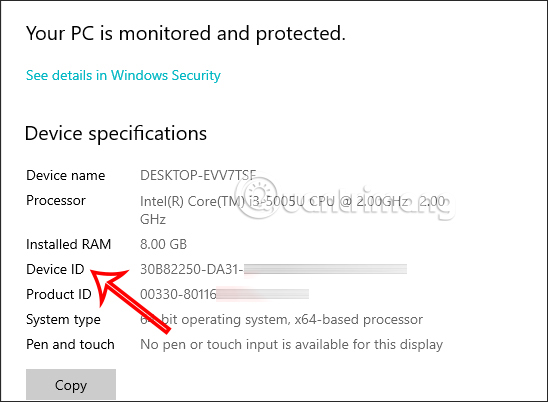
Nhìn sang nội dung bên phải bạn sẽ thấy mục Device Specifications và sau đó sẽ thấy phần Device ID chính là ID máy tính.
2. Hướng dẫn tìm ID phần cứng (Hardware ID) bằng Device Manager
Bước 1:
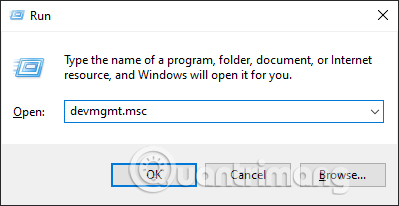
Tại giao diện trên máy tính bạn nhấn tổ hợp phím Windows + R rồi nhấn từ khóa devmgmt.msc.
Bước 2:
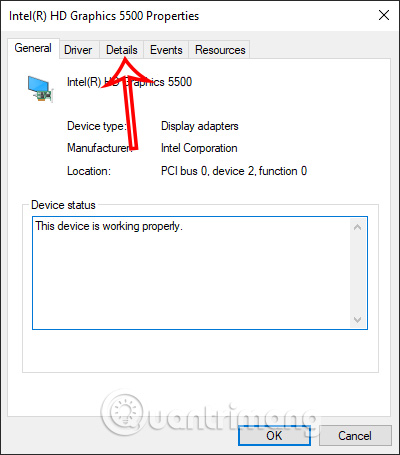
Trong giao diện Device Manager bạn tìm tới mục Display adapters rồi nhấn chuột phải vào thiết bị muốn kiểm tra và chọn Properties.

Hiển thị giao diện mới bạn nhấn tiếp vào mục Details.
Bước 3:
Trong giao diện này tại phần Property chúng ta nhấn vào biểu tượng mũi tên xổ xuống rồi nhấn tiếp vào Hardware Ids.
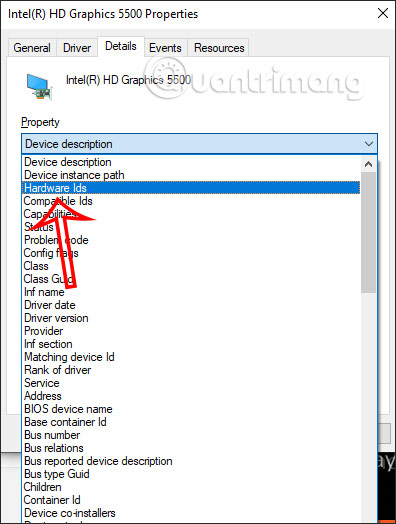
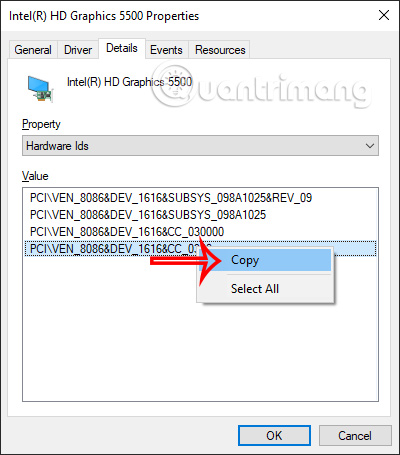
Kết quả sẽ thấy ID phần cứng trên máy tính để phục vụ cho việc tìm kiếm driver phù hợp cho máy tính.
Bước 4:
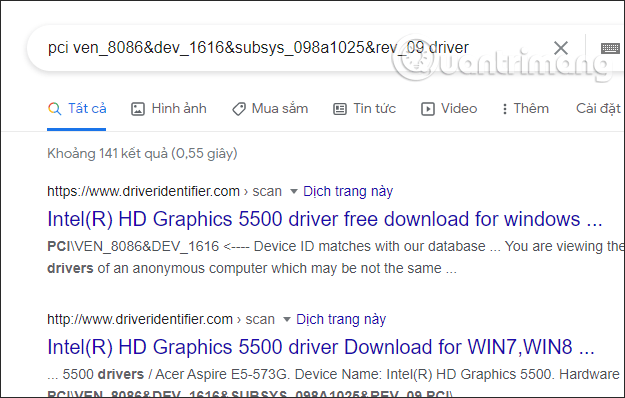
Chúng ta sao chép ID đầu tiên rồi tìm kiếm trên Google. Kết quả chúng ta sẽ thấy những trang web hỗ trợ tải driver hoặc bạn có thể thêm driver đằng sau dãy ký tự để tìm nhanh hơn.
3. Hướng dẫn tìm ID phần cứng bằng Command Prompt
Command Prompt là một công cụ đáng kinh ngạc giúp bạn truy cập hầu hết các ứng dụng, cấu hình cài đặt hệ thống và khắc phục sự cố thiết bị. Bạn cũng có thể thực hiện các thủ thuật khác với nó, chẳng hạn như kiểm tra ID phần cứng cho thiết bị của mình.
Hãy xem các bước bạn cần làm theo:
1. Nhấn Win + R để mở hộp thoại lệnh Run.
2. Nhập CMD và nhấn Ctrl + Shift + Enter để mở Command Prompt với quyền admin.
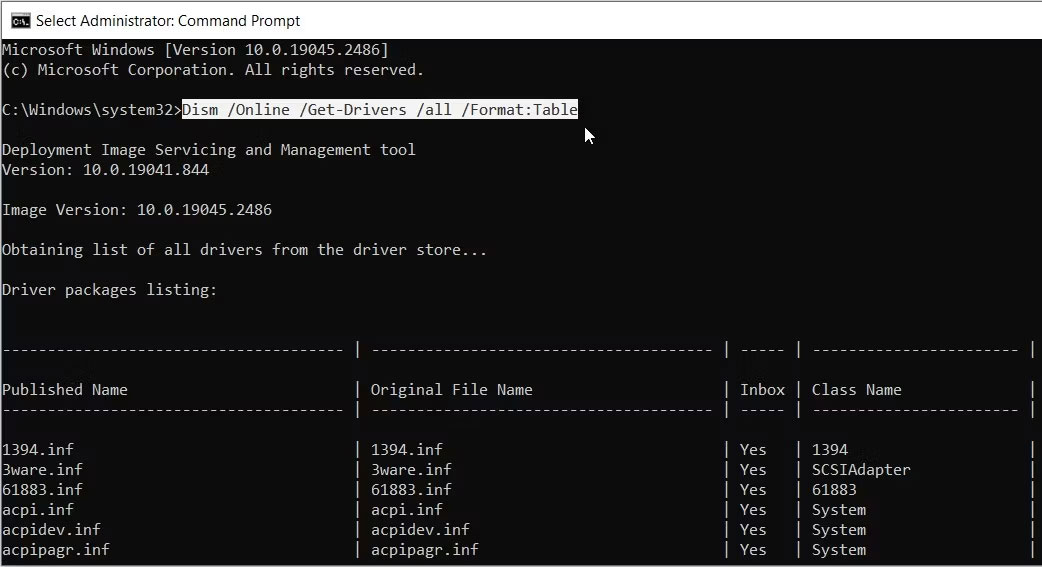
3. Nhập lệnh sau để nhận danh sách tất cả các driver và thiết bị của bạn:
Dism /Online /Get-Drivers /all /Format:Table
Bây giờ, giả sử bạn muốn có ID phần cứng cho chuột. Đây là cách bạn có thể tìm kiếm nó:
1. Cuộn xuống kết quả Command Prompt và tìm Mouse trong danh mục Class Name.
2. Trong cùng một hàng, hãy chọn tùy chọn xuất hiện trong danh mục Published Name.
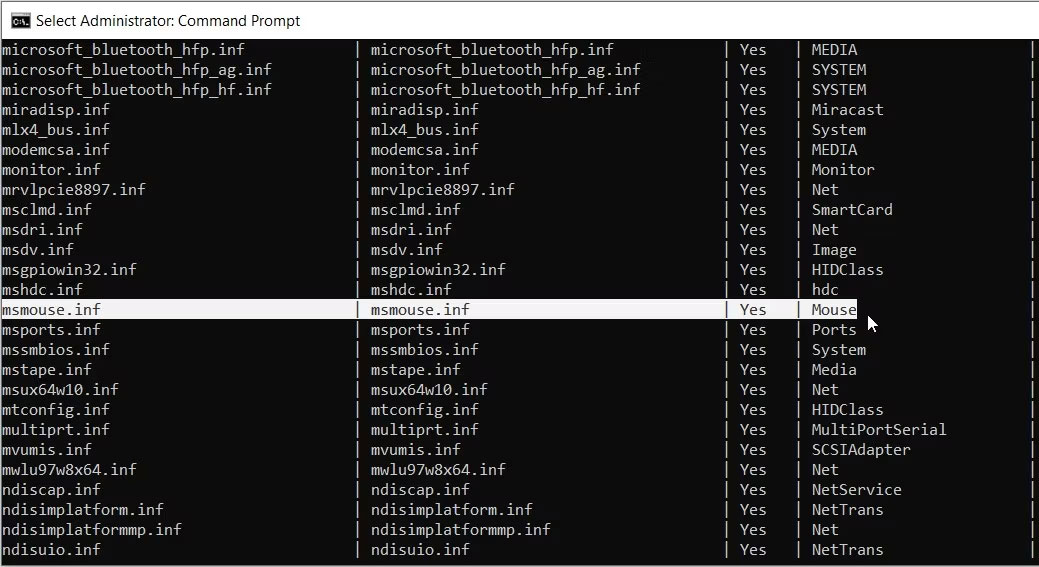
Trong trường hợp này, tùy chọn trong danh mục Published Name là msmouse.inf.
Bây giờ, bạn đã tìm thấy kết quả Published Name cho chuột, đây là cách bạn có thể sử dụng nó để tìm ID phần cứng:
1. Mở cửa sổ Command Prompt mới bằng cách làm theo các bước trước đó.
2. Nhập lệnh sau và thay thế Published Name bằng lệnh có liên quan:
Dism /Online /Get-DriverInfo /Driver:Published Name
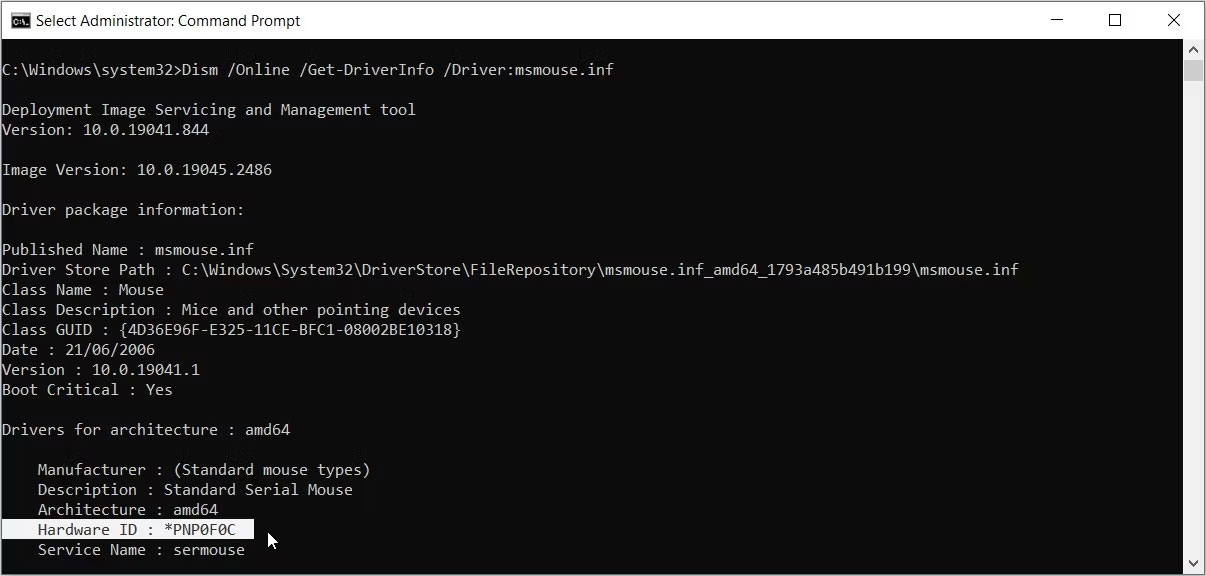
Ví dụ đã phát hiện ra trước đó rằng kết quả Published Name cho chuột là msmouse.inf. Lệnh sẽ như sau:
Dism /Online /Get-DriverInfo /Driver:msmouse.inf
Bây giờ, nhấn Enter sau khi bạn đã nhập đúng lệnh. Từ đó, tìm tùy chọn Hardware ID từ kết quả.
4. Hướng dẫn tìm ID phần cứng bằng Powershell
Ngoài ra, bạn cũng có thể kiểm tra ID phần cứng bằng Windows PowerShell. Đó là một công cụ đáng kinh ngạc khác cho phép bạn chạy nhiều lệnh khác nhau.
Hãy khám phá cách bạn có thể kiểm tra ID phần cứng bằng công cụ này:
1. Nhấn Win + R để mở hộp thoại lệnh Run.
2. Nhập PowerShell và nhấn Ctrl + Shift + Enter để mở cửa sổ PowerShell với quyền admin.
3. Nhập lệnh sau để nhận danh sách driver và thiết bị của bạn:
Get-PnpDevice -PresentOnly | Sort-Object -Property “Class” | Format-Table -AutoSize
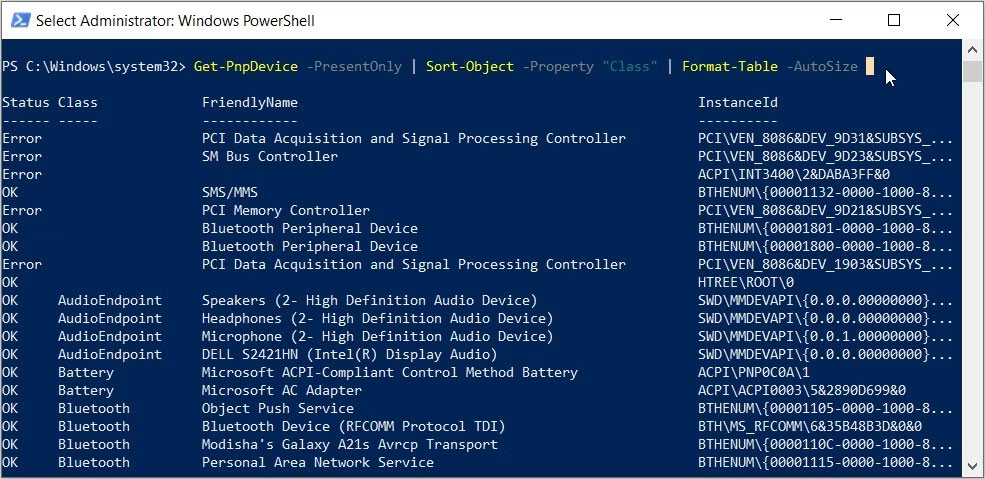
Bây giờ, hãy tìm thiết bị mục tiêu của bạn trong danh mục "FriendlyName".
Ví dụ, giả sử thiết bị mục tiêu của bạn là bàn phím. Trong trường hợp này, tùy chọn xuất hiện trong danh mục "FriendlyName" cho bàn phím là Standard PS/2 Keyboard.
Sau khi tìm thấy thiết bị mục tiêu của bạn, hãy kiểm tra Instance ID (giá trị xuất hiện trong cột cuối cùng).
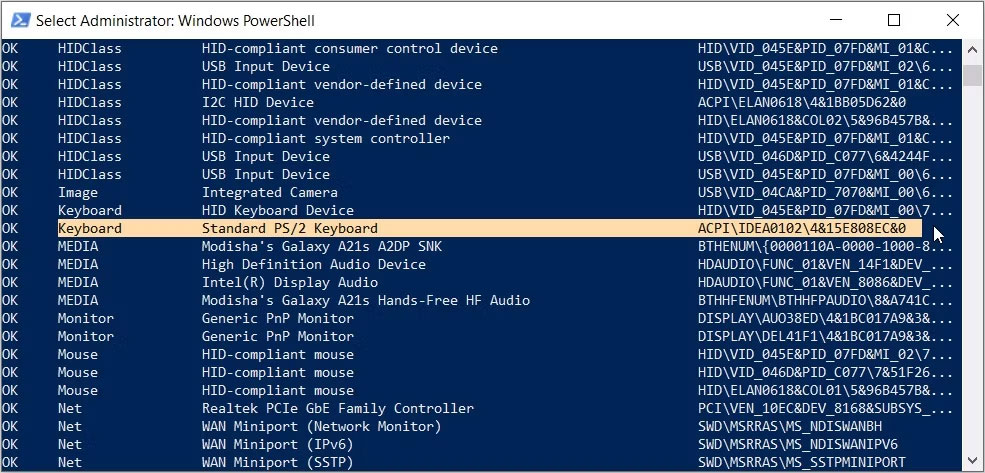
Đối với bàn phím, Instance ID là ACPI\IDEA0102\4&15E808EC&0.
Bây giờ, bạn đã tìm thấy Instance ID, đây là cách bạn có thể sử dụng nó để tìm ID phần cứng:
1. Mở cửa sổ PowerShell với quyền admin theo các bước trước đó.
2. Nhập lệnh sau và thay thế lệnh Instance Id bằng tùy chọn có liên quan:
Get-PnpDeviceProperty -InstanceId "Instance Id" | Format-Table -AutoSize
Nếu sử dụng Instance ID cho bàn phím (ACPI\IDEA0102\4&15E808EC&0), thì lệnh sẽ như sau:
Get-PnpDeviceProperty -InstanceId "ACPI\IDEA0102\4&15E808EC&0" | Format-Table -AutoSize
Bây giờ, nhấn Enter để chạy lệnh. Từ đó, hãy tìm tùy chọn DEVPKEY_Device_HardwareIds trong danh mục KeyName.
Tiếp theo, hãy tìm giá trị tương ứng trong danh mục Data. Giá trị xuất hiện trong phần này là ID phần cứng.
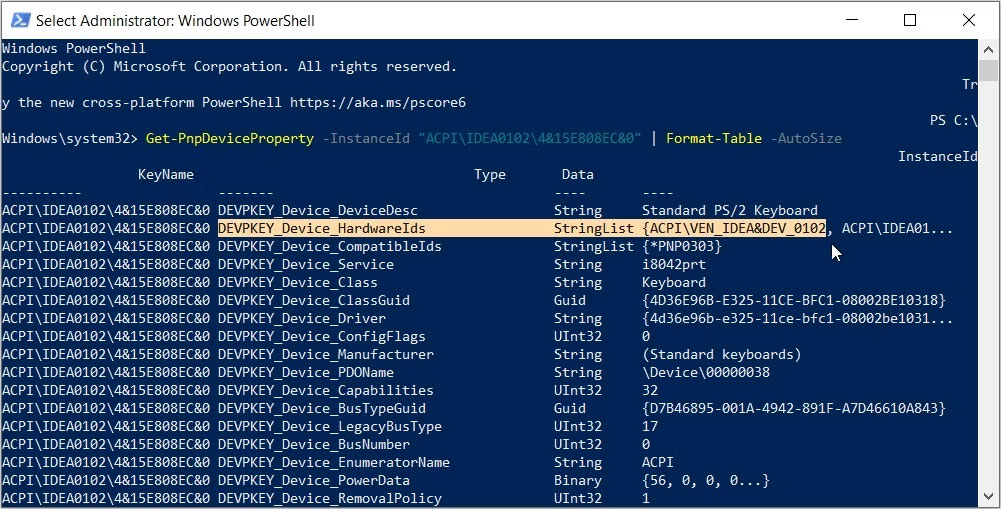
Trong trường hợp này, ID phần cứng cho bàn phím (xuất hiện trong danh mục Data) là ACPI\VEN_IDEA&DEV_0102.
5. Hướng dẫn tìm ID phần cứng bằng Windows Device Console
Device Console (DevCon) là một tính năng hiển thị cho bạn thông tin chi tiết về các thiết bị trên máy tính. Công cụ này cũng có thể giúp bạn cấu hình, cài đặt, xóa, bật hoặc tắt thiết bị.
Thật thú vị, công cụ này cho phép bạn xem ID phần cứng của nhiều ứng dụng cùng một lúc. Rất tiếc, Device Console không được tích hợp sẵn trên thiết bị của bạn. Điều này có nghĩa là bạn cần tải xuống và cài đặt nó trước.
Hãy xem cách bạn có thể cài đặt công cụ này và sử dụng nó để kiểm tra ID phần cứng:
1. Tải xuống và cài đặt Windows Drivers Kit từ trang web của Microsoft. Khi bạn đang truy cập trang web, hãy chuyển đến phần Step 2: Install the WDK và chọn một ứng dụng tương thích với thiết bị của bạn.
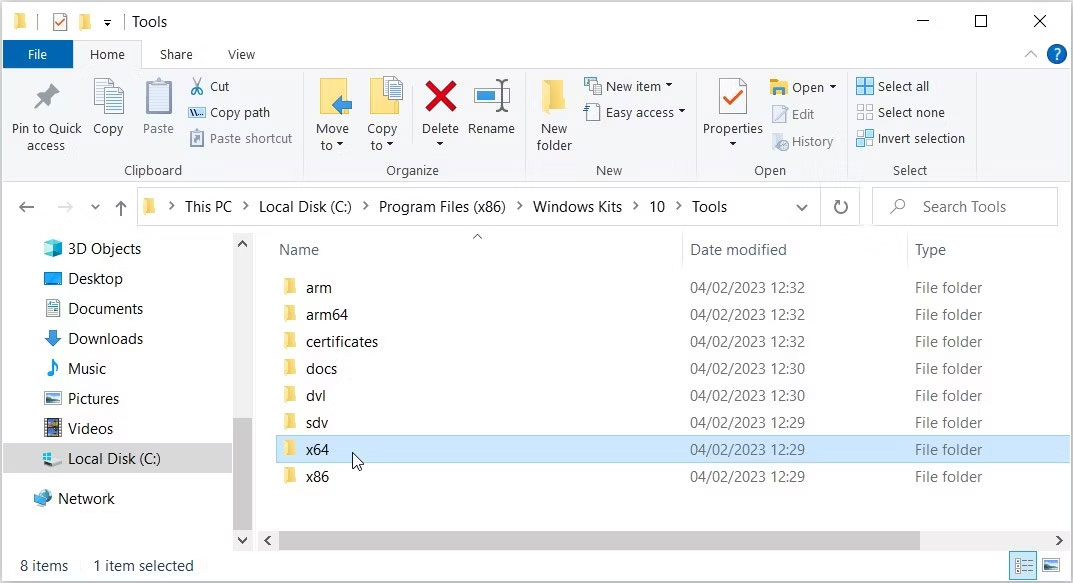
2. Khi bạn đã cài đặt xong công cụ, hãy mở File Explorer và điều hướng đến This PC > Local Disk (C:) > Program Files (x86) > Windows Kits > 10 > Tools. Nếu bạn đang sử dụng Windows 11, đường dẫn sẽ là This PC > Local Disk (C:) > Program Files (x86) > Windows Kits > 11 > Tools.
3. Truy cập thư mục x64 (64-bit) nếu bạn đang sử dụng thiết bị 64-bit hoặc thư mục x86 (32-bit) nếu bạn sử dụng PC 32-bit. Nếu bạn không chắc, trước tiên hãy kiểm tra thông số kỹ thuật PC Windows.
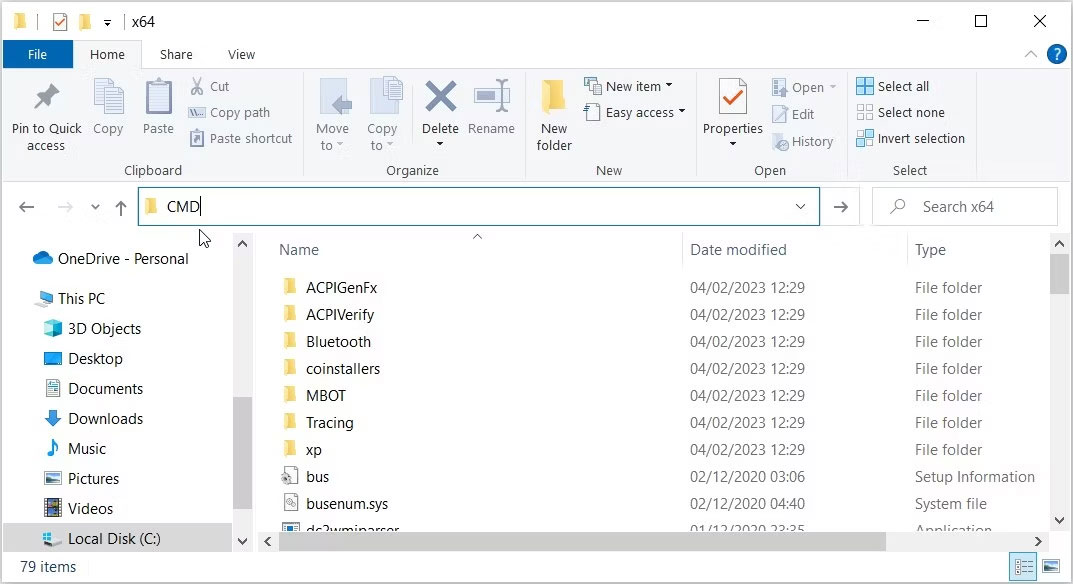
Khi bạn đang ở đúng thư mục, hãy làm theo các bước sau:
1. Nhấp vào thanh địa chỉ File Explorer.
2. Nhập CMD rồi nhấn Enter. Thao tác này sẽ chạy Command Prompt trong thư mục hiện tại.
Từ đó, nhập lệnh sau vào Command Prompt và nhấn Enter:
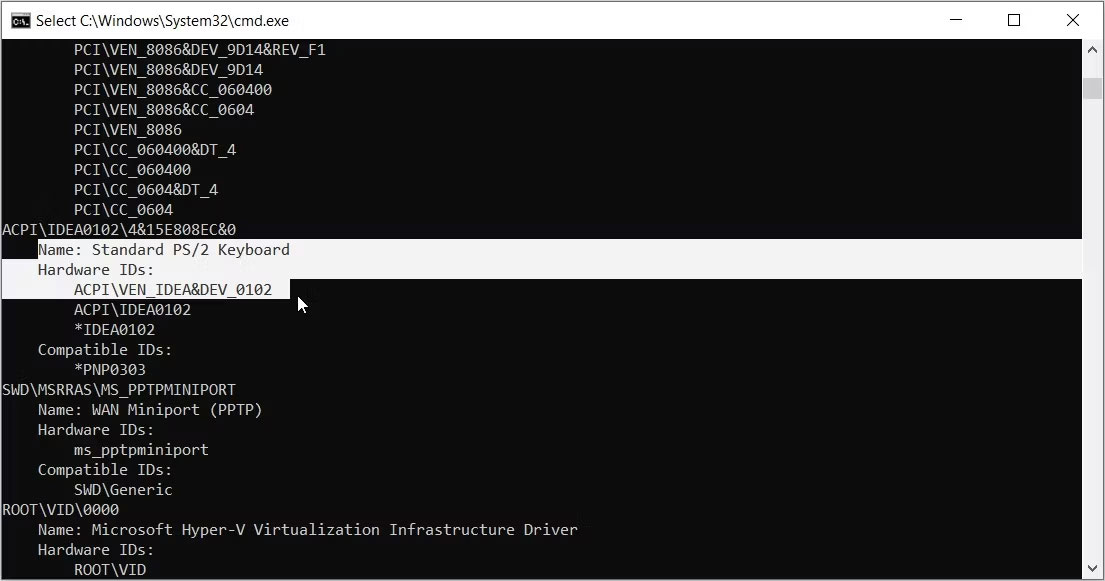
devcon hwids *
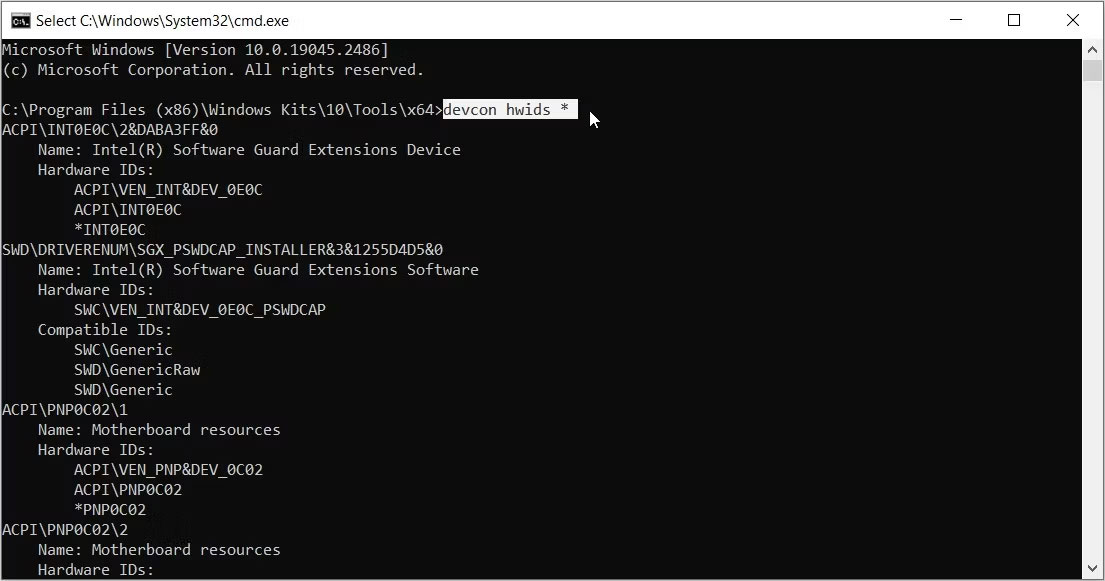
Thao tác này sẽ hiển thị cho bạn thông tin chi tiết về tất cả các thiết bị trên máy tính. Kết quả cũng sẽ chứa ID phần cứng.
Ví dụ đã đánh dấu ID phần cứng cho Standard PS/2 Keyboard trong hình bên dưới.
Hãy nhớ rằng, nếu có nhiều ID phần cứng, hãy luôn chọn tùy chọn đầu tiên. Điều này có nghĩa là ID phần cứng cho bàn phím, trong ví dụ trên, là ACPI\VEN_IDEA&DEV_0102.
Nếu bạn muốn khám phá chi tiết về Device Console, hãy xem các cách khác nhau để sử dụng Dev Con trên trang web của Microsoft.
