Cách vẽ đường thẳng, vẽ mũi tên trong Excel
- Thứ năm - 04/04/2024 23:31
- In ra
- Đóng cửa sổ này
Để vẽ đường thẳng, mũi tên trong Excel có rất nhiều cách thực hiện khác nhau. Đường thẳng và mũi tên trong Excel thường được sử dụng để vẽ sơ đồ tư duy trong Excel hoặc vẽ đồ thị hàm số trong Excel. Dưới đây là hướng dẫn chi tiết để vẽ đường thẳng, vẽ mũi tên trong Excel.
Hướng dẫn vẽ mũi tên trong Excel
Bước 1:
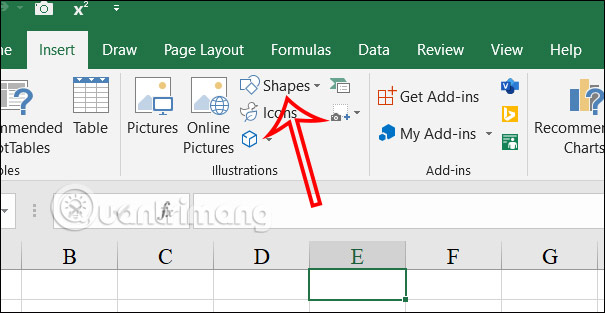
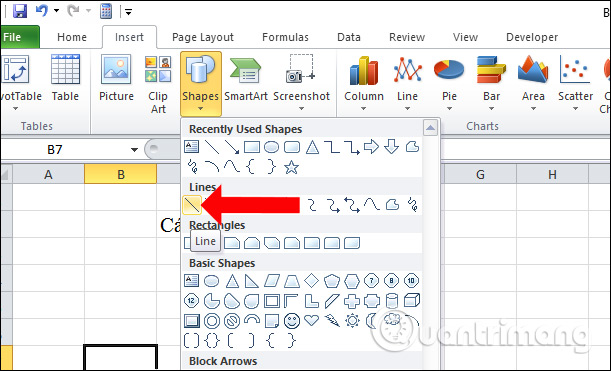
Chúng ta nhấn vào Insert sau đó nhấn chọn Shapes để hiển thị hình khối trong Excel.
Bước 2:
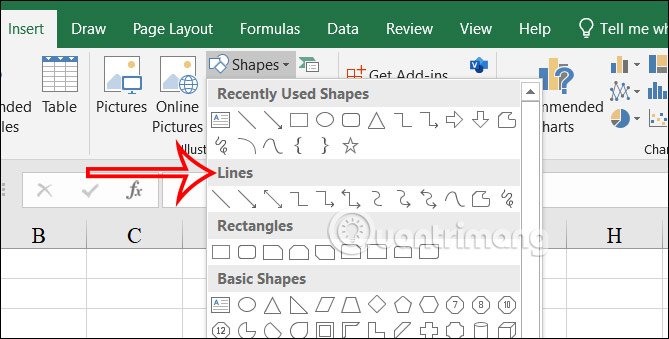
Trong phần Lines, bạn tìm tới mũi tên muốn sử dụng trong Excel, mũi tên 1 chiều hay mũi tên 2 chiều để chèn vào nội dung.
Bước 3:
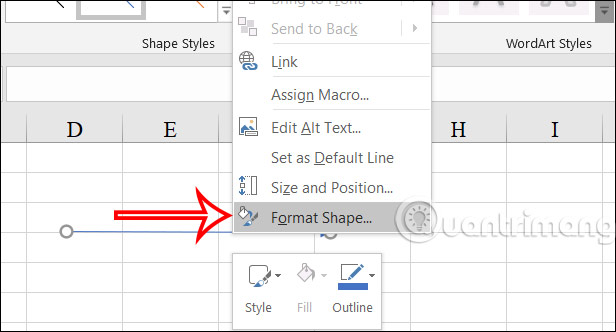
Nhấn chuột phải vào mũi tên đã vẽ trong Excel rồi chọn Format Shape hiển thị trong danh sách.
Bước 4:
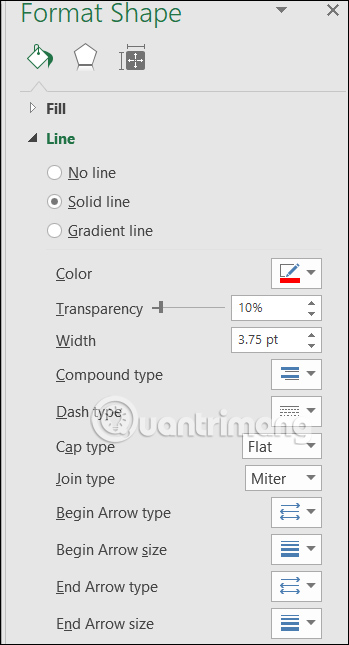
Hiển thị ở cạnh phải giao diện các tùy chọn thay đổi lại giao diện mũi tên vẽ trong Excel.
- Color: Chỉnh màu sắc của mũi tên.
- Transparency: Chỉnh độ mờ của mũi tên.
- Width: Độ dày cho mũi tên.
- Compound type: Tạo kiểu nhiều đường kẻ
- Dash type: Kiểu mũi tên.
- Begin Arrow type: Chỉnh sửa hình dạng ở đầu mũi tên.
- Begin Arrow size: Chỉnh độ lớn cho đầu mũi tên
- End Arrow type: Chỉnh sửa hình dạng ở cuối mũi tên.
- End Arrow size: Chỉnh sửa độ lớn cho cuối mũi tên.
Chúng ta sẽ nhấn vào từng mục để thay đổi giao diện hiển thị cho mũi tên trong Excel.
Bước 5:
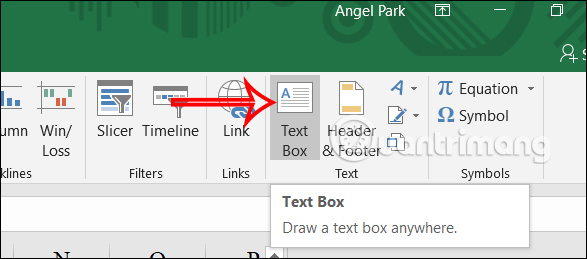
Để viết chữ lên mũi tên, bạn nhấn vào Text Box trong mục Insert để viết.
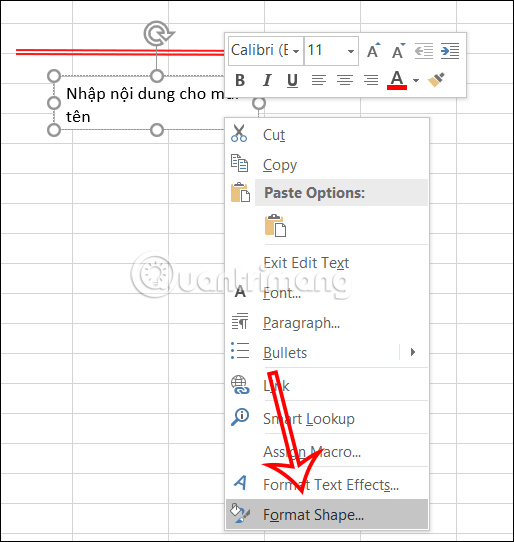
Chúng ta sẽ kẻ 1 khung tại vị trí muốn viết chữ trong mũi tên. Tiếp đến bạn nhập nội dung vào khung rồi nhấn chuột phải chọn Format Shape.
Bước 6:
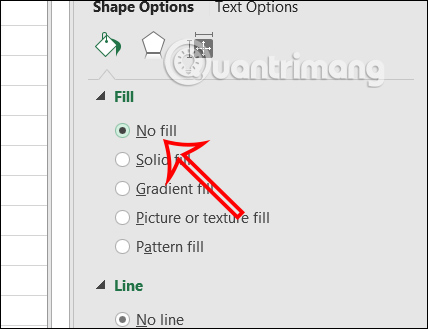
Tiếp tục bạn nhấn vào No Line trong phần Line để loại bỏ viền.
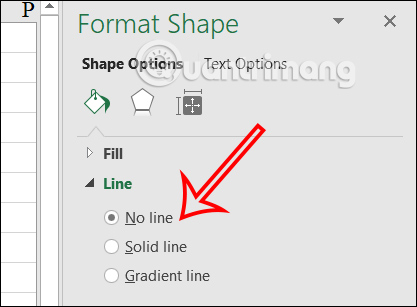
Tại Fill, bạn tích chọn No fill để loại bỏ nền trong khung Textbox.
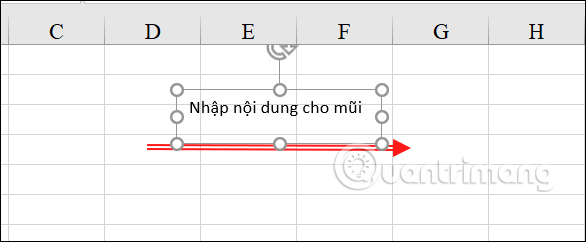
Kết quả bạn đã có được mũi tên với nội dung hiển thị như hình dưới đây. Chúng ta có điều chỉnh vị trí hiển thị nội dung sao cho phù hợp với mũi tên.
Bước 7:
Để dễ dàng hơn trong việc điều chỉnh vị trí của mũi tên, bạn nhấn phím Shift rồi click vào mũi tên và chữ rồi nhấn chuột phải chọn Group để nhóm các đối tượng là 1. Như vậy khi bạn di chuyển sẽ di chuyển mũi tên và chữ viết.

Hướng dẫn vẽ đường thẳng trong Excel
Bước 1:
Tại nội dung trên Excel nhấn chọn vào tab Insert rồi nhấn tiếp vào nhóm Illustrations. Lựa chọn mục Shapes để biểu diễn hình vẽ trên Excel. Tại đây phần Line người dùng nhấn chọn vào đường kẻ đầu tiên.
Bước 2:
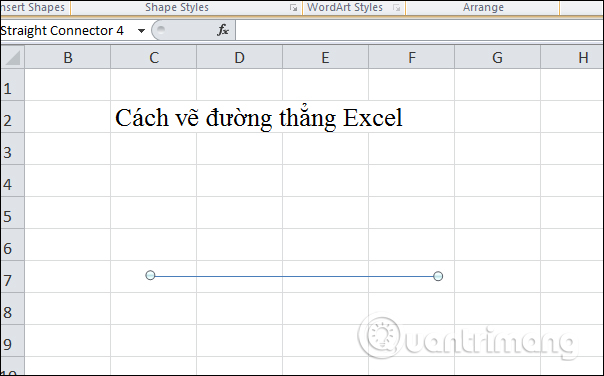
Bạn click chuột tại 1 ô rồi kéo chuột sang bên phải để tạo đường thẳng. Khi thả chuột sẽ thấy 2 điểm mút ở 2 đầu của đường thẳng. Lưu ý trong quá trình vẽ nên nhấn giữ phím Shift để đường vẽ không bị gãy khúc.
Bước 3:
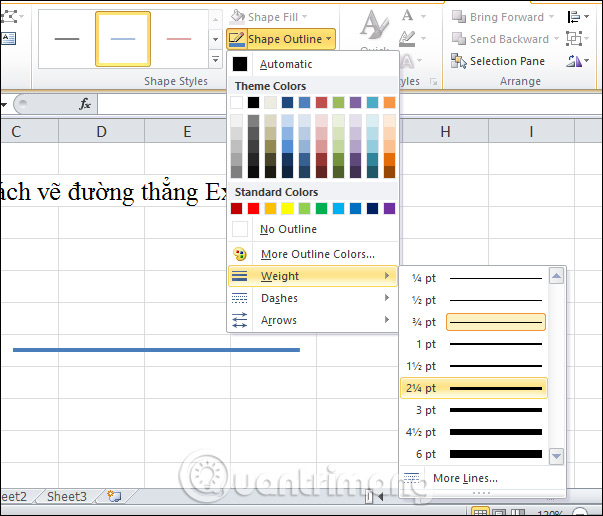
Sau khi tạo đường thẳng xong chúng ta sẽ tùy chỉnh độ dày cho đường thẳng, kích chọn vào đường thẳng vừa vẽ rồi nhấn vào tab Format, chọn Shape Outline và chọn Weight để lựa chọn độ dày cho đường thẳng.
Khi di chuột vào kích cỡ độ dày sẽ được áp dụng ngay trên đường thẳng để người dùng được biết.
Bước 4:
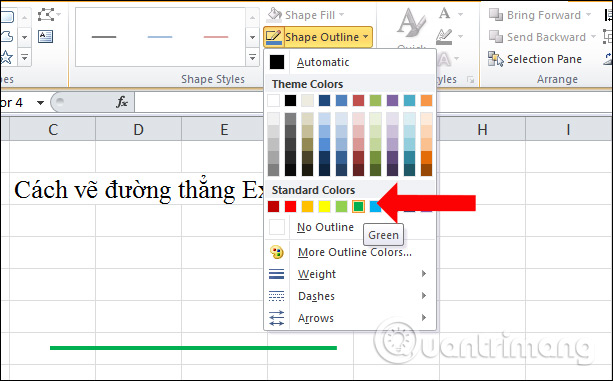
Để thay đổi màu sắc cho đường thẳng, chúng ta cũng nhấn vào Shape Outline rồi chọn màu sắc muốn dùng cho đường thẳng.
Bước 5:
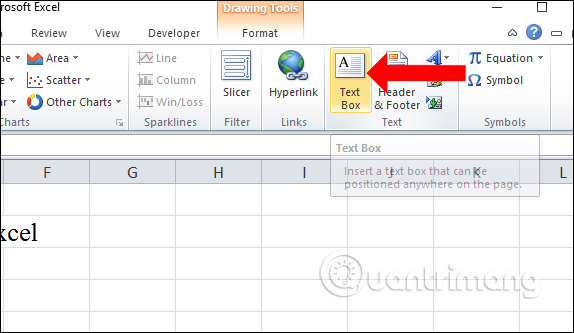
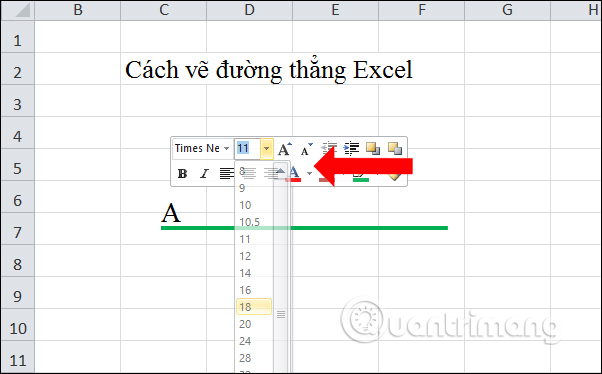
Khi đã tạo xong đường thẳng và chỉnh sửa đường thẳng, bạn cần chèn chữ tại 2 điểm mút đường thẳng. Nhấn vào tab Insert rồi tìm tới nhóm Text, chọn tiếp Textbox.
Bước 6:
Nhấn và giữ chuột theo hướng muốn tạo Textbox mà ở đây là 2 điểm đầu đường thẳng, nhập nội dung cho văn bản.
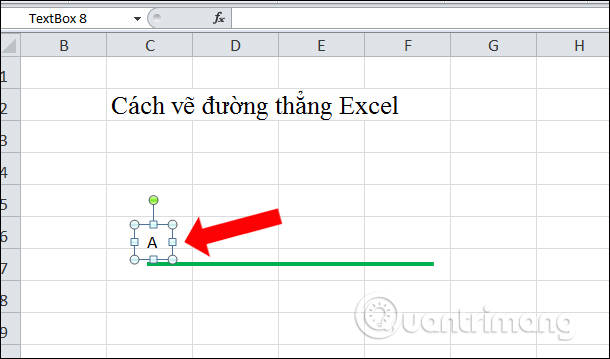
Để đổi font chữ và cỡ chữ trong Textbox, bôi đen chữ rồi chọn kiểu định dạng trong hộp thoại nhỏ hiển thị. Bạn cũng có thể điều chỉnh lại vị trí cho chữ trên 2 đầu mút.
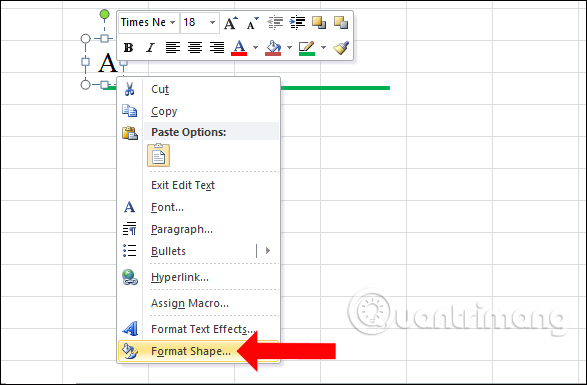
Bước 7:
Tiếp đến xóa bỏ đường viền và nền cho Textbox, nhấn chuột phải vào Textbox và chọn Format Shapes.
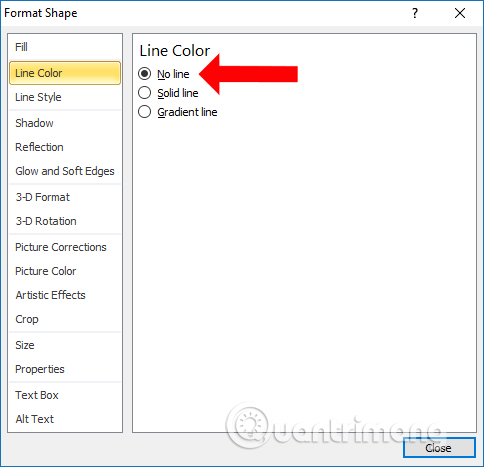
Bước 8:
Hiển thị giao diện mới, trong mục Line Color nhấn chọn No Line.
Tiếp đến mục Fill nhấn chọn No Fill.
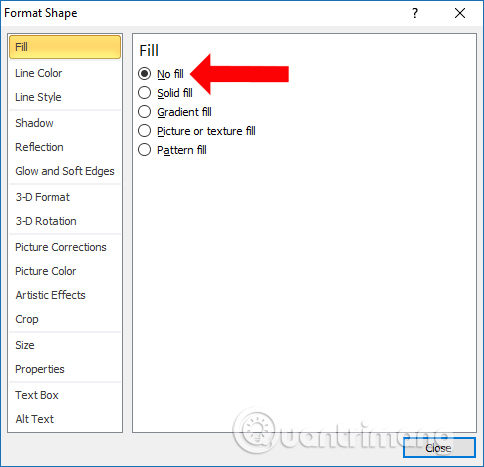
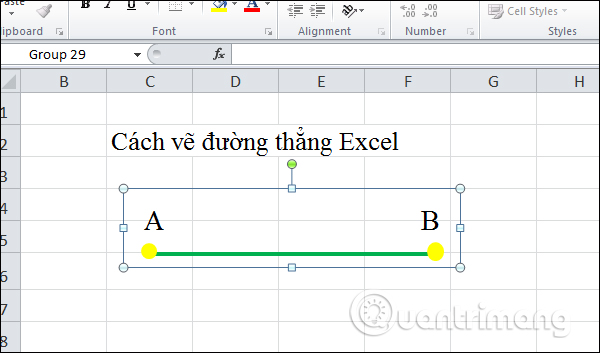
Sau đó tiếp tục tạo Textbox với đầu mút còn lại và đặt tên là B để có được đường thẳng AB như hình.

Bước 9:
2 đầu mút sẽ biến mất khi bạn nhấn chuột ra ngoài nội dung. Để tạo đoạn thẳng chặn điểm đầu và điểm cuối, nhấn vào mục Shapes chọn hình elip Oval để thêm 2 điểm đầu cuối cho đường thẳng.
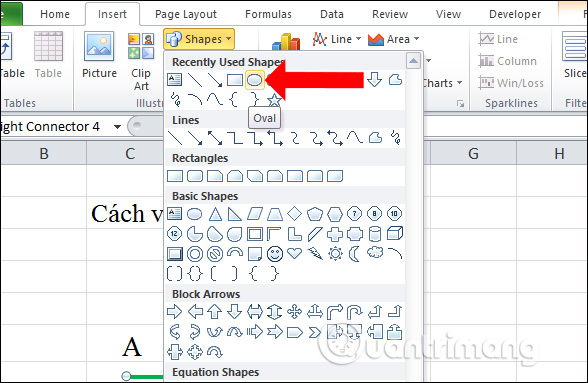
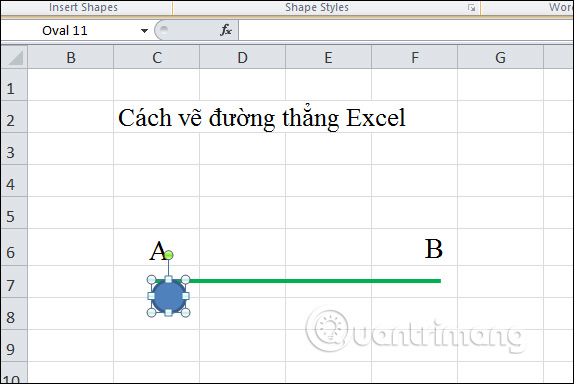
Chúng ta sẽ được hình elip như bên dưới. Việc tiếp theo đó là co kéo khung để tạo thành hình tròn và di chuyển tới đầu đường thẳng để tạo điểm mút.
Bước 10:
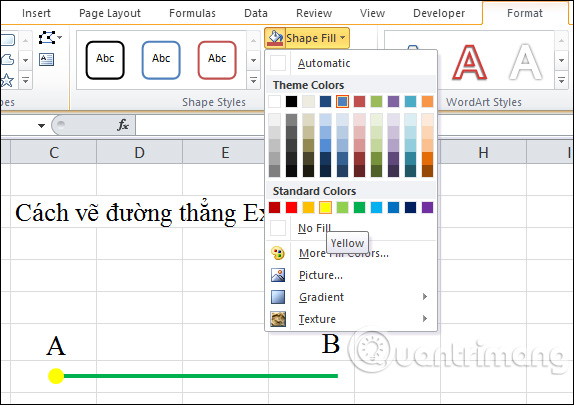
Như vậy bạn sẽ được 1 điểm mút như hình. Nhấn vào Format rồi chỉnh sửa màu sắc cho điểm mút tại Shape Fill và Shape Outline.
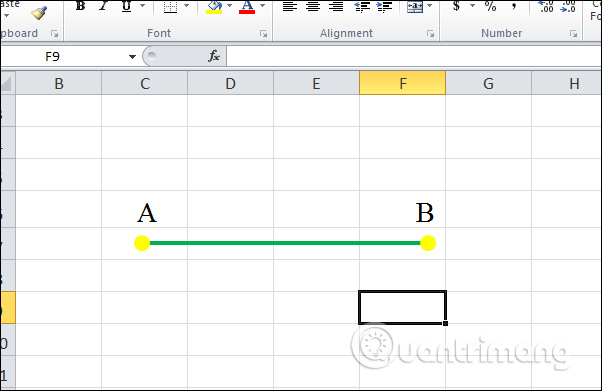
Tạo nốt điểm mút còn lại và sẽ được đoạn thẳng AB như hình.
Bước 11:
Để di chuyển đoạn thẳng và các đối tượng trong đoạn thẳng, người dùng cần nhóm các đối tượng trong đoạn thẳng thành 1 đối tượng chung.
Nhấn giữ phím Shift rồi click chuột vào các đối tượng trong hình. Sau đó nhấn chuột phải vào bất kỳ đối tượng nào chọn Group chọn tiếp Group để nhóm chúng lại.
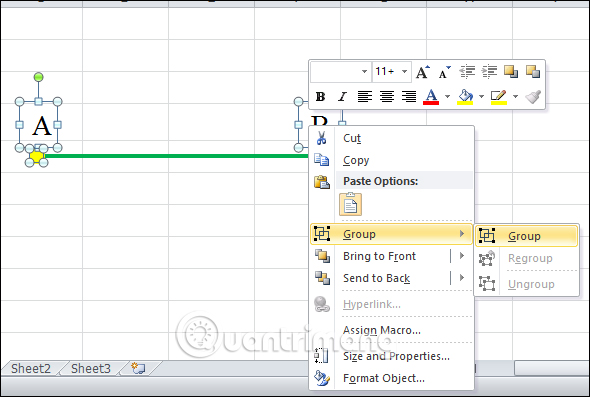
Khi nhóm thành công sẽ có khung kẻ bao quanh đoạn thẳng.
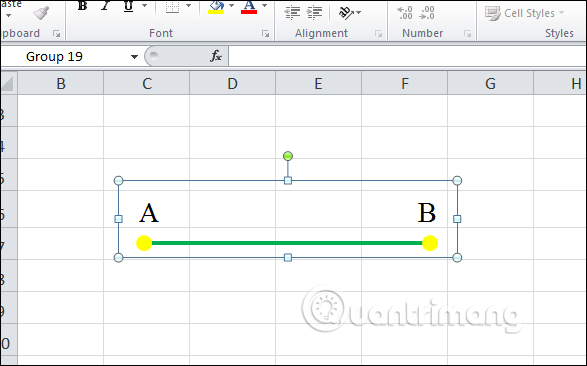
Như vậy người dùng có thể di chyển đoạn thẳng mà không làm thay đổi vị trí các đối tượng trong hình.
