Cách thay đổi biểu tượng cho định dạng file cụ thể trong Windows
- Thứ tư - 16/02/2022 07:32
- In ra
- Đóng cửa sổ này
Những biểu tượng (icon) giúp các gói phần mềm, thư mục và định dạng file khác nhau có thể dễ nhận dạng trực quan. Bạn có thể thay đổi biểu tượng cho các phím tắt và thư mục trong Windows 11. Tuy nhiên, Windows không bao gồm bất kỳ tùy chọn tích hợp nào để tùy chỉnh các biểu tượng cho những định dạng file khác nhau, chẳng hạn như PDF, PNG, JPG, MP3, TXT, v.v…
Tuy nhiên, bạn vẫn có thể thay đổi biểu tượng cho các định dạng file bằng một số phần mềm của bên thứ ba. Types và Default Programs Editor là hai ứng dụng dành cho desktop bao gồm các tùy chọn để thay đổi những biểu tượng cho định dạng file trong Windows. Dưới đây chúng tôi xem xét cách bạn có thể thay đổi các biểu tượng định dạng file với các gói phần mềm đó.
Cách thay đổi biểu tượng cho các định dạng file với Types
Types là một ứng dụng desktop miễn phí (cụ thể hơn là donationware) chạy trên tất cả các nền tảng Windows có từ thời XP. Đây là một chương trình rất nhẹ, hầu như không chiếm bất kỳ dung lượng lưu trữ ổ cứng nào (66KB). Bạn có thể thay đổi các biểu tượng với Types như thế này.
1. Tải phần mềm Types.: https://www.softpedia.com/get/System/System-Miscellaneous/Types.shtml
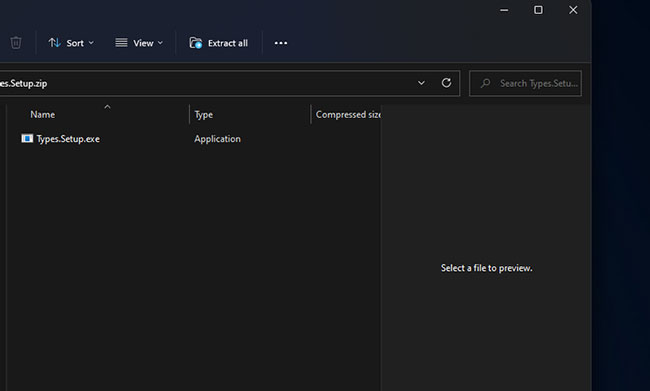
2. Nhấn phím nóng Win + E và mở thư mục bao gồm file ZIP Types trong File Explorer.
3. Nhấp đúp vào kho lưu trữ ZIP Types đã nén.
4. Nhấp vào Extract all trên thanh lệnh của File Explorer.
5. Chọn tùy chọn Show extracted files và nhấn nút Extract.

6. Nhấp đúp vào Types.Setup.exe để mở cửa sổ trong ảnh chụp nhanh ngay bên dưới.
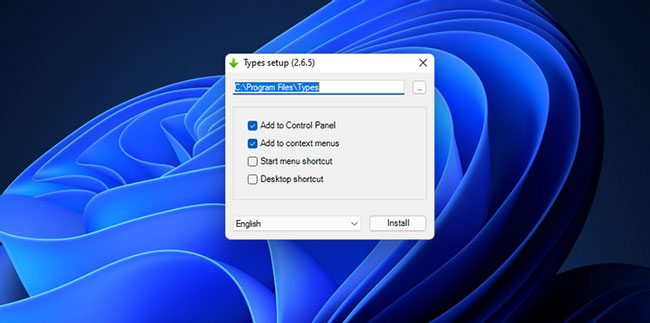
7. Chọn hộp kiểm Desktop shortcut.
8. Nhấp vào nút … để thay đổi thư mục cài đặt nếu bạn muốn.
9. Nhấn nút Install.
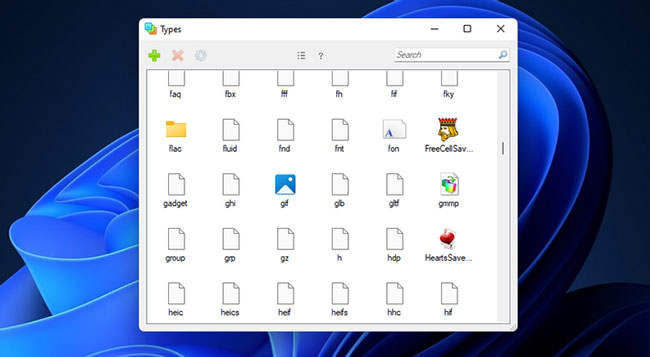
10. Sau đó nhấp đúp vào shortcut Types trên desktop.
11. Nhấp đúp vào định dạng file để thay đổi biểu tượng. Bạn có thể tìm một định dạng cụ thể bằng cách nhập phần mở rộng file vào hộp tìm kiếm.
12. Chọn tab Icon trên cửa sổ Types.
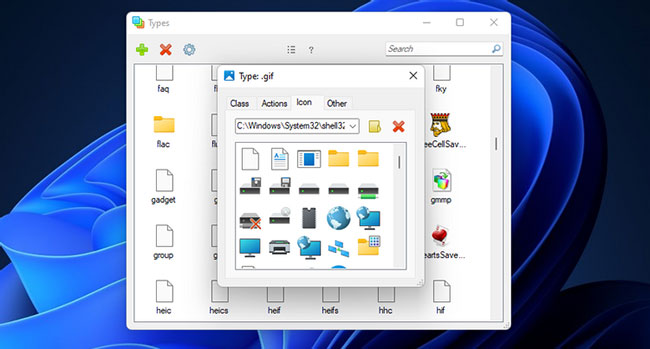
13. Chọn một biểu tượng thay thế từ thư mục System32. Ngoài ra, bạn có thể nhấp vào nút Select Icon file để chọn file trong một thư mục khác.
Nếu Types không bao gồm định dạng bạn muốn thay đổi biểu tượng, hãy nhấp vào nút +. Nhập định dạng vào hộp văn bản. Sau đó nhấp vào tùy chọn Add và chọn định dạng đã thêm trong cửa sổ.
Cách thay đổi biểu tượng cho định dạng file bằng Default Programs Editor
Default Programs Editor là một chương trình có sẵn miễn phí khác mà bạn có thể thay đổi các biểu tượng định dạng file. Nó tương thích với các nền tảng Windows từ XP đến Windows 11. Default Programs Editor cũng là một ứng dụng portable mà bạn có thể thêm vào USB. Đây là cách thay đổi các biểu tượng định dạng file bằng phần mềm này.
1. Tải Default Programs Editor: https://defaultprogramseditor.com/
2. Nhấp đúp vào kho lưu trữ ZIP của Default Programs Editor trong File Explorer.
3. Giải nén file ZIP của Default Programs Editor như đã nêu trong phương pháp trước.
4. Sau đó bấm đúp vào Default Programs Editor.exe trong thư mục giải nén để mở phần mềm.
5. Nhấp vào File Type Settings trong cửa sổ của Default Program Editor.
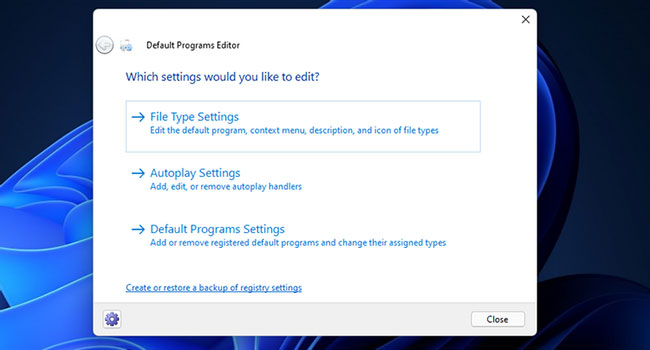
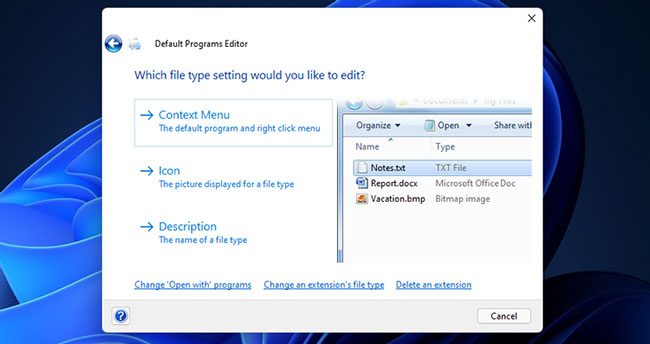
6. Chọn tùy chọn Icon.
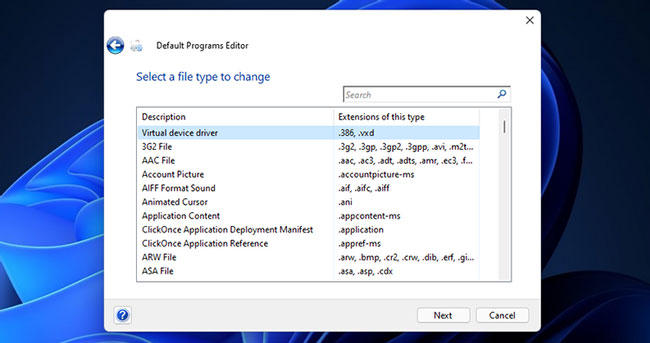
7. Chọn một định dạng file để tùy chỉnh biểu tượng trong danh sách và nhấn nút Next.
8. Nhấp vào Browse để mở cửa sổ Change Icon.
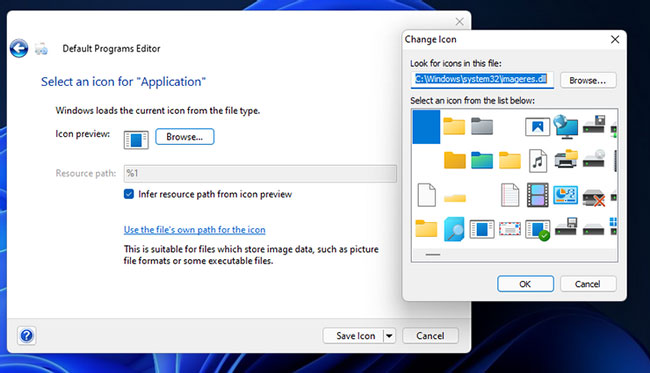
9. Bạn có thể chọn một biểu tượng khác trong thư mục System32 mặc định. Hoặc nhấp vào Browse để chọn một biểu tượng trong thư mục khác.
10. Bấm OK trên cửa sổ Change Icon.
11. Nhấn nút Save Icon.
12. Trình soạn thảo chương trình mặc định cũng có các tùy chọn khác. Bạn có thể chọn Context Menu để tùy chỉnh các tùy chọn menu ngữ cảnh cho các định dạng file. Chọn Autoplay Settings để cấu hình các lựa chọn tự động phát cho những loại file media khác nhau. Tùy chọn Default Programs Setting cho phép bạn sửa đổi các phần mở rộng file được liên kết với những gói phần mềm.
Thật nhanh chóng và đơn giản để thay đổi các biểu tượng định dạng file bằng cả Types và Default Programs Editor. Vì Default Programs Editor có nhiều tùy chọn mở rộng hơn, nên một số người dùng có thể thích phần mềm này hơn. Cho dù bạn chọn công cụ nào, chúng đều sẽ cho phép bạn tạo các file trong Windows 11 với những biểu tượng hấp dẫn hơn từ IconArchive và nhiều nguồn khác. Bạn thậm chí có thể thiết kế các biểu tượng của riêng mình cho những định dạng file bằng phần mềm chỉnh sửa ảnh nếu thích.
