Cách tắt Bitlocker trên Windows 11
- Thứ năm - 09/02/2023 23:07
- In ra
- Đóng cửa sổ này
Windows 11 mang đến nhiều thay đổi, bao gồm hai hình thức mã hóa BitLocker mới: Drive Encryption (mã hóa ổ) và Device Encryption (mã hóa thiết bị). Các tùy chọn này cung cấp bảo mật nâng cao cho thiết bị và file của bạn, nhưng điều gì xảy ra nếu bạn cần tắt chúng? Sau đây, bài viết sẽ hướng dẫn bạn cách tắt mã hóa BitLocker trên Windows 11. Hãy nhớ rằng việc tắt BitLocker trên Windows 11 có thể khiến thiết bị và dữ liệu của bạn kém an toàn hơn, vì vậy hãy thận trọng khi đưa ra quyết định này.
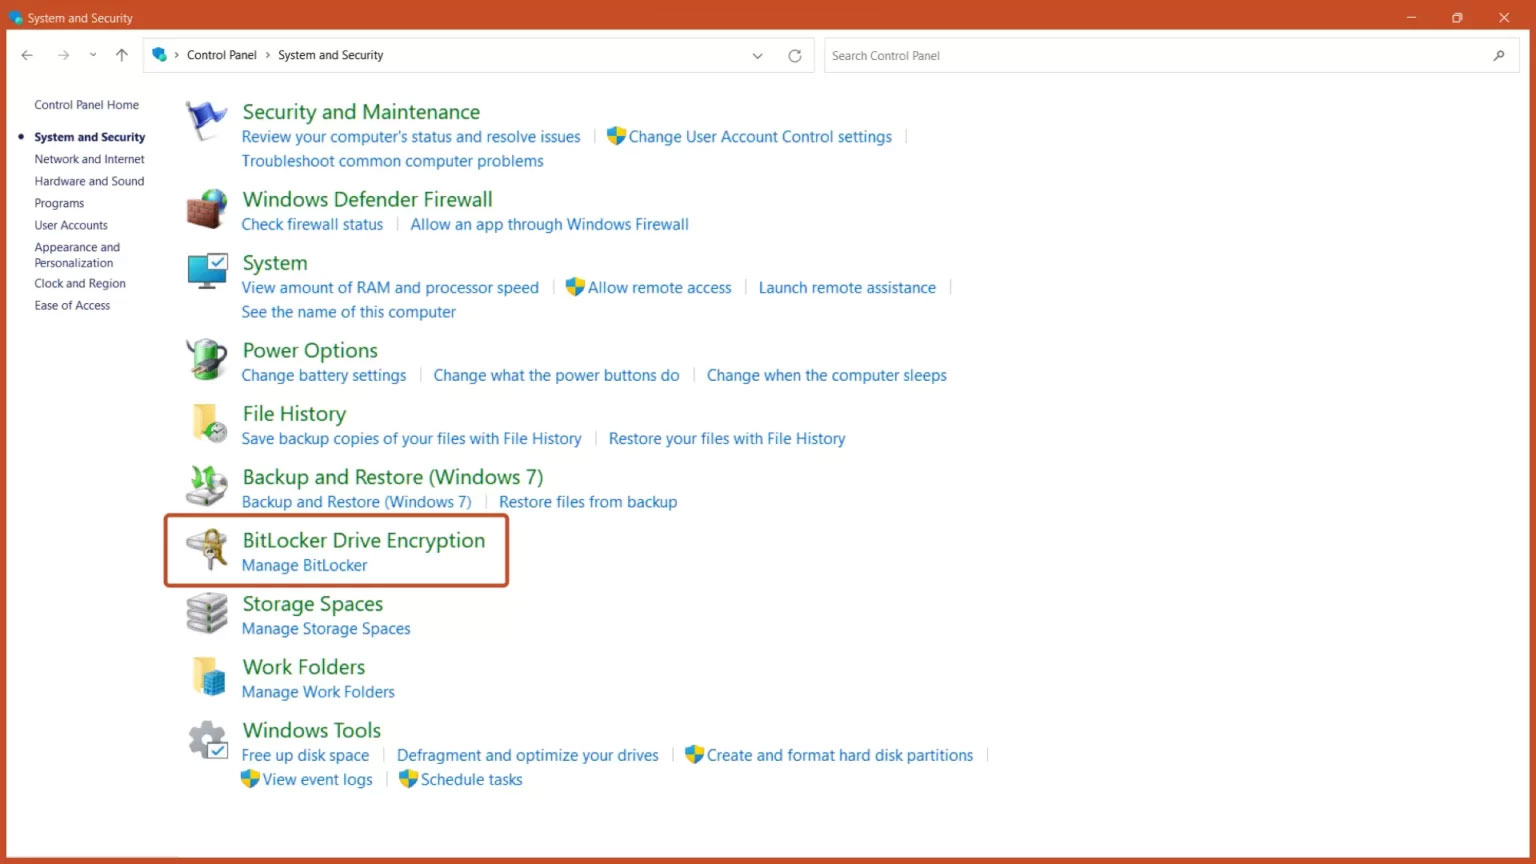
1. Tắt BitLocker qua Control Panel
Bước 1: Mở Control Panel từ menu Start và nhấp vào tùy chọn System and Security.
Bước 2: Nhấp vào nút BitLocker Drive Encryption.
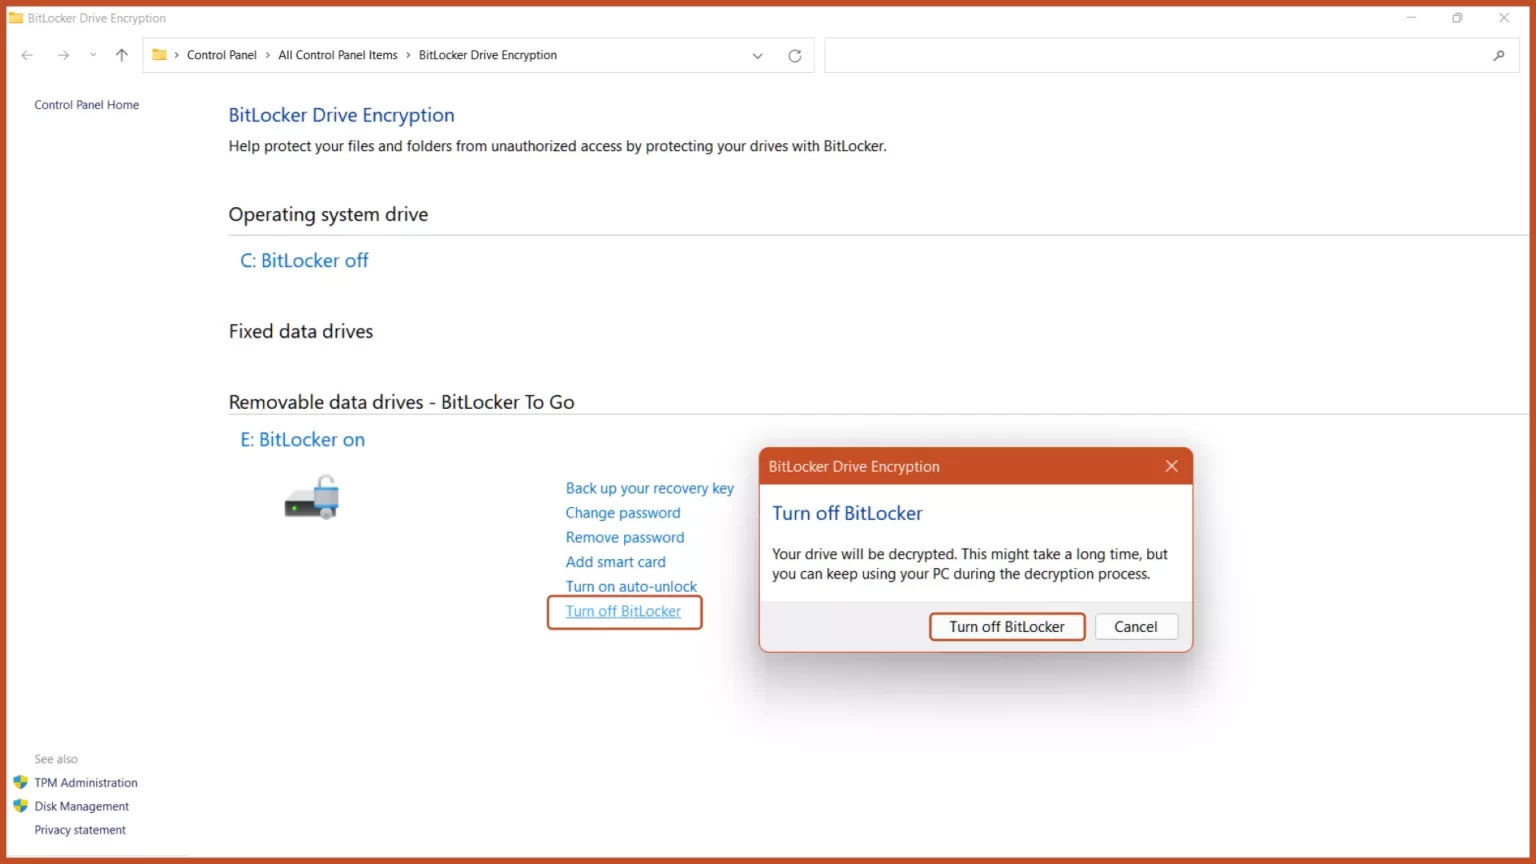
Bước 3: Nhấp vào nút Turn off BitLocker.
2. Vô hiệu hóa BitLocker qua Windows Services
Bước 1: Nhấn tổ hợp phím Windows + R trên bàn phím để mở Windows Run, gõ services.msc và nhấn nút OK.
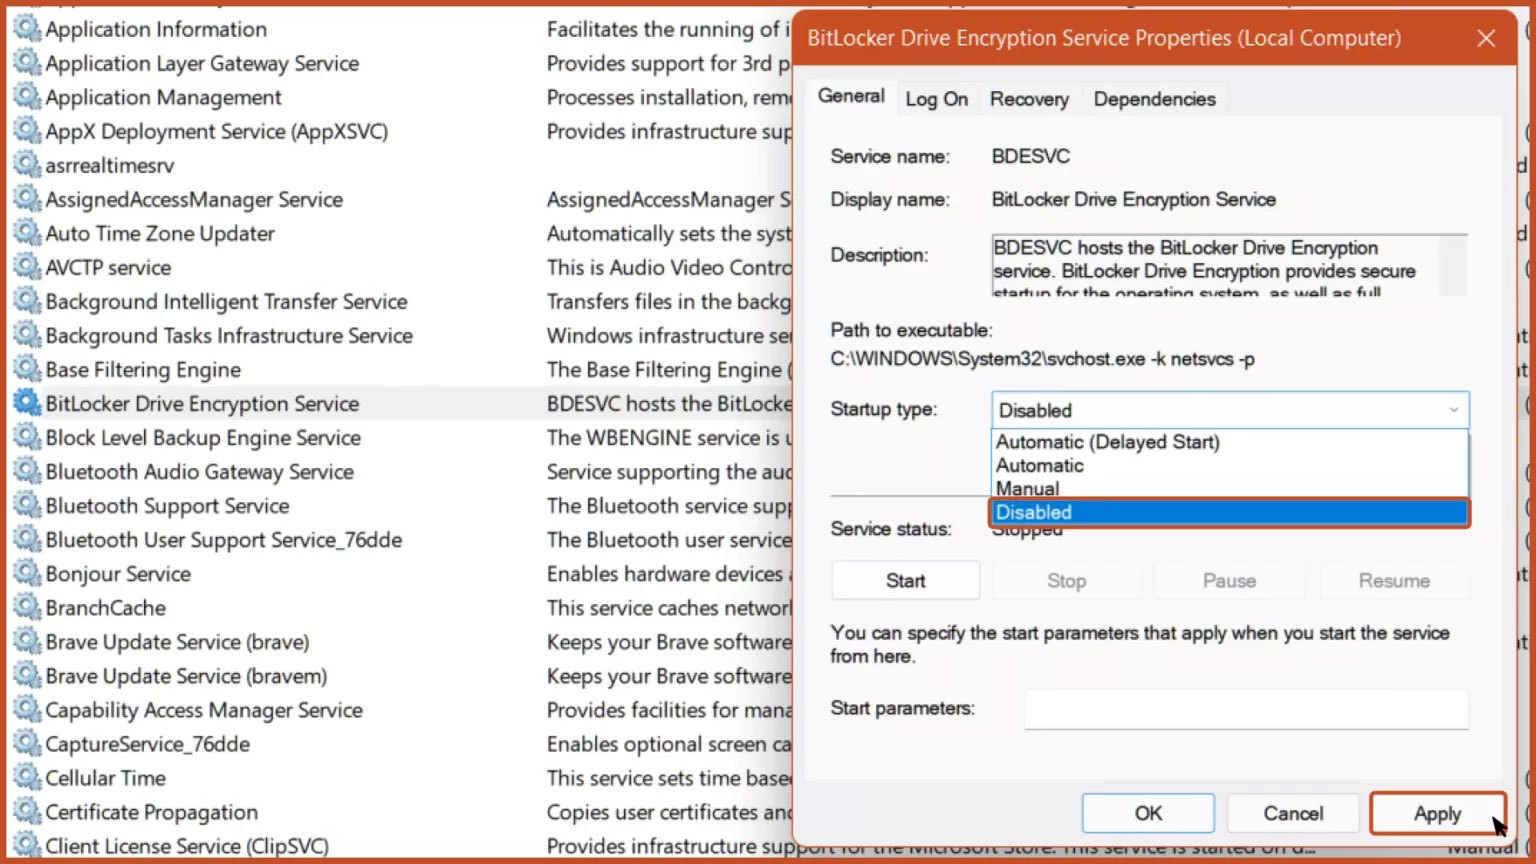
Bước 2: Cuộn và nhấp đúp vào tùy chọn BitLocker Drive Encryption Service.
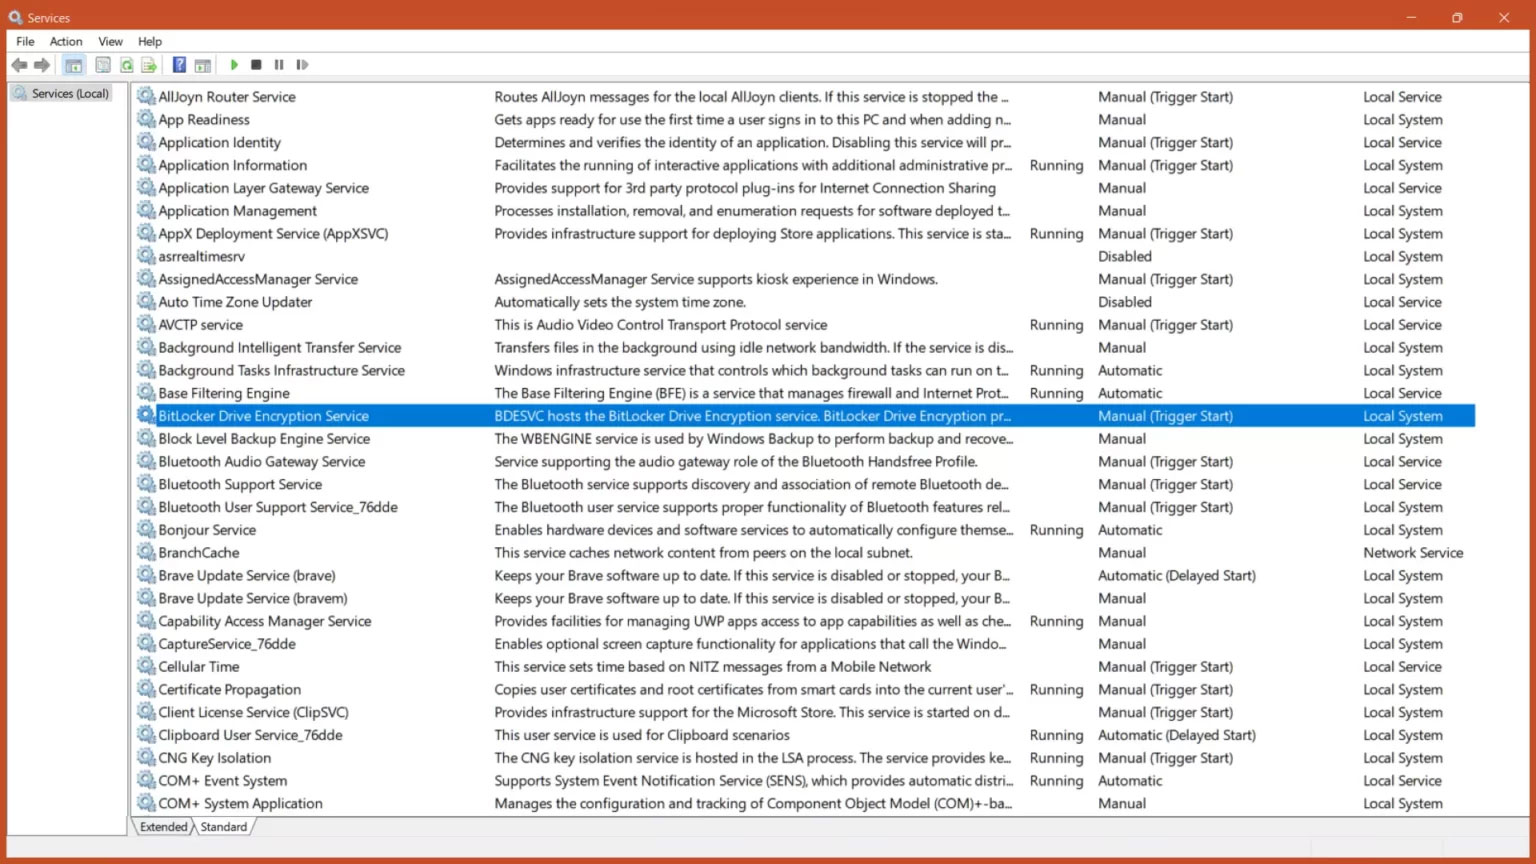
Bước 3: Để tắt mã hóa BitLocker, hãy đặt loại khởi động thành Disabled và nhấn nút Apply.
Bước 4: Khởi động lại máy tính để thay đổi có hiệu lực.

3. Tắt BitLocker qua This PC
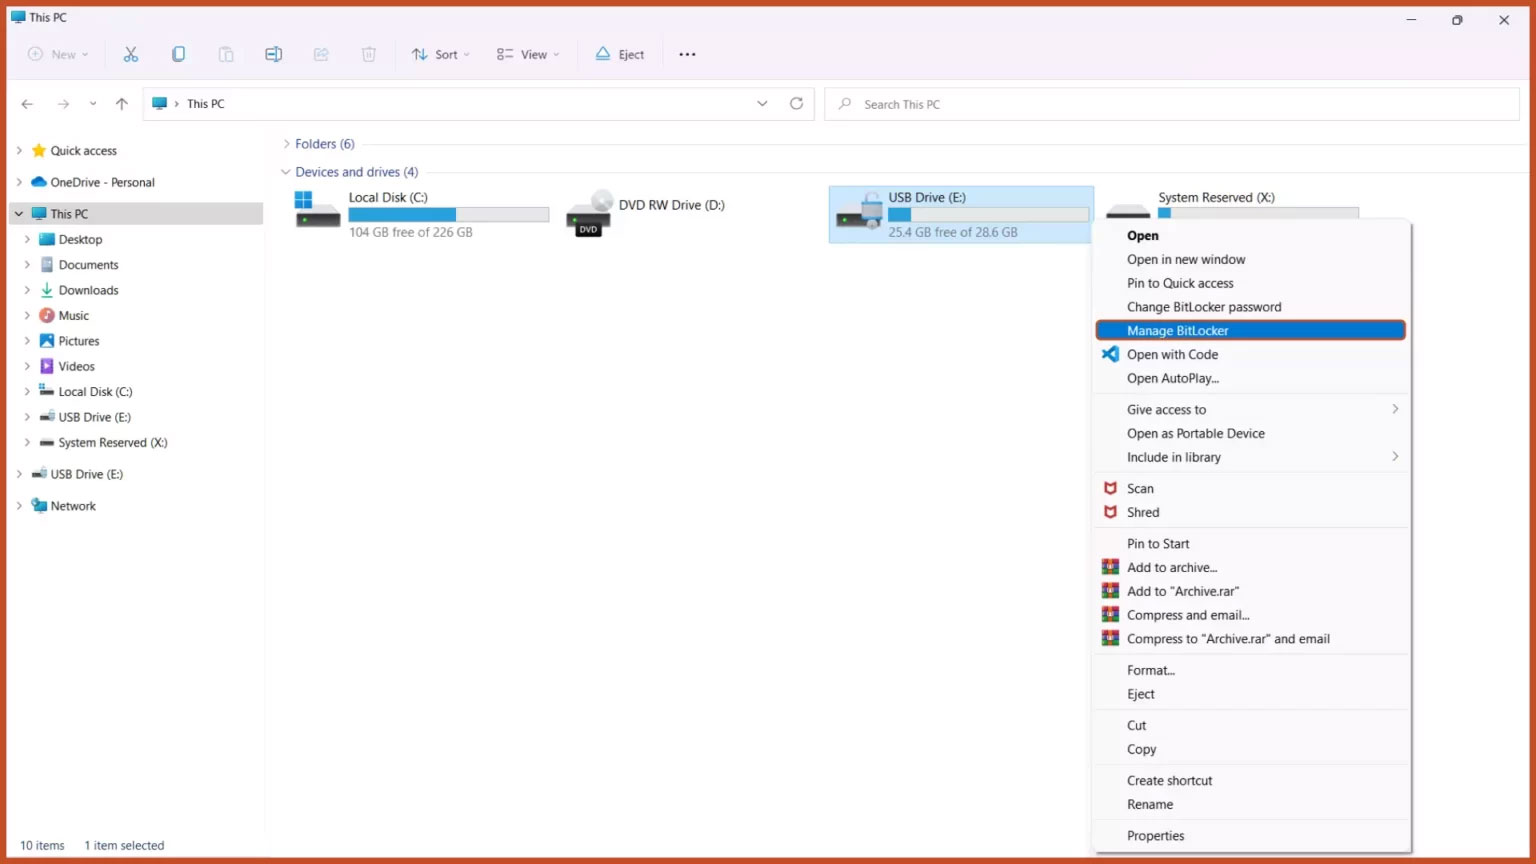
Bước 1: Mở ứng dụng This PC trên máy tính của bạn.
Bước 2: Nhấp chuột phải vào ổ mà bạn muốn tắt BitLocker và chọn tùy chọn Manage BitLocker.
Bước 3: Nhấp vào nút Turn off BitLocker.

4. Vô hiệu hóa BitLocker thông qua System Configuration
Bước 1: Mở Windows RUN bằng cách nhấn tổ hợp phím Windows + R, gõ msconfig và nhấn phím Enter.
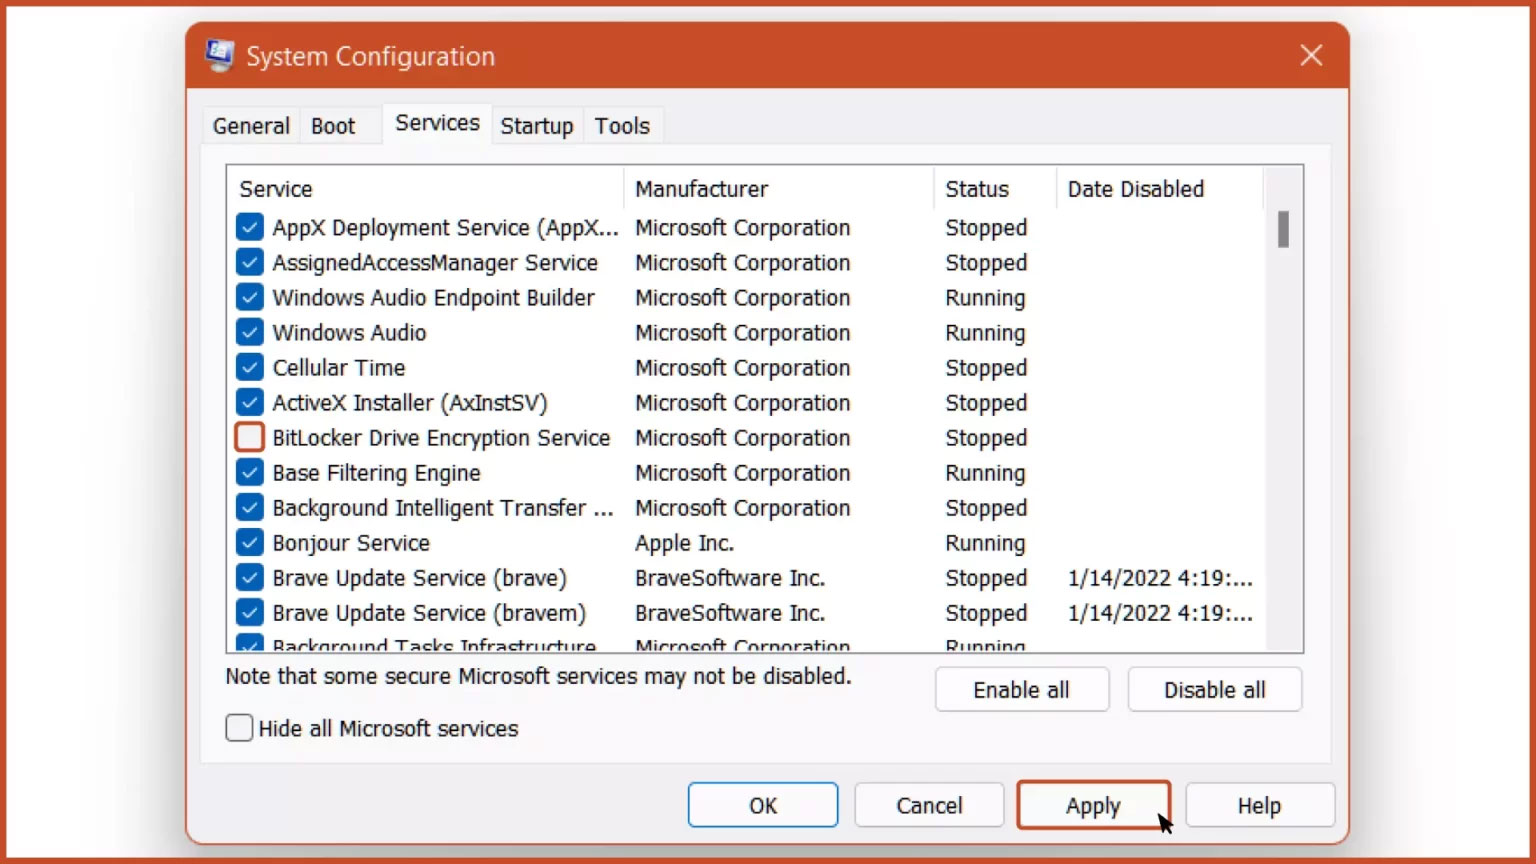
Bước 2: Chọn tab Services từ thanh trên cùng, bỏ chọn BitLocker Drive Encryption Service và nhấp vào nút Apply.
Bước 3: Khởi động lại máy tính và sau đó, BitLocker Encryption Service sẽ bị tắt.

5. Tắt BitLocker qua Command Prompt
Bước 1: Chạy Command Prompt với quyền admin từ menu Start.
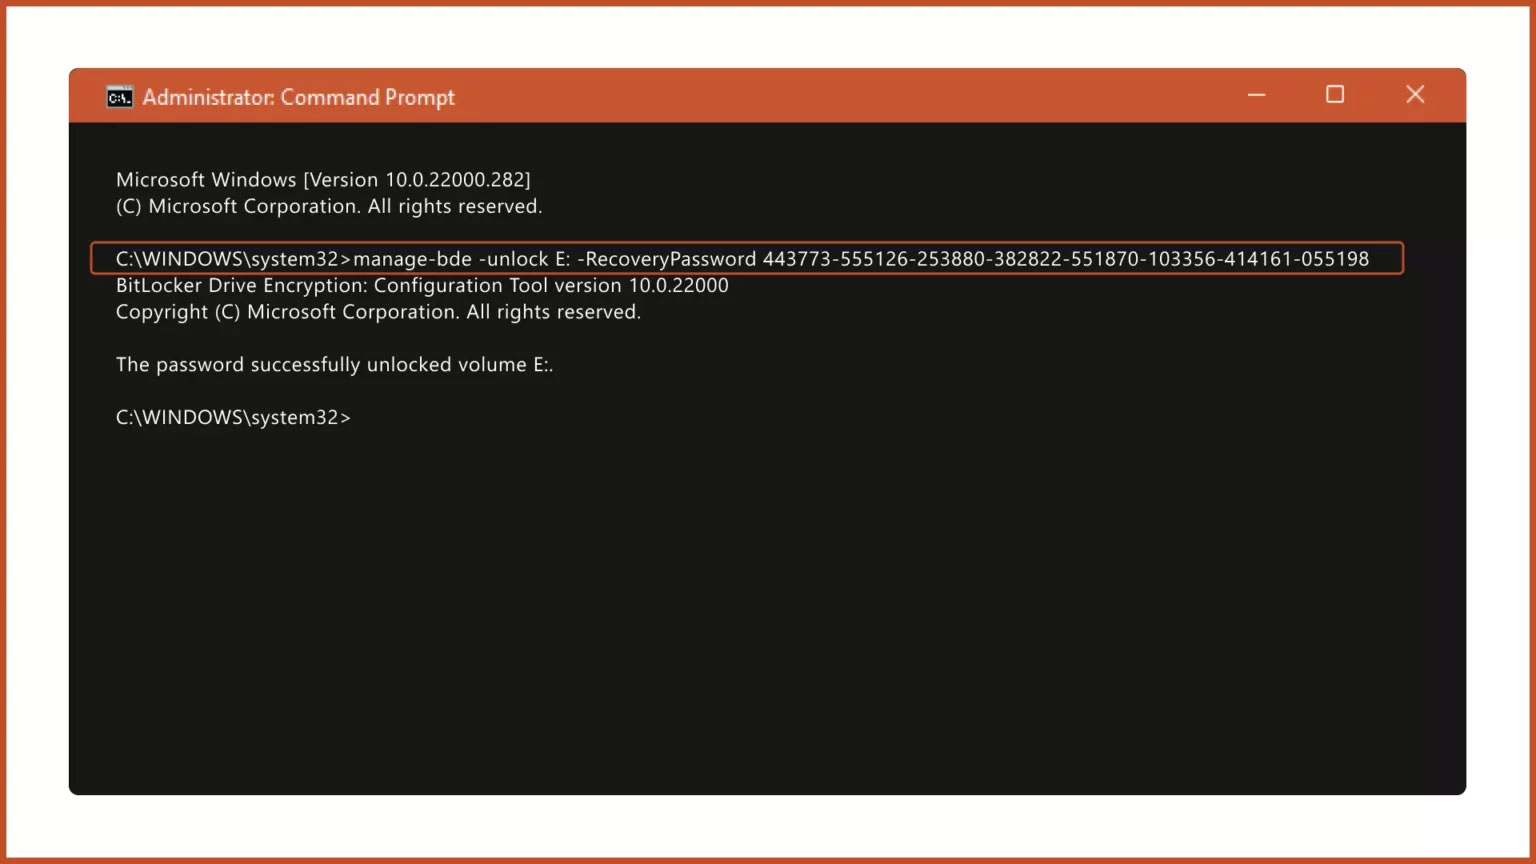
Bước 2: Để mở khóa BitLocker Encrypted Drive, gõ lệnh:
manage-bde -unlock Drive-Name: -RecoveryPassword Recovery-Code
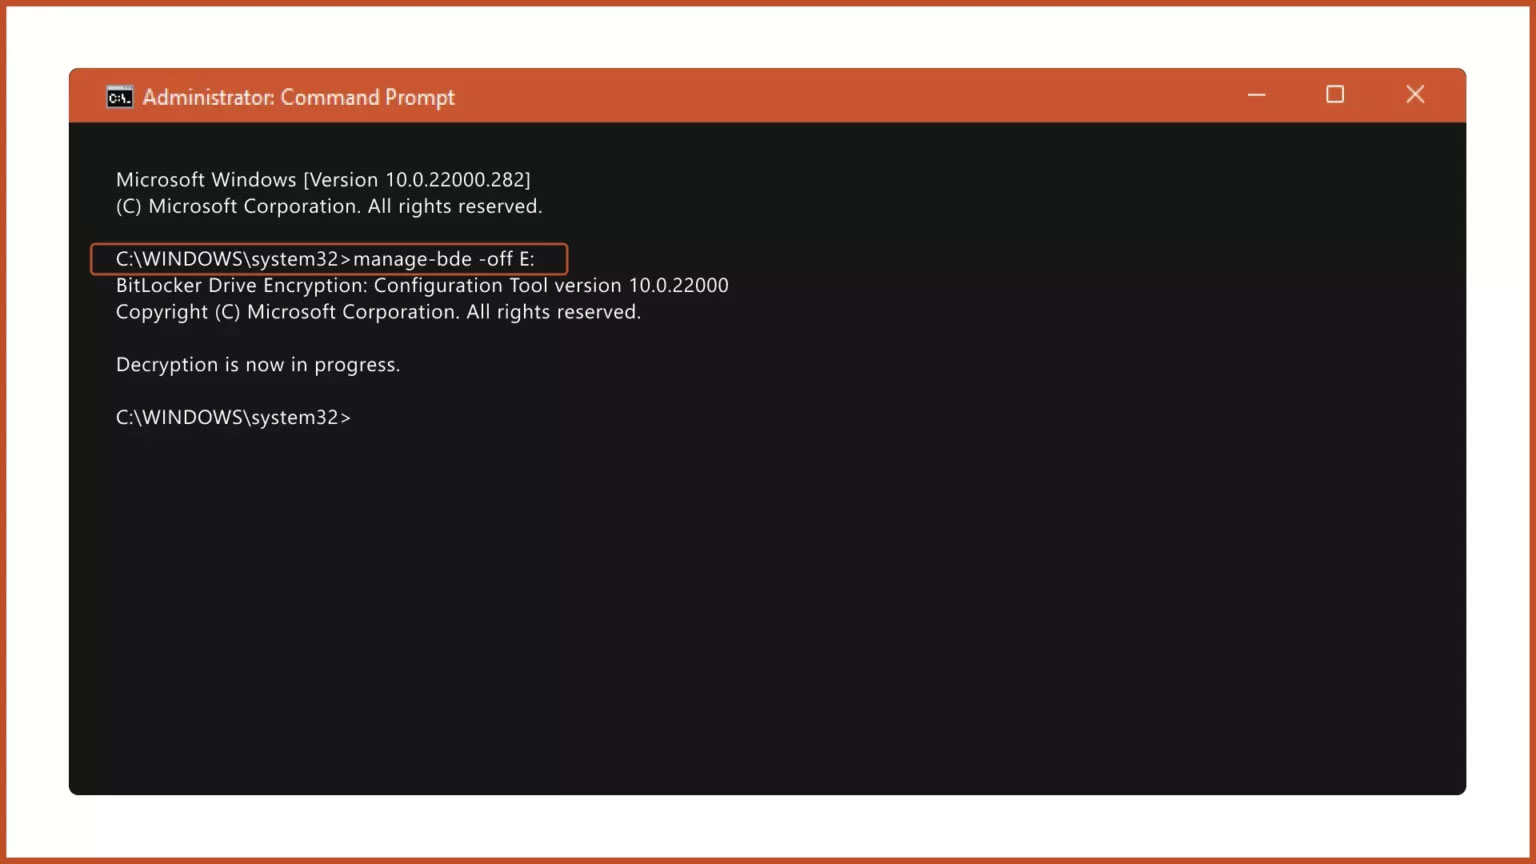
Bước 3: Để tắt BitLocker bằng CMD, gõ lệnh:
manage-bde -off Drive-Name:
Lưu ý: Thay thế Drive-Name bằng ký tự ổ của BitLocker Encrypted Drive và Recovery-Code bằng khóa khôi phục thực tế được phân bổ trong khi mã hóa ổ.
6. Vô hiệu hóa BitLocker thông qua Registry Editor
Bước 1: Mở Registry Editor từ menu Start.
Bước 2: Trong Registry Editor, điều hướng đến đường dẫn sau:
Computer\HKEY_LOCAL_MACHINE\SYSTEM\CurrentControlSet\Control\BitLocker
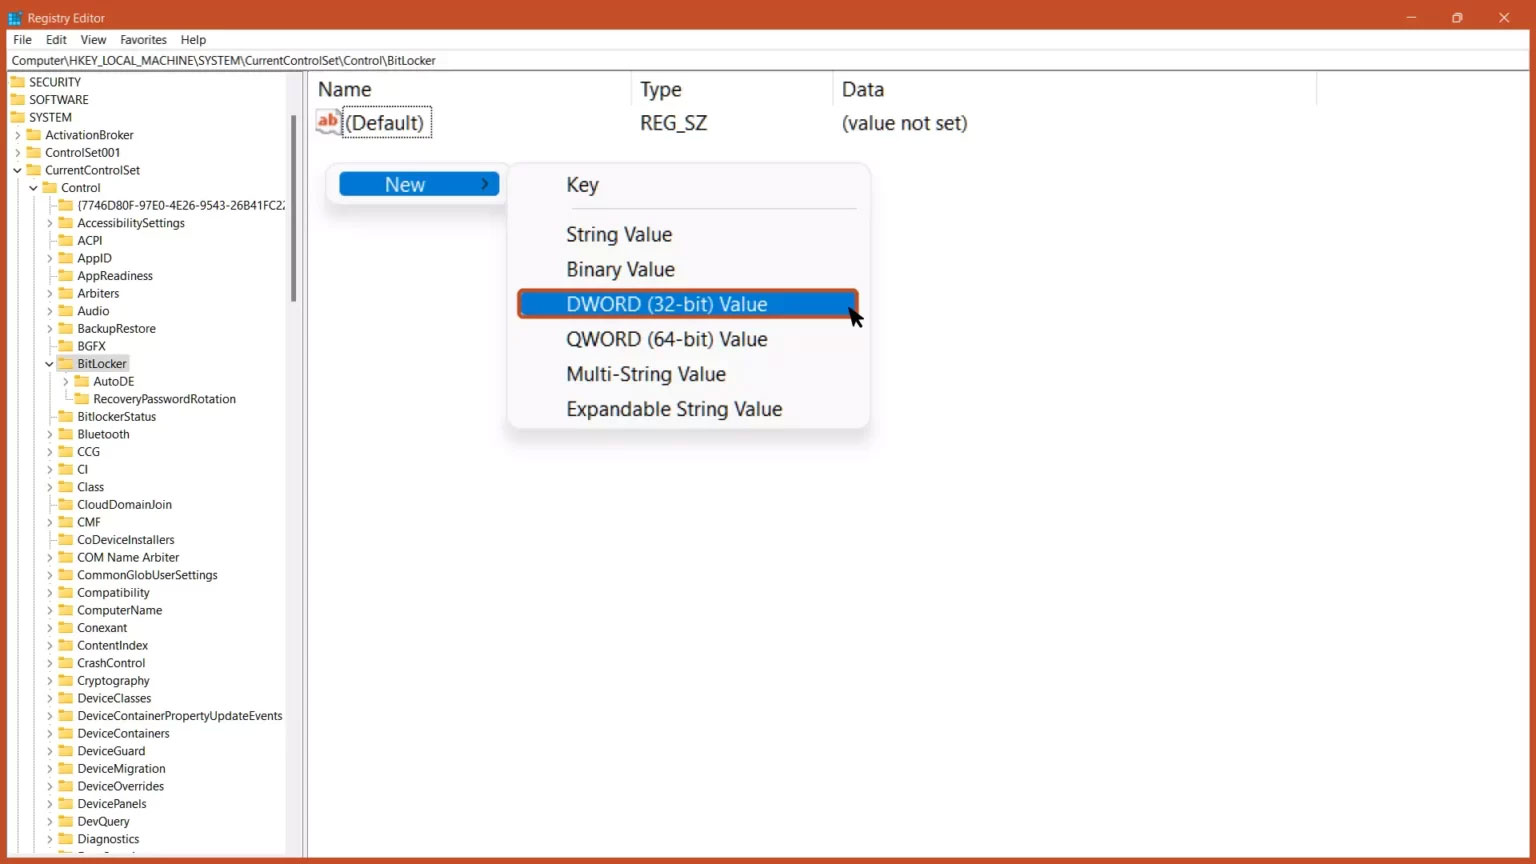
Bước 3: Nhấp chuột phải vào vùng trống trên khung bên phải, thêm giá trị DWORD (32-bit) mới và đặt tên là PreventDeviceEncryption.
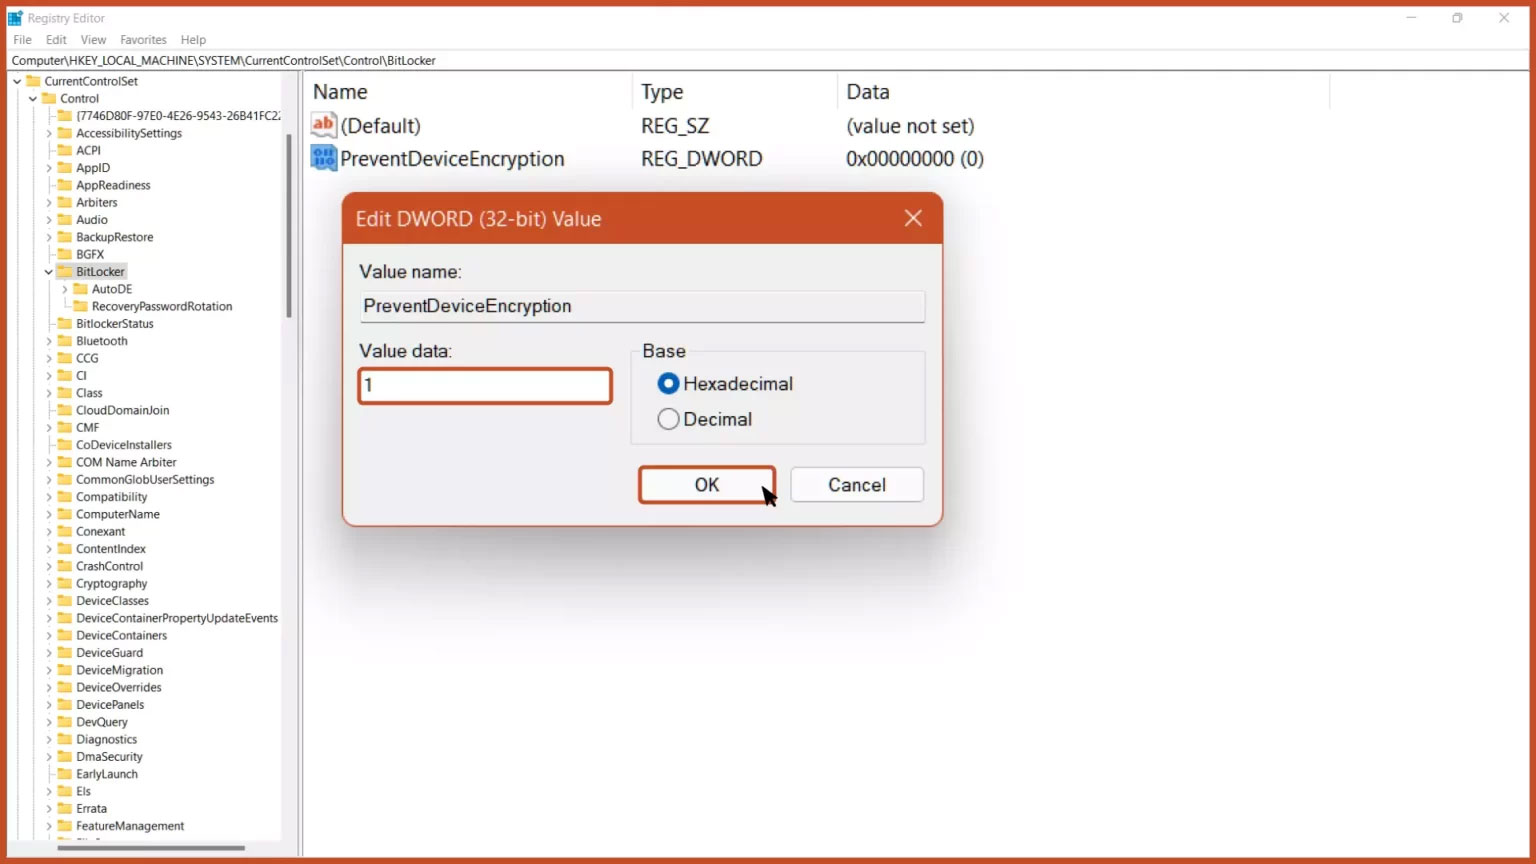
Bước 4: Mở giá trị DWORD và đặt dữ liệu giá trị từ 0 thành 1 ở định dạng thập lục phân và nhấp vào nút OK.
Bước 5: Khởi động lại máy tính để thay đổi có hiệu lực.
7. Tắt BitLocker qua PowerShell
Bước 1: Chạy PowerShell với quyền admin từ menu Start.
Bước 2: Để tắt BitLocker bằng PowerShell, gõ lệnh:
Disable-BitLocker -MountPoint Drive_Name:
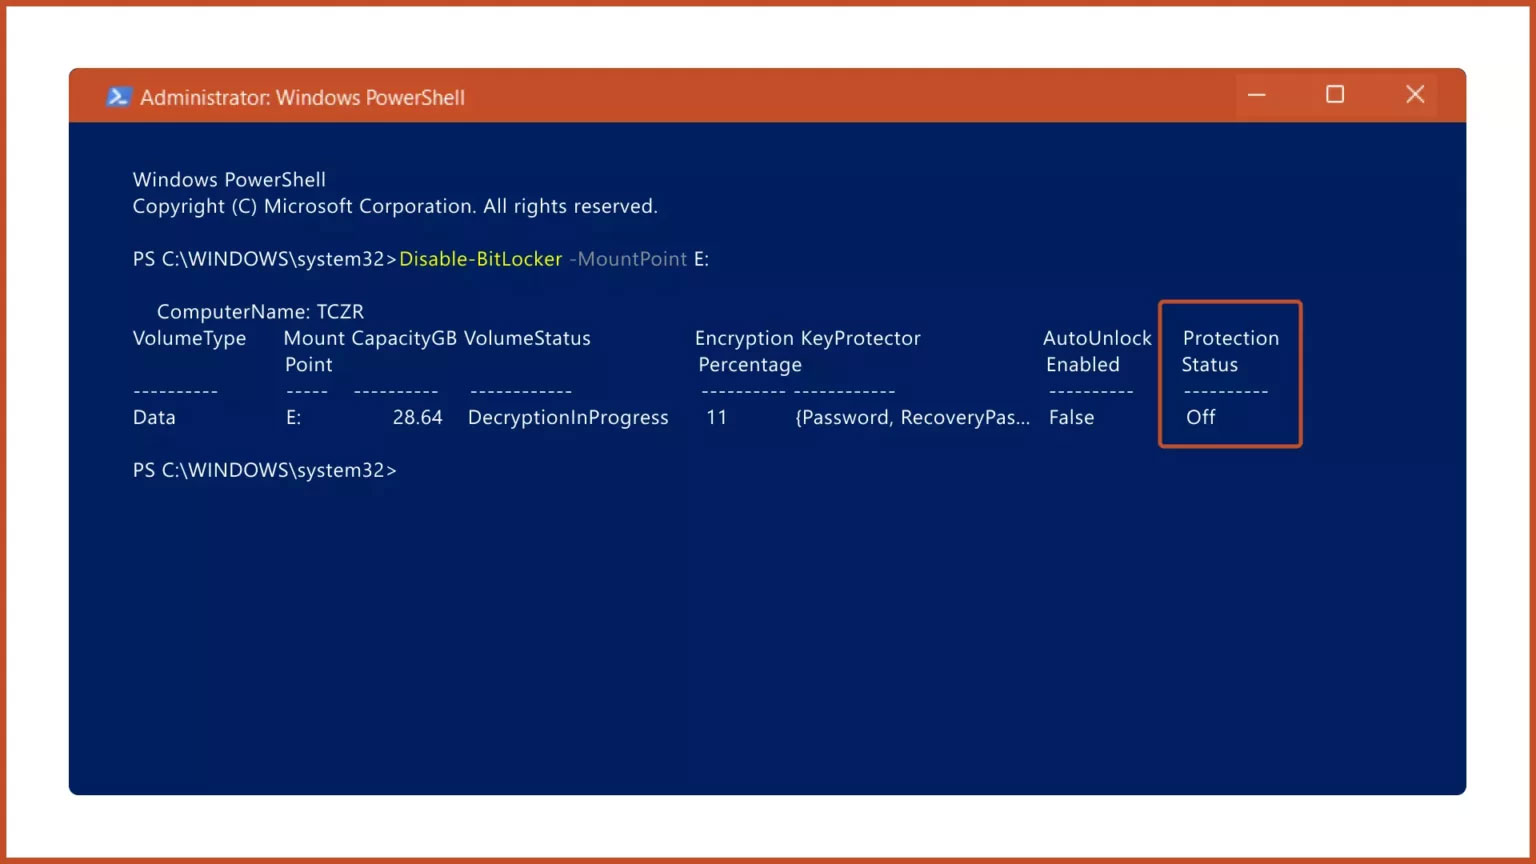
Lưu ý: Thay thế Drive_Name bằng ký tự của ổ được mã hóa BitLocker.
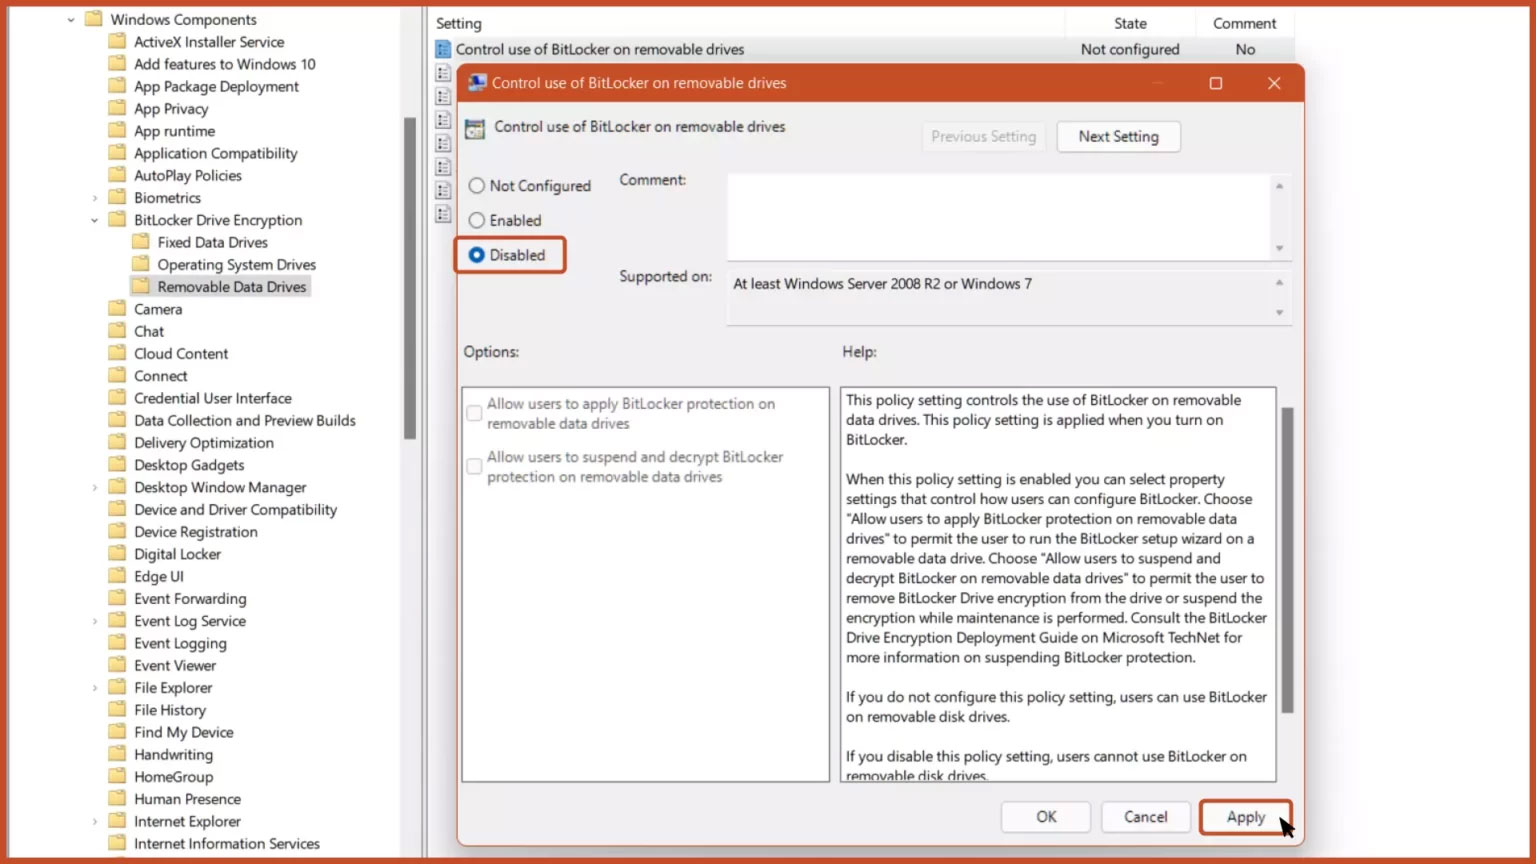
8. Tắt BitLocker qua Group Policy Editor
Bước 1: Trong menu Start, gõ Group Policy Editor và nhấn phím Enter.
Bước 2: Điều hướng đến đường dẫn sau:
Computer Configuration > Administrative Templates > Windows Components > BitLocker Drive Encryption > Removable Data Drives
... rồi nhấp vào tùy chọn Control use of BitLocker on removable drives.
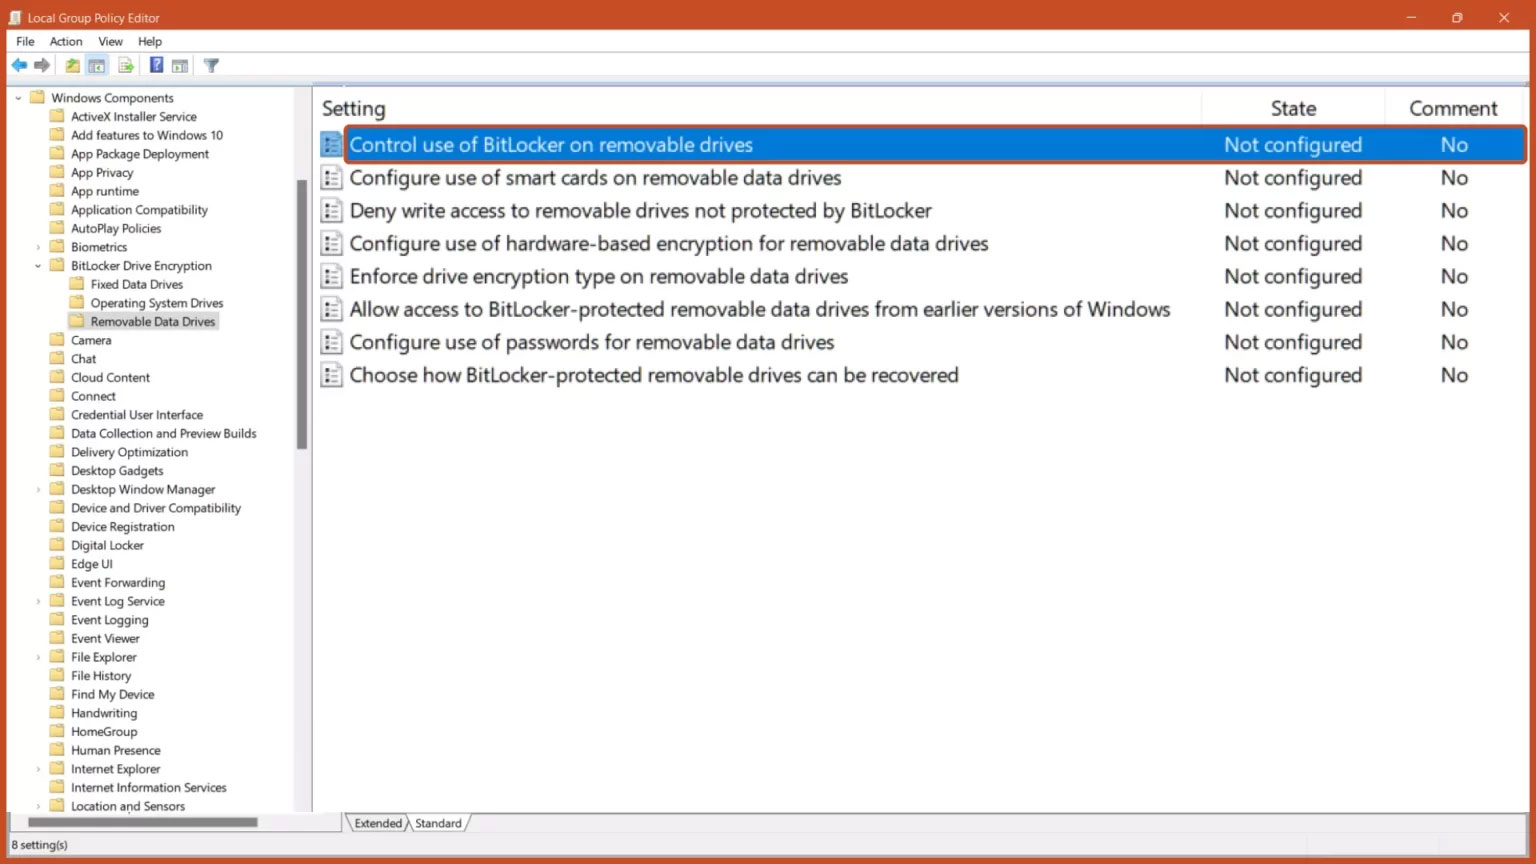
Bước 3: Chọn tùy chọn Disabled và nhấp vào nút OK.
Cài đặt policy này kiểm soát việc sử dụng BitLocker trên ổ dữ liệu di động. Cài đặt policy này được áp dụng khi bạn bật BitLocker.
Nếu bạn không cấu hình cài đặt policy này, người dùng có thể sử dụng BitLocker trên các ổ di động. Nếu bạn tắt cài đặt policy này, người dùng không thể sử dụng BitLocker trên ổ di động
