Cách tạo video bằng ứng dụng Photos trên Windows 11
- Thứ tư - 15/12/2021 23:46
- In ra
- Đóng cửa sổ này
Một trong số các tính năng thú vị nhất của Windows 11 là ứng dụng Photos, ứng dụng tuyệt vời để tạo album ảnh. Nhưng bạn có biết rằng bạn cũng có thể dễ dàng tạo video bằng công cụ này không?
Ứng dụng Photos không chỉ có thể tự động tạo video cho bạn mà thậm chí còn có trình chỉnh sửa video cho phép bạn tạo video tùy chỉnh với chuyển động, hiệu ứng 3D, âm nhạc, v.v… Hãy cùng Quantrimang.com tìm hiểu cách thực hiện qua bài viết sau đây!
Cách tạo video thú vị bằng ứng dụng Photos trong Windows 11
Bạn có thể tạo video nhanh như lời chúc mừng sinh nhật hoặc kỳ nghỉ gia đình trong ứng dụng Photos.
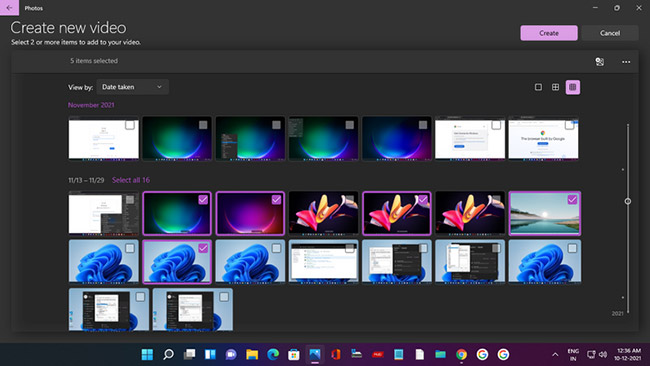
Trên màn hình chính của ứng dụng Photos, hãy nhấp vào biểu tượng New double Image. Chọn Automatic Video và sau đó chọn ảnh bằng cách đánh dấu vào hộp kiểm tương ứng của chúng. Sau đó nhấp vào Create.
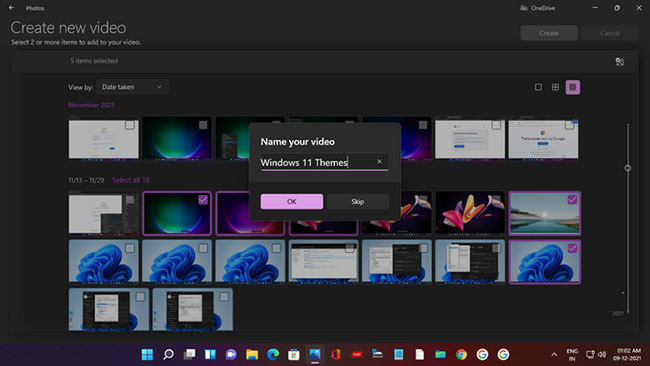
Trong lời nhắc xuất hiện, hãy thêm một tên phù hợp, chẳng hạn Windows 11 Themes như trong ví dụ. Sau đó, nhấp vào OK.
Video tự động sẽ được tạo và bạn sẽ thấy bản xem trước của video đó trên cửa sổ - hoàn chỉnh với hoạt ảnh, nhạc nền và chữ cách điệu cho phần tiêu đề video.

Và nếu bạn không thích video đã tạo, chỉ cần nhấp vào Remix it for me và AI trong ứng dụng Photos sẽ ngay lập tức tạo một phiên bản khác với cả theme và nhạc mới. Bạn có thể tiếp tục phối lại cho đến khi thấy hài lòng mới thôi.
Sau đó nhấp vào Finish video và chọn độ phân giải (khuyến nghị 1080p), rồi nhấp vào Export để lưu và thưởng thức video.
Tạo video mới với Video Editor của Windows 11
Bây giờ, hãy xem cách tạo một video tùy chỉnh, sử dụng video và hình ảnh. Bạn có thể bắt đầu một video mới theo hai cách:
1. Trên trang chủ của ứng dụng Photos, chỉ cần nhấp vào biểu tượng New Double Image và chọn New video project.
2. Tìm kiếm Video Editor và nhấp vào Best match. Trên trang chủ của Best match, nhấp vào New video project.
Cả hai thao tác này sẽ mở ra trang New Video với lời nhắc đặt tên cho video. Đặt tên cho video và sau đó nhấp vào OK.
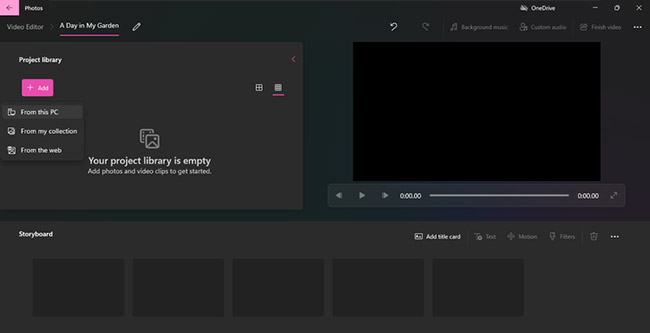
Bây giờ bạn cần thêm video và hình ảnh, vì vậy hãy nhấp vào nút + Add trong Project Library. Bạn có thể chọn From this PC, From my collection (từ ứng dụng Photos) và From the web (điều này sẽ mở ra tìm kiếm Bing để tìm nội dung media trực tuyến).
Đối với hướng dẫn này, tác giả bài viết đã chọn thêm nội dung media từ PC. Nhấp vào From this PC và File Explorer sẽ mở ra. Để thêm video trước tiên, hãy nhấp vào thư mục Videos system. Ngoài ra còn một thư mục tên là MyGarden chứa các video mà tác giả đã quay từ điện thoại.
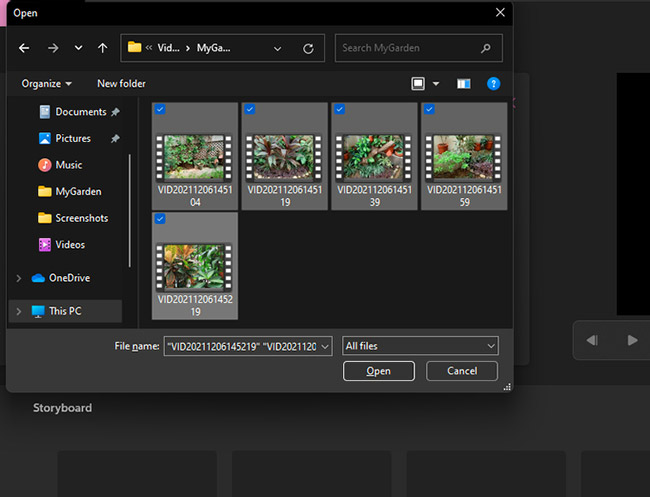
Mở thư mục và chọn video bạn muốn, sau đó nhấp vào Open.
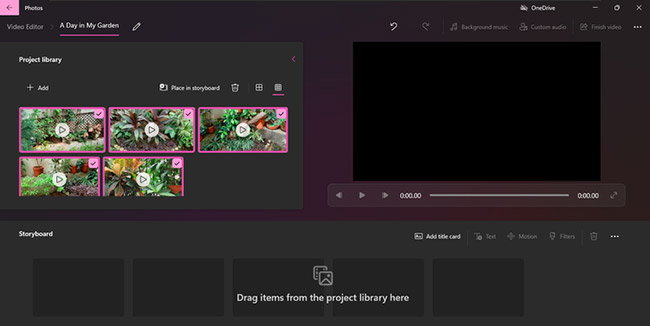
Các video được thêm vào sẽ hiển thị trong Project Library. Bạn có thể thêm ảnh từ PC của mình theo cách tương tự.
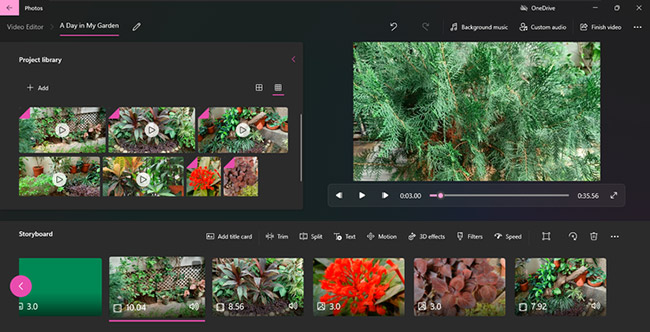
Bước tiếp theo là thêm thẻ tiêu đề vào video. Vì vậy, hãy chuyển đến menu Storyboard có các tùy chọn Add title card, Trim, Split, Text, Motion, 3D effects, Filters, Speed và Remove or Add Black Bars.
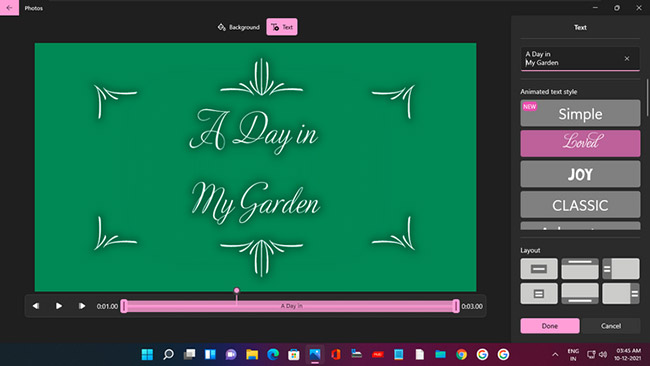
Nhấp vào Add title card và thẻ tiêu đề dài ba giây sẽ xuất hiện Bây giờ, hãy nhấp vào Text và trên trang mở ra, bạn có thể nhập tiêu đề video của mình, chọn kiểu chữ, bố cục và màu nền.
Bạn cũng có thể thay đổi thời lượng của thẻ tiêu đề bằng cách nhấp chuột phải vào thẻ và chọn một trong các tùy chọn thời lượng.
Giờ đây, bạn có thể thêm video và ảnh vào Storyboard. Bạn có thể nhấp chuột phải vào từng clip trong Project Library và chọn Add to Storyboard, hoặc kéo và thả chúng vào Storyboard.
Hãy nhớ rằng, video và hình ảnh sẽ xuất hiện theo thứ tự thêm vào - cái đầu tiên được thêm vào sẽ xuất hiện trước tiên trong video. Nhưng bạn luôn có thể thay đổi thứ tự của chúng bằng cách kéo và thả trên Storyboard.
Cách cắt và chia nhỏ video clip
Bạn có thể cắt video, nếu bạn muốn tạo ra một sản phẩm có độ dài cụ thể hoặc cảm thấy rằng một clip dài có thể gây nhàm chán khi xem.
Nhấp vào tùy chọn Trim và trang Trim với cửa sổ xem trước video sẽ mở ra. Chỉ cần kéo thanh trượt trái và phải trên timeline để cắt clip từ đầu, từ cuối và giữ lại phần bạn muốn.
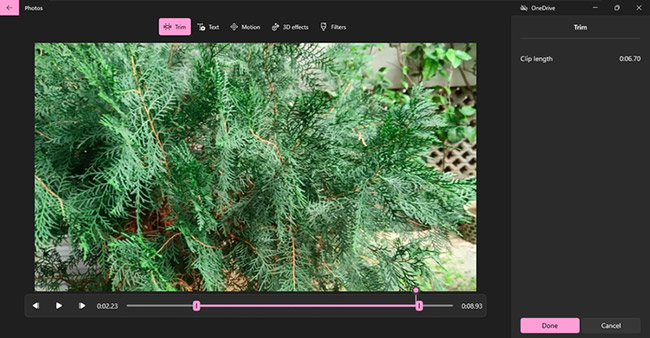
Sau đó xem trước clip đã cắt và nếu bạn thấy hài lòng, hãy nhấp vào Done.
Bạn cũng có thể chia một clip làm hai để sử dụng chúng vào những thời điểm khác nhau trong video của mình. Chỉ cần nhấp vào tùy chọn Split và kéo thanh trượt trên timeline preview. Thời lượng của cả hai clip sẽ hiển thị ở khung bên phải.
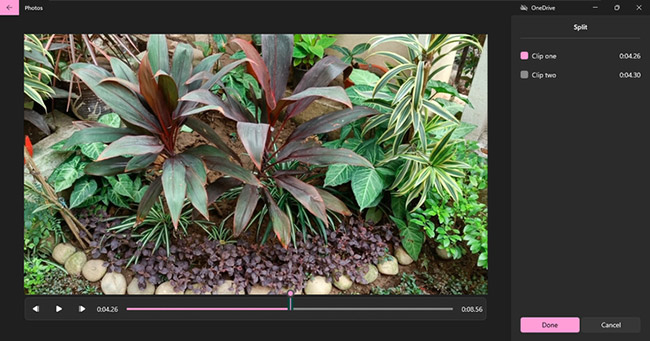
Sau đó, chỉ cần nhấp vào Done và cả hai clip sẽ xuất hiện trên Storyboard.
Cách thêm văn bản vào video clip
Để tăng thêm ý nghĩa cho video, bạn có thể thêm phụ đề. Nhấp vào tùy chọn Text và sau đó chọn kiểu phông chữ và bố cục như đã làm trong phần Add title card ở trên.
Bạn cũng có thể chọn thời lượng văn bản sẽ xuất hiện trong video bằng cách kéo thanh trượt trong timeline preview.
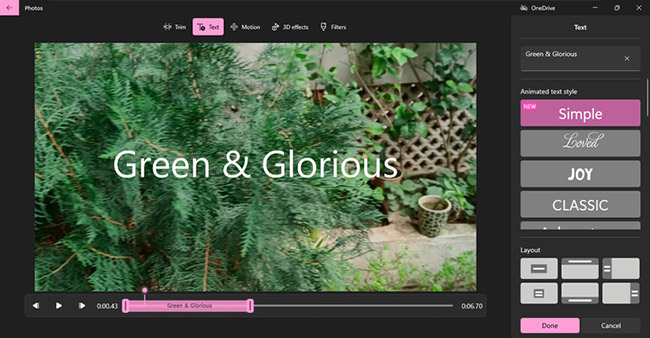
Xem trước các thay đổi và sau đó nhấp vào Done.
Cách thêm chuyển động vào ảnh
Nếu có sử dụng cả hình ảnh trong video của mình, bạn có thể thêm chuyển động cho chúng để tạo hiệu ứng nâng cao. Nhấp vào tùy chọn Motion và chọn từ nhiều tùy chọn như Zoom In, Zoom Out, Pan Left, Tilt Up, v.v…
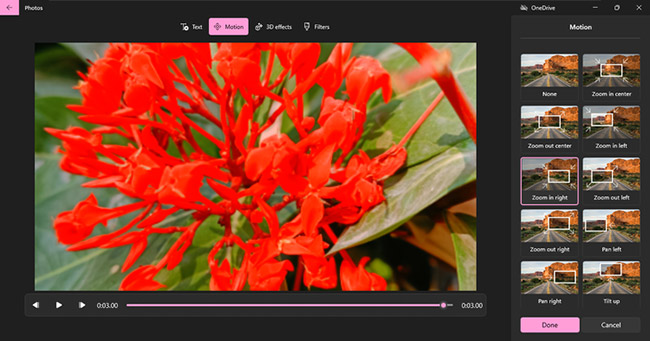
Sau đó xem trước chuyển động đã thêm và nhấp vào Done.
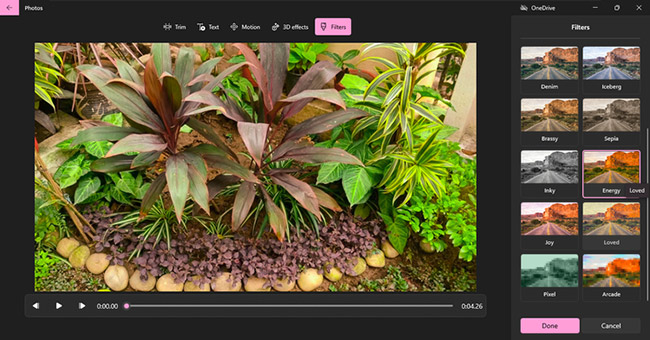
Cách thêm bộ lọc và hiệu ứng 3D vào ảnh hoặc video
Thêm bộ lọc rất dễ dàng và thú vị. Nhấp vào tùy chọn Filters và chọn một trong số các tùy chọn như Classic, Adventure, Sepia và Energy. Sau đó xem trước và nhấp vào Done.
Bạn cũng có thể thêm các hiệu ứng 3D thú vị. Nhấp vào tùy chọn hiệu ứng 3D và chọn từ một số hiệu ứng sáng tạo đi kèm với nhạc như Atomic motion, Birthday balloons, Laser well và Confetti fountain.
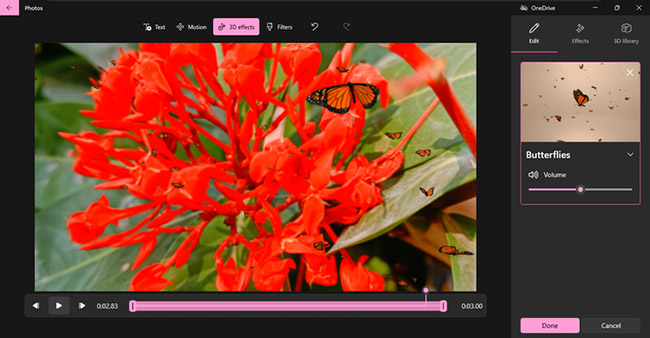
Bạn cũng có thể thêm các hiệu ứng 3D thú vị để làm cho video thú vị hơn. Sau đó xem trước chúng và nhấp vào Done.
Cách thêm nhạc nền và âm thanh tùy chỉnh vào video
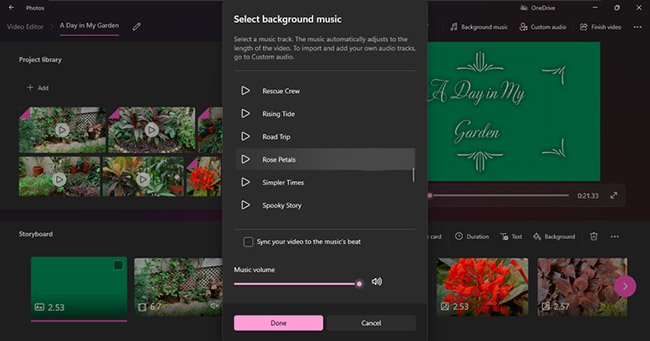
Một video thú vị cần có âm nhạc và hiệu ứng âm thanh ly kỳ. Trên trang chủ video, bạn có các tùy chọn để thêm Background music và Custom audio.
Như bạn có thể thấy trong hình ảnh bên dưới, nhấp vào Background music sẽ mở ra danh sách các tùy chọn nhạc tích hợp mà bạn có thể chọn và thêm vào video của mình. Chỉ cần chọn một bản nhạc và nhạc sẽ tự động điều chỉnh theo thời lượng video. Sau đó bấm vào Done.
Tùy chọn Custom audio cho phép bạn chọn nhạc yêu thích và thậm chí cả hiệu ứng âm thanh. Chỉ cần nhấp vào Add hoặc kéo và thả các file âm thanh vào ngăn bên phải. Sau đó bấm vào Done.
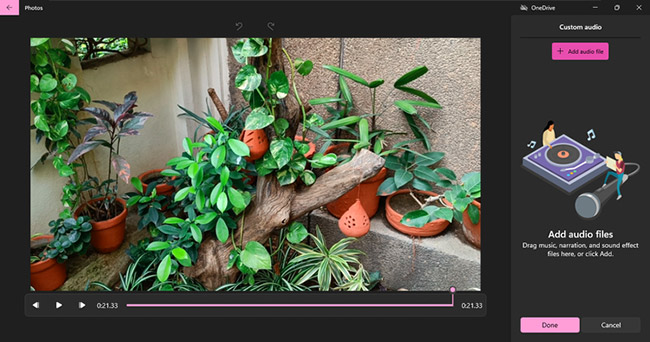
Đây là một tùy chọn tuyệt vời vì bạn cũng có thể ghi lại mô tả video bằng giọng nói của mình và thêm nó vào video.
Hơn nữa, bạn thậm chí có thể thay đổi phong cách và âm nhạc của video bằng các theme được tích hợp sẵn. Và cũng làm chậm hoặc tăng tốc độ video để có thêm hiệu ứng.
Vậy là xong, bạn có thể nhấp vào Finish video và chọn độ phân giải cho nó. Sau đó nhấp vào Export.