Cách tạo ổ cài đặt macOS Big Sur có thể khởi động
- Thứ tư - 18/11/2020 23:53
- In ra
- Đóng cửa sổ này
Apple có phiên bản hệ điều hành macOS mới, gọi là Big Sur, thế hệ 11.0. Trong bài viết này, Quantrimang sẽ hướng dẫn bạn cách tạo ổ cài đặt macOS Big Sur có thể khởi động.
Chuẩn bị ổ cứng ngoài và một đầu dẫn
Phần mềm cài đặt macOS Big Sur phải trên 12GB, vì vậy bạn vẫn thêm một ổ USB để thêm chứa đủ dữ liệu. Drive này có thể là USB flash, ổ cứng hoặc SSD.
Nếu bạn máy Mac từ đời 2015 trở lên, có 3 cổng USB-C/Thunderbolt 3, bạn cần đầu chuyển đổi từ USB sang USB-C. Đầu dẫn cho phép bạn kết nối với các thiết bị có ổ cứng sử dụng USB-A.
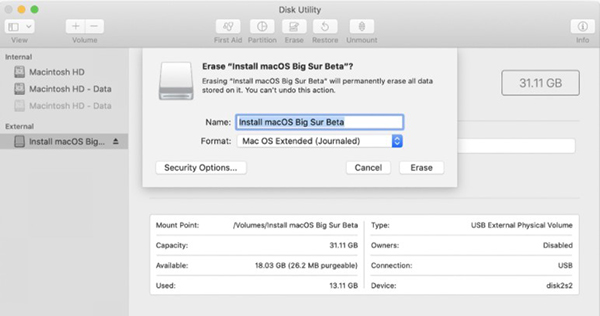
Bạn cần phải và format lại ổ cứng vào Mac OS Extended (Journaled). Việc này có thể được thực hiện trong ứng dụng Disk Utility của Mac, có trong thư mục Applications/Utilities.
Tải cài đặt phần mềm macOS Big Sur
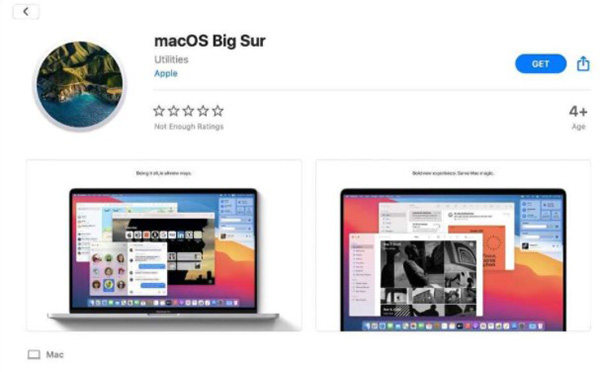
Big Sur đã có sẵn trên App Store của Apple. Bấm vào nút Get ở góc trên bên phải, phần Software Update sẽ mở ra. Chọn Download. Quá trình tải xuống có thể mất một chút thời gian.
Sau khi tải xuống và trình cài đặt được mở, đừng chọn Continue. Tắt trình cài đặt bằng cách bấm Command - Q. Sau đó, vào thư mục Applications và tìm một ứng dụng có tên “Install macOS Big Sur”. Ứng dụng này phải có mặt mới có thể tạo ổ cài đặt được.
Sử dụng Terminal để tạo ổ cài đặt macOS Big Sur
Nếu chưa từng sử dụng Terminal, dưới đây là hướng dẫn chi tiết:
1. Kết nối ổ cứng ngoài với Mac.
2. Mở Terminal (/Applications/Utilities/Terminal.app).
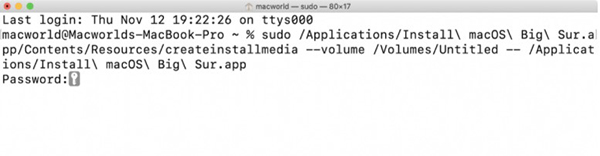
3. Sao chép lệnh sau đây:
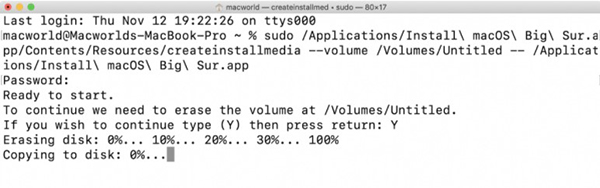
sudo /Applications/Install\ macOS\ Big\ Sur.app/Contents/Resources/createinstallmedia --volume /Volumes/Untitled -- /Applications/Install\ macOS\ Big\ Sur.app
4. Quay trở lại Terminal và dán dòng lệnh này vào cửa sổ. Hãy nhớ đổi tên “Untitled” thành tên ổ cứng của bạn. Ấn Return.
5. Terminal có thể yêu cầu mật khẩu máy. Nhập mật khẩu và ấn Return.
6. Terminal sẽ cảnh báo rằng ổ cứng ngoài của bạn cần được xóa đi. Để tiếp tục, gõ Y vào cửa sổ và ấn Return.
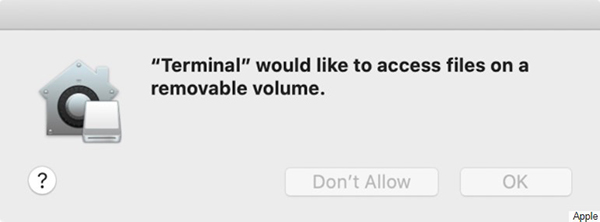
7. Một cảnh báo hiện ra hỏi quyền truy cập vào ổ cứng của Terminal. Bấm OK.
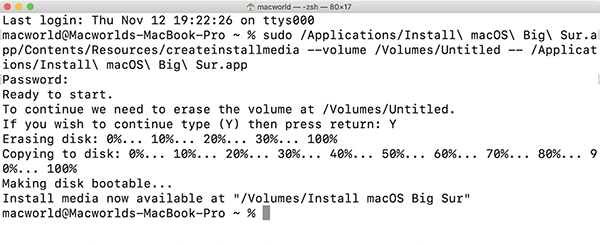
8. Terminal sau đó xóa hết ổ cứng và copy file cài đặt sang. Quá trình này sẽ mất một vài phút.
9. Sau khi hoàn thành, màn hình Terminal sẽ hiển thị một tin nhắn báo rằng drive của bạn đã sẵn sàng được sử dụng.
Cập nhật drive cài đặt
1. Kết nối ổ cứng ngoài với Mac.
2. Khởi động Mac. Giữ phím Option khi Mac bắt đầu chạy.
3. Sau đó, Mac sẽ hiển thị Startup Manager, chọn ổ cứng ngoài và ấn Return.
4. Bấm nút Update, quá trình cập nhật sẽ mất một chút thời gian.

Trong trường hợp cập nhật không thành công, bấm Try Again.
5. Sau đó, Mac sẽ khởi động lại.

Thay đổi cài đặt bảo mật
Có thể máy Mac của bạn được cài đặt không cho phép người dùng sử dụng ổ đĩa cài từ bên ngoài. Dưới đây là cách thay đổi cài đặt:
1. Khởi động lại thiết bị và giữ Command - R trong suốt quá trình khởi động. Thao tác này sẽ chạy Recovery Mode.
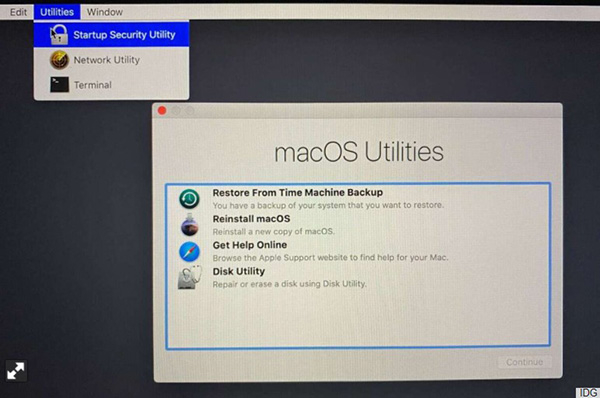
2. Cửa sổ macOS Utilities sẽ hiện ra. Bấm vào menu Utilities và chọn Startup Security Utility.
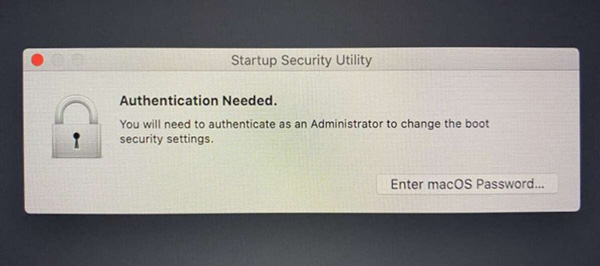
3. Cửa sổ Authentication Needed hiện ra, bạn cần phải xác nhận quyền admin (thông qua tên người dùng và mật khẩu).
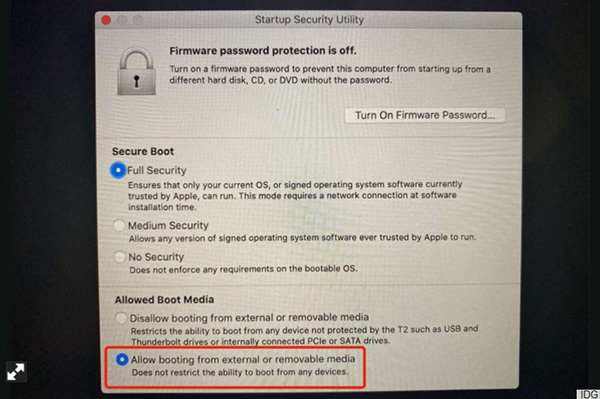
4. Chọn “Allow booting from external or removable media” sau đó đóng cửa sổ.
Cách khởi động hệ điều hành từ ổ cứng ngoài
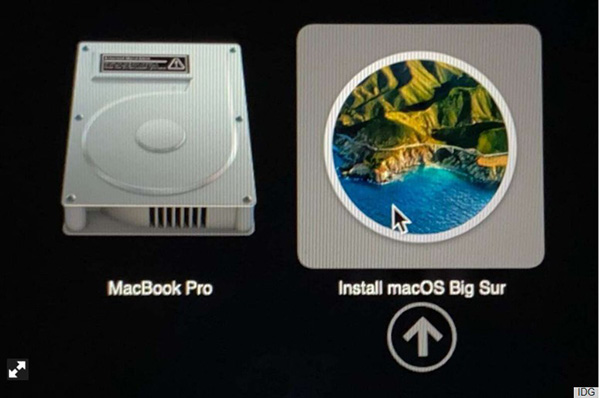
1. Kết nối ổ cứng ngoài với Mac, khởi động máy và giữ phím Option.
2. Cửa sổ Startup Manager hiện ra và chọn ổ cứng ngoài.
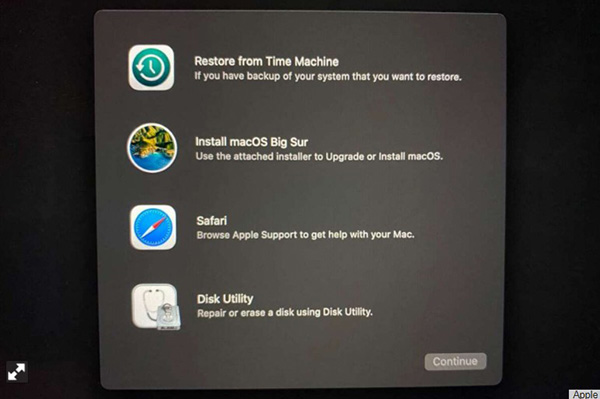
3. Mac sẽ khởi động trong Recovery Mode. Bạn sẽ thấy một cửa sổ với 4 lựa chọn. Nếu muốn cài đặt Big Sur và giữ lại dữ liệu, chọn Install macOS Big Sur. Nếu muốn xóa hết tất cả dữ liệu, vào Disk Utility để format lại ổ cứng trong trước rồi mới cài đặt macOS Big Sur. Bấm Continue.