Cách tạo ảnh bo tròn góc trên Photoshop
- Thứ ba - 01/10/2024 23:18
- In ra
- Đóng cửa sổ này
Hướng dẫn này sẽ chỉ cho bạn cách tốt nhất để bo tròn góc ảnh bằng Photoshop. Bài viết cũng chỉ cho bạn cách thêm đường viền vào ảnh sau khi bo tròn các góc. Và cuối cùng sẽ là bước quan trọng nhất, đó là cách lưu kết quả với độ trong suốt được giữ nguyên ở các góc.
Bước 1: Mở khóa layer Background
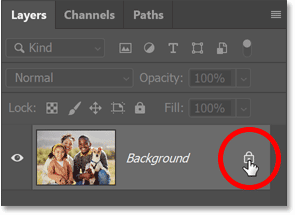
Với hình ảnh được mở trong Photoshop, hãy bắt đầu bằng cách đi đến bảng Layers nơi hình ảnh nằm trên layer Background.
Nhấp vào biểu tượng khóa của layer để mở khóa. Photoshop sẽ đổi tên layer thành Layer 0 và biểu tượng khóa sẽ biến mất.
Bước 2: Chọn Rectangle Tool
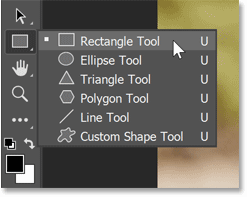
Trong thanh công cụ, hãy chọn Rectangle Tool.
Nếu có công cụ hình dạng khác, hãy nhấp và giữ vào biểu tượng của công cụ đó và chọn Rectangle Tool từ danh sách.
Bước 3: Thiết lập tùy chọn hình dạng
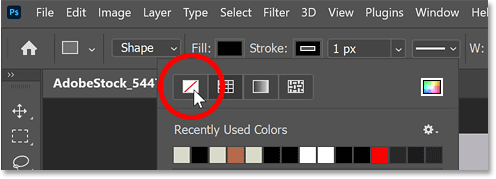
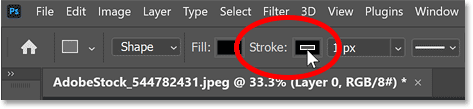
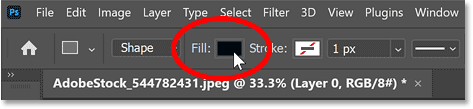
Trong Options Bar, hãy nhấp vào swatch Stroke Color.
Đặt màu thành None để không hiển thị nét.
Sau đó nhấn Enter (Return trên máy Mac) để đóng tùy chọn màu.
Bên trái màu nét là swatch Fill Color.
Bất kỳ màu nào cho hình dạng cũng được, vì vậy ví dụ sẽ để màu đen (màu hình dạng mặc định).
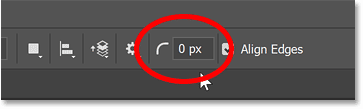
Ngoài ra trong Options Bar là tùy chọn Corner Radius, nơi bạn có thể nhập kích thước cho các góc trước khi vẽ hình dạng.
Tạm thời giữ nguyên ở mức 0 vì chúng ta sẽ bo tròn các góc sau khi vẽ hình dạng.
Bước 4: Vẽ hình chữ nhật
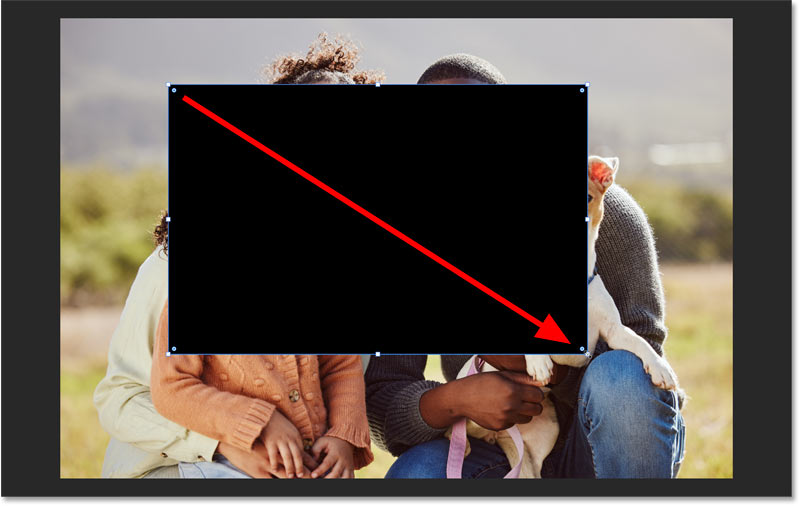
Nhấp và giữ trong tài liệu rồi kéo hình dạng ra. Đừng lo lắng về kích thước hoặc vị trí của hình dạng vì chúng ta sẽ thay đổi sau.
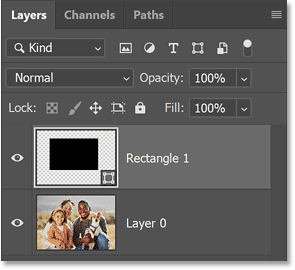
Trong bảng Layers, hình dạng sẽ xuất hiện trên layer hình dạng riêng của nó phía trên hình ảnh.
Bước 5: Căn giữa và thay đổi kích thước hình dạng
Trước khi thay đổi kích thước hình dạng, hãy căn giữa hình dạng trên canvas.
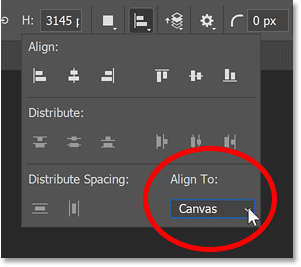
Trong Options Bar, hãy nhấp vào biểu tượng Path Alignment.
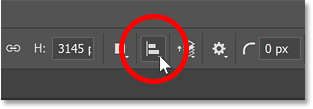
Thay đổi tùy chọn Align To từ Selection thành Canvas.
Nhấp vào biểu tượng Align Horizontal Centers và Align Vertical Centers.
Sau đó, nhấp vào bất kỳ đâu trên Options Bar để đóng hộp.

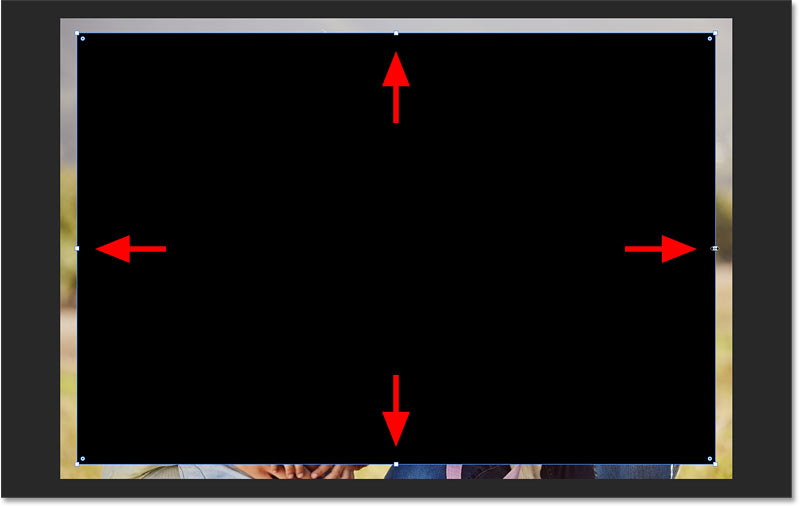
Bây giờ, hình dạng đã được căn giữa. Bạn có thể thay đổi kích thước từ tâm của nó bằng cách giữ phím Alt trên PC chạy Windows hoặc phím Option trên máy Mac và kéo bất kỳ handle chuyển đổi nào.
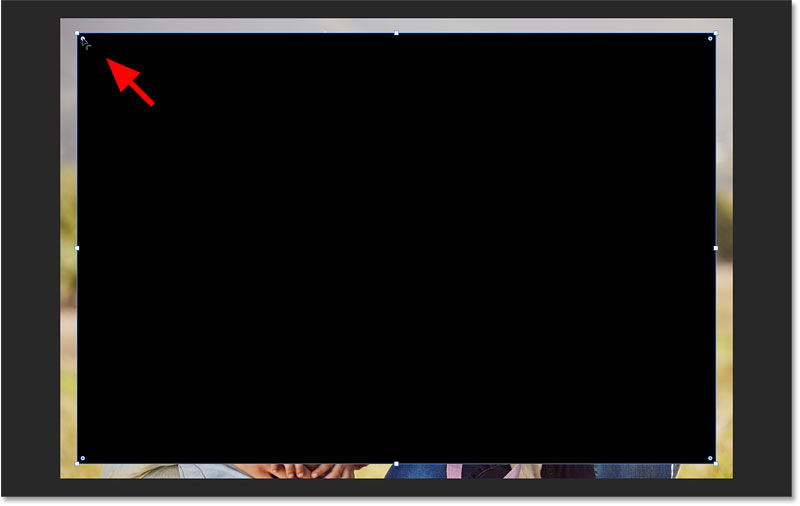
Bước 6: Bo tròn các góc của hình dạng
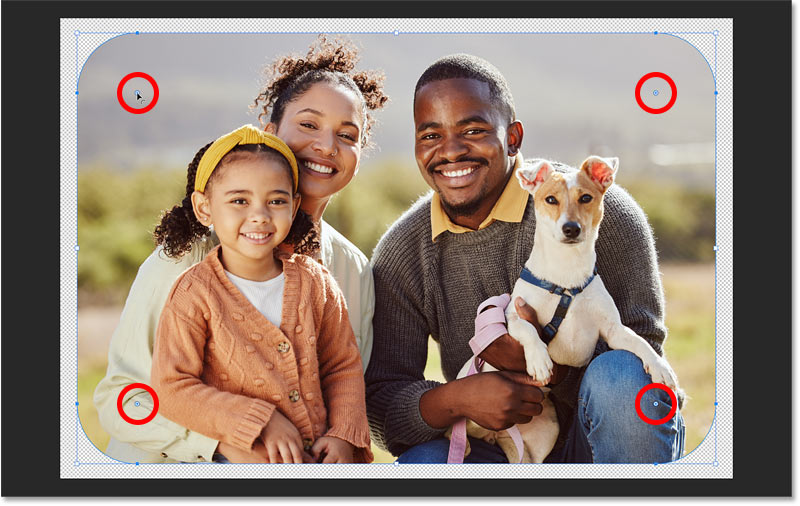
Lưu ý vòng tròn nhỏ ở mỗi góc của hình dạng. Đây là các điều khiển Corner Radius.
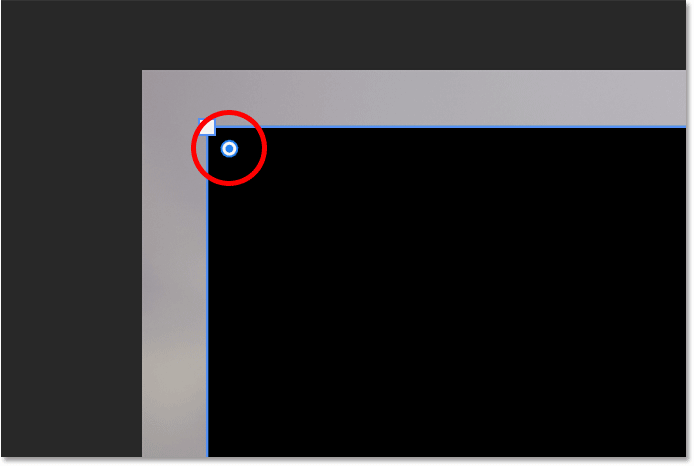
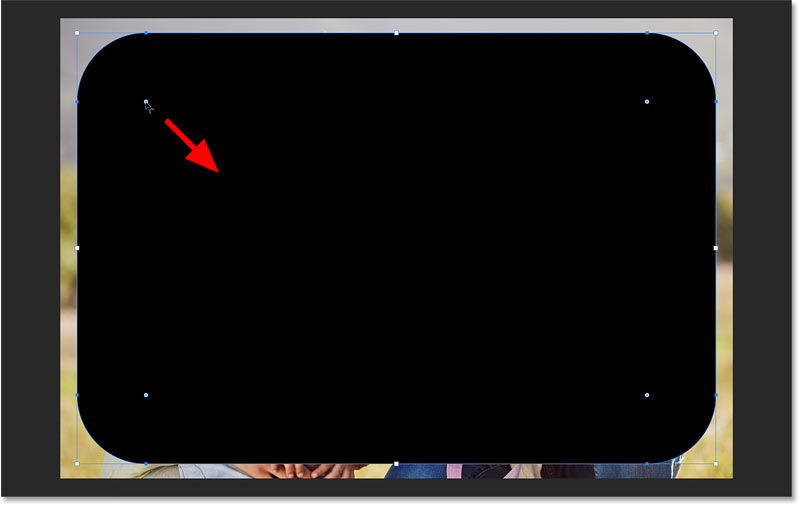
Để bo tròn các góc, chỉ cần kéo một trong các hình tròn.
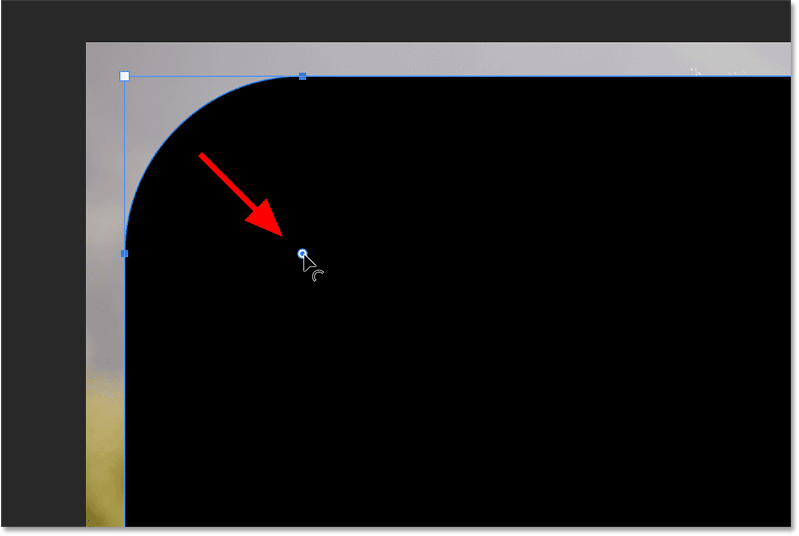
Cả 4 góc của hình dạng đều được bo tròn theo cùng một mức.
Bo tròn các góc từ bảng Properties
Một cách khác để bo tròn các góc là trong bảng Properties. Cách thứ hai này hữu ích khi bạn biết giá trị bán kính chính xác mà mình cần.
Trong bảng Properties, hãy đi tới các tùy chọn Corner Radius. Bạn có thể cần cuộn xuống để tìm chúng.
Tại đây, bạn có thể nhập các giá trị cho góc ở góc trên bên trái, góc trên bên phải, góc dưới bên phải và góc dưới bên trái của hình dạng.
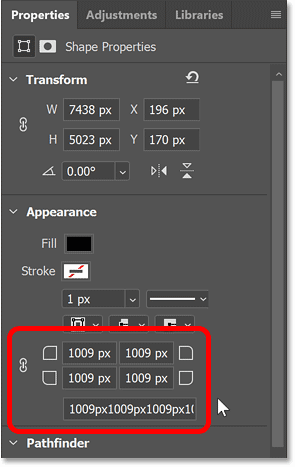
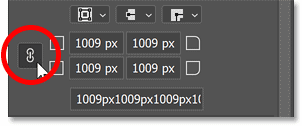
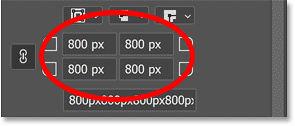
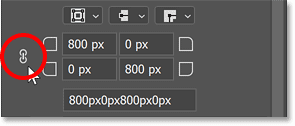
Để đặt bán kính cho cả 4 góc cùng một lúc, trước tiên hãy đảm bảo rằng biểu tượng liên kết được chọn.
Sau đó nhập giá trị vào bất kỳ ô nào. Ví đụ sẽ nhập 800 px cho góc trên bên trái.
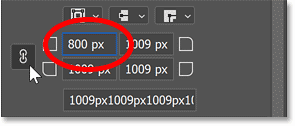
Nhấn Enter (Return trên máy Mac) để chấp nhận và đặt giá trị đó cho cả 4 góc.
Cách bo tròn một góc riêng biệt với các góc khác
Ngoài việc bo tròn cả 4 góc cùng nhau, bạn có thể bo tròn từng góc riêng lẻ.
Cách dễ nhất là giữ phím Alt trên PC chạy Windows hoặc phím Option trên máy Mac, sau đó kéo hình tròn cho góc bạn muốn điều chỉnh.
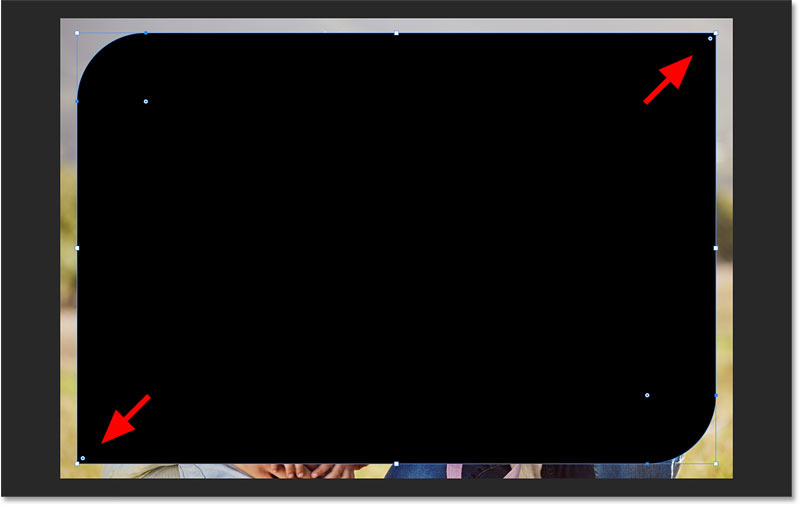
Vì vậy, nếu muốn góc trên bên phải nhọn trong khi các góc khác vẫn bo tròn, bạn có thể giữ phím Alt (Win) / Option (Mac) rồi kéo hình tròn của góc đó trở lại vị trí ban đầu.
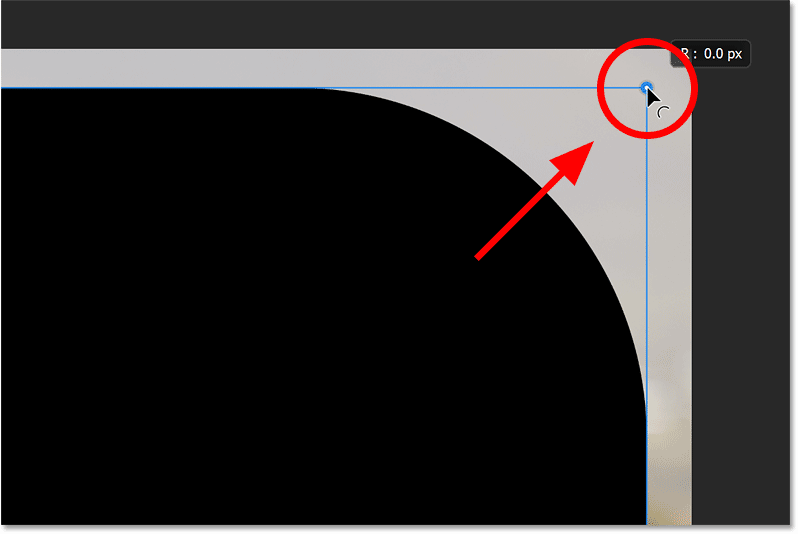
Giữ phím Alt (Win) / Option (Mac) để kéo hình tròn mà không ảnh hưởng đến các góc khác.
Và bây giờ, ta có một góc nhọn (ở góc trên bên phải) và ba góc tròn.
Một cách khác để điều chỉnh riêng một góc là từ tùy chọn Corner Radius trong bảng Properties.
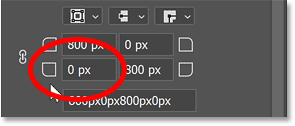
Đầu tiên, hủy liên kết các góc bằng cách bỏ chọn biểu tượng liên kết.
Sau đó, nhập giá trị bán kính cho góc. Vì vậy, nếu muốn góc dưới bên trái cũng nhọn, bạn có thể nhập giá trị 0 px.
Nhấn Enter (Return trên máy Mac) để chấp nhận.
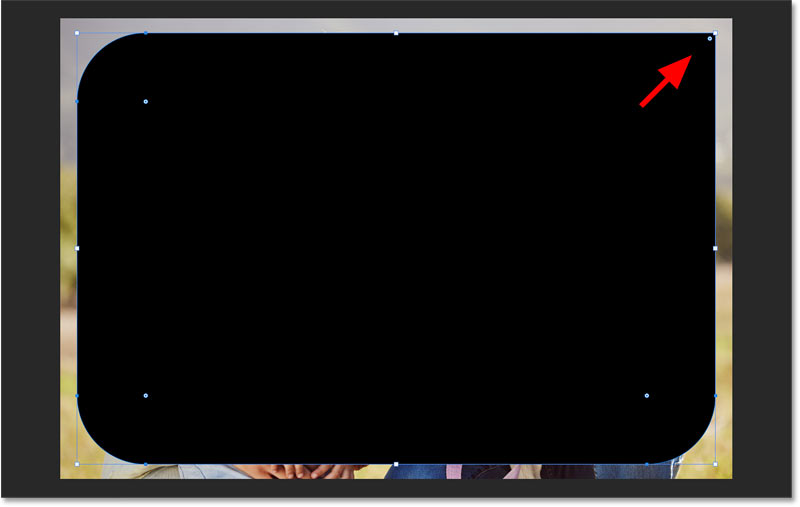
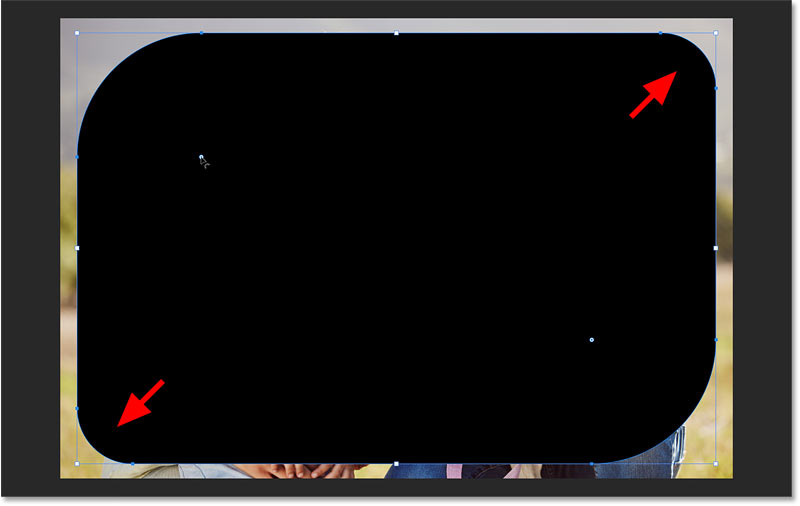
Bây giờ, ta có hai góc bo tròn và hai góc nhọn.
Đặt bán kính dưới bên trái thành 0.
Nhưng lưu ý rằng nếu bây giờ, bạn kéo một vòng tròn (không giữ phím Alt hoặc Option) để điều chỉnh cả 4 góc cùng với nhau, các góc ở góc trên bên phải và góc dưới bên trái vẫn ít bo tròn hơn các góc khác.
Reset các góc
Kéo những vòng tròn trở lại các góc để reset chúng về góc nhọn ban đầu.
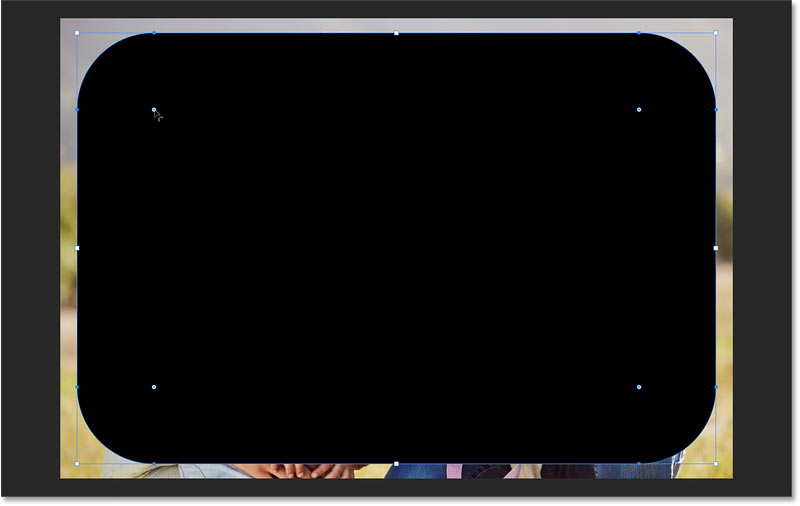
Sau đó, kéo một trong các vòng tròn để làm tròn tất cả chúng theo cùng một mức như bạn muốn.
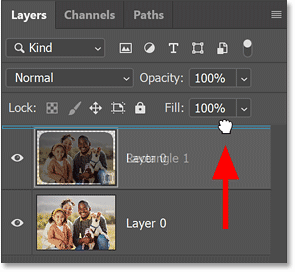
Bước 7: Tạo clipping mask
Bây giờ, bạn đã làm tròn các góc của hình dạng và cần di chuyển hình ảnh vào hình dạng. Để thực hiện việc đó, hãy sử dụng clipping mask.
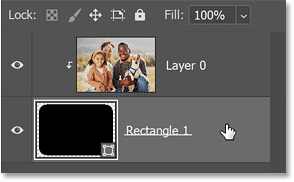
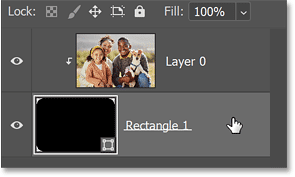
Trong bảng Layers, kéo layer hình ảnh lên trên layer hình dạng.
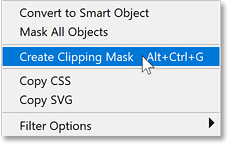
Sau đó, khi layer hình ảnh đang hoạt động, hãy nhấp vào biểu tượng menu của bảng Layers.
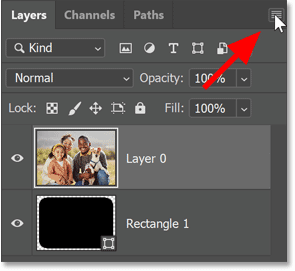
Nhấp vào biểu tượng menu.
Chọn Create Clipping Mask.
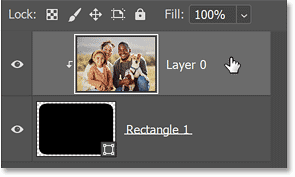
Lệnh này đặt ảnh bên trong hình dạng, khiến ảnh trông giống như có các góc bo tròn.
Và mọi thứ bên ngoài hình dạng giờ đây đều trong suốt, được biểu thị bằng họa tiết bàn cờ.

Bước 8: Thực hiện các điều chỉnh cuối cùng cho các góc
Bạn vẫn có thể điều chỉnh các góc nếu cần, ngay cả khi ảnh nằm bên trong hình dạng.
Chỉ cần chọn lại layer hình dạng trong bảng Layers.
Miễn là bạn vẫn chọn Rectangle Tool (hoặc bất kỳ công cụ hình dạng nào) trên thanh công cụ, những vòng tròn ở các góc sẽ xuất hiện lại.
Kéo một vòng tròn để điều chỉnh độ tròn cho đến khi bạn hài lòng với kết quả.
Để xem ảnh mà không có các điều khiển hình dạng cản trở, hãy chọn layer hình ảnh trong bảng Layers.
Và để đưa các điều khiển trở lại, hãy chọn layer hình dạng.
Bước 9: Cắt bỏ các vùng trong suốt
Trước khi đi sâu hơn, hãy cắt bỏ các vùng trong suốt xung quanh hình ảnh không cần thiết, vì tất cả những gì chúng ta thực sự cần là độ trong suốt ở các góc.
Vào menu Image và chọn Trim.

Trong hộp thoại Trim, chọn Transparent Pixels ở trên cùng và đảm bảo Top, Bottom, Left và Right đều được chọn ở dưới cùng.
Sau đó nhấp vào OK.
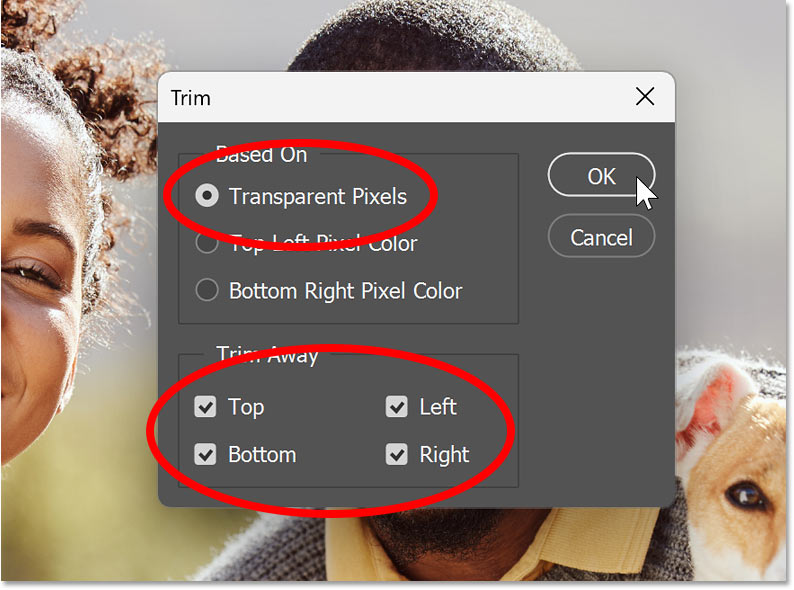
Photoshop cắt bỏ toàn bộ phần trong suốt ngoại trừ những gì còn lại ở các góc.

Bước 10: Thêm đường viền xung quanh ảnh (tùy chọn)
Nếu bạn muốn thêm đường viền xung quanh ảnh, hãy đảm bảo layer hình dạng trong bảng Layers được chọn.
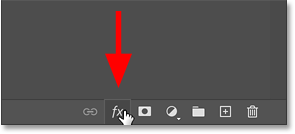
Nhấp vào biểu tượng hiệu ứng layer (fx) ở cuối bảng Layers.
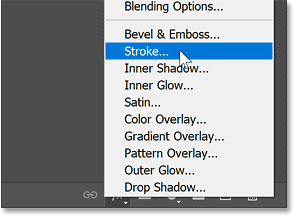
Chọn Stroke từ danh sách.
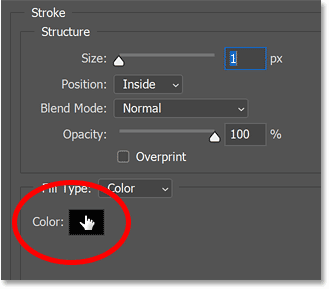
Trong hộp thoại Layer Style, nhấp vào color swatch để chọn màu cho nét.
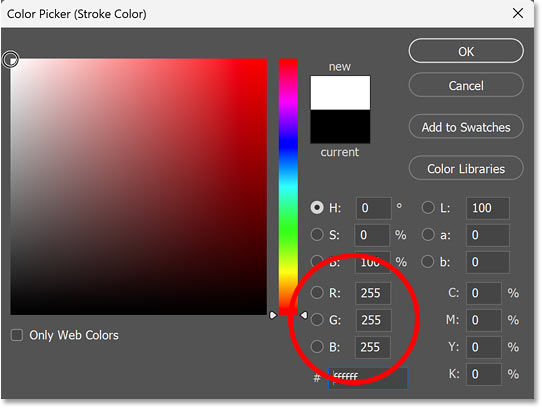
Sau đó, chọn một màu từ Color Picker. Ví dụ sẽ chọn màu trắng (với các giá trị R, G và B là 255).
Nhấp vào OK để đóng Color Picker khi hoàn tất.
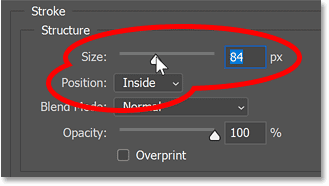
Quay lại hộp thoại Layer Style, hãy đảm bảo rằng Stroke Position được đặt thành Inside.
Sau đó, kéo thanh trượt Size để đặt chiều rộng của nét. Kích thước bạn cần sẽ phụ thuộc vào kích thước hình ảnh.
Nhấp vào OK để đóng hộp thoại Layer Style khi bạn hoàn tất.
Đây là hình ảnh với nét vẽ (đường viền) được thêm vào.

Bước 11: Lưu hình ảnh
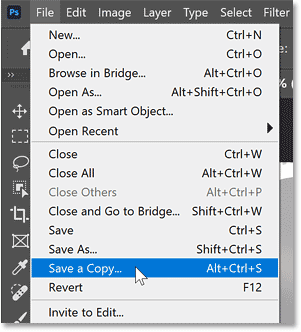
Cuối cùng, để lưu hình ảnh và giữ cho các góc được bo tròn, bạn cần lưu hình ảnh ở định dạng hỗ trợ độ trong suốt. JPEG sẽ không hoạt động. Thay vào đó, cần lưu hình ảnh dưới dạng PNG.
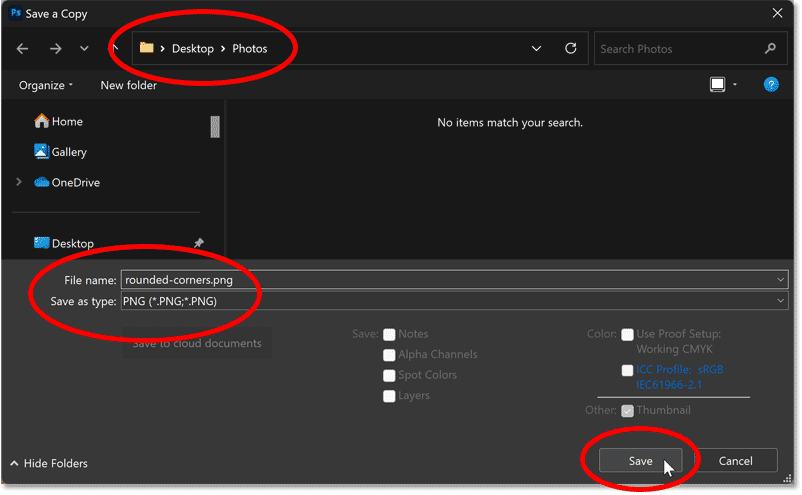
Vào menu File và chọn Save a Copy (không phải Save As).
Trong hộp thoại Save a Copy:
- Điều hướng đến nơi bạn muốn lưu file trên máy tính của mình.
- Đổi loại file thành PNG.
- Đặt tên cho file. Ví dụ sẽ đặt tên là "rounded-corners".
- Nhấp vào Save.
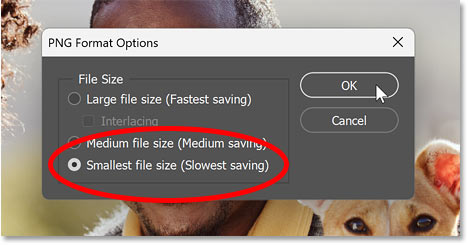
Trong PNG Format Options, chọn Smallest file size và nhấp vào OK.
Bây giờ, hình ảnh của bạn đã được lưu với các góc được bo tròn.
Và thế là xong! Đó là cách bo tròn các góc ảnh bằng Photoshop.
