Cách sửa USB bị hỏng trong Linux
- Thứ sáu - 04/07/2025 08:20
- In ra
- Đóng cửa sổ này

Mọi người đều có ổ flash. Chúng là những thứ nhỏ tuyệt vời và giúp việc di chuyển dữ liệu trở nên dễ dàng. Tuy nhiên, đôi khi ổ flash có thể bị hỏng hoặc ngừng hoạt động hoàn toàn. May mắn thay, nếu đang sử dụng Linux, bạn đã có quyền truy cập vào một loạt các công cụ có thể giúp bạn khắc phục sự cố. Hướng dẫn này sử dụng Ubuntu, nhưng mọi thứ đều áp dụng cho hầu hết các bản phân phối Linux hiện đại. Sau đây là cách bạn có thể sửa USB bị hỏng trong Linux.
Bài viết này ưu tiên sự an toàn của dữ liệu. Trước tiên, bạn sẽ học cách sao lưu nội dung ổ flash của mình và sau đó tiến hành các bản sửa lỗi khác nhau cho sự cố hiện tại. Theo cách này, nếu nỗ lực khắc phục sự cố khiến vấn đề trở nên tồi tệ hơn, bạn vẫn có thể khôi phục lại snapshot trạng thái hiện tại của ổ flash.
Tạo image sao lưu đầy đủ đã nén
Trong Linux, có nhiều công cụ để sao lưu bất kỳ thiết bị lưu trữ nào. Tuy nhiên, phương pháp đã được thử nghiệm và kiểm tra dựa trên dd và gzip.
Trước khi chuyển sang chế độ sao lưu, bạn nên kiểm tra xem ổ có thực sự bị hỏng không. Bước đầu tiên đơn giản là cắm USB vào một cổng USB khác hoặc thậm chí là một máy tính khác. Đôi khi, vấn đề không phải do ổ - mà có thể là một thứ đơn giản như kết nối lỏng lẻo hoặc cổng không ổn định.
Bây giờ, để sao lưu ổ flash, trước tiên hãy kết nối USB với máy tính. Khởi động terminal yêu thích của bạn (hoặc nhấn CTRL + Alt + T). Sau đó, xác định vị trí ổ flash của bạn bằng lệnh sau:
ls /dev/disk/by-id
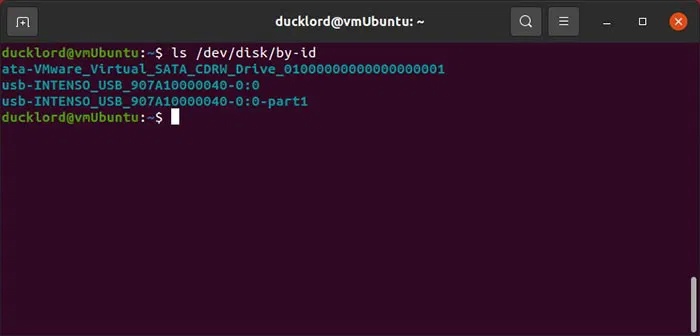
Ngoài ra, bạn có thể xác định ổ flash của mình bằng cách chạy lsblk hoặc sudo fdisk -l để tìm tên thiết bị (ví dụ: /dev/sdb, không phải phân vùng như /dev/sdb1).
Tiếp theo, sao lưu ổ flash vào file image được nén bằng GZIP trong một lệnh duy nhất, sử dụng:
sudo dd if=/dev/disk/by-id/YOUR_FLASH_DRIVE status=progress | gzip -c > /home/USERNAME/backups/BACKUP_NAME.img.gz
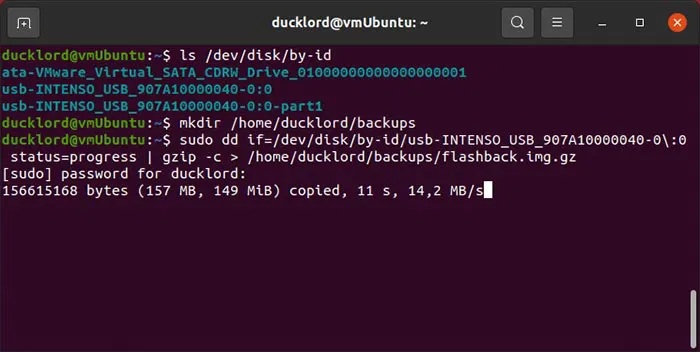
Ngoài ra, hãy đảm bảo rằng “/home/USERNAME/backups/” tồn tại (tạo nó bằng mkdir -p /home/USERNAME/backups). Ngoài ra, tham số if= chỉ định ổ flash và gzip nén đầu ra.
Để khôi phục bản sao lưu, bạn sẽ phải đảo ngược trình tự của hai lệnh và xác định ổ flash của mình là thiết bị đầu ra. Lệnh đầy đủ sẽ trông như thế này:
sudo gzip -cd /home/USERNAME/backups/BACKUP_NAME.img.gz | sudo dd of=/dev/disk/by-id/YOUR_FLASH_DRIVE status=progress
Lưu ý: Thao tác này sẽ ghi đè lên toàn bộ ổ flash, xóa tất cả dữ liệu. Kiểm tra lại tên thiết bị để tránh mất dữ liệu.
Sửa hệ thống file bị hỏng bằng FSCK
Sau khi sao lưu nội dung ổ flash, đã đến lúc thử sửa nó. Để làm được điều đó, bạn có thể chuyển sang fsck. Công cụ này rất tuyệt để loại bỏ các block file bị hỏng, vì hầu hết (nếu không muốn nói là tất cả) tình trạng hỏng và không thể đọc được đều xuất phát từ những sự cố như thế này.
Đối với lệnh này, bạn sẽ phải xác định phân vùng thay vì ổ đầy đủ. Bạn sẽ tìm thấy phân vùng có tên tương tự như thiết bị của mình bằng cách thực thi:
ls /dev/disk/by-id/usb*
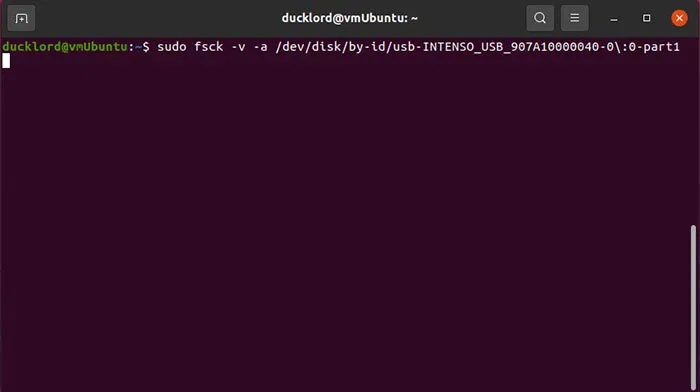
Sau đó, chạy fsck trên ổ đó bằng lệnh:
sudo fsck -v -y /dev/disk/by-id/YOUR_FLASH_DRIVE-PARTITION-TO-CHECK
Trong lệnh này:
- sudo fsck chạy công cụ sửa lỗi với quyền admin
- -v yêu cầu công cụ hiển thị thông tin chi tiết về quá trình xử lý.
- -y cho biết bạn muốn công cụ tự động thử sửa bất kỳ lỗi nào tìm thấy.
- /dev/disk… là phân vùng sẽ được kiểm tra lỗi.
Định dạng ổ USB bằng Fdisk/MKFS từ Terminal
Nếu fsck không sửa được hệ thống file của thiết bị, bạn có thể thử định dạng để sử dụng như thể nó mới.
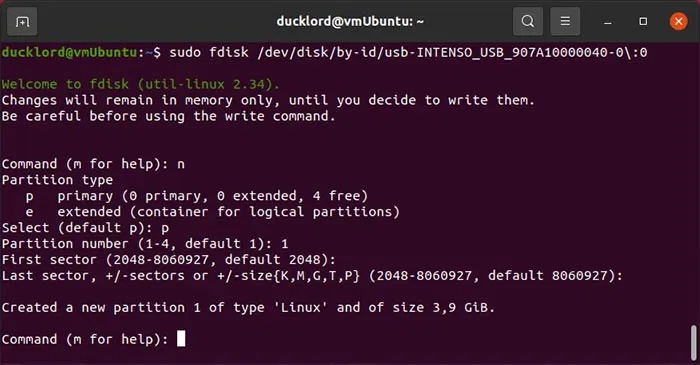
Bước đầu tiên là xóa mọi cấu trúc hệ thống file hiện có và tạo lại chúng từ đầu. Bạn có thể sử dụng fdisk cho mục đích này. Chạy nó bằng sudo trên thiết bị của bạn với:
sudo fdisk /dev/disk/by-id/YOUR_FLASH_DRIVE
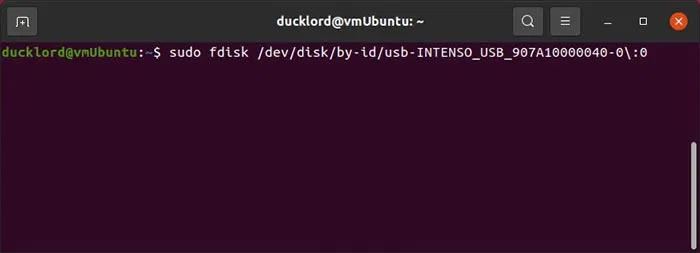
Nhấn o rồi Enter để tạo bảng phân vùng DOS mới trên đó để USB của bạn có thể đọc được ở mọi nơi. Nếu chỉ muốn sử dụng nó trên máy tính và hệ điều hành hiện đại của mình, bạn có thể thay o bằng g để tạo bảng phân vùng GPT mới.
Nhấn n rồi Enter để tạo phân vùng mới, sau đó nhấn p để biến nó thành phân vùng chính. Nếu bạn sử dụng e thay vì p, nó sẽ được tạo dưới dạng phân vùng mở rộng, nhưng không có ích gì khi làm như vậy nếu bạn không có kế hoạch tạo nhiều hơn 3 phân vùng trên ổ. Sau đó, bạn chỉ cần nhấn Enter khi được hỏi về số phân vùng, sector đầu tiên và sector cuối cùng, để chấp nhận các mặc định và để phân vùng trải dài trên toàn bộ ổ USB.
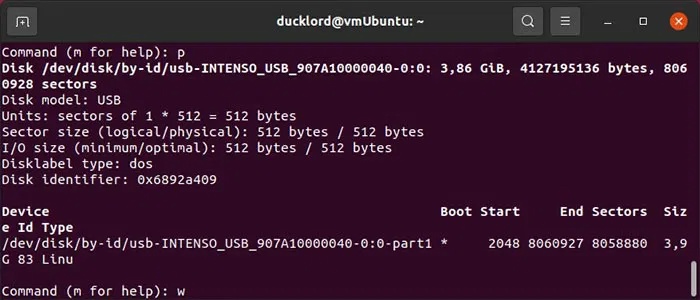
Nhấn p rồi Enter để kiểm tra cấu trúc lưu trữ mới trong ổ USB. Sau đó, nhấn w rồi Enter để ghi các thay đổi vào ổ USB và thoát fdisk.
Định dạng phân vùng mới bằng hệ thống file
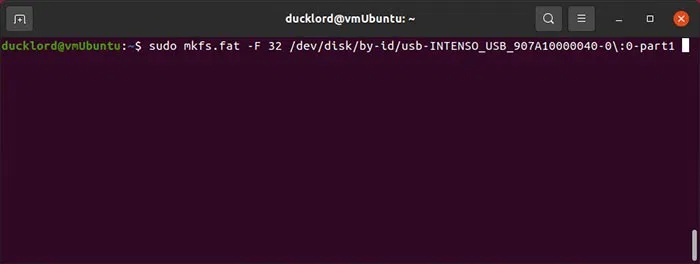
Phân vùng của bạn sẽ không được định dạng và vì nó chưa có hệ thống file nên sẽ không sử dụng được. Bạn có thể tạo hệ thống file bằng một trong các công cụ mkfs đi kèm với tất cả mọi bản phân phối Linux hiện đại. Để định dạng phân vùng thành FAT32, có thể sử dụng được trên hầu hết các thiết bị, hãy sử dụng:
sudo mkfs.fat -F 32 /dev/disk/by-id/YOUR_FLASH_DRIVE-PARTITION
Để định dạng phân vùng bằng NTFS, để sử dụng với các phiên bản Windows hiện đại hoặc bằng EXT4, chỉ sử dụng với Linux, hãy sử dụng:
sudo mkfs.ntfs /dev/disk/by-id/YOUR_FLASH_DRIVE-PARTITION
hoặc
sudo mkfs.ext4 /dev/disk/by-id/YOUR_FLASH_DRIVE-PARTITION

EXT4 được tối ưu hóa cho Linux nhưng không được Windows hoặc macOS hỗ trợ gốc nếu không có phần mềm bổ sung.
Sau khi định dạng, bạn có thể gắn USB vào và xác nhận rằng ổ đang hoạt động. Chỉ cần sử dụng lại lsblk để kiểm tra xem phân vùng có hệ thống file và có thể mount được hay không.
Thông qua GUI để kiểm tra và sửa USB bằng Disks
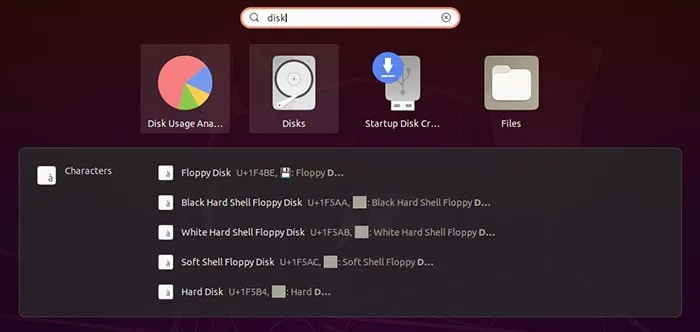
Nếu không thích nhập lệnh, bạn có thể chuyển sang công cụ Disks để kiểm tra và định dạng USB. Disks được cài đặt sẵn trên Ubuntu.
Truy cập menu ứng dụng và tìm kiếm Disks. Khởi chạy ứng dụng khi bạn tìm thấy nó.
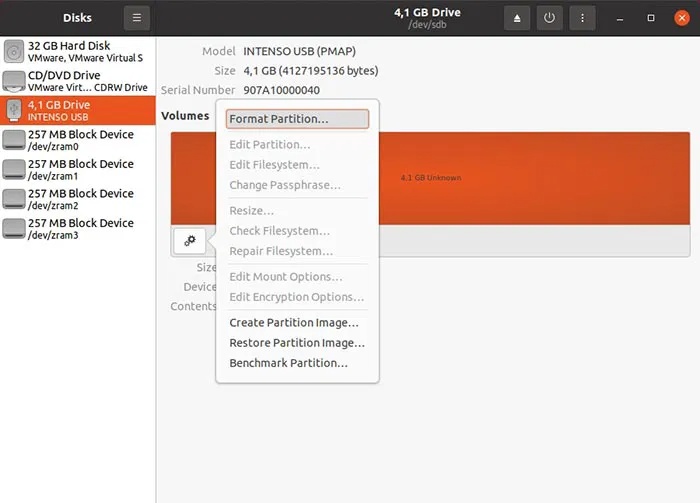
Chọn ổ USB của bạn từ danh sách bên trái và nhấp vào biểu tượng bánh răng. Sau đó, chọn Repair Filesystem và làm theo các bước của trình hướng dẫn để sửa hệ thống file.
Trong trường hợp này, ví dụ không gặp sự cố phần cứng mà là hệ thống file bị hỏng. Mặc dù sự cố không thể sửa chữa được, nhưng bạn có thể định dạng lại ổ USB và tiếp tục sử dụng. Để thực hiện việc đó với Disks và USB được chọn, hãy nhấp lại vào biểu tượng bánh răng và chọn Format Partition.
Nhập tên cho ổ USB vào trường Volume Name và chọn từ 3 hệ thống file phổ biến nhất cho ổ đó:
- Ext4 để sử dụng với Linux
- NTFS để sử dụng với các phiên bản Windows hiện đại
- FAT để sử dụng với cả hai, cũng như các loại thiết bị khác (từ điện thoại thông minh đến game console)
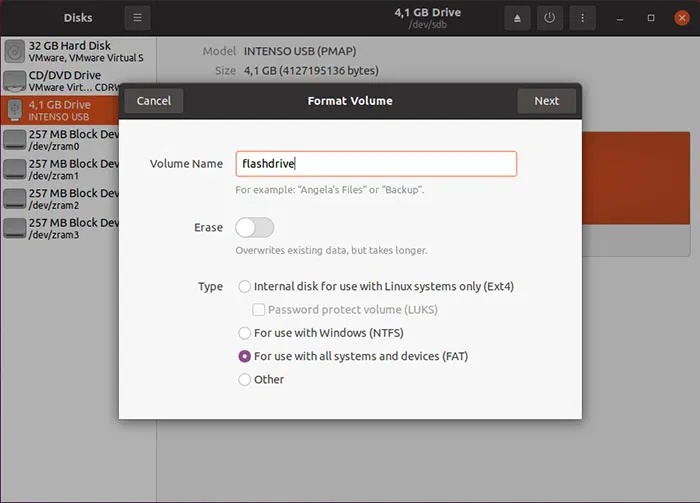
Lưu ý đến tùy chọn Erase. Để tùy chọn này ở chế độ vô hiệu hóa để định dạng nhanh. Vuốt sang On để định dạng hoàn toàn, xóa hoàn toàn nội dung của thiết bị. Khi xử lý các thiết bị bị hỏng cũng có thể có một số bad block, tốt hơn là nên sử dụng tùy chọn xóa hoàn toàn.
Chúc các bạn thành công!
