Cách sửa lỗi “No Boot Device Found Press Any Key to Reboot the Machine“ trên Windows
- Thứ năm - 18/07/2024 23:29
- In ra
- Đóng cửa sổ này

Khi bật laptop hoặc máy tính Windows của mình lên, bạn có thấy màn hình đen thông báo "No Boot Device Found Press Any Key to Reboot the Machine" không? Sự cố này chủ yếu ảnh hưởng đến PC và laptop của Dell nhưng cũng có thể xảy ra trên các thiết bị của các nhà sản xuất khác. Điều gì gây ra sự cố, và làm thế nào bạn có thể khắc phục nó? Chúng ta sẽ thảo luận về điều đó trong bài viết này.
1. Đảm bảo rằng ổ cứng có thể được phát hiện và cắm đúng cách
Vì thiết bị của bạn không thể truy cập vào ổ lưu trữ chứa hệ điều hành, hãy kiểm tra xem ổ cài đặt Windows đã được cắm đúng cách và có sẵn để truy cập hay chưa. Thực hiện theo các bước sau để tìm hiểu:
- Giữ nút nguồn trong vài giây để tắt thiết bị.
- Khởi động lại máy tính bằng cách nhấn nút nguồn và tiếp tục nhấn F2 cho đến khi cài đặt BIOS của bạn xuất hiện. (Xem hướng dẫn về cách vào BIOS để biết các phím bạn cần nhấn để truy cập BIOS trên các thiết bị của những nhà sản xuất khác ngoài Dell)
- Chuyển đến System Information ở bên trái.
- Tìm phần Device Information ở bên phải và kiểm tra xem ổ cứng chính của bạn có được liệt kê ở đó không.
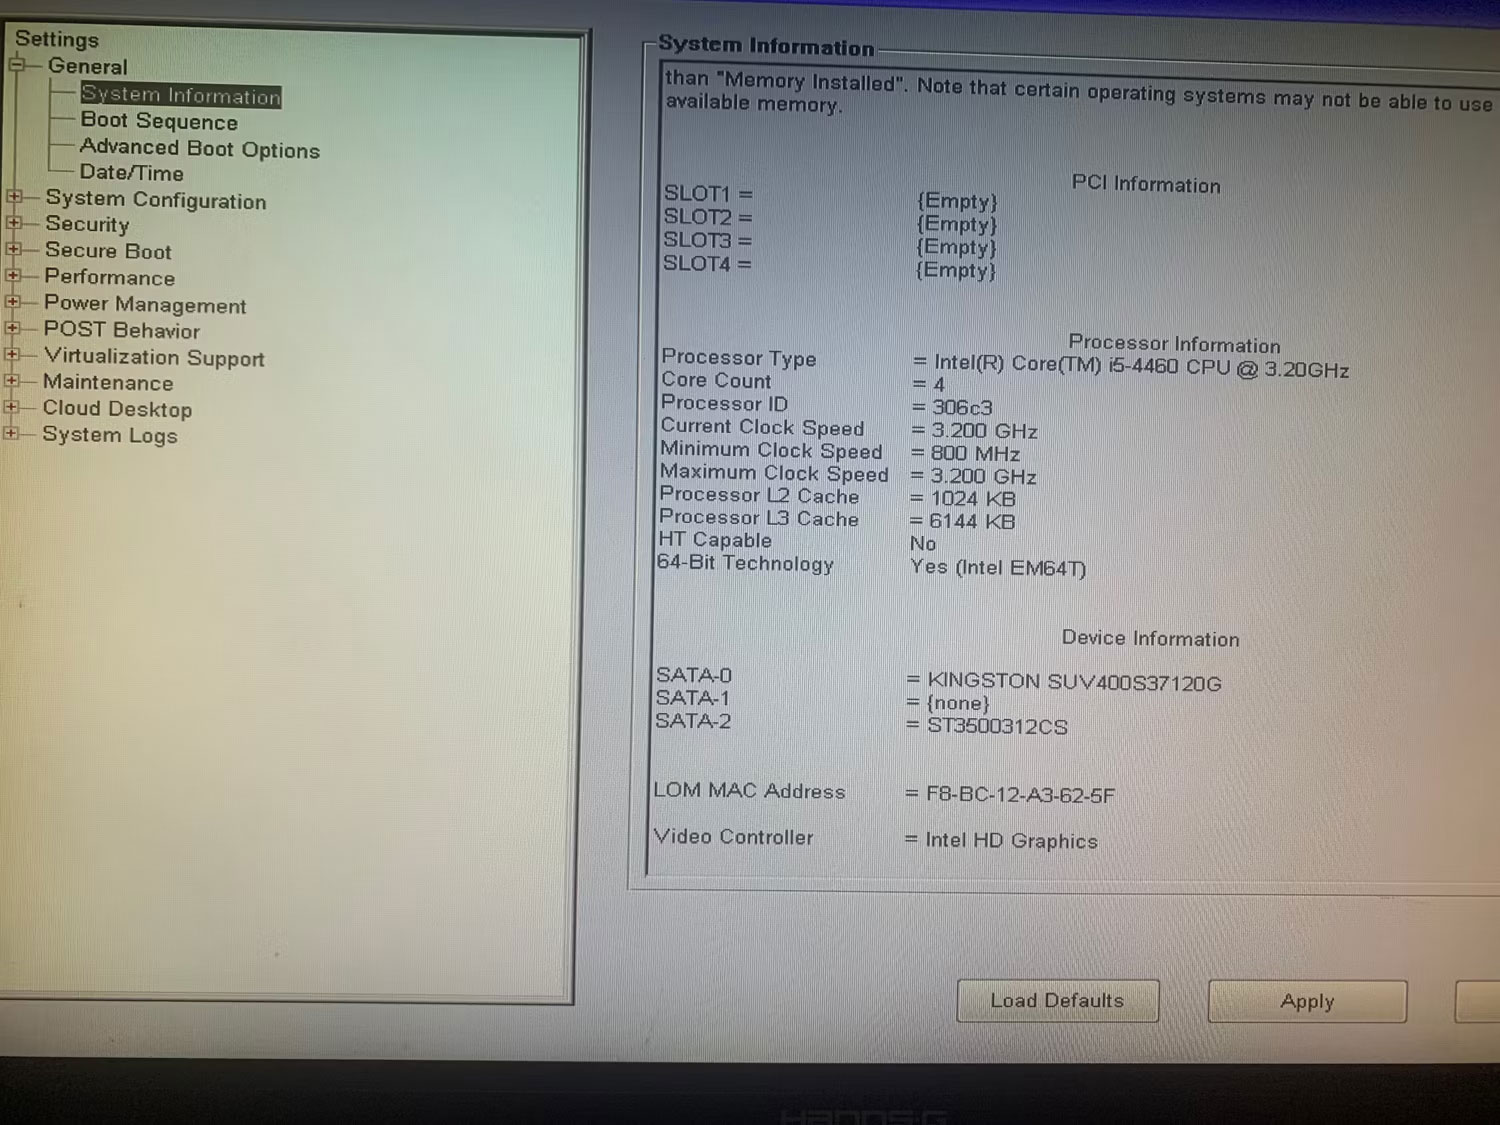
Nếu máy tính của bạn được cài đặt nhiều ổ, hãy kiểm tra xem hệ thống của bạn có thể truy cập ổ chứa hệ điều hành hay không, nghĩa là chi tiết ổ sẽ xuất hiện trong phần thông tin thiết bị.
Nếu thiết bị của bạn có thể truy cập ổ lưu trữ nơi Windows được cài đặt, bạn có thể tiến hành cách sửa lỗi thứ ba. Tuy nhiên, nếu ổ đĩa không xuất hiện trong phần thông tin thiết bị, thì nó không thể phát hiện được. Trong trường hợp đó, hãy chạy tiến trình chẩn đoán.
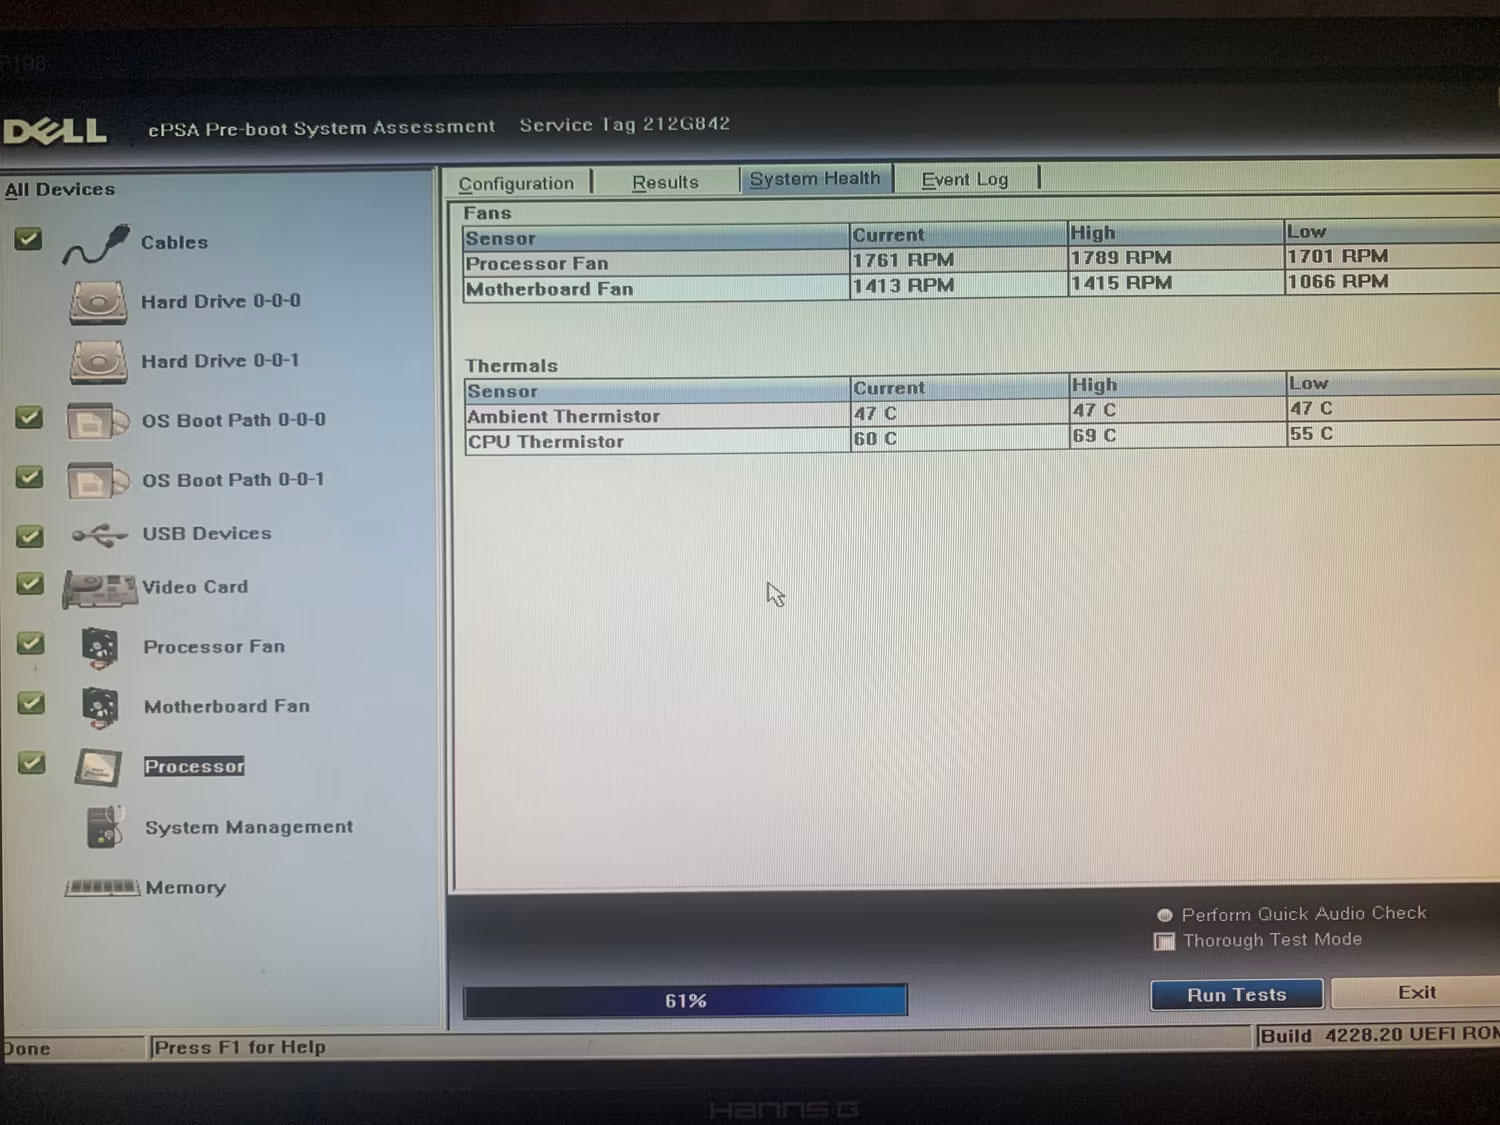
2. Chạy tiến trình chẩn đoán
Chẩn đoán giúp chúng ta xác định phần cứng có vấn đề trên thiết bị của mình. Vì ổ lưu trữ có thể gặp vấn đề trong tình huống này, bạn nên chạy chẩn đoán để xác nhận những nghi ngờ của mình. Thực hiện theo các bước sau để chạy tiến trình chẩn đoán:
1. Giữ nút nguồn trong vài giây để tắt thiết bị.
2. Khởi động lại máy tính bằng cách nhấn nút nguồn và tiếp tục nhấn F12.
3. Chọn Diagnostics và nhấn Enter.

4. Nhấp vào Yes trong cửa sổ tiếp theo.
5. Sau khi kiểm tra chẩn đoán kết thúc, nó sẽ cho bạn biết nếu có vấn đề với ổ cứng của bạn hoặc bất kỳ thành phần nào khác không.
Nếu kiểm tra chẩn đoán chỉ ra rằng ổ lưu trữ của bạn không được cắm đúng cách, hãy kiểm tra xem dây của nó có được kết nối đúng cách chưa. Nếu ổ được cắm đúng cách, hãy ngắt kết nối và kết nối lại vì việc này có thể khắc phục sự cố.
Nếu bạn không tìm ra sự cố hoặc nếu sự cố xảy ra trên laptop mà bạn không thể nhanh chóng kiểm tra các sự cố kết nối ổ cứng, hãy nhờ kỹ thuật viên kiểm tra thiết bị của bạn.
3. Thay đổi trình tự khởi động
Trình tự khởi động đề cập đến thứ tự thiết bị mà máy tính tìm kiếm dữ liệu có thể khởi động. Nếu máy của bạn được cài đặt nhiều thiết bị lưu trữ thì việc đặt ổ, nơi cài đặt hệ điều hành, lên đầu sẽ giúp máy tính của bạn truy cập dữ liệu khởi động nhanh hơn. Làm như vậy có thể khắc phục lỗi " No boot device found".
Làm theo các bước sau để thay đổi trình tự khởi động:
1. Giữ nút nguồn trong vài giây để tắt thiết bị.
2. Khởi động lại máy tính bằng cách nhấn nút nguồn và tiếp tục nhấn F2 cho đến khi cài đặt BIOS của bạn xuất hiện.
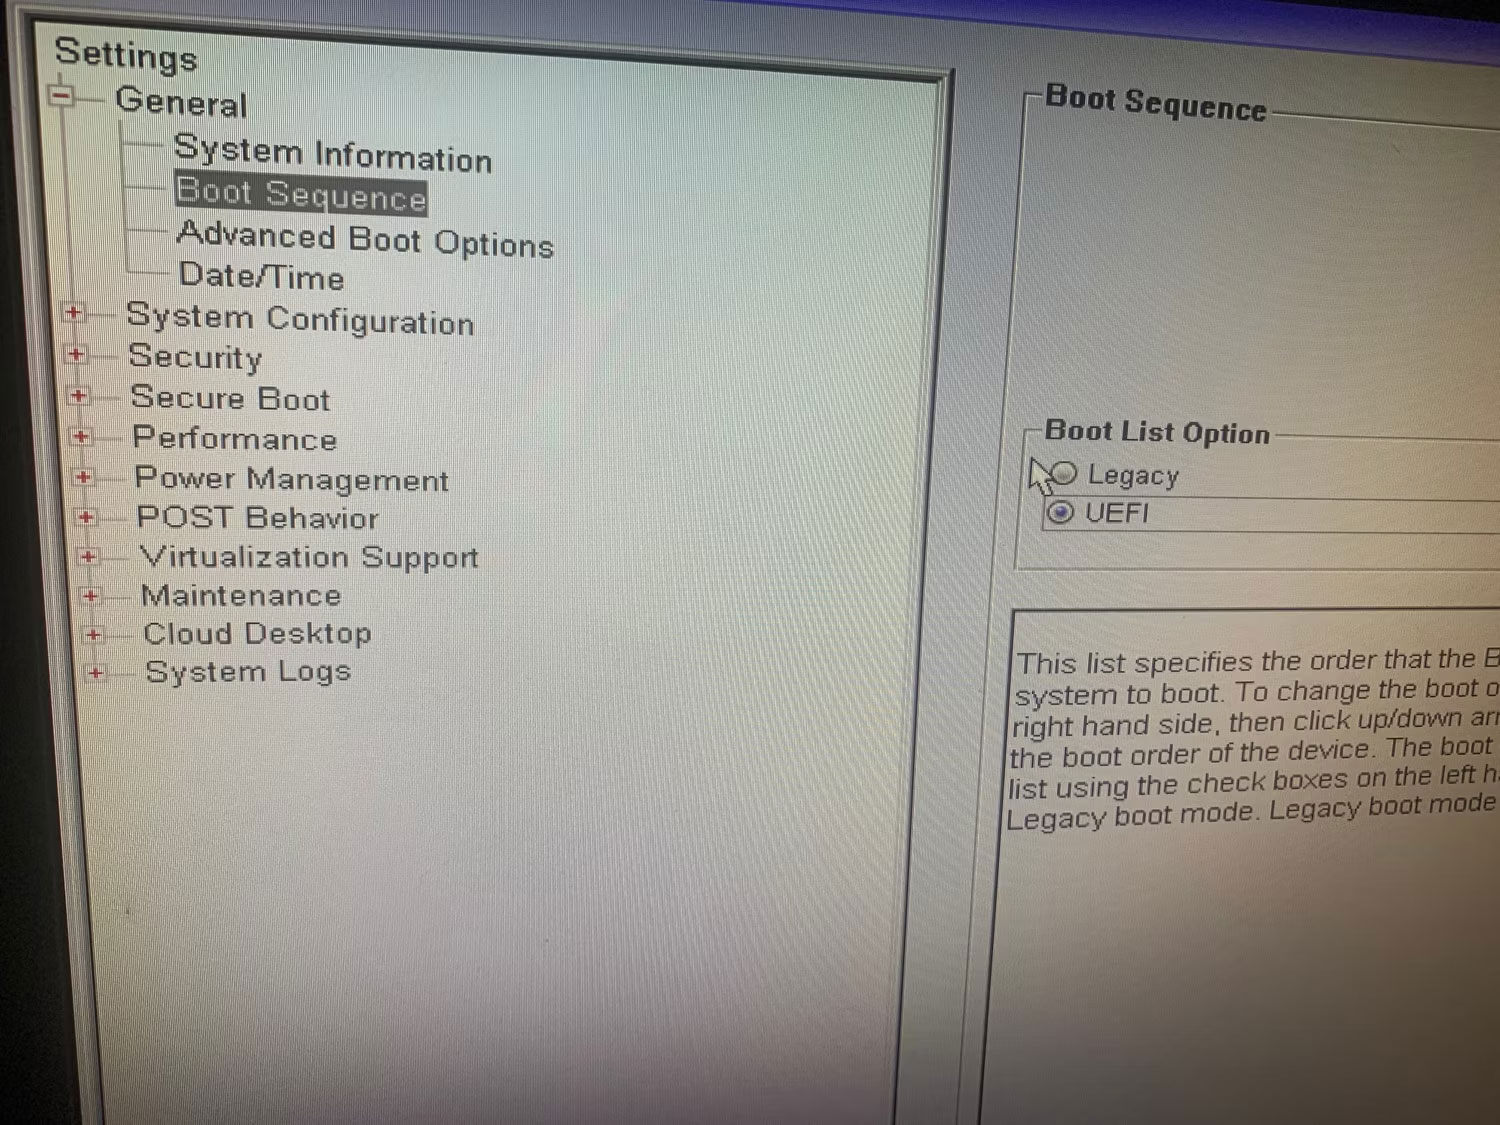
3. Chuyển đến Boot Sequence từ menu bên trái.
4. Chọn Legacy trong Boot List Option nếu nó chưa được chọn. Thay đổi tùy chọn khởi động sẽ hiển thị cài đặt Boot Sequence.
5. Trong Boot Sequence, hãy đảm bảo rằng hộp bên cạnh thiết bị lưu trữ mà bạn đang sử dụng để khởi động hệ điều hành, rất có thể là ổ HDD hoặc SSD, đã được chọn.
6. Sau đó, xác định vị trí của thiết bị lưu trữ chứa hệ điều hành trong chuỗi. Nếu nó không ở trên cùng, hãy chọn nó và bấm vào mũi tên hướng lên để di chuyển nó lên trên cùng.
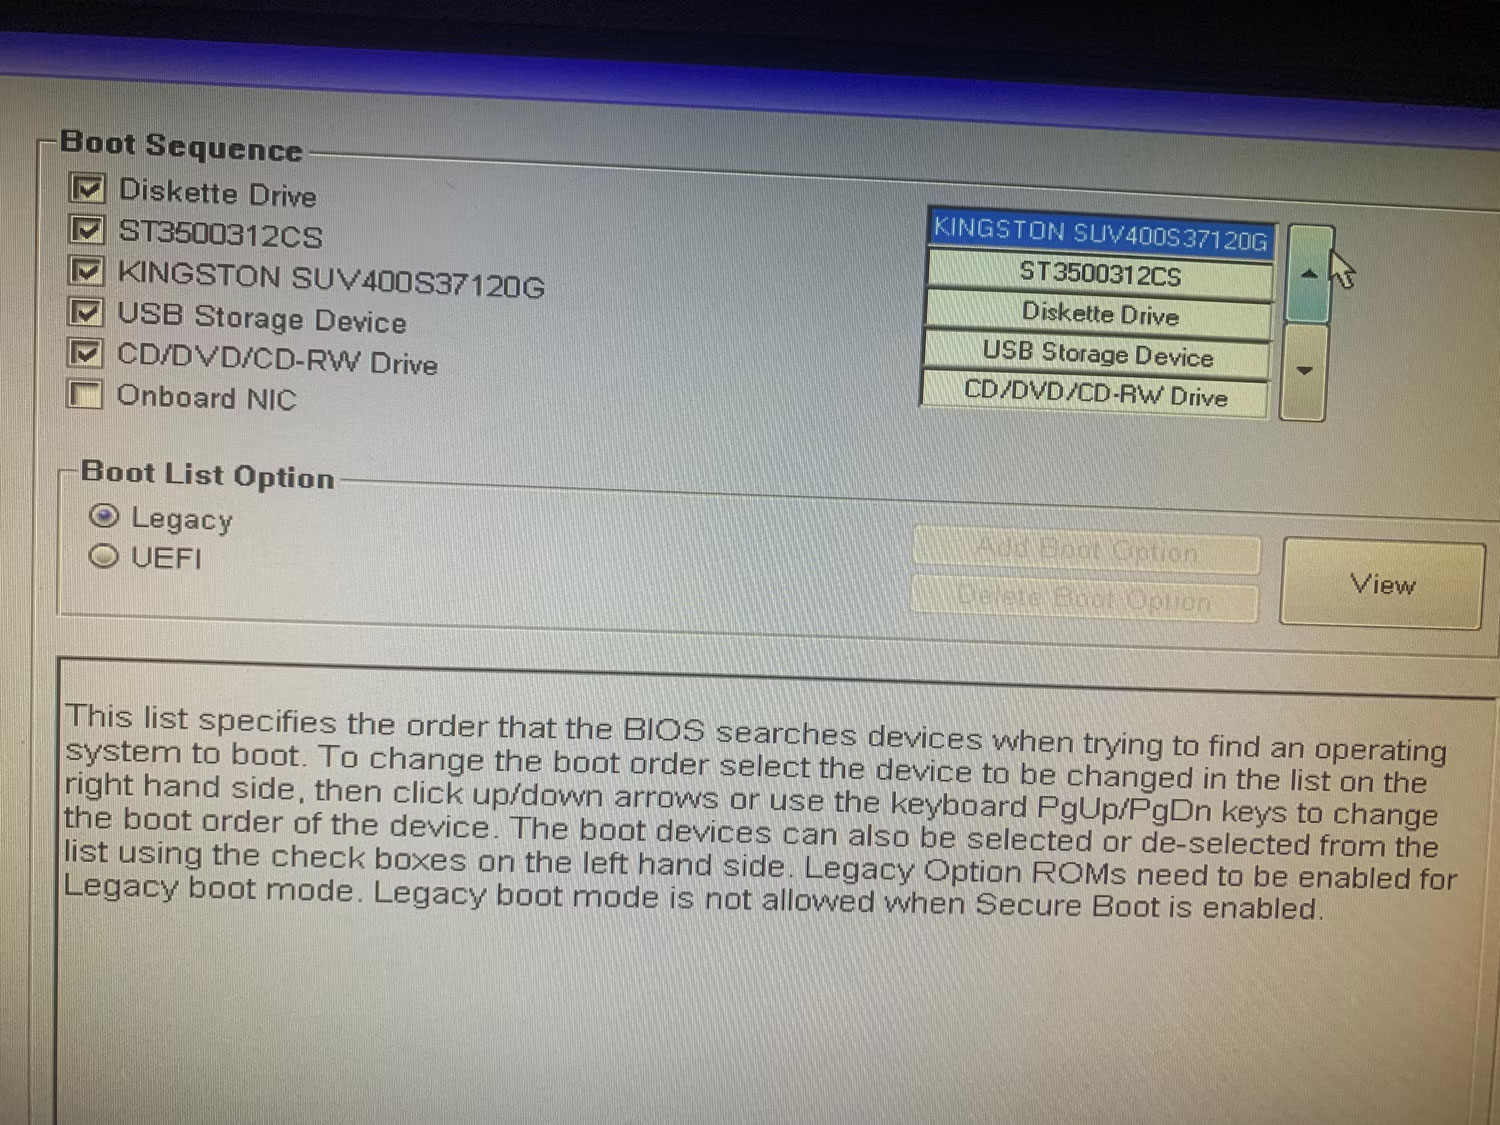
7. Để lưu các thay đổi, nhấp vào Apply.
8. Sau đó nhấp vào Exit và máy tính của bạn sẽ khởi động lại.
Hy vọng rằng việc thay đổi trình tự khởi động sẽ giải quyết được sự cố. Nhưng bạn nên làm gì nếu BIOS của bạn thiếu Legacy Boot hoặc tùy chọn khởi động chuyển sang màu xám? Bạn có thể dễ dàng sửa tùy chọn Legacy Boot chuyển sang màu xám trên Windows. Tuy nhiên, nếu nó không khả dụng, hãy thử cách khắc phục tiếp theo.
4. Reset cài đặt về mặc định
Nếu tùy chọn Legacy Boot không khả dụng trong BIOS của bạn, bạn có thể khôi phục cài đặt mặc định bằng cách thực hiện theo các bước sau:
1. Giữ nút nguồn trong vài giây để tắt thiết bị.
2. Khởi động lại máy tính bằng cách nhấn nút nguồn và tiếp tục nhấn F2 cho đến khi cài đặt BIOS của bạn xuất hiện.
3. Chọn General ở bên trái.
4. Sau đó nhấp vào Load Defaults.
5. Nhấp vào OK trong cửa sổ pop-up cảnh báo.
6. Nhấp vào Exit.
Cảnh báo: Thực hiện bước này sẽ khôi phục cài đặt BIOS về mặc định, vì vậy bạn có thể mất các tùy chỉnh mà mình đã thực hiện.
