Cách sửa driver bị hỏng trên Windows 10
- Thứ hai - 29/11/2021 23:47
- In ra
- Đóng cửa sổ này
Bạn đang gặp lỗi màn hình xanh, lỗi âm thanh, sự cố kết nối hoặc thậm chí là lỗi DRIVER CORRUPTED EXPOOL? Có thể một hoặc nhiều driver của bạn đã bị hỏng. Driver bị hỏng, thiếu và cũ trên Windows có thể gây ra nhiều sự cố khác nhau trên hệ thống.
Thật không may, điều này cũng có thể làm cho thiết bị mà nó điều khiển không sử dụng được hoặc gặp sự cố. Do đó, điều quan trọng là phải sửa một driver bị hỏng ngay khi bạn phát hiện ra nó để ngăn máy tính không gặp trục trặc. Dưới đây là một số cách để sửa driver bị hỏng trong Windows 10.
1. Cập nhật driver từ menu Device Manager
Windows 10 tự động cập nhật driver thông qua các bản cập nhật. Tuy nhiên, một số bản cập nhật có thể gây ra sự cố cho driver, khiến chúng hoạt động sai cách. Trong một số trường hợp, cập nhật driver bị lỗi theo cách thủ công có thể khắc phục sự cố. Đây là cách thực hiện:
B1: Nhấn và giữ phím Windows + R để mở hộp thoại Run. Gõ devmgmt.msc và bấm OK để mở menu Device Manager.
B2: Kiểm tra danh sách driver và mở rộng danh sách nếu cần. Tìm driver có dấu chấm hỏi màu vàng. Dấu này cho biết thiết bị nào có driver bị hỏng hoặc lỗi.
B3: Khi bạn tìm thấy driver bị hỏng, hãy nhấp chuột phải vào nó và chọn Update driver từ menu ngữ cảnh.
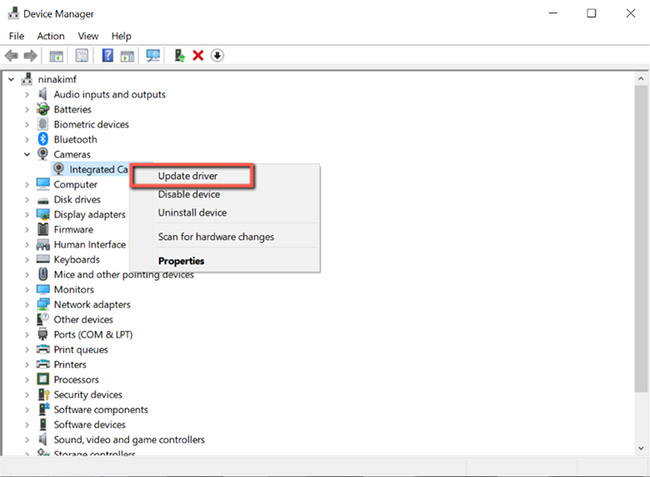
Windows sẽ tự động tìm kiếm driver này trực tuyến và cài đặt mọi bản cập nhật tương thích cho thiết bị.
Nếu phiên bản driver mới nhất chưa được cài đặt trên máy tính của bạn, việc cập nhật driver theo cách thủ công thường khắc phục được sự cố. Tuy nhiên, nếu không có bản cập nhật nào có sẵn, hãy tiếp tục với bản sửa lỗi tiếp theo.
2. Cài đặt lại driver
Nếu driver của bạn đã được cập nhật và vẫn bị hỏng, việc cài đặt lại driver đôi khi có thể hữu ích. Làm theo các bước dưới đây:
B1: Nhấn và giữ phím Windows + R để mở hộp thoại Run. Gõ devmgmt.msc và bấm OK để mở menu Device Manager.
B2: Tìm driver bị hỏng và nhấp chuột phải vào nó. Sau đó, chọn Properties từ menu.
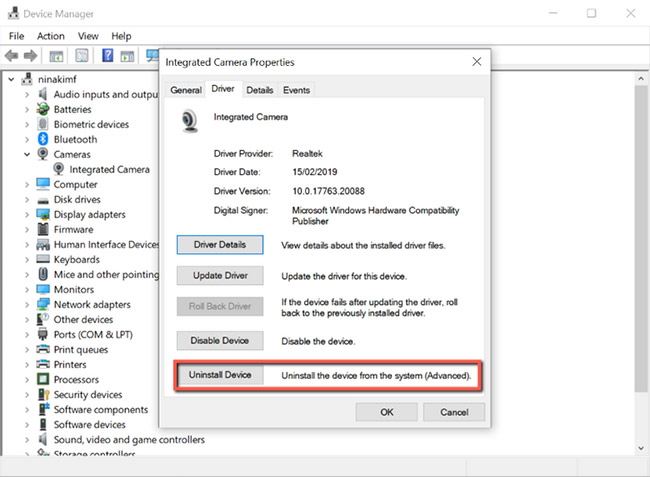
B3: Trên thuộc tính driver, hãy chuyển đến tab Drivers và lưu ý đến "Driver Version". Bạn sẽ cần thông tin này sau đó để tải xuống driver từ trang web của nhà sản xuất máy tính.

B4: Tiếp theo, nhấp vào Uninstall Device để xóa driver khỏi hệ thống.
B5: Sau khi gỡ cài đặt driver, hãy truy cập trang web OEM, tìm kiếm phiên bản driver mà bạn đã ghi lại và tải xuống.
B6: Cài đặt driver và khởi động lại PC.
3. Chạy Windows troubleshooter
Nếu thấy quá trình thủ công để sửa driver bị hỏng quá tẻ nhạt, công cụ Windows troubleshooter sẽ là lựa chọn hoàn hảo cho bạn. Công cụ nằm trong Control Panel giúp người dùng khắc phục một số sự cố phổ biến nhất được tìm thấy trong Windows 10.
Thông qua công cụ này, Windows sẽ tự động tải xuống hoặc sửa các driver bị hỏng, bị thiếu hoặc có vấn đề trong thiết bị. Đây là cách sử dụng nó:
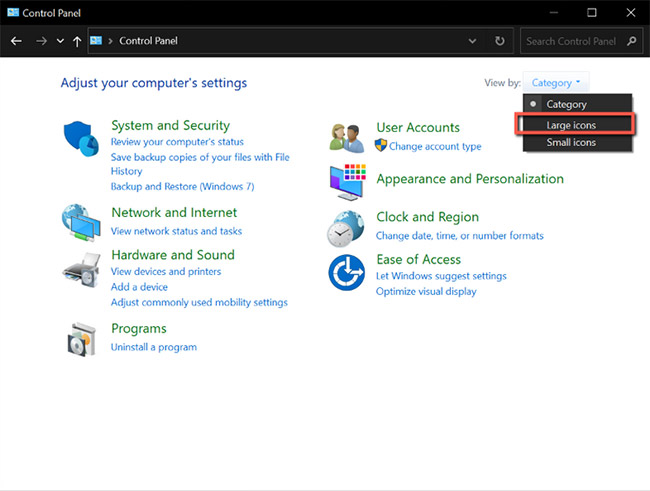
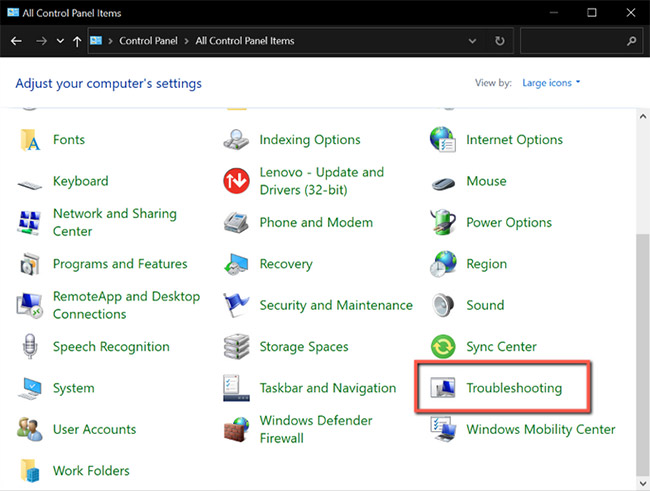
B1: Nhấn và giữ phím Windows + R để mở hộp thoại Run. Sau đó, nhập control và nhấp vào OK để mở Control Panel.
B2: Trên Control Panel, thay đổi chế độ xem thành Large icons.
B3: Tiếp theo, chọn Troubleshooting từ menu.
B4: Nhấp vào View all từ menu bên trái.
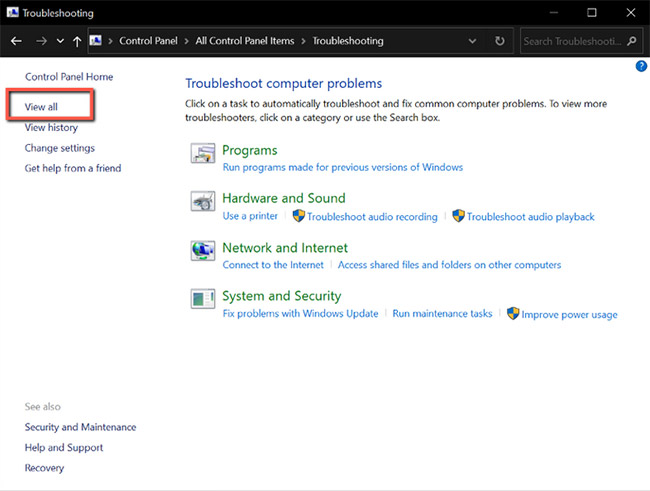
B5: Từ danh sách này, xác định vấn đề bạn hiện đang gặp phải và nhấp vào nó. Thao tác này sẽ chạy trình khắc phục sự cố.
B6: Từ cửa sổ pop-up, nhấp vào Next, sau đó Windows sẽ tự động phát hiện sự cố và khắc phục nó.
4. Quét hệ thống để tìm virus bằng Windows Security
Driver bị hỏng đôi khi là do phần mềm độc hại trên máy tính. Nếu bạn có thói quen tải xuống các file từ những trang web không đáng tin cậy, bạn đang đặt hệ thống của mình vào nguy hiểm. Các file này có thể bị nhiễm virus và can thiệp vào driver, ảnh hưởng đến một số thành phần của máy tính.
May mắn thay, Microsoft có một công cụ bảo mật tích hợp cho phép bạn tìm và xóa các file độc hại hay bị hỏng khỏi hệ thống. Điều này sẽ cho phép bạn loại bỏ nguyên nhân của sự cố, vì vậy bạn sẽ không phải tiếp tục sửa các driver bị hỏng của mình. Đây là cách bạn có thể sử dụng nó:
B1: Nhấn và giữ phím Windows + S để mở Windows Search. Gõ Windows Security và nhấn Enter.
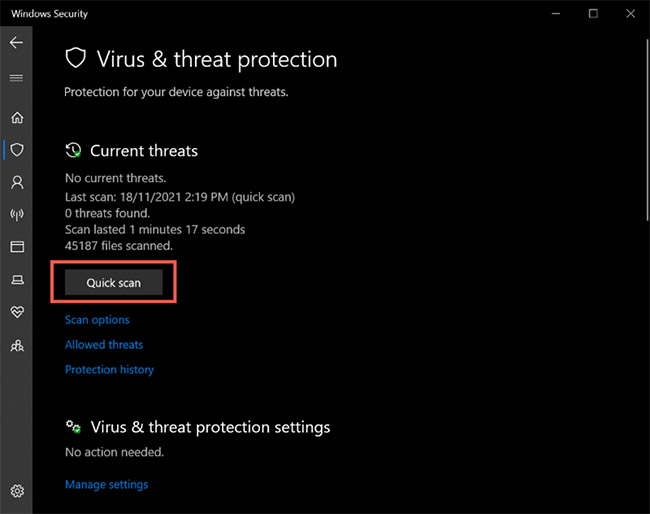
B2: Nhấp vào Virus & threat protection.
B3: Từ trang này, nhấp vào Quick scan. Thao tác này sẽ quét hệ thống để tìm bất kỳ mối đe dọa nào và xóa chúng khỏi hệ thống. Quá trình quét có thể mất một lúc nếu máy tính của bạn có nhiều file và ứng dụng.
B4: Sau khi quá trình quét hoàn tất, bạn có thể cập nhật và cài đặt driver như đã đề cập trong phương pháp đầu tiên ở trên.
5. Cập nhật Windows 10
Nếu vẫn thất bại, bản cập nhật hệ thống có thể giải quyết các driver bị hỏng trong Windows 10. Nhưng trước khi bạn cập nhật hệ thống của mình, hãy đảm bảo rằng Device installation settings đã được bật. Cài đặt này đảm bảo rằng Windows sẽ cập nhật tất cả các driver cùng với bản cập nhật hệ thống. Đây là cách kích hoạt nó trong hệ thống:
B1: Nhấn và giữ phím Windows + S để mở Windows Search. Nhập Device installation settings và nhấn Enter.
B2: Một cửa sổ sẽ xuất hiện và hỏi: "Do you want to automatically download manufacturers' apps and custom icons that are available for your devices?".
B3: Chọn Yes và nhấp vào Save Changes.
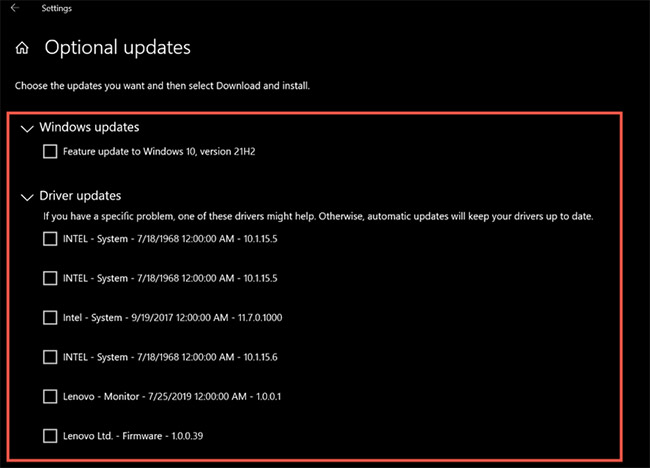
Ngoài ra, hãy kiểm tra các bản cập nhật tùy chọn trước khi tải xuống bản cập nhật Windows mới nhất. Các bản cập nhật tùy chọn này mang đến những thay đổi cần thiết cho máy tính và việc cài đặt chúng có thể giúp sửa các driver bị hỏng.
Driver bị hỏng có thể gây ra sự cố cho hệ thống và có thể ảnh hưởng đến chức năng tổng thể của thiết bị. Driver giúp hệ thống của bạn giao tiếp với phần cứng một cách chính xác và nếu chúng bị hỏng hoặc thiếu, các thành phần của máy tính có thể không sử dụng được.
Rất may, các bản sửa lỗi ở trên có thể giúp khôi phục driver hệ thống về trạng thái bình thường, cho phép máy tính hoạt động ở trạng thái tốt nhất.
