Cách sử dụng Start11 đại tu hoàn toàn Windows 11
- Thứ tư - 09/04/2025 00:32
- In ra
- Đóng cửa sổ này
Microsoft đã thay đổi hoàn toàn giao diện Windows trong Windows 11 và hầu hết các thủ thuật cũ về registry không còn hiệu quả để đảo ngược những thay đổi này nữa. Đó là lý do tại sao nhiều người sử dụng Start11 để làm cho Windows 11 có giao diện giống như mong muốn. Nếu không thích giao diện mặc định, đã đến lúc thêm nét cá nhân của riêng bạn.
Bắt đầu với Start11
Công cụ dùng để tùy chỉnh Windows 11, Start11, cung cấp bản dùng thử miễn phí và sau đó tính phí một lần là 9,99 USD. Có gói đa thiết bị nếu bạn muốn sử dụng trên nhiều thiết bị. Phần tuyệt nhất là bản dùng thử miễn phí kéo dài 1 tháng, vì vậy bạn có thể dùng thử và quyết định xem nó có xứng đáng với giá tiền hay không dựa trên các tính năng bạn thích.
Bạn nên bắt đầu với bản dùng thử miễn phí. Để thực hiện, hãy truy cập trang web Stardock, tải xuống Start11 và chạy cài đặt. Sau khi cài đặt, hãy kích hoạt bản dùng thử và bạn có thể bắt đầu tùy chỉnh Windows.
Tùy chỉnh menu Start
Menu Start trong Windows 11 đã được thiết kế lại hoàn toàn. Trong Windows 10, nó được căn trái, có các ứng dụng được ghim và những file đã mở gần đây, bao gồm các live tile. Thiết kế mới hiện được căn giữa và loại bỏ tính năng live tile. Nhiều người thích giao diện cũ hơn, vì vậy họ đã quay lại phong cách Windows 10.
Để tùy chỉnh menu Start bằng Start11, hãy làm theo các bước sau:
- Đi tới tab Start Menu ở thanh bên trái.
- Chọn Windows 10 style từ ngăn bên phải.
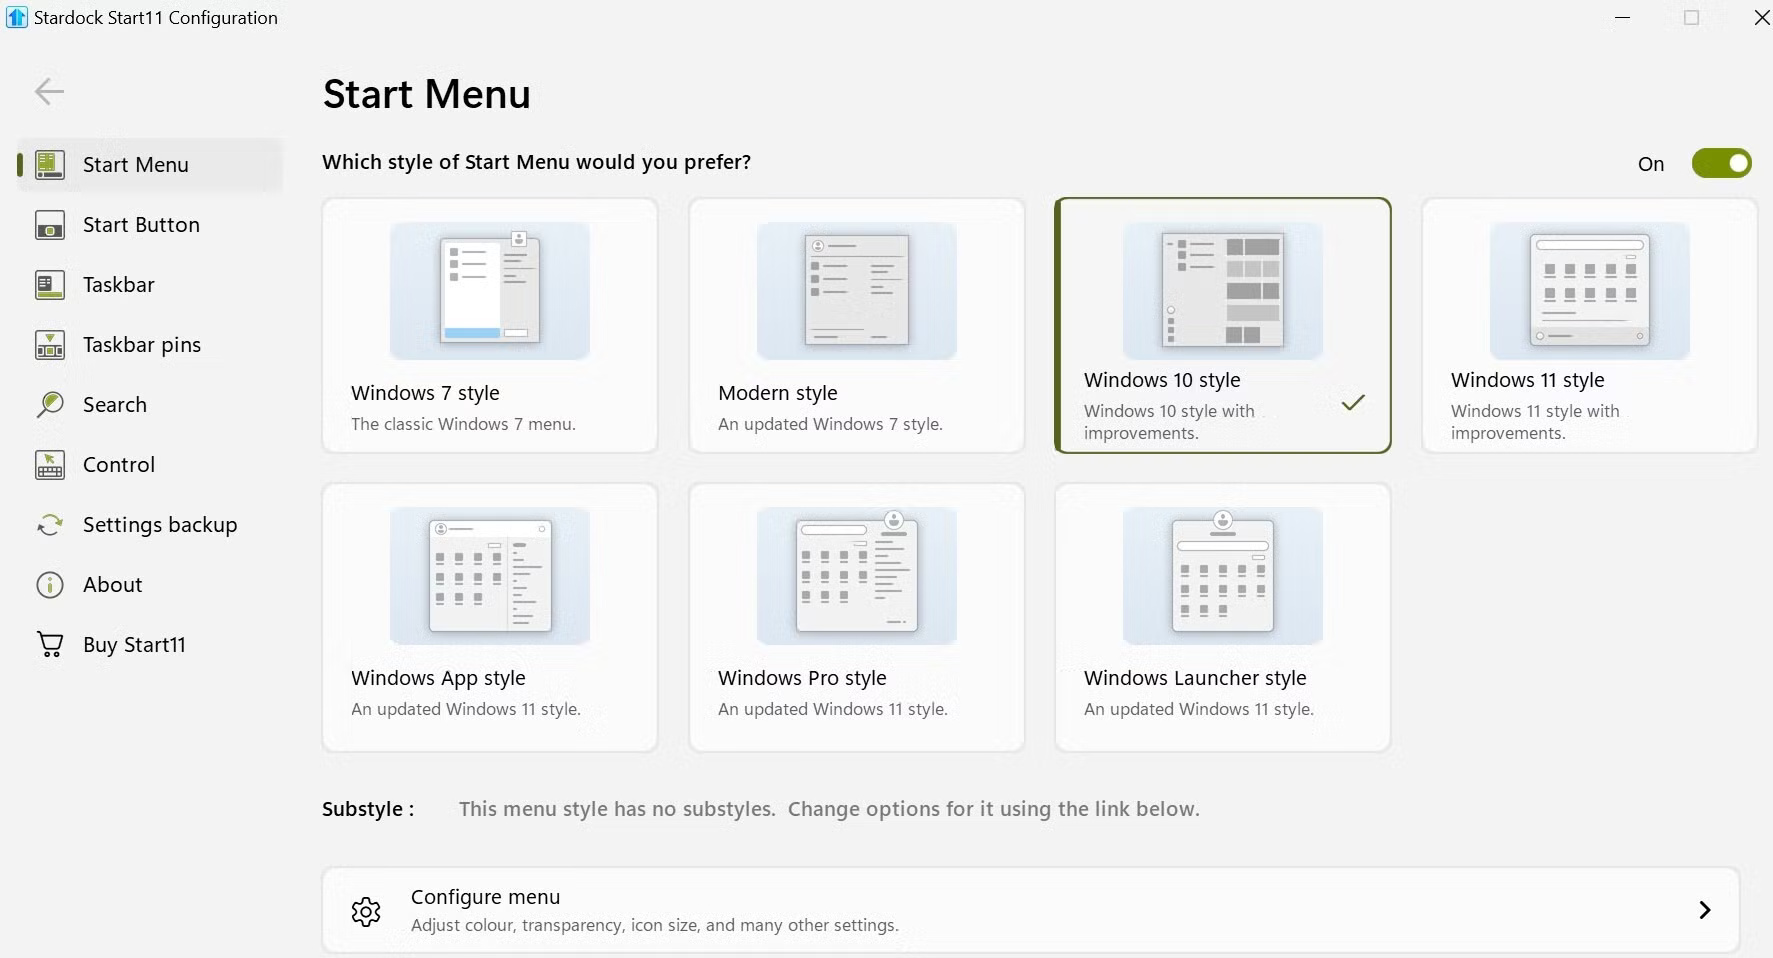
Bây giờ, hãy nhấp vào nút Start để xem các thay đổi theo thời gian thực. Bạn cũng có thể khám phá các kiểu menu Start khác và sử dụng chúng nếu muốn. Bằng cách nhấp vào Configure menu ở cuối, bạn cũng có thể tùy chỉnh giao diện bằng cách điều chỉnh màu sắc, độ trong suốt, kích thước biểu tượng và các cài đặt khác.
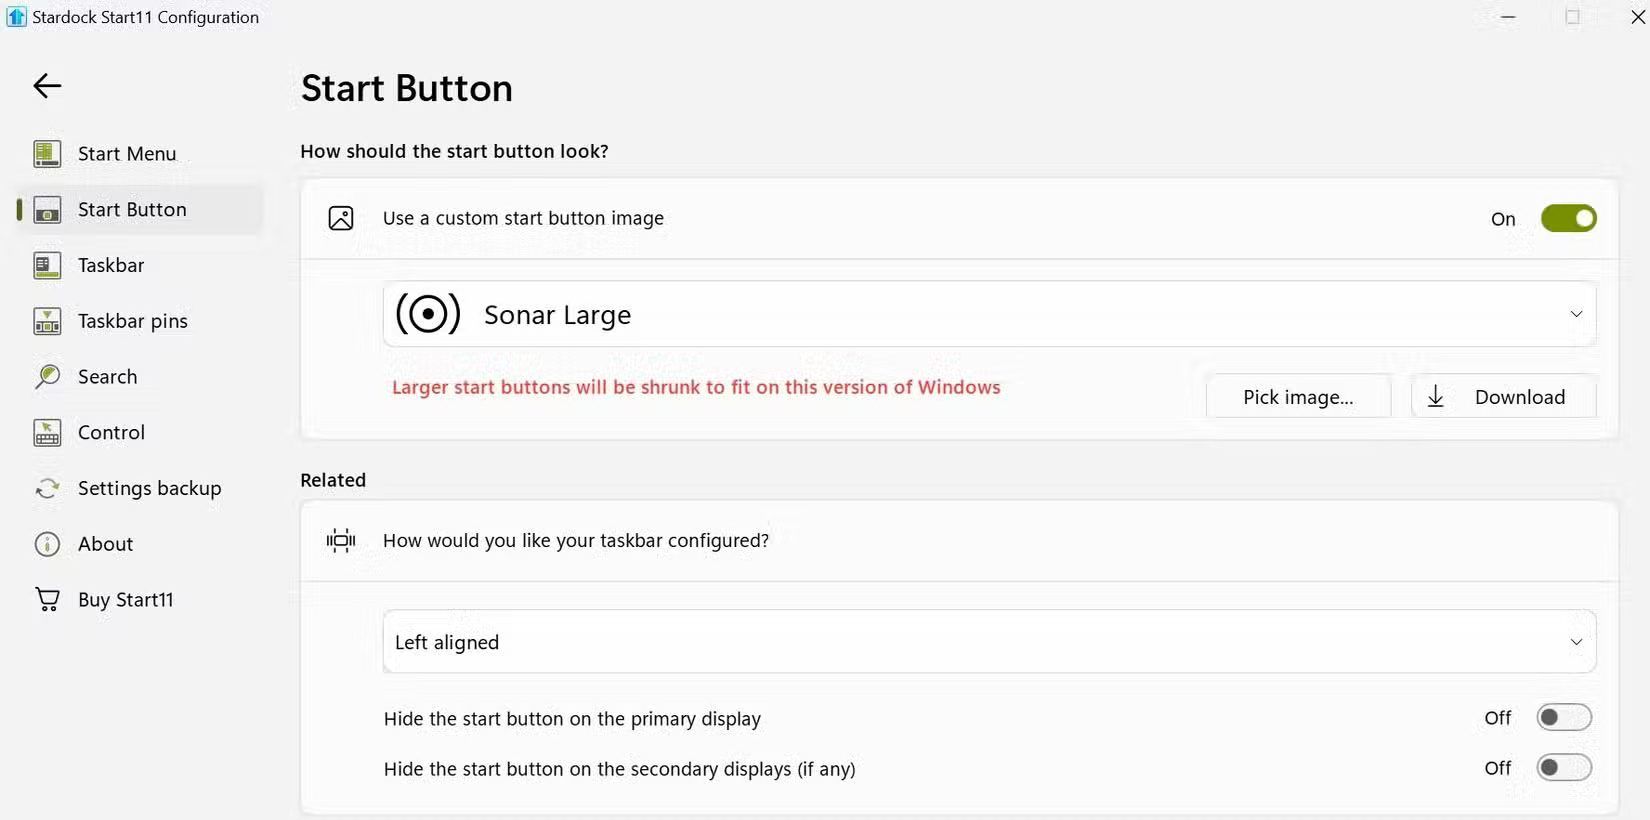
Thay đổi nút Start
Start11 cũng cho phép tùy chỉnh nút Start, một tính năng không có sẵn theo mặc định trên Windows. Bạn có thể chọn từ các biểu tượng trong ứng dụng hoặc upload lên biểu tượng riêng bằng cách nhấp vào nút Pick image. Ứng dụng sẽ tự động thay đổi kích thước biểu tượng để phù hợp với phiên bản Windows của bạn và bạn thậm chí có thể tải xuống hình ảnh từ thư viện trực tuyến.
Bạn cũng có thể điều chỉnh căn chỉnh thanh tác vụ thông qua các cài đặt Related được tìm thấy tại đây. Nếu không thay đổi vị trí mặc định của nút này khi thiết lập Start11, bạn có thể thực hiện ngay bây giờ. Mở menu drop-down và chọn vị trí thanh tác vụ ưa thích của bạn.
Tinh chỉnh thanh tác vụ Windows
Start11 cung cấp một loạt các tùy chọn tùy chỉnh để tinh chỉnh thanh tác vụ Windows. Bạn có thể định vị lại và thay đổi kích thước thanh tác vụ, thay đổi màu sắc, điều chỉnh độ trong suốt, hiển thị giây trên đồng hồ thanh tác vụ và thậm chí áp dụng các họa tiết tùy chỉnh để có giao diện độc đáo. Bạn cũng có thể thêm các góc bo tròn vào thanh tác vụ và điều chỉnh những cài đặt liên quan đến tính năng này để tùy chỉnh thêm.
Ứng dụng này cũng cung cấp tính năng tùy chỉnh tự động. Để bật tính năng này, hãy bật nút chuyển đổi bên cạnh Let Start11 enhance the taskbar và nhấp vào Configure enhanced taskbar để truy cập các cài đặt bổ sung.
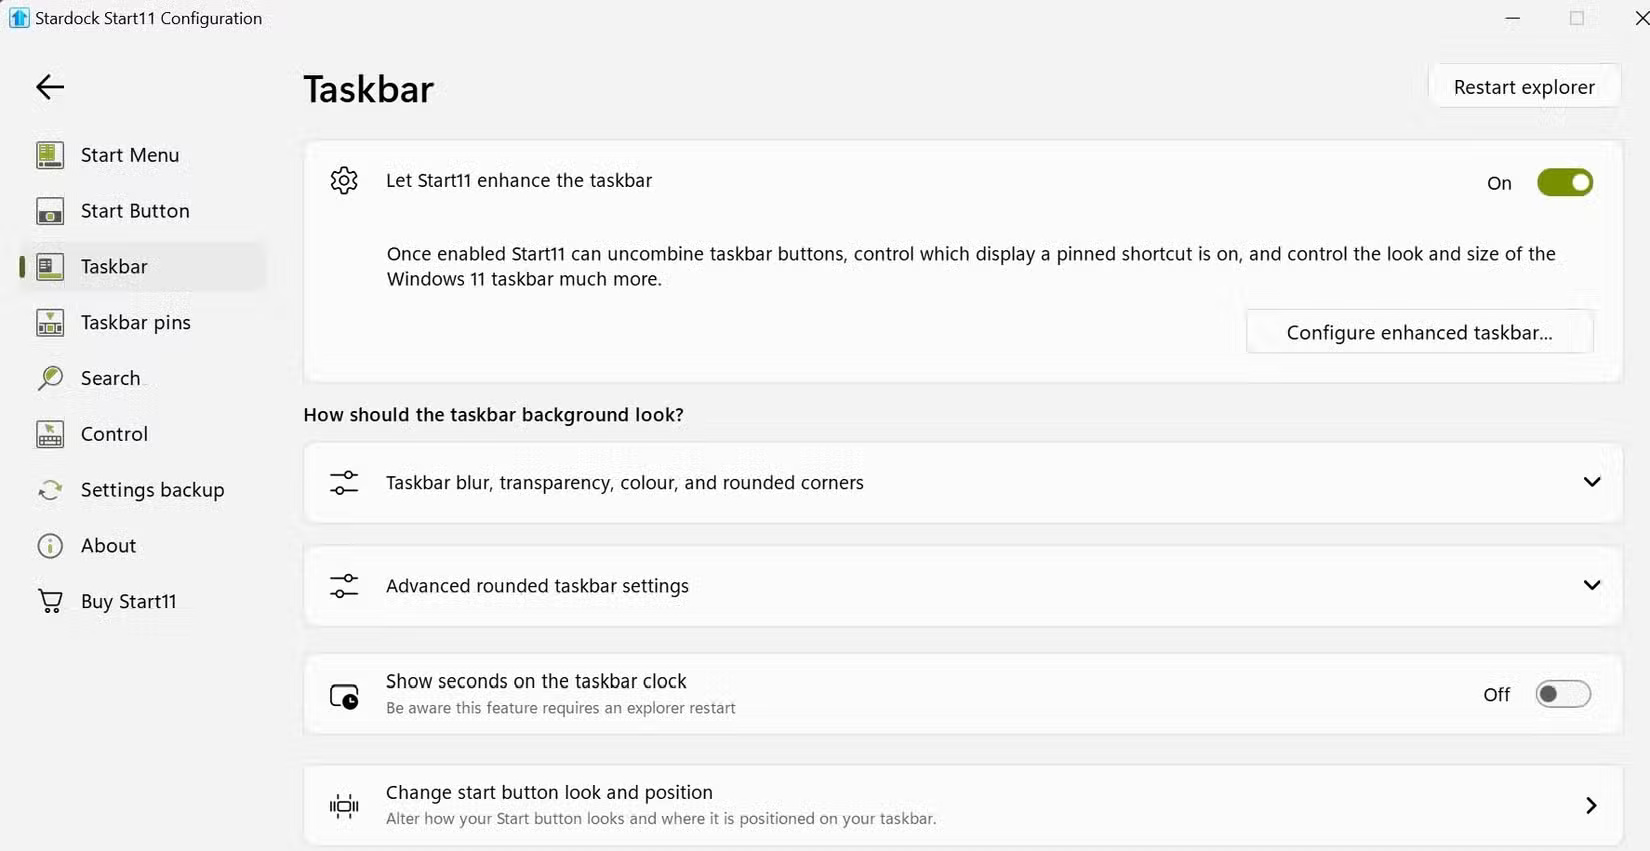
Tại đây, bạn có thể điều chỉnh giao diện của các nút trên thanh tác vụ, quản lý cách chúng kết hợp, v.v... Bạn sẽ phải khởi động lại Windows Explorer để các thay đổi có hiệu lực.
Ghim tài liệu và thư mục vào thanh tác vụ
Tính năng hữu ích nhất trong Start11 là khả năng ghim tài liệu và thư mục vào thanh tác vụ. Mặc dù Windows cung cấp các giải pháp thay thế cho việc này, nhưng Start11 giúp quá trình này đơn giản hơn nhiều. Bạn có thể ghim từng tài liệu, toàn bộ thư mục hoặc thậm chí là menu pop-up thư mục cấp quyền truy cập nhanh vào các thư mục con.
Tính năng này cho phép bạn mở các file và thư mục quan trọng chỉ bằng một cú nhấp chuột. Sau đây là cách bạn có thể sử dụng tính năng này:
- Mở tab Taskbar pins từ thanh bên trái.
- Nhấp vào Pin file, chọn tài liệu và tài liệu sẽ được ghim.
- Để ghim thư mục, hãy nhấp vào Pin folder và chọn thư mục mong muốn.
- Để tạo menu pop-up thư mục, hãy nhấp vào Pin folder menu và chọn thư mục chính có các thư mục con.

Tùy chỉnh cài đặt Control
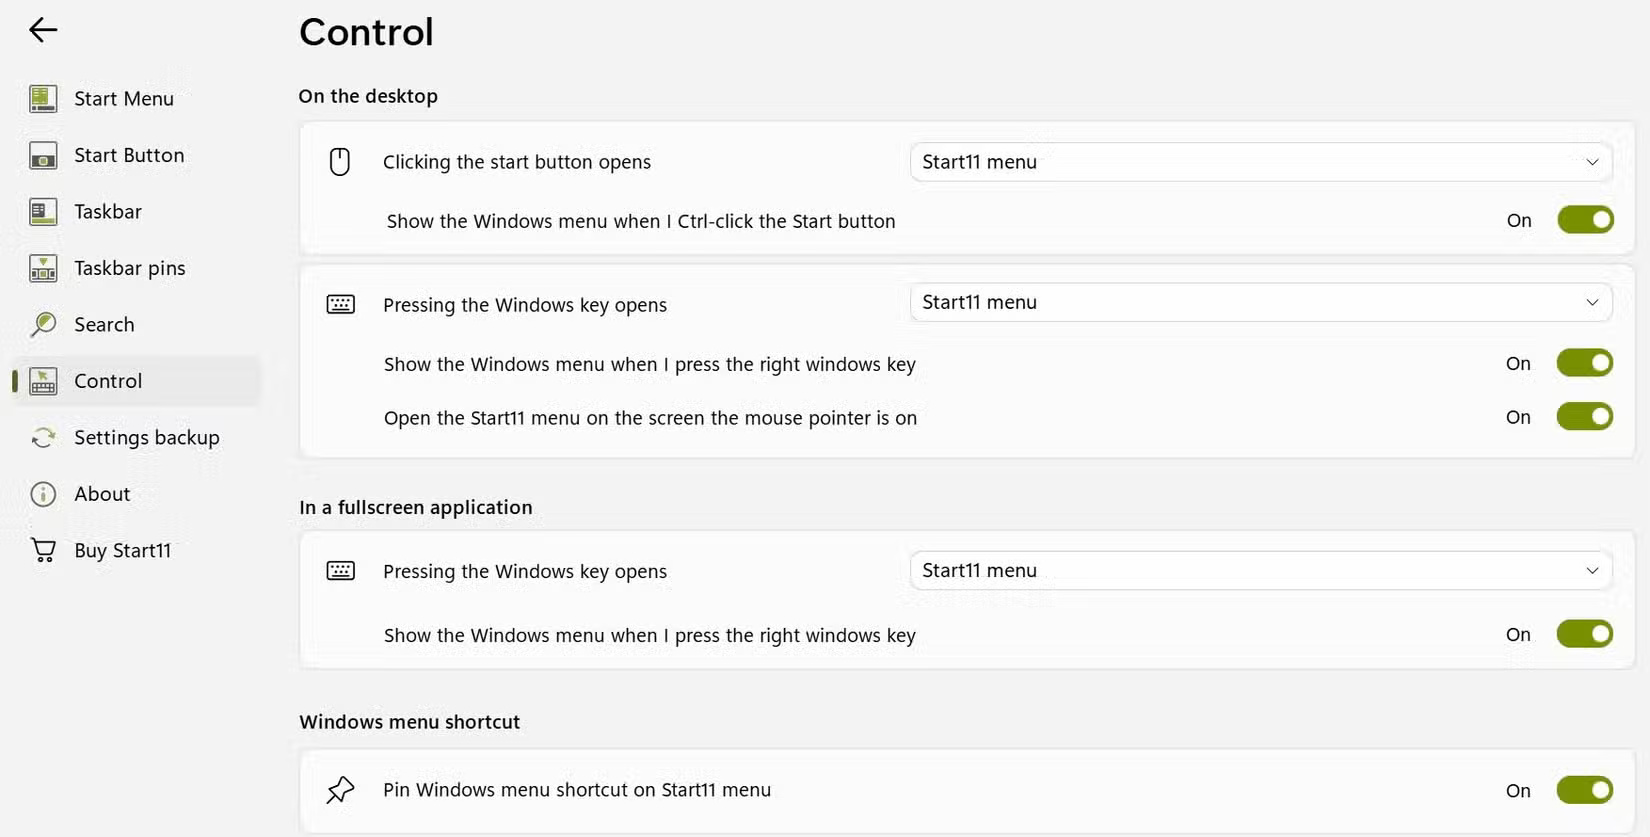
Start11 cũng bao gồm một số cài đặt điều khiển cho phép bạn tùy chỉnh cách nút Start và phím Windows hoạt động. Ví dụ, bạn có thể chọn những gì xảy ra khi nhấp vào nút Start hoặc nhấn phím Windows. Ngoài ra, bạn có thể cấu hình để hiển thị menu Windows khi bạn nhấn Ctrl và nhấp vào nút Start hoặc nhấn phím Windows bên phải.
Ngoài ra còn có các tùy chọn riêng để kiểm soát những gì xảy ra khi bạn nhấn phím Windows trong khi ở trong ứng dụng toàn màn hình và liệu menu Windows có xuất hiện khi nhấn phím Windows bên phải hay không.
Thực hiện theo các bước dưới đây để điều chỉnh các cài đặt này:
- Mở ứng dụng Start11.
- Điều hướng đến tab Control ở thanh bên trái.
- Trong mục On the desktop, tùy chỉnh các điều khiển khi bạn đang ở trên desktop.
- Trong mục In a fullscreen application, sửa đổi các điều khiển cho những ứng dụng toàn màn hình.
Đổi Windows Search thành Start11
Start11 cũng cho phép bạn thay thế Windows Search mặc định bằng tính năng tìm kiếm riêng. Tính năng này đi kèm với các tính năng bổ sung không có trong Windows Search gốc. Tính năng này cho phép bạn lọc kết quả theo loại mục, tìm kiếm văn bản trong file và thậm chí hiển thị các tab đang mở của Microsoft Edge trong kết quả tìm kiếm.
Để áp dụng những thay đổi này, hãy chuyển đến tab Search ở bên trái và bật nút chuyển bên cạnh Use Start11 search in the Start11 start menu. Từ đó, bạn có thể bật hoặc tắt bất kỳ tính năng nào bạn muốn sử dụng hoặc bỏ qua. Ví dụ, bạn có thể bật tùy chọn tìm kiếm nội dung cùng với tên file để tìm văn bản cụ thể trong tài liệu.

Nếu bạn muốn giữ lịch sử tìm kiếm của mình ở chế độ riêng tư, hãy nhấp vào nút Clear Search History để xóa và bạn đã sẵn sàng.
Tạo bản sao lưu cài đặt Start11
Sau khi cấu hình ứng dụng Start11, bạn nên sao lưu cài đặt của mình bằng cách xuất chúng dưới dạng file và lưu cục bộ. Điều này cho phép bạn khôi phục tùy chọn của mình nếu reset cài đặt hoặc cài đặt lại Windows. Tính năng này cũng hữu ích nếu bạn đã thiết lập Start11 trên một máy tính và muốn sao chép cùng cấu hình trên thiết bị khác.
Sau đây là cách bạn có thể sao lưu cài đặt Start11:
- Điều hướng đến tab Settings Backup ở bên trái.
- Nhấp vào Backup settings to a file và chọn vị trí để lưu.
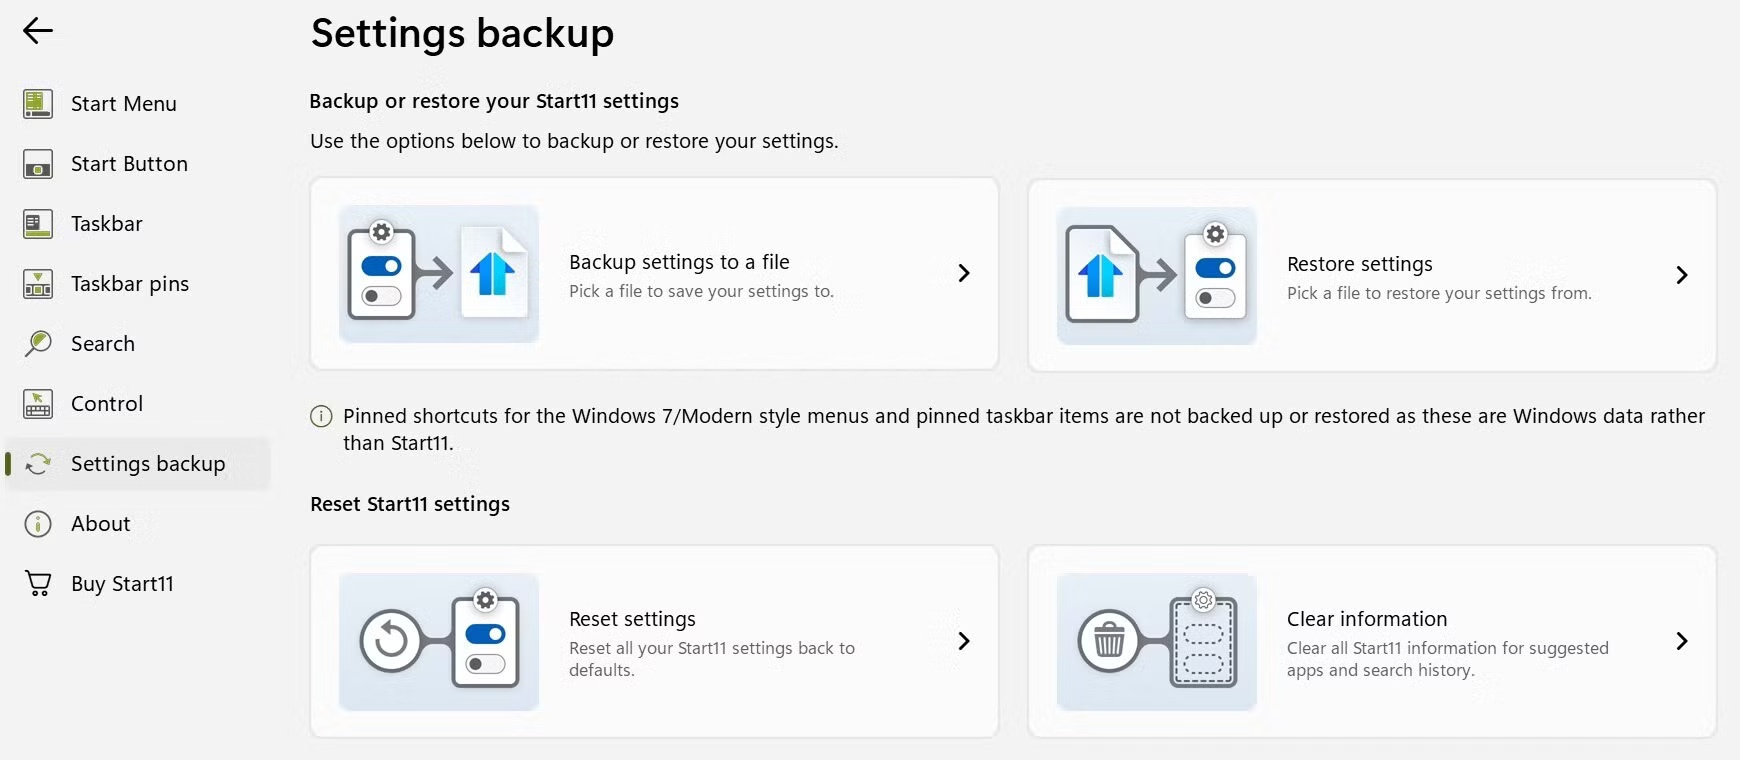
Để khôi phục cài đặt sau này, hãy nhấp vào Restore settings, chọn file sao lưu và cài đặt Start11 của bạn sẽ được khôi phục mà không cần phải cấu hình lại mọi thứ từ đầu. Nếu bạn muốn hoàn tác tất cả các thay đổi, hãy nhấp vào Reset settings để trở về cấu hình mặc định.
Đó là cách Start11 giúp tùy chỉnh giao diện Windows 11! Hãy dùng thử phiên bản dùng thử và nếu thấy hữu ích, bạn có thể trả phí một lần để tiếp tục sử dụng Start 11.
