Cách sử dụng Finder trên Mac cho người mới bắt đầu
- Thứ tư - 13/01/2021 22:24
- In ra
- Đóng cửa sổ này
Finder trong macOS chính là cánh cổng dẫn đến tất cả ứng dụng, file và các tệp tải xuống trên Mac. Mọi thứ, từ các thư mục trong Dropbox cho đến hình nền máy tính đều có thể tìm được trong Finder. Bạn có thể quản lý được rất nhiều thứ từ Finder. Trong bài viết dưới đây, Quantrimang sẽ hướng dẫn bạn sử dụng Finder nếu lần đầu dùng Mac.
Cách mở cửa sổ Finder
Có một vài cách mở cửa sổ trong Finder để truy cập vào các file trong hệ thống.
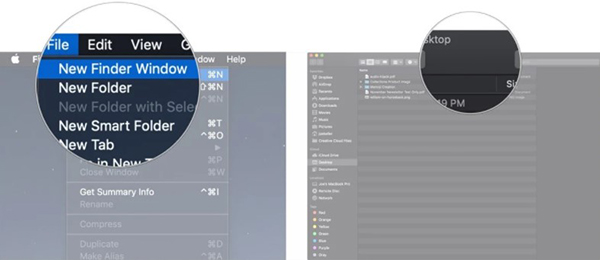
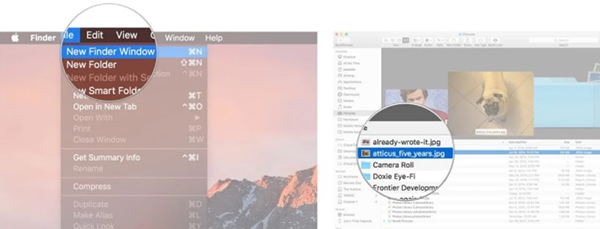
- Trên màn hình (không cần chọn ứng dụng hay chương trình nào cả), bấm vào File trên thanh menu và chọn New Finder Window.

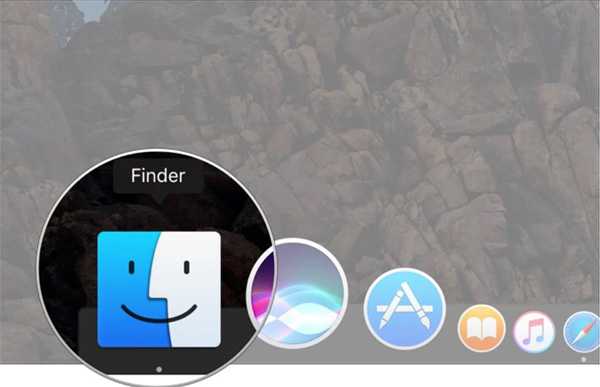
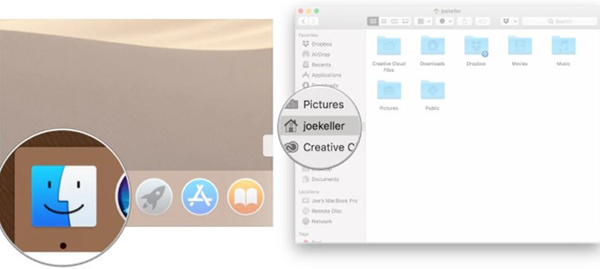
- Trên thanh Dock, bấm vào biểu tượng Finder (hình mặt cười).
- Trên bàn phím, nhấn tổ hợp phím Command + N.
Cách tùy chỉnh thanh công cụ Finder
Theo mặc định, thanh công cụ Finder có một vài nút bạn có thể sử dụng để thay đổi cách xem và thực hiện các thao tác, nhưng bạn có thể tùy chỉnh thanh công cụ này theo ý muốn của mình.
1. Mở cửa sổ Finder mới.
2. Giữ phím Control trên bàn phím rồi bấm chuột hoặc bấm hai ngón trên thanh công cụ.
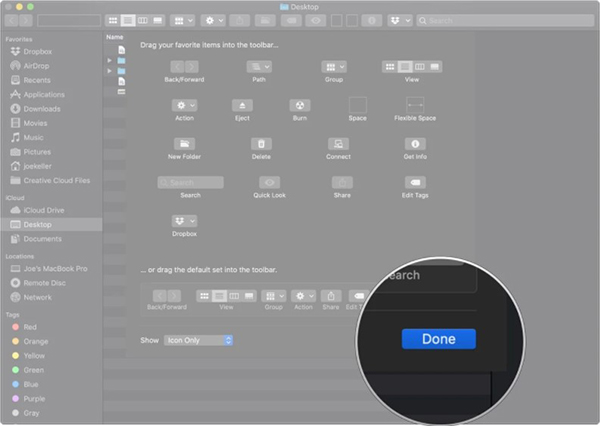
3. Chọn Customize Toolbar...
4. Bấm và thả các công cụ khác vào thanh công cụ. Dưới đây là một số công cụ bạn có thể chọn:
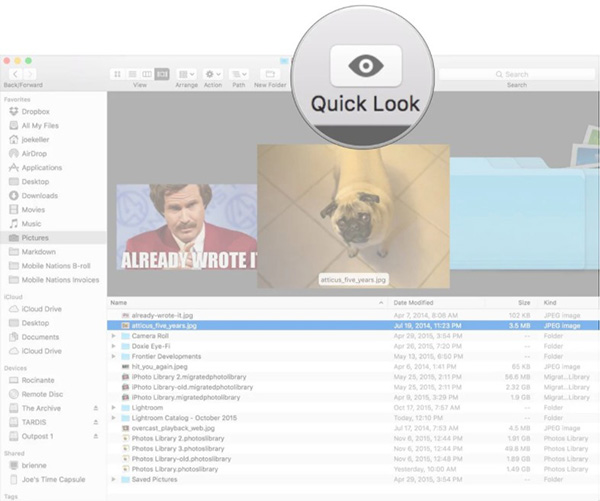
- Quick Look: Nút Quick Look là một công cụ rất hay để xem trước tài liệu hoặc ảnh trong Finder.
- Delete: Xóa một file từ Finder sau khi chọn.
- Connect: Kết nối với server ngoài nếu bạn biết địa chỉ. Bạn có thể lưu một vài server yêu thích và chuyển đổi giữa chúng bằng nút này.
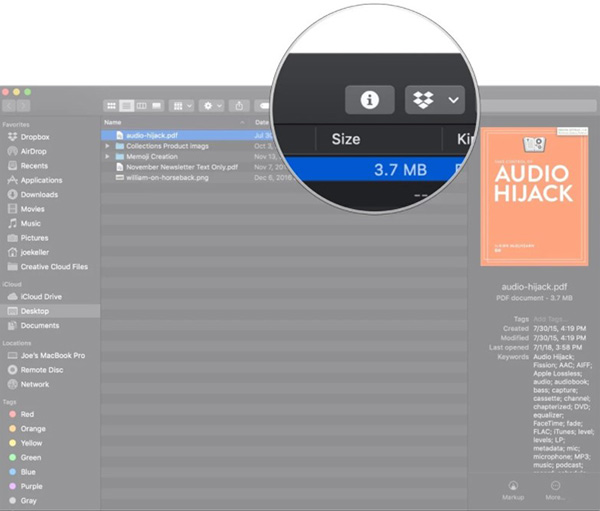
- Get Info: Chọn file trong Finder và ấn nút này để xem các thông tin của file.
5. Bấm Done khi tùy chỉnh xong thanh công cụ phù hợp với sở thích của mình.
Cách sử dụng Quick Look
Sau khi thêm Quick Look vào thanh công cụ Finder, hãy dùng nút này để xem trước các tài liệu, ảnh hoặc các file khác trước khi sử dụng.
1. Mở cửa sổ Finder.
2. Tìm file bạn muốn sử dụng công cụ Quick Look và bấm một lần.
3. Bấm vào nút Quick Look trên thanh công cụ Finder. Hoặc bấm vào phím Space trên bàn phím để thực hiện thao tác tương tự với Quick Look.
Cách sử dụng nút Info
Sau khi thêm nút Info vào thanh công cụ Finder, bạn có thể sử dụng nó để xem các thông tin của file.
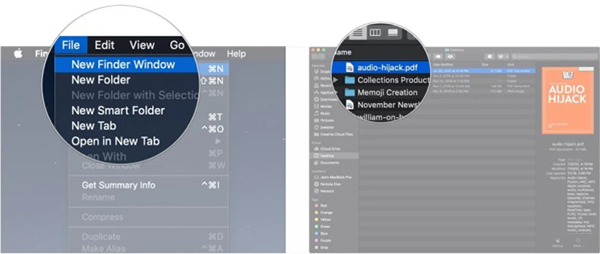
1. Mở cửa sổ Finder mới.
2. Bấm vào file bạn muốn lấy thông tin.
3. Bấm chọn nút Info.
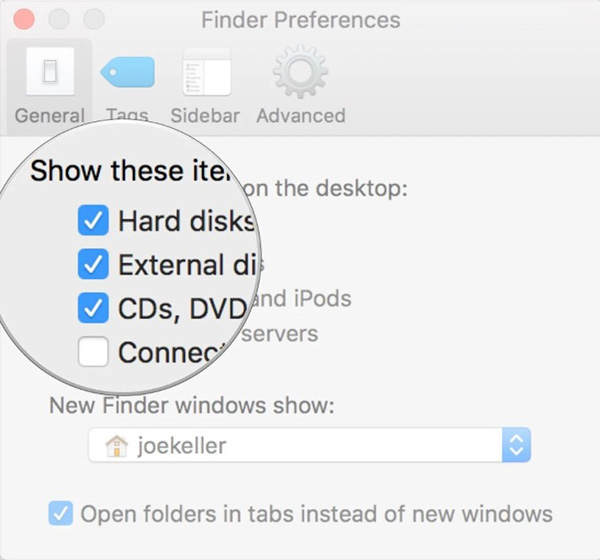
Cách ẩn ổ đĩa cứng, ổ đĩa ngoài, CD và kết nối với các server trên máy tính
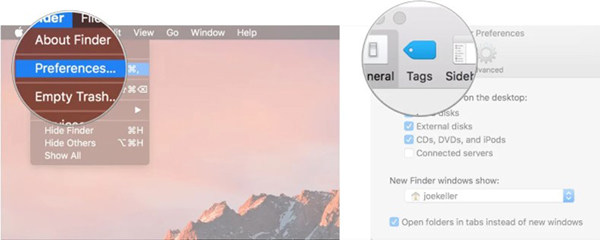
1. Vào Finder, bấm Finder trên thanh menu và chọn Preferences.
2. Bấm General.

3. Tích vào các ô bạn muốn thông tin hiển thị trên màn hình.
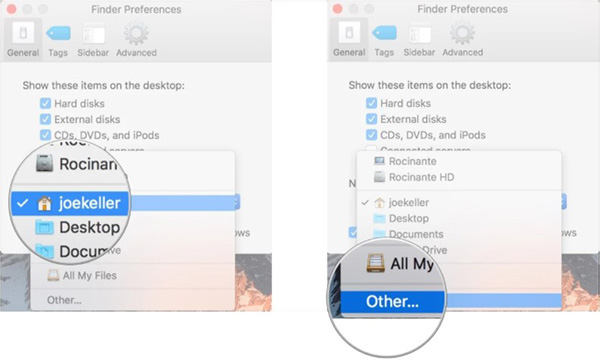
Cài đặt cửa sổ mặc định mới trên Finder
1. Vào Finder, chọn Finder từ thanh menu và bấm Preferences.
2. Chọn General.
3. Trong menu thả xuống, bấm vào thư mục hoặc thiết bị lưu trữ.
4. Nếu mục mà bạn muốn chọn ko có sẵn, bấm Other.
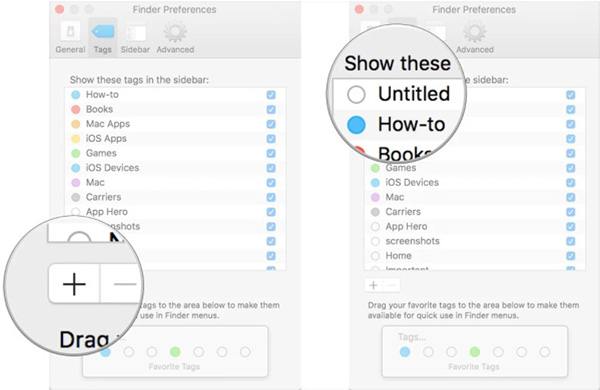
Cách sử dụng Tags
1. Trong Finder, bấm vào Finder trên thanh menu và chọn Preferences.
2. Chọn Tags.
3. Tích vào ô cạnh những thẻ bạn muốn hiển thị trên sidebar của Finder.
4. Kéo thẻ ưa thích xuống cuối tab Tags để có thể truy cập nhanh trong menu Finder.
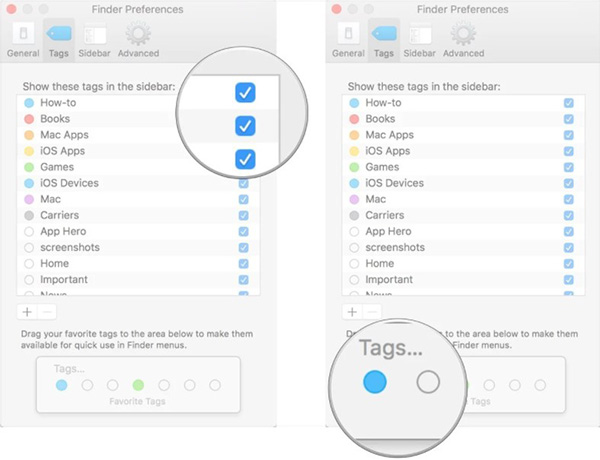
Cách tạo Tags tùy chỉnh
1. Trong Finder, bấm vào Finder trên thanh menu và chọn Preferences.
2. Bấm Tags.
3. Dưới danh sách thẻ, bấm nút dấu “+”.
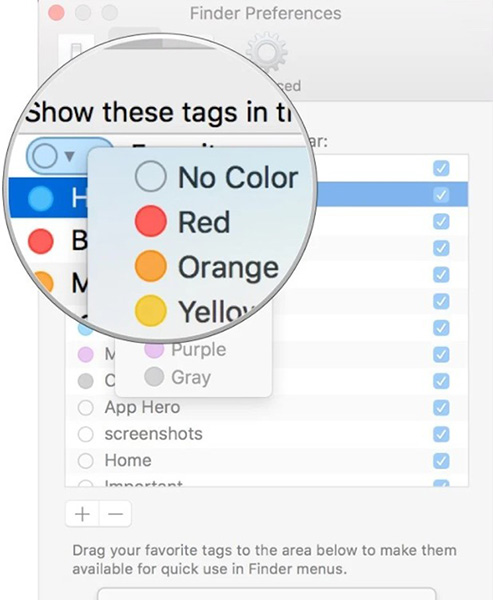
4. Gắn tên cho thẻ.
5. Bấm vào hình tròn cạnh thẻ để đặt màu.
Tùy chỉnh sidebar Finder
1. Trong Finder, chọn Finder từ thanh menu sau đó bấm Preferences.
2. Chọn Sidebar.
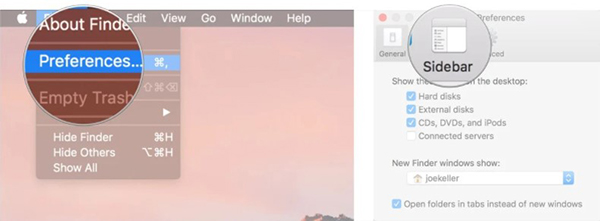
3. Đánh dấu vào những phần bạn muốn thấy trong sidebar của Finder.

Cách sử dụng Stacks trong Finder
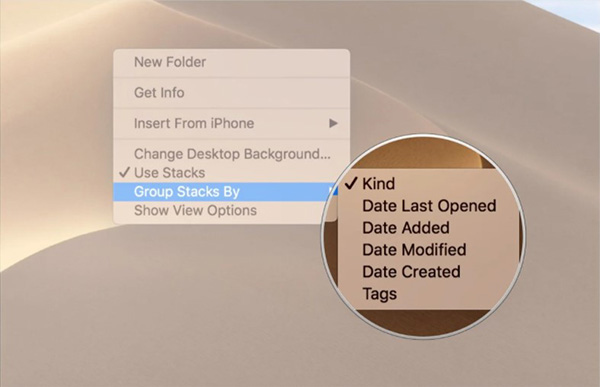
1. Bấm View trên thanh menu khi không có ứng dụng nào đang chạy trên máy.
2. Bấm Use Stacks.
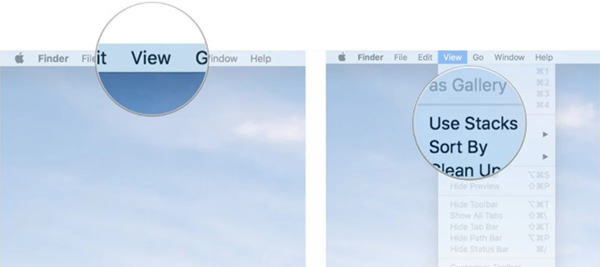
3. Giữ phím Control rồi bấm chuột hoặc bấm bằng hai ngón tay trên máy tính.
4. Di chuột vào phần Group Stacks By. Chọn giữa Kind, Date, Last Opened, Date Added, Date Modified, Date Created và Tags.
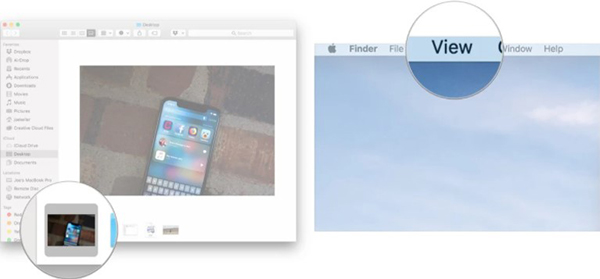
Cách sử dụng Gallery trong Finder
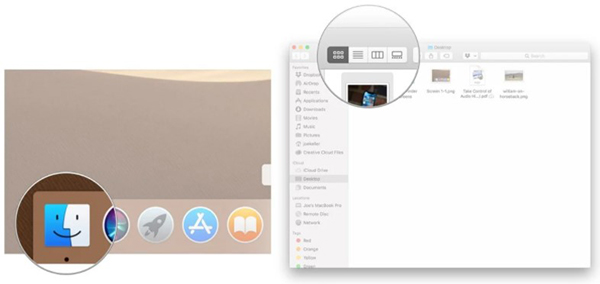
1. Bấm vào biểu tượng Finder trên Dock để mở cửa sổ Finder mới.
2. Vào thư mục hoặc phần bạn muốn xem.
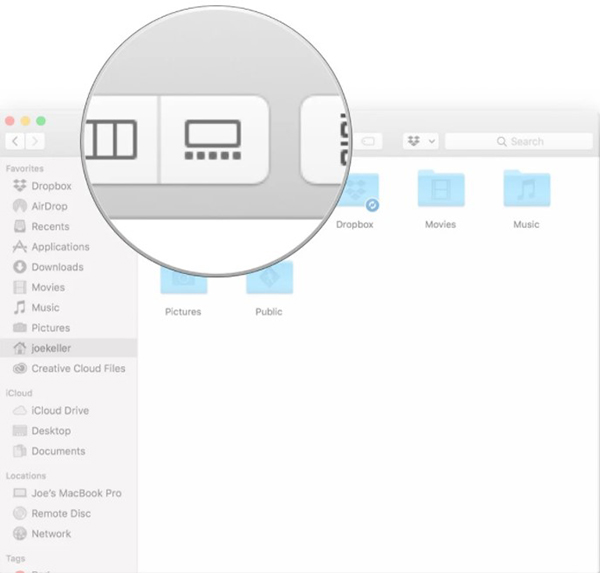
3. Bấm vào nút Gallery View ở phía bên phải trên cửa sổ Finder.
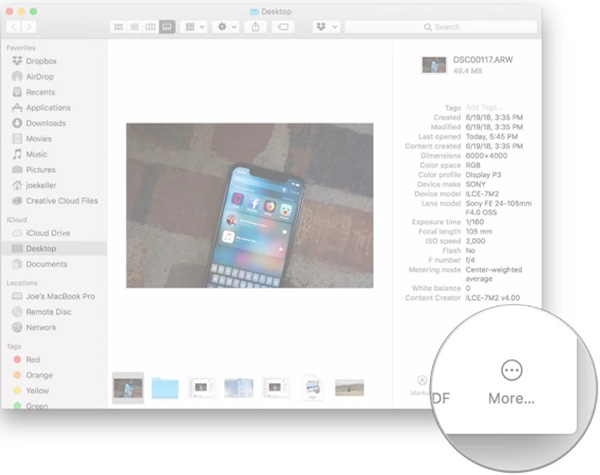
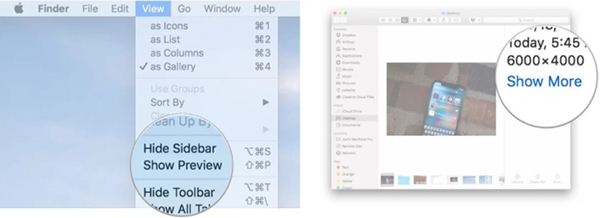
Cách xem file siêu dữ liệu trong Finder
1. Bấm vào biểu tượng Finder trên Dock để mở cửa sổ Finder.
2. Chọn phần kiểu xem.
3. Chọn file có thông tin bạn muốn dùng.
4. Bấm View trên thanh menu.
5. Chọn Show Preview.
6 Bấm Show More trong trang Preview để xem các siêu dữ liệu liên quan.
Cách sử dụng Quick Actions trong Finder
1. Bấm vào biểu tượng Finder trong Dock để mở cửa sổ mới.
2. Chọn kiểu xem.
3. Chọn một hoặc nhiều file muốn thực hiện thao tác nhanh.
4. Bấm vào View trên thanh menu nếu trang View không hiển thị.
5. Chọn Show Preview.
6. Chọn một trong những thao tác có sẵn ở cuối trang để thực hiện trên những file đã chọn.
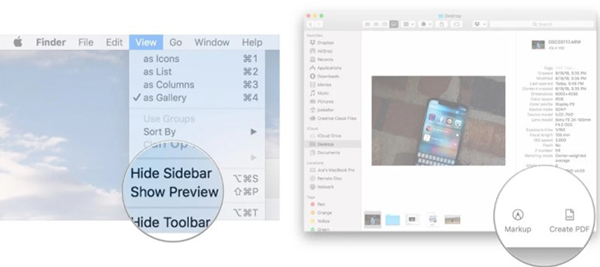
7. Bấm More… để tìm các thao tác khác.