Cách sao lưu máy tính Windows 11 đúng cách
- Thứ sáu - 27/09/2024 23:35
- In ra
- Đóng cửa sổ này
Mặc dù Windows Backup là giải pháp sao lưu tốt cho Windows 11, nhưng nó có những hạn chế. Đó là lý do tại sao bạn nên dựa vào quy trình 3 bước sau để sao lưu đúng cách PC Windows 11 của mình. Sau đây là cách thực hiện với Windows Backup, File History và giải pháp của bên thứ ba.
1. Sử dụng Windows Backup
Windows Backup là tùy chọn sao lưu gốc có sẵn trong Windows 11. Theo mặc định, nó sao lưu tất cả các thư mục trong thư mục "Users", chẳng hạn như Pictures, Documents, Music và Videos, cùng với cài đặt hệ thống, tùy chọn, danh sách ứng dụng và thông tin đăng nhập đã lưu vào OneDrive.
Để cấu hình Windows Backup, hãy làm theo các bước sau:
- Vào menu Start > Settings > Accounts. Sau đó, cuộn xuống bên phải và nhấp vào Windows backup. Đảm bảo bạn đã đăng nhập vào tài khoản OneDrive của mình.
- Nhấp vào Manage sync settings bên cạnh OneDrive folder syncing. Sau đó, chọn các thư mục để sao lưu. Lưu ý rằng thao tác này cũng cập nhật tùy chọn sao lưu OneDrive của bạn.
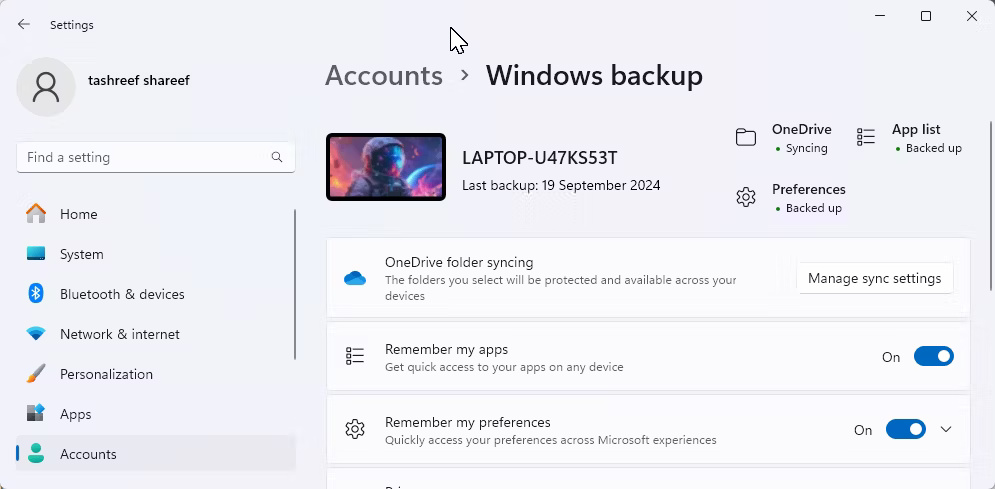
- Để sao lưu danh sách ứng dụng của bạn, hãy bật Remember my apps. Sau đó, bật công tắc Remember my preferences để sao lưu tùy chọn hệ thống. Bạn có thể mở rộng tùy chọn này để chọn các tùy chọn cụ thể mà bạn không muốn sao lưu.
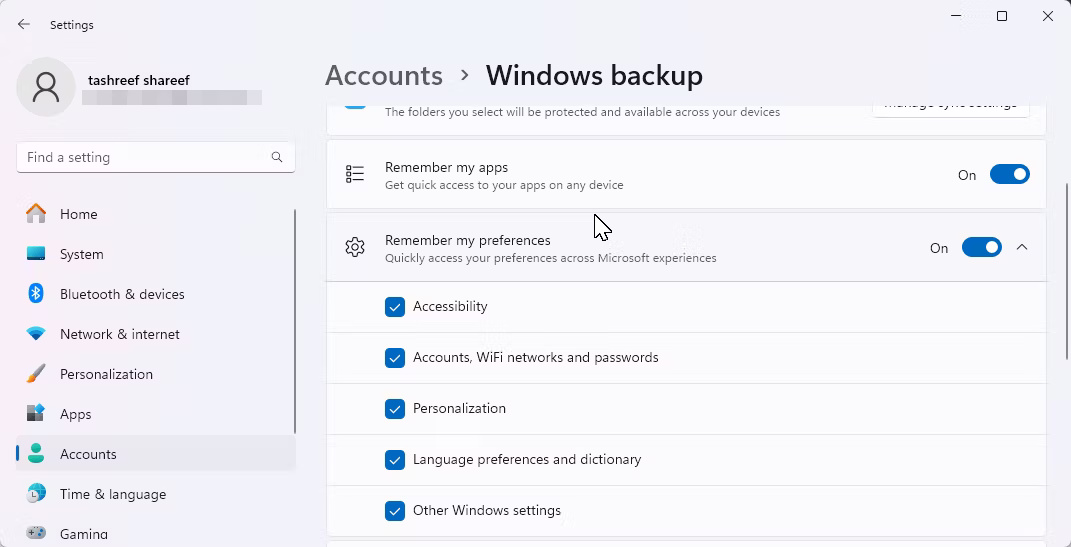
Cài đặt sao lưu Windows trong Windows 11
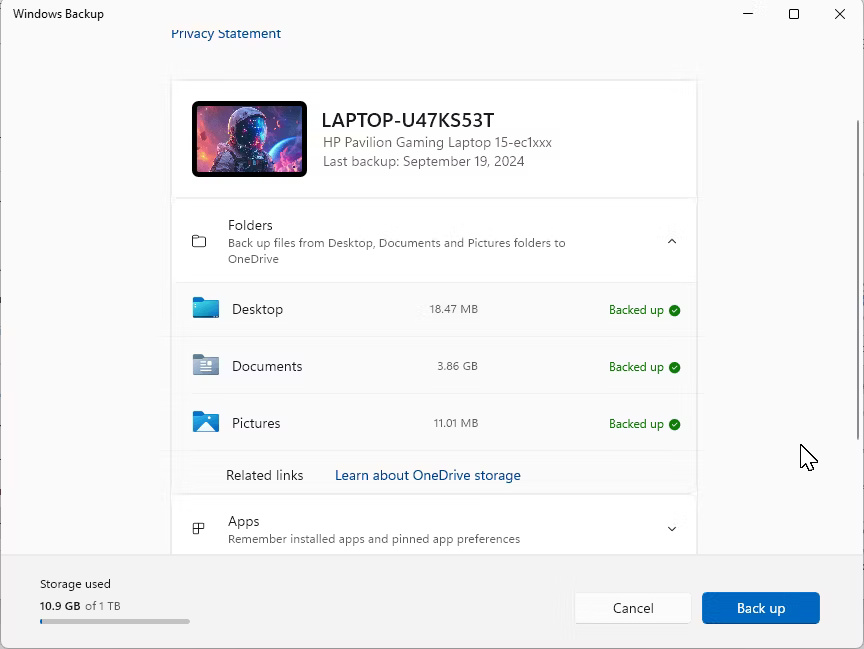
- Với cài đặt sao lưu Windows đã được cấu hình, hãy nhấp vào biểu tượng menu Start, nhập Windows Backup và mở từ kết quả tìm kiếm. Nếu được nhắc, hãy đăng nhập bằng tài khoản Microsoft của bạn. Nhấp vào Back up để bắt đầu quá trình sao lưu.
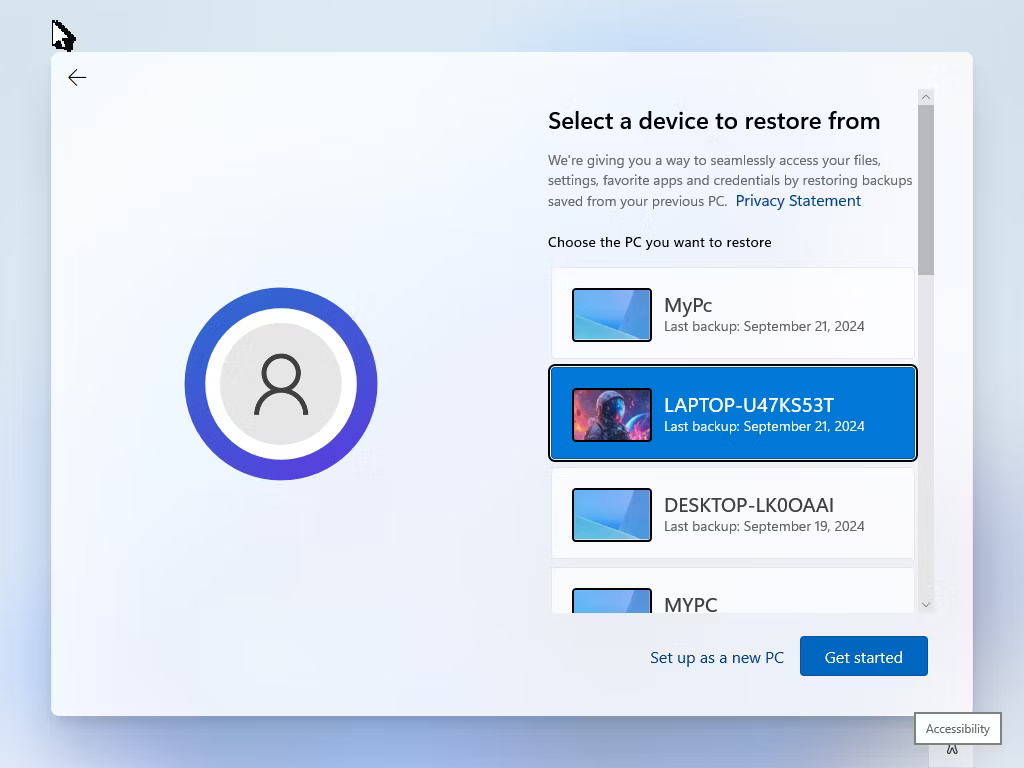
Sau khi hoàn tất, bạn có thể khôi phục bản sao lưu sau khi reset hoặc cài đặt sạch Windows. Trong trình hướng dẫn thiết lập Windows, hãy đăng nhập bằng Tài khoản Microsoft của bạn. Trên màn hình Restore from your PC backup, hãy chọn bản sao lưu PC mà bạn muốn khôi phục, sau đó nhấp vào Restore from this PC.
2. Sao lưu file vào thiết bị lưu trữ ngoài bằng File History
File History là một thành phần quan trọng khác trong chiến lược sao lưu của bạn. Khi được bật, nó sẽ phát hiện mọi thay đổi được thực hiện đối với các file trong thư mục người dùng và sao lưu chúng thường xuyên tùy ý. Theo cách này, bạn có thể khôi phục các phiên bản cũ của các file đã thay đổi nếu cần.
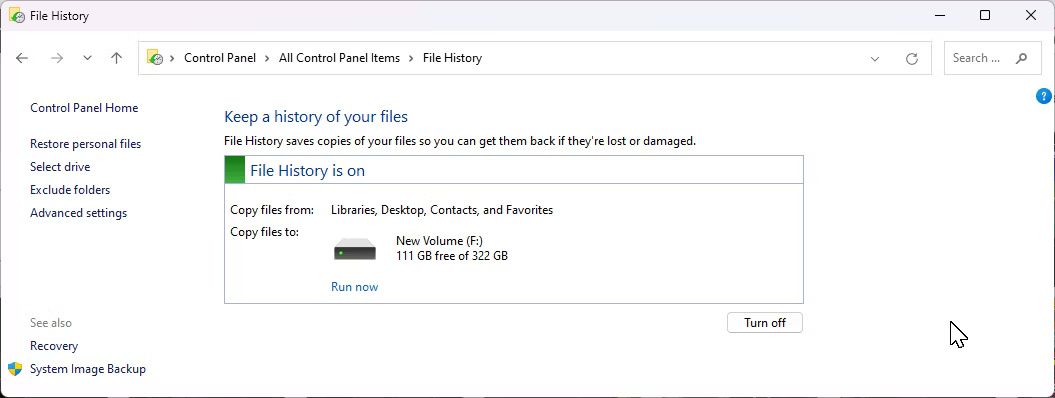
Vì không được cấu hình theo mặc định, bạn sẽ cần bật và thiết lập File History thông qua Control Panel trong Windows 11. Bạn có thể tùy chỉnh tần suất sao lưu - từ vài phút đến 24 giờ một lần - và quyết định thời điểm xóa các bản sao lưu cũ hơn để quản lý lưu trữ hiệu quả.
3. Tạo bản sao lưu image toàn hệ thống
Bản sao lưu image sẽ sao lưu toàn bộ ổ đĩa của bạn vào ổ cứng ngoài. Trong trường hợp hiếm hoi khi ổ cứng trong của bạn bị lỗi, bạn có thể sử dụng ổ khôi phục để khôi phục tất cả dữ liệu, bao gồm cả cài đặt Windows, từ bản sao lưu image.
Hãy sử dụng Macrium Reflect để tạo bản sao lưu image. Đây là ứng dụng cao cấp cung cấp bản dùng thử miễn phí 30 ngày. Sau khi thời gian dùng thử kết thúc, ứng dụng sẽ chuyển sang chế độ Restore Only, cho phép bạn khôi phục bất kỳ bản sao lưu nào đã tạo trước đó. Tuy nhiên, bạn sẽ không thể tạo bản sao lưu mới nếu không có giấy phép.
Để bắt đầu, hãy truy cập trang chủ Macrium Reflect, nhấp vào Free Trial, sau đó chọn 64 bit. Bạn có thể cần đăng ký và xác minh tài khoản của mình trước khi có thể tải xuống trình cài đặt. Chạy trình cài đặt và làm theo hướng dẫn trên màn hình để hoàn tất quá trình cài đặt.
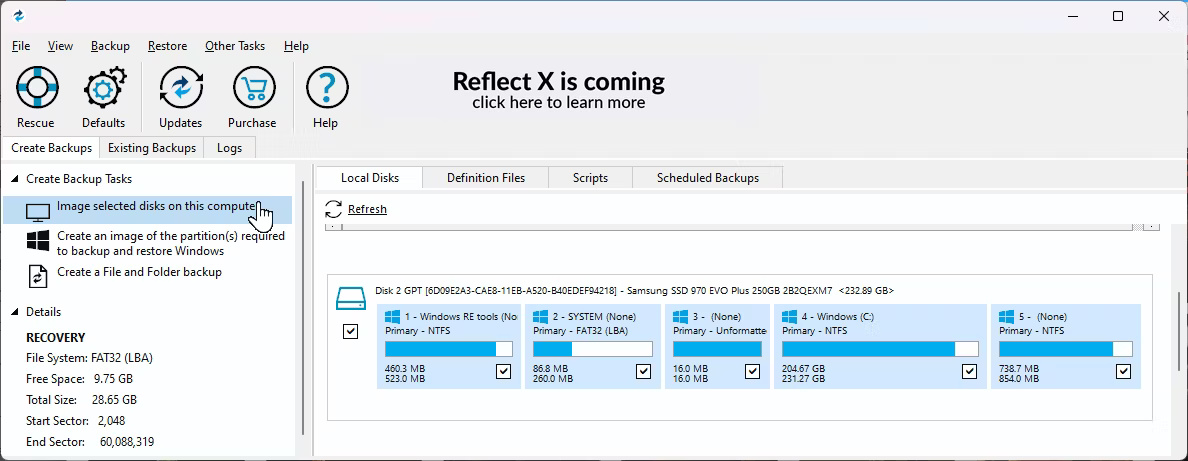
Để tạo bản sao lưu image, hãy kết nối thiết bị lưu trữ ngoài với máy tính của bạn. Khởi chạy Macrium Reflect và chọn tất cả các ổ bạn muốn sao lưu. Sau đó, nhấp vào tùy chọn Image selected disks on this computer ở bên trái.
Trong phần Destination, nhấp vào biểu tượng Folder và chọn ổ sao lưu của bạn. Đảm bảo rằng ổ lưu trữ chính xác được chọn. Bạn có tùy chọn đặt tên cho bản sao lưu của mình.

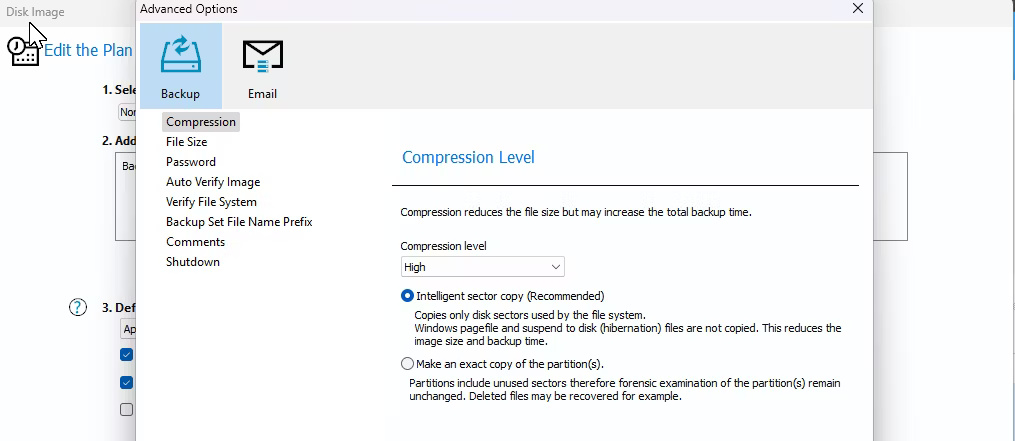
Nhấp vào Advanced Options để tùy chỉnh tùy chọn sao lưu của bạn. Đi tới tab Compression trong thanh bên, nhấp vào danh sách drop-down Compression level và chọn High để giảm kích thước file sao lưu. Bạn thậm chí có thể đặt mật khẩu cho bản sao lưu của mình từ tab Password.
Nhấp vào Auto Verify Image ở thanh bên trái, sau đó chọn Verify image backup file directly after creation để xác minh tính toàn vẹn của image sau khi tạo. Trong tab Shutdown, bạn có thể chọn tắt máy tính sau khi sao lưu hoàn tất. Nhấp vào OK để lưu các thay đổi, sau đó nhấp vào Next.
Macrium Reflect hỗ trợ các kế hoạch sao lưu (Incremental, Differential hoặc Full), cho phép bạn cấu hình các bản sao lưu tự động. Tuy nhiên, đây là tùy chọn. Nếu bạn muốn sao lưu thủ công, hãy chọn None.
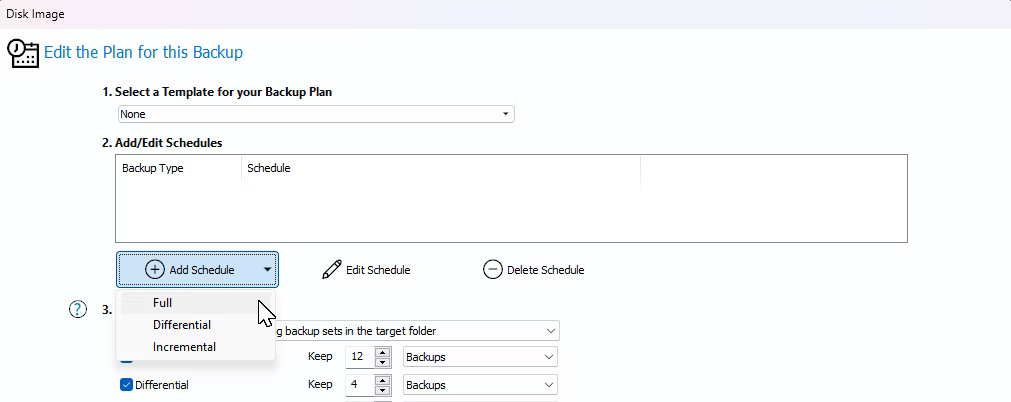
Tốt nhát nên tạo bản sao lưu đầy đủ một lần mỗi tháng và nếu muốn làm như vậy, bạn cần tạo một lịch trình. Trong mục Add/Edit Schedules, nhấp vào Add Schedule, sau đó chọn Full.
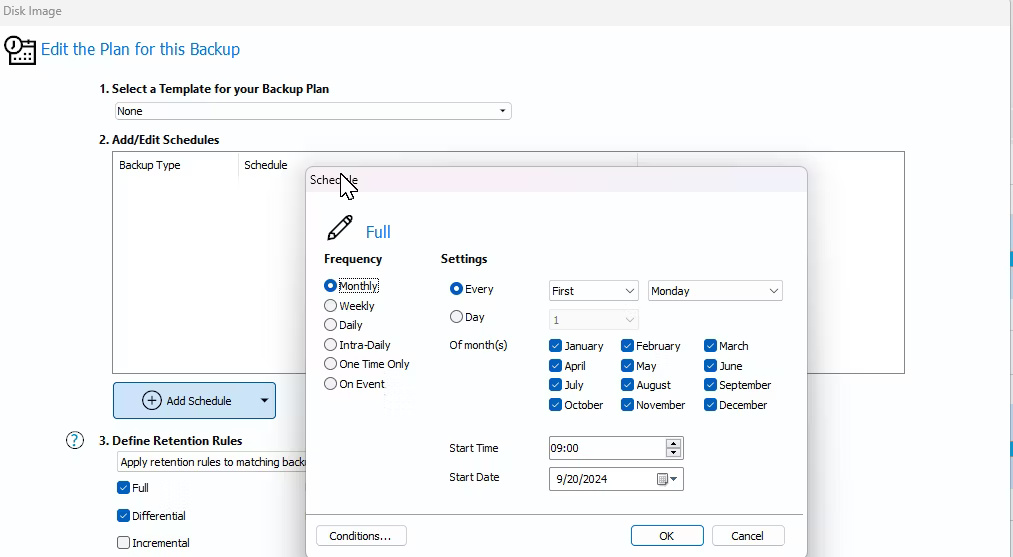
Đặt Frequency thành Monthly, sau đó để các tùy chọn khác theo mặc định. Bạn có thể thực hiện các thay đổi nhỏ tại đây tùy theo ý muốn. Khi hoàn tất, hãy nhấp vào OK.
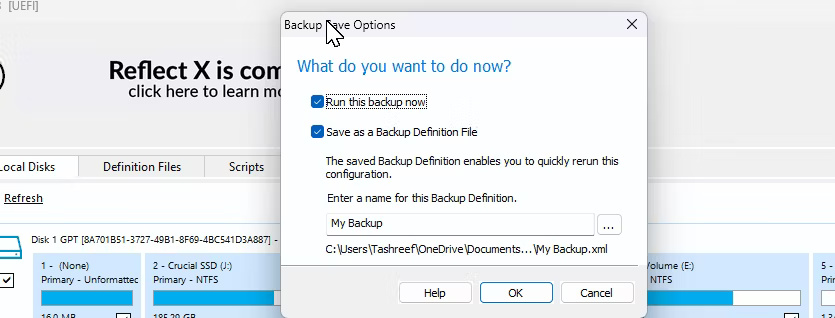
Lý tưởng nhất là bạn nên giữ ít nhất 3 bản sao lưu đầy đủ. Tuy nhiên, điều này có thể thay đổi tùy thuộc vào tần suất bạn thực hiện các thay đổi trên máy tính của mình. Nhấp vào Next, xem lại tóm tắt về kế hoạch sao lưu của bạn, sau đó nhấp vào Finish. Nhập tên cho định nghĩa sao lưu, sau đó nhấp vào OK.
Tùy thuộc vào loại lưu trữ và kích thước bản sao lưu, quá trình này có thể mất một thời gian để hoàn tất. Khi cần thực hiện khôi phục, bạn sẽ cần một phương tiện cứu hộ để khởi động vào Macrium Reflect Recovery Environment rồi khôi phục từ disk image đã sao lưu.
Việc dựa vào một nguồn sao lưu duy nhất có thể rất rủi ro. Chiến lược lý tưởng bao gồm công cụ Windows Backup tích hợp, tính năng File History và sao lưu image đầy đủ bằng Macrium Reflect. Có nhiều bản sao lưu ở nhiều nơi có thể là cứu cánh trong hầu hết các trường hợp.
