Cách kích hoạt Virtualization (VT) trên Windows 10 cho BlueStacks 5
- Thứ năm - 19/06/2025 00:56
- In ra
- Đóng cửa sổ này
Tại sao nên kích hoạt Ảo hóa (Virtualization)?
Bằng cách bật Virtualization, bạn sẽ nhận được những lợi ích sau đây giúp cải thiện đáng kể trải nghiệm tổng thể của bạn trên BlueStacks 5:
- Tăng gấp 5 lần hiệu suất
- Cho phép BlueStacks 5 sử dụng nhiều hơn 1 lõi CPU
- Loại bỏ tình trạng giật/lag FPS trong nhiều game khác nhau.
- Game có thể được chơi ở cài đặt đồ họa cao nhất
Làm cách nào để kích hoạt Virtualization?
Để bật Virtualization, trước tiên bạn phải vào BIOS và kích hoạt Virtualization từ trong cài đặt BIOS. Các bước dưới đây sẽ hướng dẫn bạn cách bạn thực hiện việc này.
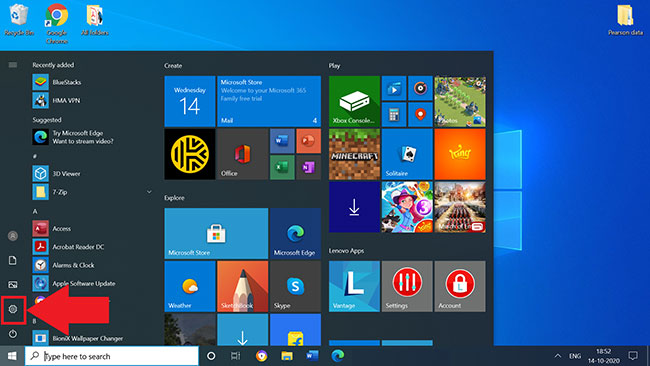
1. Nhấp vào menu Start và mở Windows Settings bằng cách nhấp vào biểu tượng bánh răng, như hình dưới đây.
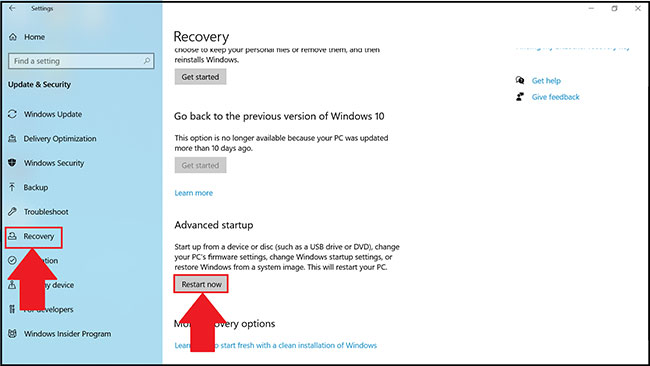
2. Nhấp vào Update & Security.

3. Trong tab Recovery, nhấp vào Restart now.
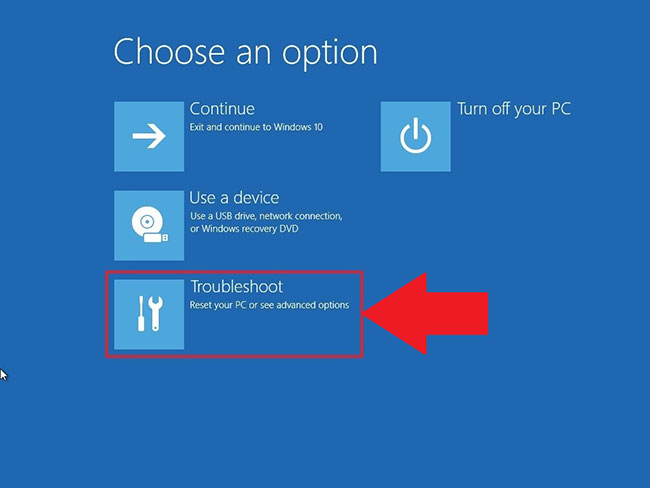
4. Bây giờ, bạn sẽ có 4 tùy chọn để lựa chọn. Nhấp vào Troubleshoot.
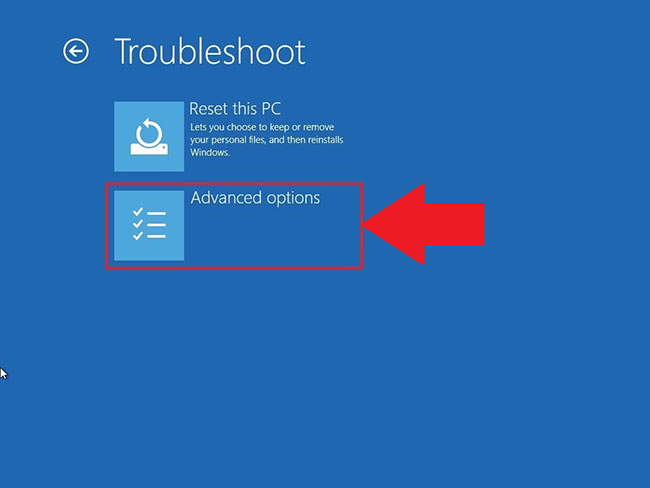
5. Tiếp theo, nhấp vào Advanced Options.
6. Trong Advanced options, hãy chọn UEFI Firmware Settings, như được hiển thị bên dưới.
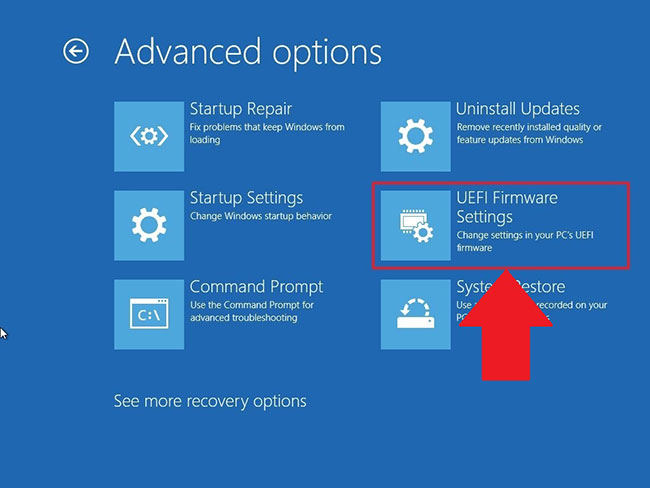
LƯU Ý: Nếu bạn không thấy UEFI Firmware Settings, hãy tắt Fast Startup hoặc tham khảo phương pháp thay thế này để truy cập BIOS.
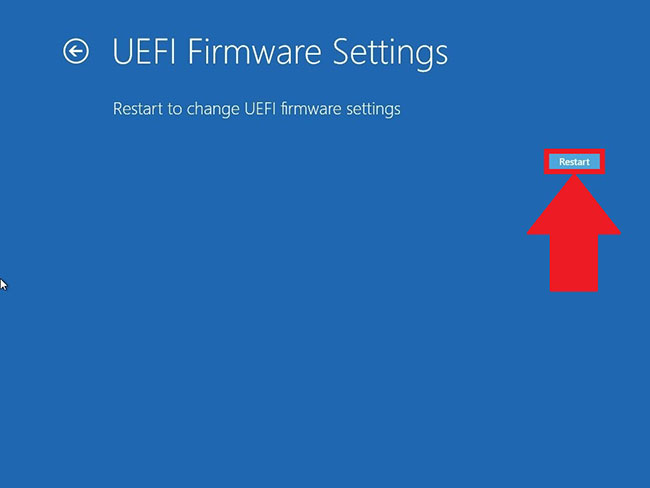
7. Bây giờ bạn sẽ được nhắc khởi động lại máy tính của mình. Nhấp vào Restart Now.
8. Khi bạn đã vào cài đặt BIOS trong PC, các bước để bật ảo hóa sẽ khác nhau tùy theo CPU bạn có. Dựa trên CPU bạn có trong PC, hãy làm theo một trong 2 phần bên dưới bên dưới.
Bật ảo hóa trong BIOS cho CPU Intel
LƯU Ý: Bố cục của BIOS Settings cũng có thể thay đổi tùy theo nhiều yếu tố khác nhau như bo mạch chủ, chipset, model máy tính và OEM của bạn.
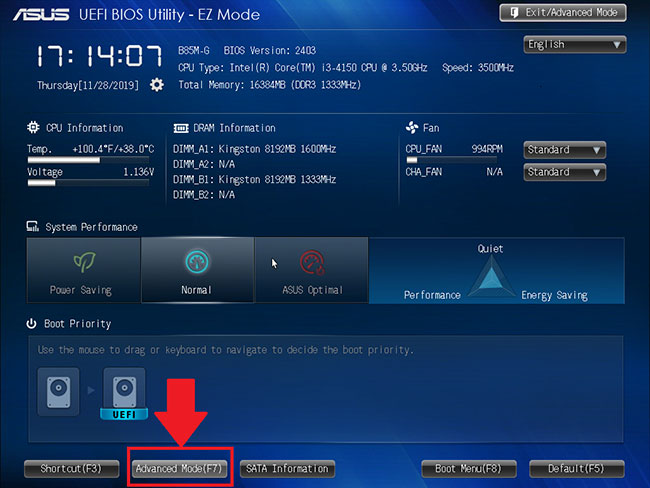
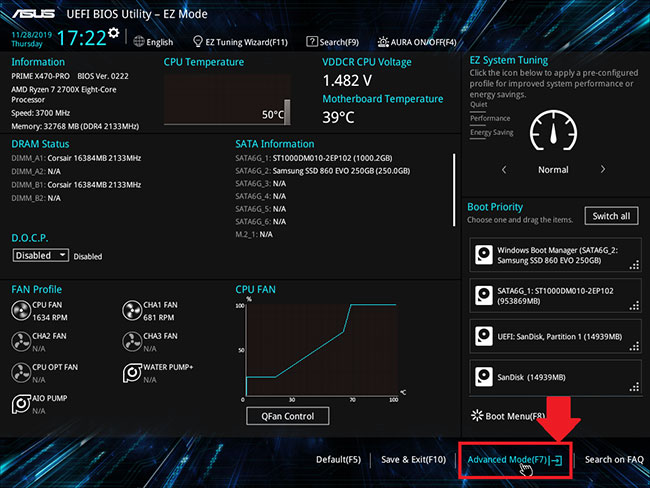
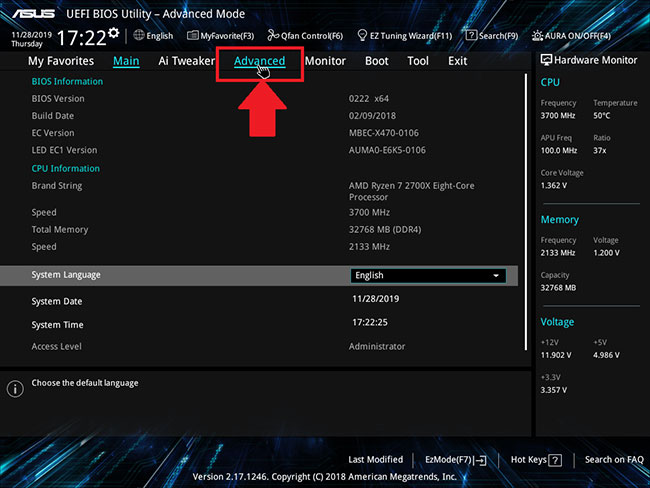
1. Sau khi vào cài đặt BIOS, nhấn phím F7 hoặc nhấp vào nút Advanced Mode, như hình dưới đây.
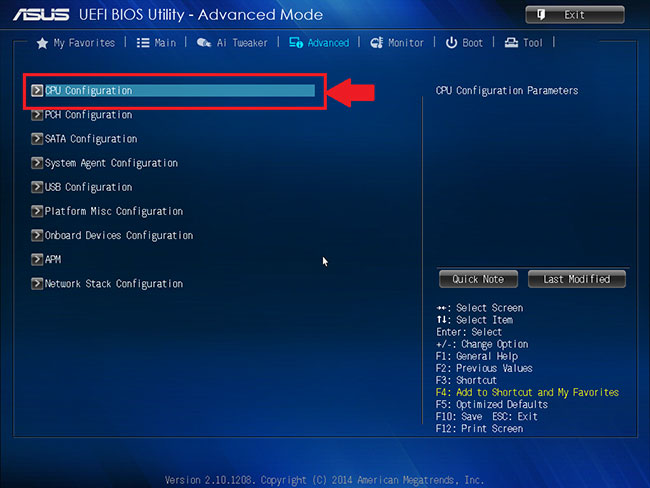
2. Bây giờ, hãy mở tab Advanced, như hình dưới đây.
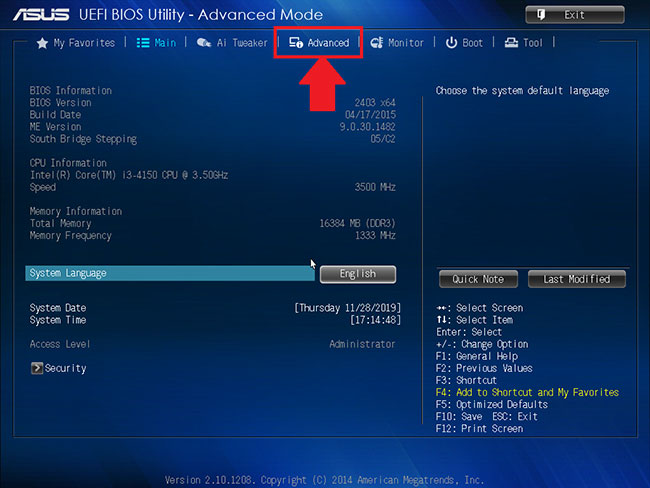
3. Tại đây, bạn sẽ được cung cấp các tùy chọn khác nhau. Chọn CPU Configuration.
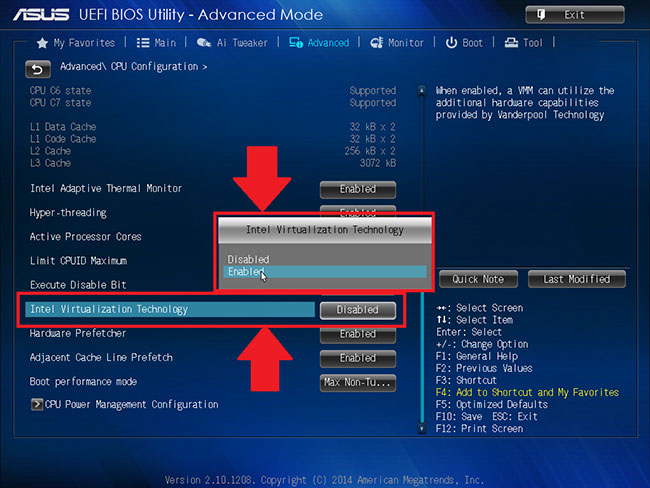
4. Để bật Virtualization, hãy nhấp vào Disabled bên cạnh Intel Virtualization Technology và thay đổi thành Enabled.
5. Cuối cùng, nhấp vào Exit và chọn Save changes & reset.
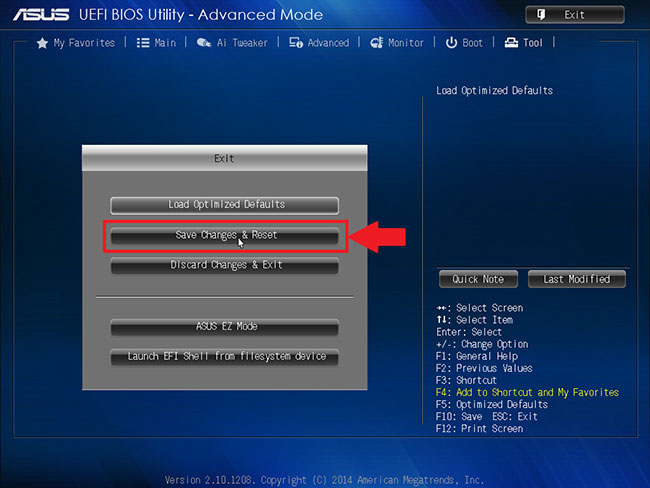
LƯU Ý: Tên các tùy chọn có thể khác nhau tùy thuộc vào model PC của bạn, nhưng trong mọi trường hợp, hãy nhớ lưu trước khi thoát.
Bật ảo hóa trong BIOS cho CPU AMD
LƯU Ý: Bố cục của BIOS Settings cũng có thể thay đổi tùy theo nhiều yếu tố khác nhau như bo mạch chủ, chipset, model máy tính và OEM của bạn.
1. Trong cài đặt BIOS, nhấn phím F7 hoặc nhấp vào tùy chọn Advanced Mode, như được hiển thị bên dưới.
2. Bây giờ, điều hướng đến tab Advanced.
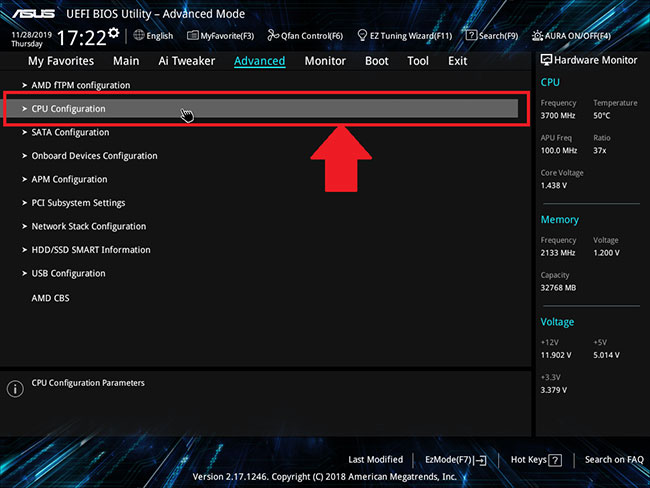
3. Tìm và chọn CPU configuration.
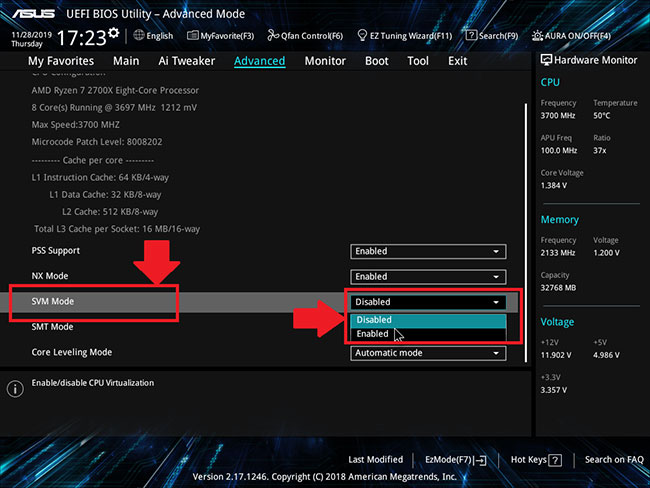
4. Để bật Virtualization, hãy mở menu drop-down bên cạnh SVM Mode và chọn Enabled.
5. Tiếp theo, nhấp vào Exit.
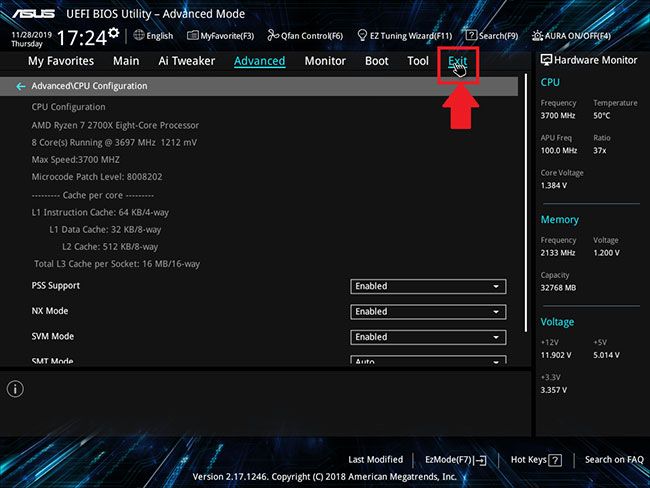
6. Bây giờ bạn sẽ được yêu cầu lưu các thay đổi của mình.
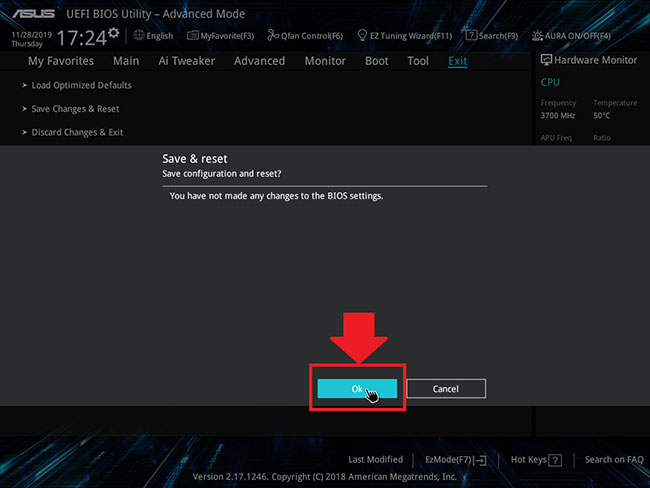
Nhấp vào OK để áp dụng các thay đổi bạn đã thực hiện cho cài đặt BIOS.
