Cách gỡ ứng dụng đã cài từ Store trên Windows 10
- Thứ năm - 24/06/2021 00:52
- In ra
- Đóng cửa sổ này
Windows 10 giới thiệu một thế hệ ứng dụng được xây dựng trên công nghệ mới. Các ứng dụng này được gọi là ứng dụng Windows Store và bài viết này sẽ chỉ cho bạn các cách gỡ cài đặt khác nhau.
1. Sử dụng menu Start
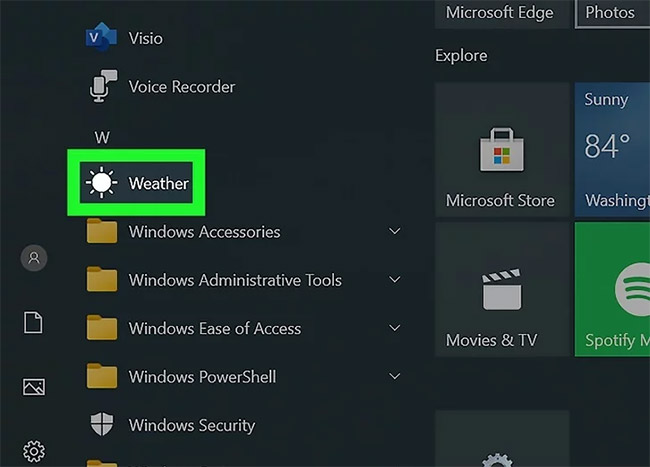
Bước 1: Khởi chạy menu Start. Nhấp vào nút Start, nằm ở dưới cùng bên trái. Bạn cũng có thể nhấn phím Windows trên bàn phím.
Bước 2: Xác định vị trí và nhấp chuột phải vào ứng dụng bạn muốn gỡ cài đặt. Nhấp chuột phải vào tile hoặc ứng dụng trong danh sách All apps. Một menu ngữ cảnh sẽ xuất hiện.
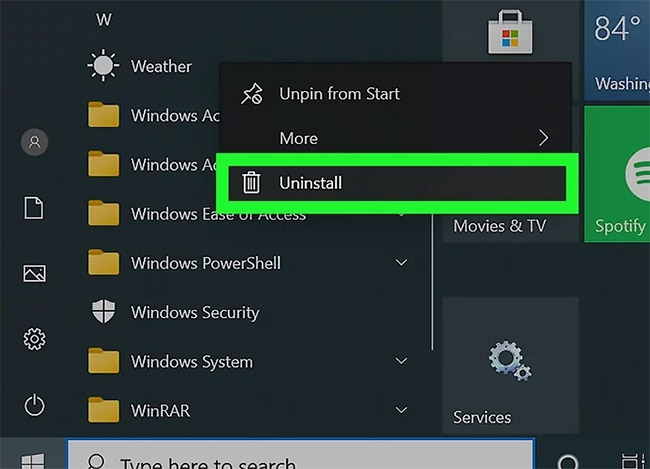
Bước 3: Gỡ cài đặt ứng dụng. Nhấp vào Uninstall từ menu ngữ cảnh xuất hiện.
Bước 4: Xác nhận việc gỡ cài đặt ứng dụng. Một hộp thoại xác nhận nhỏ sẽ xuất hiện. Nhấp vào Uninstall để xác nhận rằng bạn thực sự muốn gỡ cài đặt ứng dụng. Nếu bạn thay đổi quyết định của mình, chỉ cần nhấp ra ngoài.
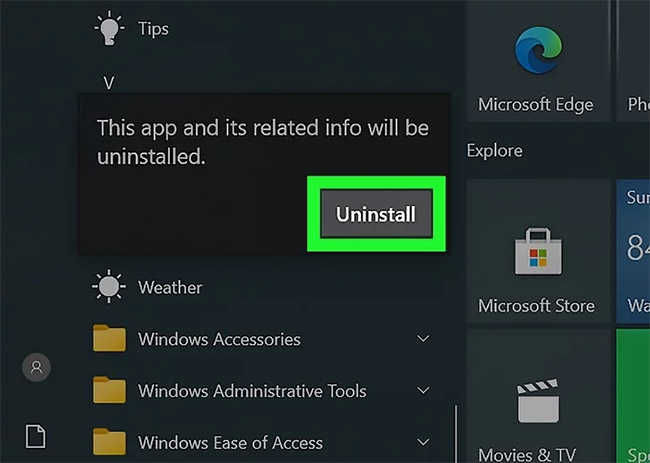
Sau khi thực hiện việc này, ứng dụng sẽ biến mất khỏi danh sách và được gỡ cài đặt. Quá trình này có thể mất đến 30 giây.
2. Sử dụng tính năng Search
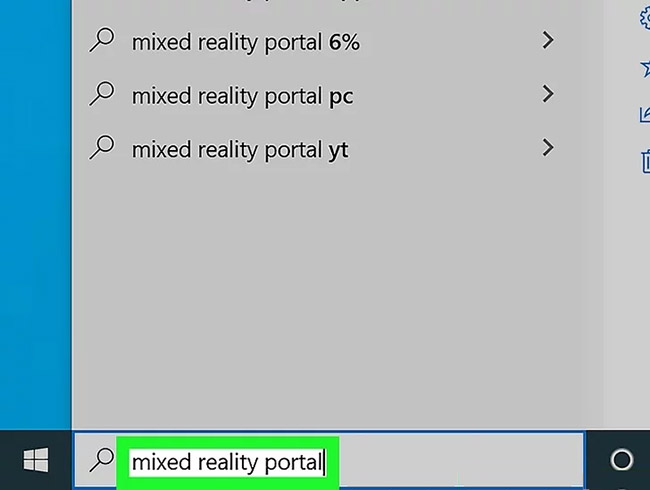
Bước 1: Khởi chạy tính năng Search (tìm kiếm). Nhấp vào biểu tượng/thanh tìm kiếm trên Taskbar. Nó có thể xuất hiện dưới dạng biểu tượng Cortana hình tròn.
Bước 2: Tìm kiếm ứng dụng bạn muốn gỡ cài đặt. Nhập tên của nó vào.
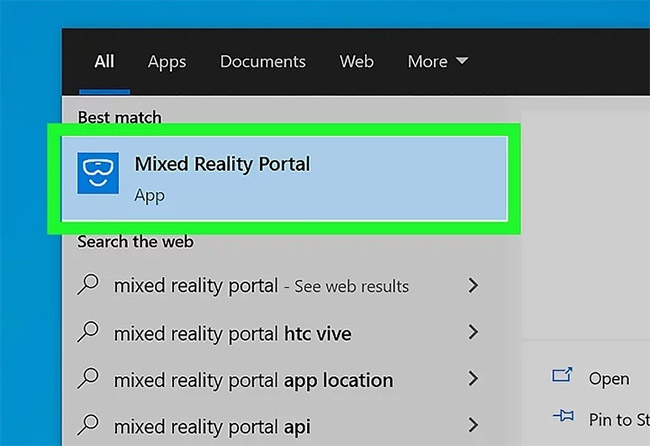
Bước 3: Nhấp chuột phải vào ứng dụng từ kết quả. Thao tác này sẽ nhắc một menu ngữ cảnh xuất hiện.
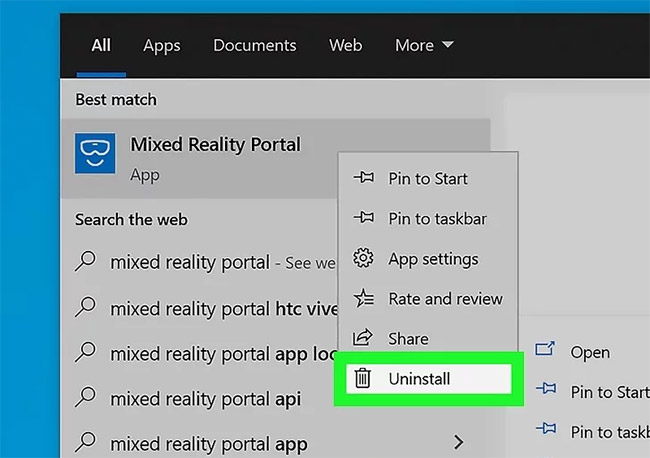
Bước 4: Gỡ cài đặt ứng dụng. Nhấp vào Uninstall từ menu ngữ cảnh xuất hiện.
Bước 5: Xác nhận việc gỡ cài đặt ứng dụng. Một hộp thoại xác nhận nhỏ sẽ xuất hiện. Nhấp vào Uninstall để xác nhận rằng bạn thực sự muốn gỡ cài đặt ứng dụng. Nếu bạn thay đổi quyết định, chỉ cần nhấp ra ngoài.
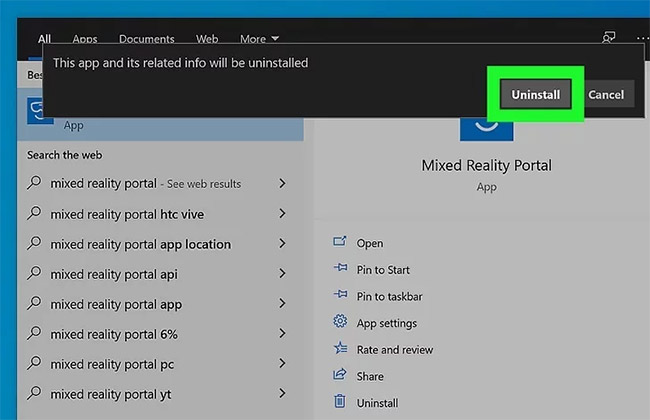
Sau khi thực hiện việc này, ứng dụng sẽ biến mất khỏi danh sách và được gỡ cài đặt. Quá trình này có thể mất đến 30 giây.
3. Sử dụng ứng dụng Settings
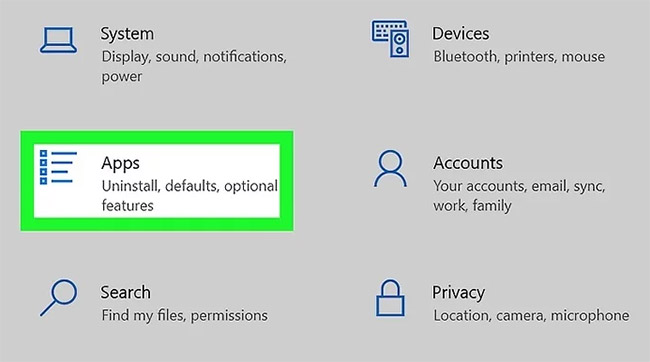
Bước 1: Mở ứng dụng Settings. Nhấp vào nút Start và chọn bánh răng cài đặt.
Bước 2: Chuyển đến danh mục Apps. Nếu bạn không có tùy chọn này (có thể do bạn đang chạy phiên bản Windows 10 cũ), hãy nhấp vào System thay thế.
Bước 3: Tìm ứng dụng bạn muốn gỡ cài đặt. Sử dụng thanh tìm kiếm để tìm một ứng dụng cụ thể nếu bạn muốn.
- Bạn có thể thay đổi thứ tự của danh sách bằng cách chọn một thứ tự sắp xếp khác.
- Bạn cũng có thể sử dụng thanh tìm kiếm phía trên danh sách ứng dụng để tìm ứng dụng.

Bước 4: Nhấp vào danh sách ứng dụng.

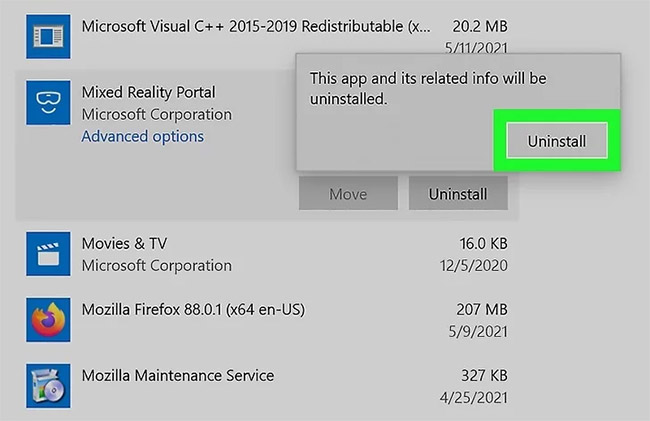
Bước 5: Gỡ cài đặt ứng dụng. Nhấp vào Uninstall.
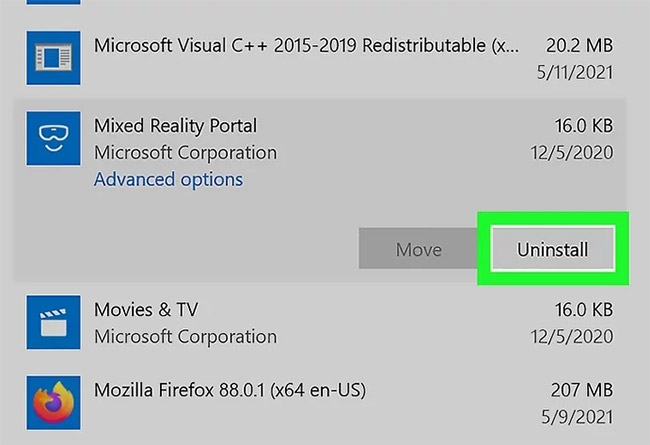
Bước 6: Xác nhận việc gỡ cài đặt ứng dụng. Một hộp thoại xác nhận nhỏ sẽ xuất hiện. Nhấp vào Uninstall để xác nhận rằng bạn thực sự muốn gỡ cài đặt ứng dụng. Nếu bạn thay đổi quyết định, chỉ cần nhấp ra ngoài.
Sau khi thực hiện việc này, ứng dụng sẽ biến mất khỏi danh sách và được gỡ cài đặt. Quá trình này có thể mất đến 30 giây.
Chúc bạn thực hiện thành công!
