<!DOCTYPE html>
    <html lang="vi" xmlns="http://www.w3.org/1999/xhtml" prefix="og: http://ogp.me/ns#">
    <head>
<title>Cách gỡ cài đặt Adobe Creative Cloud trên Windows đúng cách</title>
<meta name="description" content="Cách gỡ cài đặt Adobe Creative Cloud trên Windows đúng cách - Savefile - Tin Tức -...">
<meta name="author" content=".: Nguoicodonvn2008.info - Cõi lòng người cô đơn :.">
<meta name="copyright" content=".: Nguoicodonvn2008.info - Cõi lòng người cô đơn :. [admin@nguoicodonvn2008.info]">
<meta name="robots" content="index, archive, follow, noodp">
<meta name="googlebot" content="index,archive,follow,noodp">
<meta name="msnbot" content="all,index,follow">
<meta name="generator" content="NukeViet v4.5">
<meta http-equiv="Content-Type" content="text/html; charset=utf-8">
<meta property="og:title" content="Cách gỡ cài đặt Adobe Creative Cloud trên Windows đúng cách">
<meta property="og:type" content="website">
<meta property="og:description" content="Savefile - Tin Tức - https&#x3A;&#x002F;&#x002F;www.nguoicodonvn2008.info&#x002F;vi&#x002F;news&#x002F;savefile&#x002F;kien-thuc-may-tinh&#x002F;cach-go-cai-dat-adobe-creative-cloud-tren-windows-dung-cach-8972.html">
<meta property="og:site_name" content=".&#x3A; Nguoicodonvn2008.info - Cõi lòng người cô đơn &#x3A;.">
<meta property="og:url" content="https://www.nguoicodonvn2008.info/vi/news/savefile/kien-thuc-may-tinh/cach-go-cai-dat-adobe-creative-cloud-tren-windows-dung-cach-8972.html">
<link rel="shortcut icon" href="https://nguoicodonvn2008.info/favicon.ico">
<link rel="canonical" href="https://www.nguoicodonvn2008.info/vi/news/savefile/kien-thuc-may-tinh/cach-go-cai-dat-adobe-creative-cloud-tren-windows-dung-cach-8972.html">
<link rel="alternate" href="https://nguoicodonvn2008.info/vi/news/rss/" title="Tin Tức" type="application/rss+xml">
<link rel="alternate" href="https://nguoicodonvn2008.info/vi/news/rss/karaoke-dual/" title="Tin Tức - Karaoke Dual" type="application/rss+xml">
<link rel="alternate" href="https://nguoicodonvn2008.info/vi/news/rss/nhac-tre/" title="Tin Tức - Nhạc trẻ" type="application/rss+xml">
<link rel="alternate" href="https://nguoicodonvn2008.info/vi/news/rss/tru-tinh/" title="Tin Tức - Trữ tình" type="application/rss+xml">
<link rel="alternate" href="https://nguoicodonvn2008.info/vi/news/rss/nuoc-ngoai/" title="Tin Tức - Nước ngoài" type="application/rss+xml">
<link rel="alternate" href="https://nguoicodonvn2008.info/vi/news/rss/remix/" title="Tin Tức - Remix" type="application/rss+xml">
<link rel="alternate" href="https://nguoicodonvn2008.info/vi/news/rss/tam-su-tinh-yeu/" title="Tin Tức - Tâm sự tình yêu" type="application/rss+xml">
<link rel="alternate" href="https://nguoicodonvn2008.info/vi/news/rss/tho-suu-tam/" title="Tin Tức - Thơ sưu tầm" type="application/rss+xml">
<link rel="alternate" href="https://nguoicodonvn2008.info/vi/news/rss/cuoc-song/" title="Tin Tức - Cuộc sống" type="application/rss+xml">
<link rel="alternate" href="https://nguoicodonvn2008.info/vi/news/rss/phan-mem/" title="Tin Tức - Phần mềm" type="application/rss+xml">
<link rel="alternate" href="https://nguoicodonvn2008.info/vi/news/rss/kien-thuc-may-tinh/" title="Tin Tức - Kiến thức máy tính" type="application/rss+xml">
<link rel="alternate" href="https://nguoicodonvn2008.info/vi/news/rss/hoc-tap/" title="Tin Tức - Học tập" type="application/rss+xml">
<link rel="alternate" href="https://nguoicodonvn2008.info/vi/news/rss/tai-lieu/" title="Tin Tức - Tài liệu" type="application/rss+xml">
<link rel="alternate" href="https://nguoicodonvn2008.info/vi/news/rss/de-thi/" title="Tin Tức - Đề thi" type="application/rss+xml">
<link rel="preload" as="style" href="https://nguoicodonvn2008.info/assets/css/font-awesome.min.css" type="text/css">
<link rel="preload" as="style" href="https://nguoicodonvn2008.info/themes/default/css/bootstrap.non-responsive.css" type="text/css">
<link rel="preload" as="style" href="https://nguoicodonvn2008.info/themes/default/css/style.css" type="text/css">
<link rel="preload" as="style" href="https://nguoicodonvn2008.info/themes/default/css/style.non-responsive.css" type="text/css">
<link rel="preload" as="style" href="https://nguoicodonvn2008.info/themes/default/css/news.css" type="text/css">
<link rel="preload" as="style" href="https://nguoicodonvn2008.info/themes/default/css/custom.css" type="text/css">
<link rel="preload" as="script" href="https://nguoicodonvn2008.info/assets/js/jquery/jquery.min.js" type="text/javascript">
<link rel="preload" as="script" href="https://nguoicodonvn2008.info/assets/js/language/vi.js" type="text/javascript">
<link rel="preload" as="script" href="https://nguoicodonvn2008.info/assets/js/DOMPurify/purify3.js" type="text/javascript">
<link rel="preload" as="script" href="https://nguoicodonvn2008.info/assets/js/global.js" type="text/javascript">
<link rel="preload" as="script" href="https://nguoicodonvn2008.info/assets/js/site.js" type="text/javascript">
<link rel="preload" as="script" href="https://nguoicodonvn2008.info/themes/default/js/news.js" type="text/javascript">
<link rel="preload" as="script" href="https://nguoicodonvn2008.info/themes/default/js/main.js" type="text/javascript">
<link rel="preload" as="script" href="https://nguoicodonvn2008.info/themes/default/js/custom.js" type="text/javascript">
<link rel="preload" as="script" href="https://nguoicodonvn2008.info/themes/default/js/bootstrap.min.js" type="text/javascript">
<link rel="stylesheet" href="https://nguoicodonvn2008.info/assets/css/font-awesome.min.css">
<link rel="stylesheet" href="https://nguoicodonvn2008.info/themes/default/css/bootstrap.non-responsive.css">
<link rel="stylesheet" href="https://nguoicodonvn2008.info/themes/default/css/style.css">
<link rel="stylesheet" href="https://nguoicodonvn2008.info/themes/default/css/style.non-responsive.css">
<link rel="StyleSheet" href="https://nguoicodonvn2008.info/themes/default/css/news.css">
<link rel="stylesheet" href="https://nguoicodonvn2008.info/themes/default/css/custom.css">
<style type="text/css">
	body{background: #fff;}
</style>
    </head>
    <body>
<div id="print">
	<div id="hd_print">
		<h2 class="pull-left">.&#x3A; Nguoicodonvn2008.info - Cõi lòng người cô đơn &#x3A;.</h2>
		<p class="pull-right"><a title=".&#x3A; Nguoicodonvn2008.info - Cõi lòng người cô đơn &#x3A;." href="https://nguoicodonvn2008.info/">https://nguoicodonvn2008.info</a></p>
	</div>
	<div class="clear"></div>
	<hr />
	<div id="content">
		<h1>Cách gỡ cài đặt Adobe Creative Cloud trên Windows đúng cách</h1>
		<ul class="list-inline">
			<li>Thứ hai - 09/09/2024 00:28</li>
			<li class="hidden-print txtrequired"><em class="fa fa-print">&nbsp;</em><a title="In ra" href="javascript:;" onclick="window.print()">In ra</a></li>
			<li class="hidden-print txtrequired"><em class="fa fa-power-off">&nbsp;</em><a title="Đóng cửa sổ này" href="javascript:;" onclick="window.close()">Đóng cửa sổ này</a></li>
		</ul>
		<div class="clear"></div>
		<div id="hometext">
		</div>
				<div class="imghome">
			<img alt="Cách gỡ cài đặt Adobe Creative Cloud trên Windows đúng cách" src="https://st.quantrimang.com/photos/image/2024/09/09/go-cai-dat-adobe-creative-cloud-tren-windows-8.jpg" width="460" class="img-thumbnail" />
		</div>
		<div class="clear"></div>
		<div id="bodytext" class="clearfix">
			<p style="text-align: justify;">Rất ít ứng dụng hiện đại trên Windows khó gỡ bỏ như bộ Adobe Creative Cloud (Adobe CC). Tuy nhiên, với cách tiếp cận đúng đắn, bạn có thể xóa Adobe CC và mọi dấu vết của nó trong khoảng 10 phút. Bài viết sẽ chỉ cho bạn cách thực hiện bên dưới.</p>

<h2 style="text-align: justify;">Gỡ cài đặt tất cả ứng dụng Adobe</h2>

<p style="text-align: justify;">Để gỡ cài đặt Adobe Creative Cloud, trước tiên bạn cần gỡ cài đặt tất cả các ứng dụng Adobe, như Photoshop, Lightroom, InDesign, Premiere Pro, v.v., mà bạn đã cài đặt bằng Creative Cloud. Nếu không, bạn có thể thấy lỗi &quot;Couldn&#039;t uninstall Creative Cloud for desktop&quot;.</p>

<p style="text-align: justify;">Mặc dù bạn có thể gỡ cài đặt các ứng dụng Adobe từ ứng dụng Settings, nhưng tốt nhất là thực hiện từ ứng dụng Adobe CC trên desktop. Theo cách này, ứng dụng desktop có thể theo dõi tất cả các ứng dụng Adobe đã xóa khỏi máy tính và ngăn chặn mọi sự leo thang khi bạn cố gắng xóa Creative Cloud.</p>

<p style="text-align: justify;">Để gỡ cài đặt các ứng dụng Adobe của bạn:</p>

<ul>
	<li style="text-align: justify;">Khởi chạy Adobe Creative Cloud và đăng nhập nếu cần.</li>
	<li style="text-align: justify;">Mở tab&nbsp;<strong>Apps</strong>. Bạn có thể tìm thấy các ứng dụng đã cài đặt trong ngăn bên phải, bên dưới&nbsp;<strong>Installed apps</strong>.</li>
	<li style="text-align: justify;">Di con trỏ chuột qua ứng dụng, sau đó nhấp vào menu ba chấm và chọn&nbsp;<strong>Uninstall</strong>.</li>
</ul>

<figure>
<div style="text-align: justify;"><img alt="Tab ứng dụng Adobe Creative Cloud có tùy chọn Uninstall" data-i="0" data-src="https://st.quantrimang.com/photos/image/2024/09/09/go-cai-dat-adobe-creative-cloud-tren-windows-1.jpg" data-was-processed="true" height="447" src="https://st.quantrimang.com/photos/image/2024/09/09/go-cai-dat-adobe-creative-cloud-tren-windows-1.jpg" width="1099" /></div>

<figcaption>
<div style="text-align: justify;">Tab ứng dụng Adobe Creative Cloud có tùy chọn Uninstall</div>
</figcaption>
</figure>

<div style="text-align: justify;"><iframe allow="autoplay" allowtransparency="true" aria-label="Advertisement" data-google-container-id="a!2" data-google-query-id="CMK6kLCCtYgDFZ7dFgUdgXgyNg" data-load-complete="true" frameborder="0" height="0" hspace="0" id="aswift_1" marginheight="0" marginwidth="0" name="aswift_1" sandbox="allow-scripts allow-same-origin allow-forms allow-presentation allow-popups" scrolling="no" tabindex="0" title="Advertisement" vspace="0" width="694"></iframe></div>

<ul>
	<li style="text-align: justify;">
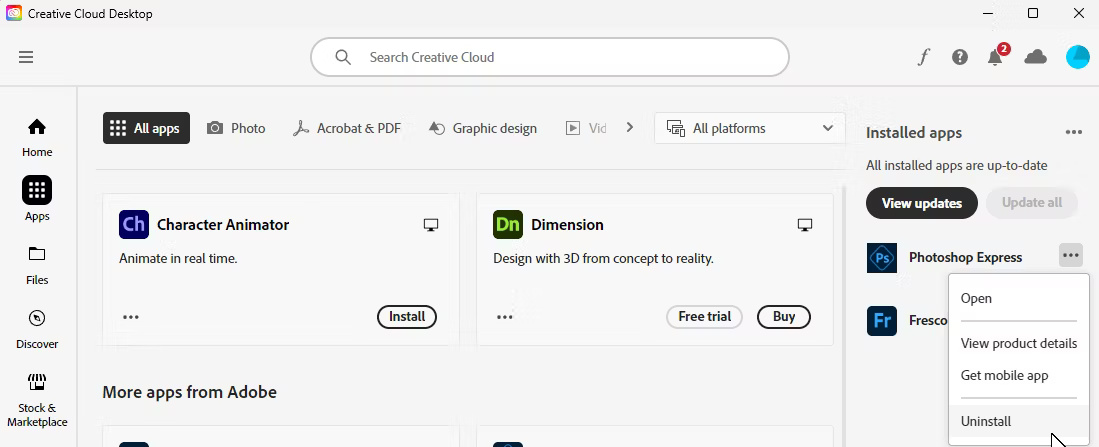
Lặp lại các bước để xóa tất cả các ứng dụng.</li>
</ul>

<p style="text-align: justify;">Nếu bạn không thể truy cập tài khoản Adobe CC của mình, hãy thử gỡ cài đặt các ứng dụng Adobe khỏi ứng dụng Settings. Để thực hiện việc này, hãy nhấn&nbsp;<strong>Win + I</strong>&nbsp;trên bàn phím để&nbsp;mở Settings, chọn&nbsp;<strong>Apps</strong>&nbsp;từ thanh bên trái và nhấp vào&nbsp;<strong>Installed Apps</strong>&nbsp;ở bên phải.</p>

<figure>
<div style="text-align: justify;"><img alt="Cài đặt Windows 11 có tùy chọn gỡ cài đặt Adobe Photoshop Express" data-i="1" data-src="https://st.quantrimang.com/photos/image/2024/09/09/go-cai-dat-adobe-creative-cloud-tren-windows-2.jpg" data-was-processed="true" height="422" src="https://st.quantrimang.com/photos/image/2024/09/09/go-cai-dat-adobe-creative-cloud-tren-windows-2.jpg" width="1044" /></div>

<figcaption>
<div style="text-align: justify;">Cài đặt Windows 11 có tùy chọn gỡ cài đặt Adobe Photoshop Express</div>
</figcaption>
</figure>

<p style="text-align: justify;">
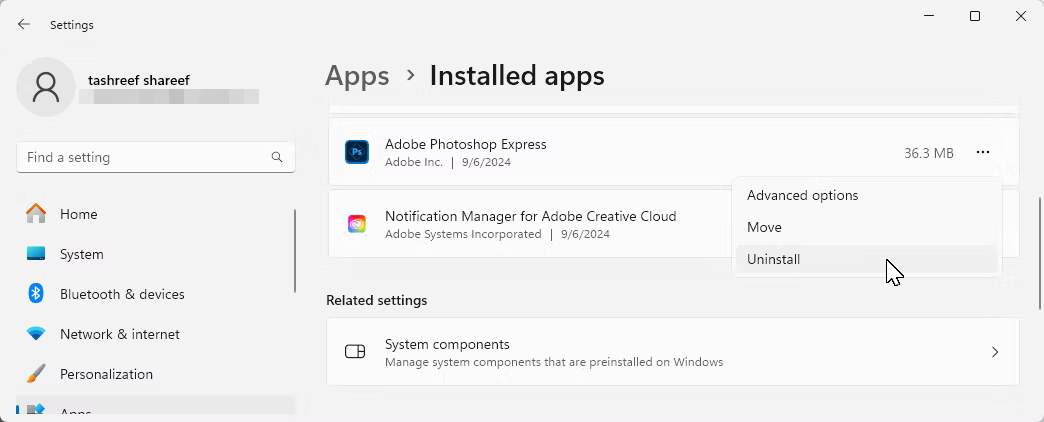
Xác định vị trí ứng dụng Adobe mà bạn muốn xóa, nhấp vào menu ba chấm và chọn&nbsp;<strong>Uninstall</strong>. Nhấp vào&nbsp;<strong>Uninstall</strong>&nbsp;một lần nữa để xóa ứng dụng. Nếu bạn vẫn không thể gỡ cài đặt các ứng dụng, hãy sử dụng công cụ Adobe CC Cleaner như mô tả trong phần cuối của hướng dẫn này.</p>

<h2 style="text-align: justify;">Gỡ cài đặt Adobe Creative Cloud bằng trình gỡ cài đặt của nó</h2>

<p style="text-align: justify;">Bạn có thể dễ dàng gỡ cài đặt bất kỳ ứng dụng Windows nào khỏi ứng dụng Settings, ngoại trừ Adobe Creative Cloud dành cho desktop. Bất kỳ nỗ lực nào để xóa ứng dụng đều kết thúc bằng lỗi &quot;Couldn&#039;t uninstall Creative Cloud for desktop&quot;. Thay vào đó, bạn có thể sử dụng Adobe CC Uninstaller, một trình gỡ cài đặt chuyên dụng của Adobe, để gỡ cài đặt ứng dụng trên desktop.</p>

<figure>
<div style="text-align: justify;"><img alt="Trang web tải xuống trình gỡ cài đặt Adobe Creative Cloud trên desktop" data-adbro-processed="true" data-i="2" data-src="https://st.quantrimang.com/photos/image/2024/09/09/go-cai-dat-adobe-creative-cloud-tren-windows-3.jpg" data-was-processed="true" height="471" src="https://st.quantrimang.com/photos/image/2024/09/09/go-cai-dat-adobe-creative-cloud-tren-windows-3.jpg" width="964" /></div>

<figcaption>
<div style="text-align: justify;">Trang web tải xuống trình gỡ cài đặt Adobe Creative Cloud trên desktop</div>
</figcaption>
</figure>

<div style="text-align: justify;"><iframe allow="autoplay" allowtransparency="true" aria-label="Advertisement" data-google-container-id="a!3" data-google-query-id="CNnnkLCCtYgDFUbJFgUdZBcg_g" data-load-complete="true" frameborder="0" height="0" hspace="0" id="aswift_2" marginheight="0" marginwidth="0" name="aswift_2" sandbox="allow-scripts allow-same-origin allow-forms allow-presentation allow-popups" scrolling="no" tabindex="0" title="Advertisement" vspace="0" width="694"></iframe></div>

<ul>
	<li style="text-align: justify;">
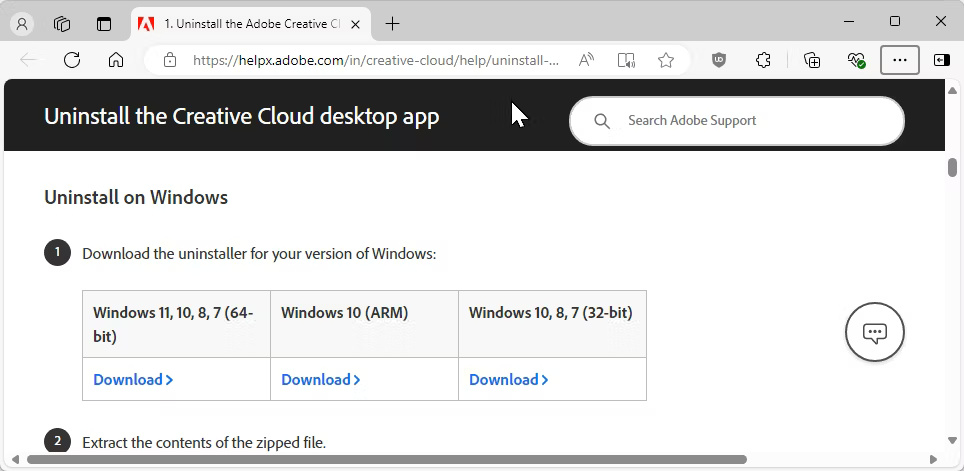
Truy cập trang Adobe Creative Cloud Uninstaller, sau đó cuộn xuống phần&nbsp;<strong>Uninstall on Windows</strong>. Nhấp vào liên kết phù hợp với phiên bản Windows của bạn.</li>
</ul>

<pre id="pre0">
<code>https://helpx.adobe.com/creative-cloud/help/uninstall-creative-cloud-desktop-app.html</code></pre>

<ul>
	<li style="text-align: justify;">Giải nén file zip đã tải xuống vào PC. Sau đó, nhấp đúp vào file Creative Cloud Uninstaller.exe để khởi chạy trình gỡ cài đặt. Nhấp vào&nbsp;<strong>Yes</strong>&nbsp;nếu được Windows User Account Control nhắc.</li>
	<li style="text-align: justify;">Sau đó, nhấp vào&nbsp;<strong>Uninstall</strong>&nbsp;trên hộp thoại xác nhận và đợi quá trình hoàn tất.</li>
</ul>

<figure>
<div style="text-align: justify;"><img alt="Màn hình xác nhận trình gỡ cài đặt ứng dụng trên desktop Adobe Creative Cloud" data-i="3" data-src="https://st.quantrimang.com/photos/image/2024/09/09/go-cai-dat-adobe-creative-cloud-tren-windows-4.jpg" data-was-processed="true" height="155" src="https://st.quantrimang.com/photos/image/2024/09/09/go-cai-dat-adobe-creative-cloud-tren-windows-4.jpg" width="856" /></div>

<figcaption>
<div style="text-align: justify;">Màn hình xác nhận trình gỡ cài đặt ứng dụng trên desktop Adobe Creative Cloud</div>
</figcaption>
</figure>

<h2 style="text-align: justify;">Dọn sạch phần mềm rác còn sót lại bằng công cụ Adobe CC Cleaner</h2>

<p style="text-align: justify;">Nhờ tích hợp sâu của Adobe vào hệ điều hành Windows, bạn vẫn cần dọn sạch một số phần mềm rác còn sót lại của ứng dụng Creative Cloud. Để xóa phần mềm rác và file còn sót lại, chúng ta sẽ sử dụng công cụ Adobe Creative Cloud Cleaner.</p>

<ul>
	<li style="text-align: justify;">Truy cập trang tải xuống Adobe CC Cleaner. Tại đây, cuộn xuống phần&nbsp;<strong>How to use the Creative Cloud Cleaner tool</strong>, sau đó nhấp vào&nbsp;<strong>Download</strong>. Sau khi tải xuống, hãy chạy file AdobeCreativeCloudCleanerTool.exe và nhấp vào&nbsp;<strong>Yes</strong>.</li>
</ul>

<pre id="pre1">
<code>https://helpx.adobe.com/creative-cloud/kb/cc-cleaner-tool-installation-problems.html</code></pre>

<ul>
	<li style="text-align: justify;">Trong màn hình giống như Command Prompt, nhập&nbsp;<strong>e</strong>&nbsp;và nhấn&nbsp;<strong>Enter</strong>&nbsp;để chọn ngôn ngữ là Tiếng Anh. Sau đó, nhập&nbsp;<strong>Yes</strong>&nbsp;hoặc<strong>&nbsp;Y</strong>&nbsp;và nhấn&nbsp;<strong>Enter</strong>&nbsp;để đồng ý với thỏa thuận cấp phép người dùng cuối của Adobe.</li>
</ul>

<figure>
<div style="text-align: justify;"><img alt="Tùy chọn ngôn ngữ AdobeCreativeCloudCleanerTool" data-i="4" data-src="https://st.quantrimang.com/photos/image/2024/09/09/go-cai-dat-adobe-creative-cloud-tren-windows-5.jpg" data-was-processed="true" height="140" src="https://st.quantrimang.com/photos/image/2024/09/09/go-cai-dat-adobe-creative-cloud-tren-windows-5.jpg" width="829" /></div>

<figcaption>
<div style="text-align: justify;">Tùy chọn ngôn ngữ AdobeCreativeCloudCleanerTool</div>
</figcaption>
</figure>

<ul>
	<li style="text-align: justify;">
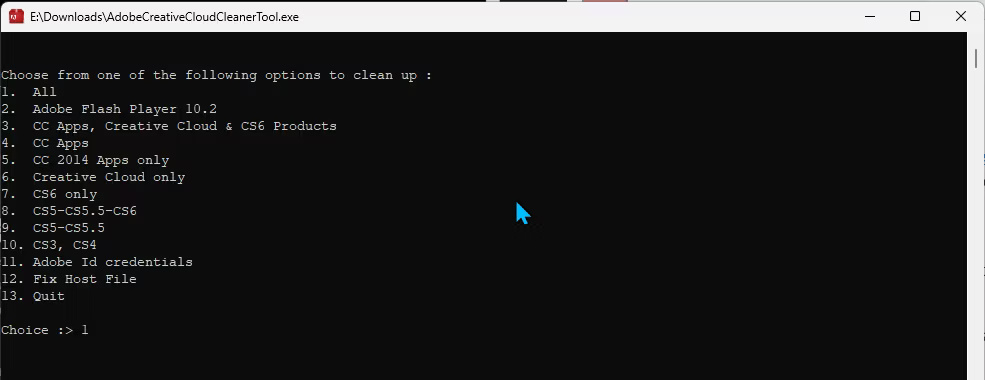
Màn hình tiếp theo sẽ hiển thị tất cả phần mềm Adobe bloatware còn sót lại trên máy tính của bạn. Nhập&nbsp;<strong>1</strong>&nbsp;và nhấn&nbsp;<strong>Enter</strong>&nbsp;để chọn dọn dẹp tất cả các file hoặc nhấn số tương ứng để xóa một tập hợp file cụ thể.</li>
</ul>

<figure>
<div style="text-align: justify;"><img alt="Tùy chọn xóa công cụ Adobe Creative Cloud Cleaner" data-i="5" data-src="https://st.quantrimang.com/photos/image/2024/09/09/go-cai-dat-adobe-creative-cloud-tren-windows-6.jpg" data-was-processed="true" height="380" src="https://st.quantrimang.com/photos/image/2024/09/09/go-cai-dat-adobe-creative-cloud-tren-windows-6.jpg" width="985" /></div>

<figcaption>
<div style="text-align: justify;">Tùy chọn xóa công cụ Adobe Creative Cloud Cleaner</div>
</figcaption>
</figure>

<div style="text-align: justify;"><iframe allow="autoplay" allowtransparency="true" aria-label="Advertisement" data-google-container-id="a!4" data-google-query-id="CIn2yomDtYgDFcbKFgUdw18bQA" data-load-complete="true" frameborder="0" height="0" hspace="0" id="aswift_3" marginheight="0" marginwidth="0" name="aswift_3" sandbox="allow-scripts allow-same-origin allow-forms allow-presentation allow-popups" scrolling="no" tabindex="0" title="Advertisement" vspace="0" width="694"></iframe></div>

<ul>
	<li style="text-align: justify;">
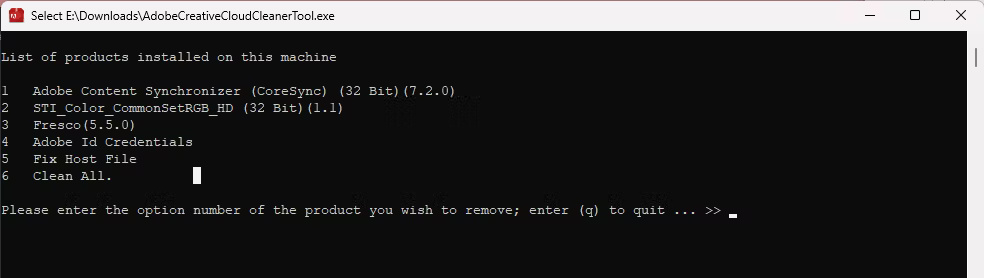
Trên màn hình tiếp theo, bạn sẽ thấy danh sách các sản phẩm được cài đặt trên máy tính của mình. Nhập&nbsp;<strong>6</strong>&nbsp;và nhấn&nbsp;<strong>Enter</strong>&nbsp;để chọn&nbsp;<strong>Clean All</strong>, sau đó nhập&nbsp;<strong>Y</strong>&nbsp;và nhấn&nbsp;<strong>Enter</strong>&nbsp;để xác nhận hành động. Bây giờ, hãy đợi công cụ hoàn tất việc xóa các file.</li>
</ul>

<figure>
<div style="text-align: justify;"><img alt="Công cụ Adobe Creative Cloud Cleaner liệt kê sản phẩm được cài đặt trên máy này" data-i="6" data-src="https://st.quantrimang.com/photos/image/2024/09/09/go-cai-dat-adobe-creative-cloud-tren-windows-7.jpg" data-was-processed="true" height="278" src="https://st.quantrimang.com/photos/image/2024/09/09/go-cai-dat-adobe-creative-cloud-tren-windows-7.jpg" width="984" /></div>

<figcaption>
<div style="text-align: justify;">Công cụ Adobe Creative Cloud Cleaner liệt kê sản phẩm được cài đặt trên máy này</div>
</figcaption>
</figure>

<p style="text-align: justify;">Nếu hoàn tất thành công, hãy nhấn&nbsp;<strong>Enter</strong>&nbsp;để thoát. Nếu bạn thấy bất kỳ lỗi nào, hãy chạy lại công cụ để xóa mọi file còn sót lại.</p>

<h2 style="text-align: justify;">Xóa thủ công Adobe Genuine Service và các thư mục</h2>

<p style="text-align: justify;">Phần cuối cùng của câu đố này liên quan đến việc xóa Adobe Genuine Service (còn được gọi là Adobe Client), được thiết kế để phát hiện các công cụ Adobe vi phạm bản quyền trên máy tính của bạn.</p>

<p style="text-align: justify;">Để xóa Adobe Genuine Service:
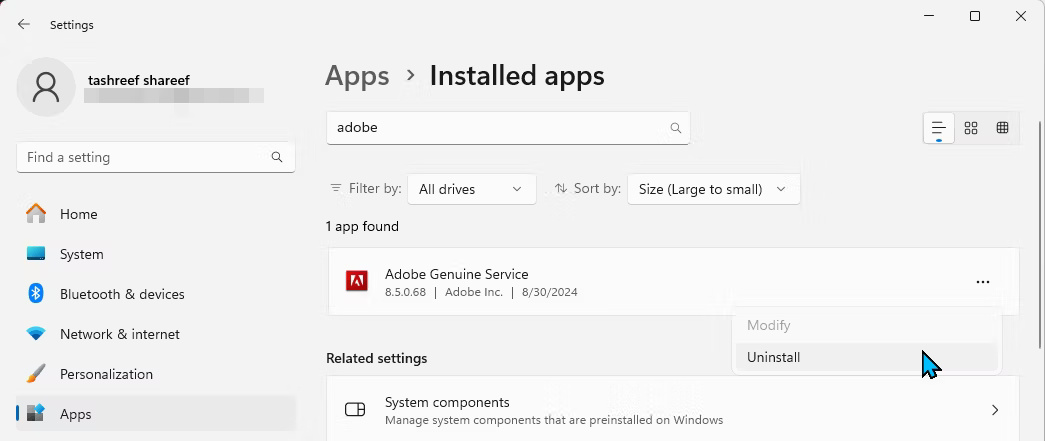
</p>

<ul>
	<li style="text-align: justify;">Vào&nbsp;<strong>Settings &gt; Apps &gt; Installed apps</strong>.</li>
	<li style="text-align: justify;">Tìm&nbsp;<strong>Adobe Genuine Service</strong>, nhấp vào menu ba chấm và chọn&nbsp;<strong>Uninstall.</strong></li>
	<li style="text-align: justify;">Nhấp vào&nbsp;<strong>Uninstall</strong>&nbsp;một lần nữa để xác nhận hành động.</li>
	<li style="text-align: justify;">Nhấp vào&nbsp;<strong>Yes</strong>, sau đó nhấp vào&nbsp;<strong>Uninstall</strong>&nbsp;trong trình hướng dẫn Adobe Genuine Service Uninstaller.</li>
</ul>

<figure>
<div style="text-align: justify;"><img alt="Gỡ cài đặt Adobe Genuine Service trong Windows 11 Settings" data-i="7" data-src="https://st.quantrimang.com/photos/image/2024/09/09/go-cai-dat-adobe-creative-cloud-tren-windows-8.jpg" data-was-processed="true" height="441" src="https://st.quantrimang.com/photos/image/2024/09/09/go-cai-dat-adobe-creative-cloud-tren-windows-8.jpg" width="1045" /></div>

<figcaption>
<div style="text-align: justify;">Gỡ cài đặt Adobe Genuine Service trong Windows 11 Settings</div>
</figcaption>
</figure>

<p style="text-align: justify;">Sau đó, bạn có thể xóa các thư mục Adobe ở các vị trí sau:</p>

<pre id="pre2">
<code>C:\Program Files\Adobe
C:\Users\Username\AppData\Roaming\Adobe (replace Username with your computer&#039;s username)
C:\Program Files (x86)\Adobe
C:\Program Files (x86)\Common Files\Adobe
C:\Program Files\Common Files\Adobe</code></pre>

<p style="text-align: justify;">Mở thư mục Adobe, chọn tất cả các file bên trong và chọn&nbsp;<strong>Delete</strong>. Thực hiện thao tác này cho tất cả các thư mục ở trên. Ngoài ra, hãy nhớ làm trống thùng rác để giải phóng dung lượng trên ổ.</p>

<p style="text-align: justify;">Adobe khiến việc xóa ứng dụng Creative Cloud trên desktop trở nên khó khăn không cần thiết. Mặc dù Adobe cung cấp một số công cụ để dọn dẹp cài đặt, nhưng vẫn cần phải dọn dẹp thủ công để xóa tất cả các file.</p>
		</div>
				<div id="author">
						<p>
				<strong>Nguồn tin:</strong>
				Quantrimang.com:
			</p>
		</div>
	</div>
	<div id="footer" class="clearfix">
		<div id="url">
			<strong>URL của bản tin này: </strong><a href="https://www.nguoicodonvn2008.info/vi/news/savefile/kien-thuc-may-tinh/cach-go-cai-dat-adobe-creative-cloud-tren-windows-dung-cach-8972.html" title="Cách gỡ cài đặt Adobe Creative Cloud trên Windows đúng cách">https://www.nguoicodonvn2008.info/vi/news/savefile/kien-thuc-may-tinh/cach-go-cai-dat-adobe-creative-cloud-tren-windows-dung-cach-8972.html</a>

		</div>
		<div class="clear"></div>
		<div class="copyright">
			&copy; .&#x3A; Nguoicodonvn2008.info - Cõi lòng người cô đơn &#x3A;.
		</div>
		<div id="contact">
			<a href="mailto:admin@nguoicodonvn2008.info">admin@nguoicodonvn2008.info</a>
		</div>
	</div>
</div>
        <div id="timeoutsess" class="chromeframe">
            Bạn đã không sử dụng Site, <a onclick="timeoutsesscancel();" href="https://nguoicodonvn2008.info/#">Bấm vào đây để duy trì trạng thái đăng nhập</a>. Thời gian chờ: <span id="secField"> 60 </span> giây
        </div>
        <div id="openidResult" class="nv-alert" style="display:none"></div>
        <div id="openidBt" data-result="" data-redirect=""></div>
		</script>
		<div class="car-top">
  <span><img src="https://nguoicodonvn2008.info/themes/default/images/car.png" alt=""></span>
</div>
<script src="https://nguoicodonvn2008.info/assets/js/jquery/jquery.min.js"></script>
<script>var nv_base_siteurl="/",nv_lang_data="vi",nv_lang_interface="vi",nv_name_variable="nv",nv_fc_variable="op",nv_lang_variable="language",nv_module_name="news",nv_func_name="savefile",nv_is_user=0, nv_my_ofs=-4,nv_my_abbr="EDT",nv_cookie_prefix="nv4c_e856T",nv_check_pass_mstime=1738000,nv_area_admin=0,nv_safemode=0,theme_responsive=0,nv_recaptcha_ver=2,nv_recaptcha_sitekey="",nv_recaptcha_type="image",XSSsanitize=1;</script>
<script src="https://nguoicodonvn2008.info/assets/js/language/vi.js"></script>
<script src="https://nguoicodonvn2008.info/assets/js/DOMPurify/purify3.js"></script>
<script src="https://nguoicodonvn2008.info/assets/js/global.js"></script>
<script src="https://nguoicodonvn2008.info/assets/js/site.js"></script>
<script src="https://nguoicodonvn2008.info/themes/default/js/news.js"></script>
<script src="https://nguoicodonvn2008.info/themes/default/js/main.js"></script>
<script src="https://nguoicodonvn2008.info/themes/default/js/custom.js"></script>
<script type="application/ld+json">
        {
            "@context": "https://schema.org",
            "@type": "Organization",
            "url": "https://nguoicodonvn2008.info",
            "logo": "https://nguoicodonvn2008.info/uploads/angel.gif"
        }
        </script>
<script src="https://nguoicodonvn2008.info/themes/default/js/bootstrap.min.js"></script>
<script type="text/javascript">
var $scrolltop = $('.car-top');
$scrolltop.on('click', function () {
    $('html,body').animate({
        scrollTop: 0
    }, 800);
    $(this).addClass("car-run");
    setTimeout(function(){ $scrolltop.removeClass('car-run');}, 1000);
    return false;
});
$(window).on('scroll', function ()
{ 
    if($(window).scrollTop() >= 200)
    {
        $scrolltop.addClass("show");
        $scrolltop.addClass("car-down");
    }
    else
    {
       $scrolltop.removeClass("show");
       setTimeout(function(){ $scrolltop.removeClass('car-down');}, 300);
    }
});
</script>
</body>
</html>