Cách cài đặt VPN trên Windows Server 2019
- Thứ sáu - 18/09/2020 00:54
- In ra
- Đóng cửa sổ này
Bài viết hôm nay là hướng dẫn từng bước về cách cài đặt và cấu hình VPN trên Windows Server 2019. Bài viết sẽ chỉ cho bạn cách có thể dễ dàng thiết lập VPN server cho môi trường nhỏ, văn phòng chi nhánh hoặc server được host. VPN (Mạng riêng ảo) server này cho phép bạn kết nối từ các client từ xa hoặc tường lửa đến Windows Server.
Để cài đặt VPN trên Windows Server 2019, chỉ cần làm theo hướng dẫn từng bước sau:
Cài đặt Remote Access Role
Đầu tiên, hãy cài đặt Remote Access qua Server Manager hoặc PowerShell.
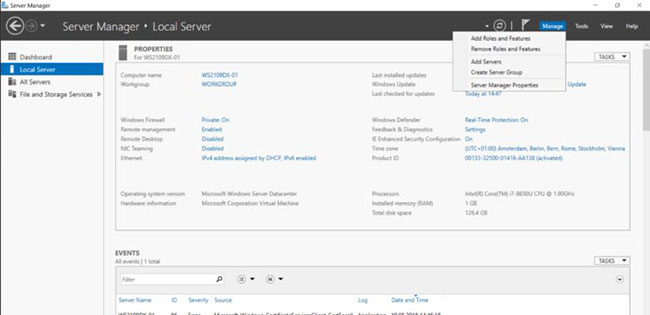
Mở Server Manager và chọn Add Roles and Features.
Chọn Remote Access Role và nhấp vào Next theo các bước trong trình hướng dẫn.
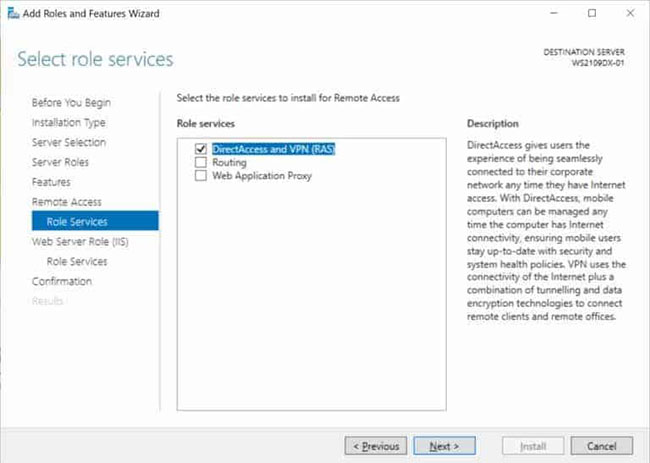
Ở bước Role Services, chọn DirectAccess and VPN (RAS).
Ở bước cuối cùng, chọn Install để cài đặt Remote Access role.
Điều này có thể yêu cầu khởi động lại server.
Cài đặt và cấu hình VPN trên Windows Server 2019
Sau khi cài đặt thành công, bây giờ, bạn có thể khởi động trình hướng dẫn để cài đặt và cấu hình VPN server trong Windows Server 2019.
Sau khi các tính năng được cài đặt, có thể mất một lúc để hoàn thành, bạn sẽ thấy liên kết Getting Started Wizard. Nhấp vào Open the Getting Started Wizard.

Thao tác này sẽ mở ra một trình hướng dẫn mới, giúp bạn cấu hình server. Trên màn hình đầu tiên, chọn Deploy VPN only.
Thao tác này sẽ mở Routing and Remote Access Management Console.
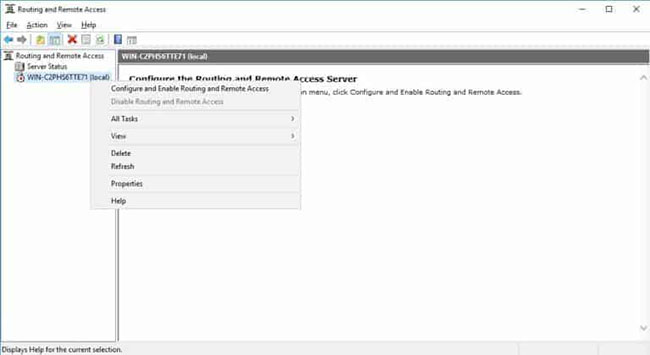
Nhấp chuột phải vào tên server và nhấn vào Configure and Enable Routing and Remote Access.
Trên trình hướng dẫn mới, hãy chọn Custom configuration.
Chọn VPN Access.
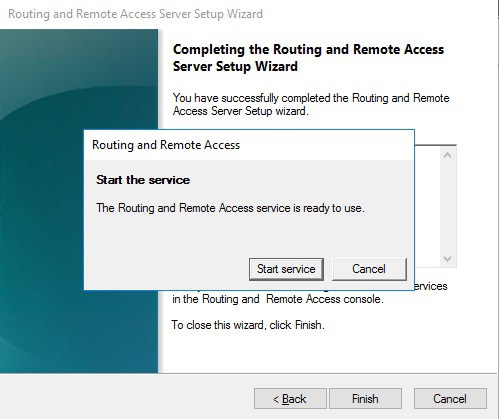
Sau khi bấm Finish, bây giờ, bạn có thể khởi động service Routing and Remote Access.
Cấu hình mạng và người dùng truy cập VPN
Nếu có tường lửa giữa Internet và Windows Server, bạn phải mở cổng Firewall sau để chuyển tiếp chúng tới Windows Server:
- Đối với PPTP: 1723 TCP và Protocol 47 GRE (còn được gọi là PPTP Pass-through).
- Đối với L2TP over IPSEC: 1701 TCP và 500 UDP.
- Đối với SSTP: 443 TCP.
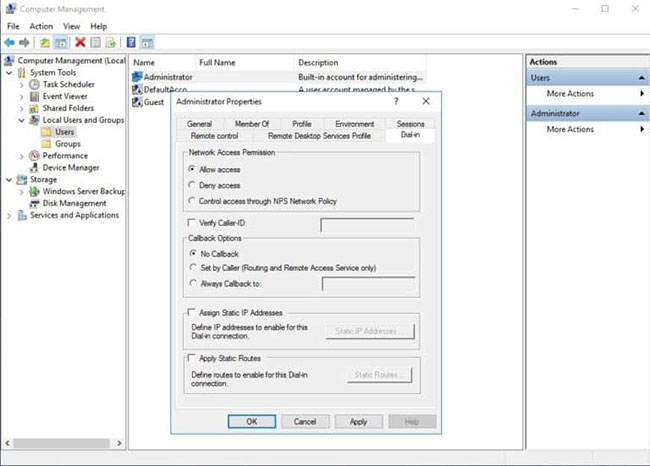
Sau khi cài đặt, người dùng phải được kích hoạt quyền truy cập từ xa để kết nối với VPN Server. Trên một server độc lập, điều này có thể được thực hiện trong Computer Management MMC. Trong môi trường domain, điều này có thể được thực hiện trong phần thuộc tính người dùng của một Active Directory user.
Nếu không có DHCP server trong môi trường, bạn phải thêm một IP address pool (dãy địa chỉ có sẵn cho client DHCP) tĩnh. Điều này thường cần thiết nếu bạn có một server duy nhất được host bởi một nhà cung cấp dịch vụ. Trong các thuộc tính của VPN server, bạn có thể nhấp vào tab IPv4, kích hoạt và cấu hình Static address pool.
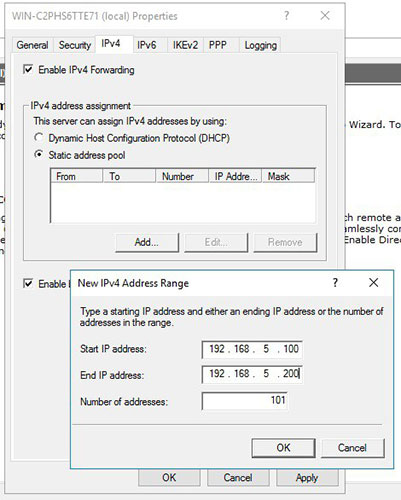
Bây giờ, bạn phải thêm một địa chỉ IP từ cùng một mạng con như address pool tĩnh vào interface mạng của server, để người dùng có thể truy cập vào server.
