Cách cài đặt trình quản lý gói NPM YARN trên Rocky Linux
- Thứ ba - 25/04/2023 00:55
- In ra
- Đóng cửa sổ này
Hướng dẫn này sẽ giải thích cách cài đặt Yarn trên Rocky Linux bằng môi trường dòng lệnh. Sau khi cài đặt Yarn, bạn sẽ đến với các lệnh và tùy chọn cơ bản của Yarn.
Cập nhật hệ thống
Cần phải cập nhật hệ thống vì nếu không, chúng có thể dễ bị tấn công vào lỗ hổng bảo mật và các lỗi khác. Điều quan trọng là phải liên tục cập nhật hệ thống vì bạn muốn hệ thống được update và chạy trơn tru.
Chạy lệnh bên dưới để cập nhật hệ thống.
sudo dnf check-update
sudo dnf update -y
Chạy lệnh bên dưới để khởi động lại hệ thống. Khởi động lại hệ thống là cần thiết vì một số lý do. Khởi động lại sẽ khắc phục mọi sự cố với hệ thống, đảm bảo mọi thứ chạy trơn tru và hiệu quả. Việc khởi động lại sẽ cập nhật không chỉ kernel và hệ điều hành mà còn cả firmware driver phần cứng của hệ thống. Việc khởi động lại có thể được thực hiện tự động thông qua một service như systemd.
sudo reboot now
Điều kiện tiên quyết
- Server chạy Rocky Linux 8 hoặc 9
- Kết nối Internet và quyền truy cập root vào server
Cài đặt Node.JS và NPM
npm là phương pháp cài đặt được đề xuất và phổ biến nhất để cài đặt Yarn trên bất kỳ hệ thống Linux nào. Bạn có thể cài đặt npm bằng cách cài đặt Node.JS. Khi viết bài này, Nodejs 16.x là bản phát hành ổn định hiện tại.
Trước tiên, bạn cần tải script Nodesource xuống hệ thống của mình bằng cách chạy lệnh bên dưới. Bạn có thể thay thế 16.x trong lệnh bên dưới bằng bất kỳ phiên bản Nodejs nào.
curl -sL https://rpm.nodesource.com/setup_16.x | sudo -E bash -
Chạy lệnh bên dưới để kiểm tra xem script đã được thêm thành công chưa.
sudo dnf repolist
Bạn sẽ nhận được một đầu ra như bên dưới.

Tiếp theo, cài đặt Node.JS bằng lệnh bên dưới.
sudo dnf install -y nodejs
Sau khi cài đặt hoàn tất, hãy kiểm tra xem node và npm đã được cài đặt đúng chưa bằng cách chạy các lệnh này trên Terminal.
node -v && npm -v
Bạn sẽ nhận được một đầu ra như bên dưới. Miễn là bạn nhận được số phiên bản cho cả hai thứ này, mọi thứ sẽ ổn.

Cài đặt Yarn
Chạy lệnh bên dưới để cài đặt Yarn trên hệ thống của bạn bằng NPM. Bài viết sử dụng tùy chọn -g trong lệnh để cho biết muốn Node.JS được cài đặt trên hệ thống để nó có sẵn cho bất kỳ dự án nào.
sudo npm install -g yarn
Sau khi cài đặt hoàn tất, hãy chạy lệnh bên dưới để kiểm tra xem Yarn đã được cài đặt thành công chưa.
yarn -v
Bạn sẽ nhận được kết quả như bên dưới nếu mọi thứ suôn sẻ.

Test Yarn
Phần này giải thích cách sử dụng các tùy chọn và lệnh Yarn cơ bản. Bài viết sẽ tạo một dự án đơn giản yêu cầu thêm một vài dependency.
Theo nguyên tắc thông thường, nên tạo một thư mục mới cho dự án của mình để giữ cho nó có tổ chức. Bài viết sẽ tạo thư mục mới có tên app_testing_yarn và di chuyển vào thư mục đó bằng lệnh bên dưới.
mkdir app_testing_yarn && cd app_testing_yarn
Khi đang ở trong thư mục dự án, bạn cần khởi tạo dự án bằng Yarn bằng cách chạy lệnh bên dưới để có thể cài đặt các dependency với Yarn.
yarn init
Lệnh này hướng dẫn bạn qua một loạt câu hỏi cho phép bạn cấu hình các tiêu chuẩn viết code của dự án và xác định tác giả. Bạn sẽ được hỏi một số câu hỏi liên quan đến dự án. Bạn có thể nhấn Enter để giữ tùy chọn mặc định hoặc nhập tùy chọn mong muốn.
Đầu ra mẫu:
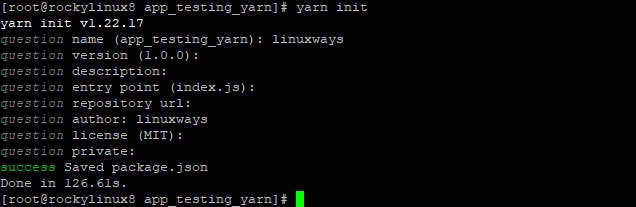
Một file pack.json mới sẽ được tạo sau khi bạn hoàn thành các câu hỏi. File pack.json là một loại file cấu hình cho các ứng dụng Yarn. Nó xác định siêu dữ liệu về ứng dụng, bao gồm các dependency và thông tin tác giả.
Sử dụng lệnh ls để liệt kê nội dung trong thư mục và bạn sẽ thấy rằng file pack.json mới đã được tạo trong thư mục dự án.
ls
Đầu ra mẫu:

Ví dụ muốn thêm các dependency cho dự án của mình để có thể sử dụng chúng trong code của mình. Để thực hiện việc này, hãy chạy lệnh bên dưới, thay thế [package_name] bằng tên của gói bạn muốn cài đặt.
yarn add [package_name]
Bạn có thể nhận danh sách các gói Yarn có sẵn trên trang web chính thức của nó.
Ví dụ sẽ cài đặt ExpressJS, đây là một web framework. Vì vậy, sau khi chạy lệnh bên dưới, gói express sẽ được thêm vào dependency trong pack.json.
yarn add express
Bạn sẽ nhận được kết quả như bên dưới nếu mọi thứ suôn sẻ.
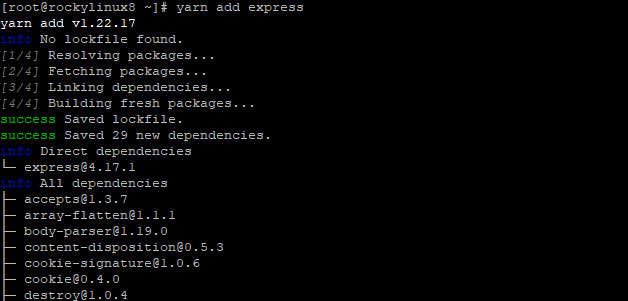
Yarn là một lệnh khá đơn giản. Như đã nói trước đó, nó cài đặt tất cả các dependency bạn muốn và sau đó lưu chúng vào file pack.json.
Nó thực hiện điều này bằng cách tìm nạp các gói từ npmjs.org và lưu chúng vào thư mục dự án để bạn sử dụng. Lệnh trên sẽ tải xuống và lưu nhanh trong thư mục dự án.
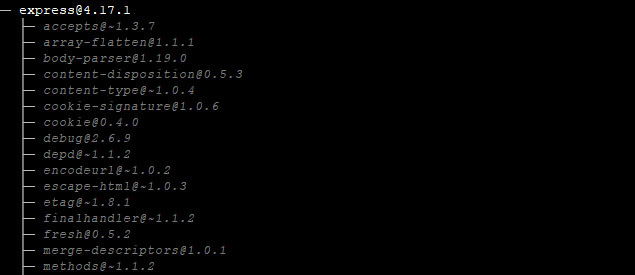
Để xem tất cả các gói đã cài đặt, hãy sử dụng lệnh yarn list.
yarn list
Như bạn có thể thấy trong ảnh chụp màn hình bên dưới, chỉ gói express được cài đặt vì bài viết không cài đặt bất kỳ dependency nào khác cho ví dụ này.
Tuy nhiên, khi sử dụng một dự án thực tế, bạn sẽ thấy tất cả các gói được cài đặt với Yarn.
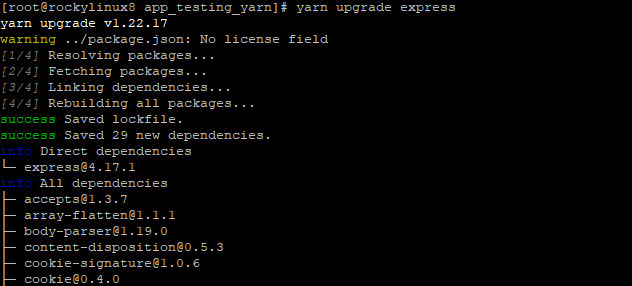
Nếu bạn muốn nâng cấp một gói cụ thể, hãy sử dụng lệnh bên dưới và thay [package_name] bằng tên gói.
yarn upgrade [package_name]
Ví dụ này sẽ sử dụng express làm ví dụ.
yarn upgrade express
Đầu ra mẫu:
Bạn cũng có thể loại bỏ một dependency mà bạn cần sử dụng Yarn. Để thực hiện việc này, hãy chạy lệnh bên dưới, thay thế [package_name] bằng tên của gói bạn muốn xóa.
yarn remove [package_name]
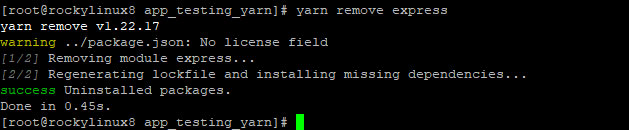
Ví dụ sẽ xóa gói express đã thêm trong phần trước. Sau khi chạy lệnh bên dưới, gói express sẽ bị xóa khỏi dependency trong pack.json.
yarn remove express
Đầu ra mẫu:
Hướng dẫn này đã chỉ cho bạn cách cài đặt Yarn trên hệ thống. Mặc dù bạn có thể sử dụng NPM để cài đặt tất cả các loại gói, nhưng bạn nên sử dụng Yarn cho các dự án của mình vì nó cung cấp một cách dễ dàng hơn để quản lý các dependency trong những file JavaScript khác nhau cho React, Angular và bất kỳ front-end framework nào khác. Nó cũng làm cho quá trình quản lý dependency nhanh hơn.
