Cách cài đặt Proxmox trên Intel NUC hoặc PC x86
- Thứ hai - 23/10/2023 09:29
- In ra
- Đóng cửa sổ này
Proxmox là một nền tảng quản lý máy chủ nguồn mở cho phép bạn triển khai, quản lý và giám sát các máy ảo. Với Proxmox, bạn có thể chạy nhiều hệ điều hành hoặc dịch vụ trên giao diện web bằng bất kỳ trình duyệt web nào.
Vì vậy, cho dù bạn là sinh viên, người đam mê công nghệ hay chủ doanh nghiệp, bạn đều có thể cài đặt Proxmox trên phần cứng Intel NUC hoặc PC mini dựa trên x86 để tạo phòng thí nghiệm tự làm tại nhà và quản lý các dịch vụ khác nhau, bao gồm phần mềm tự động hóa gia đình, media server, NAS lưu trữ, v.v... từ giao diện web Proxmox.
Điều kiện tiên quyết để cài đặt Proxmox
Để cài đặt và chạy Proxmox trên Intel NUC hoặc x86 thay thế cho PC mini Intel NUC, bạn sẽ cần Intel NUC đáp ứng các yêu cầu hệ thống sau:
- Ít nhất 4 lõi CPU
- RAM tối thiểu 4GB (khuyến nghị 8GB trở lên)
- Dung lượng ổ đĩa trống 64GB trở lên, tốt nhất là SSD
Ví dụ đang sử dụng Intel NUC10I3FNHN. Đó là một chiếc PC mini đơn giản được trang bị bộ xử lý Intel i3 thế hệ thứ 10. Ngoài ra, ví dụ đã lắp đặt:
- RAM DDR4 16GB (2 thanh 8GB)
- Ổ SSD M.2 PCIe4 1TB
- Ổ SSD SATA3 1TB
Bạn cũng sẽ cần:
- PC Windows, macOS hoặc Linux để tạo phương tiện cài đặt USB boot
- USB (8GB hoặc lớn hơn)
Khi bạn có PC mini đáp ứng các yêu cầu phần cứng này và những thứ bắt buộc khác, hãy làm theo các bước dưới đây để cài đặt Proxmox.
Cách cài đặt Proxmox trên Intel NUC hoặc PC x86
Bước 1: Tạo phương tiện cài đặt USB Proxmox
Để tạo công cụ cài đặt USB Proxmox:
- Truy cập phần Proxmox Downloads chính thức và chọn phiên bản Proxmox cho Intel NUC hoặc PC x86 của bạn.
- Nhấp vào nút Download. Điều này sẽ tải xuống image ISO trên hệ thống của bạn.
- Sau khi quá trình tải xuống hoàn tất, hãy khởi chạy Rufus và chọn phương tiện USB được kết nối. Duyệt và chọn file Proxmox ISO rồi nhấp vào Start.
- Đảm bảo không có dữ liệu quan trọng trong phương tiện USB, sau đó nhấp vào Yes để xác nhận.
Thao tác này sẽ tạo công cụ cài đặt USB Proxmox mà bạn có thể sử dụng để cài đặt Proxmox trên Intel NUC hoặc bất kỳ PC x86 nào. Bạn cũng có thể sử dụng balenaEtcher để ghi file image ISO Proxmox vào USB.
Bước 2: Chuẩn bị Intel NUC hoặc PC mini x86 để cài đặt Proxmox
Để chuẩn bị Intel NUC hoặc PC x86 để cài đặt Proxmox, bạn cần bật nguồn Intel NUC và mở BIOS. Thông thường, bạn cần nhấn liên tục phím Del hoặc F10 để vào BIOS.
Khi bạn đã vào BIOS, hãy thực hiện các thay đổi sau:
- Đảm bảo BIOS được cập nhật.
- Tắt Secure Boot và bật Legacy Boot.
- Kích hoạt Virtualization Technology, chẳng hạn như Intel VT-x hoặc AMD-V (trong PC mini x86 khác).
- Lưu những thay đổi này và sau đó tắt/tắt nguồn.
Sau khi cập nhật BIOS và kích hoạt công nghệ ảo hóa, bạn có thể tiến hành cài đặt Proxmox trên Intel NUC hoặc PC x86 của mình.
Bước 3: Cài đặt Proxmox trên Intel NUC hoặc PC mini x86
Sau khi tạo USB boot, hãy cắm nó vào Intel NUC hoặc PC x86 của bạn và khởi động lại hệ thống.
1. Ngay lập tức bắt đầu nhấn phím menu tùy chọn/thứ tự boot (thường là F8) để xem ổ USB.
2. Sử dụng các phím mũi tên để chọn USB và nhấn Enter.
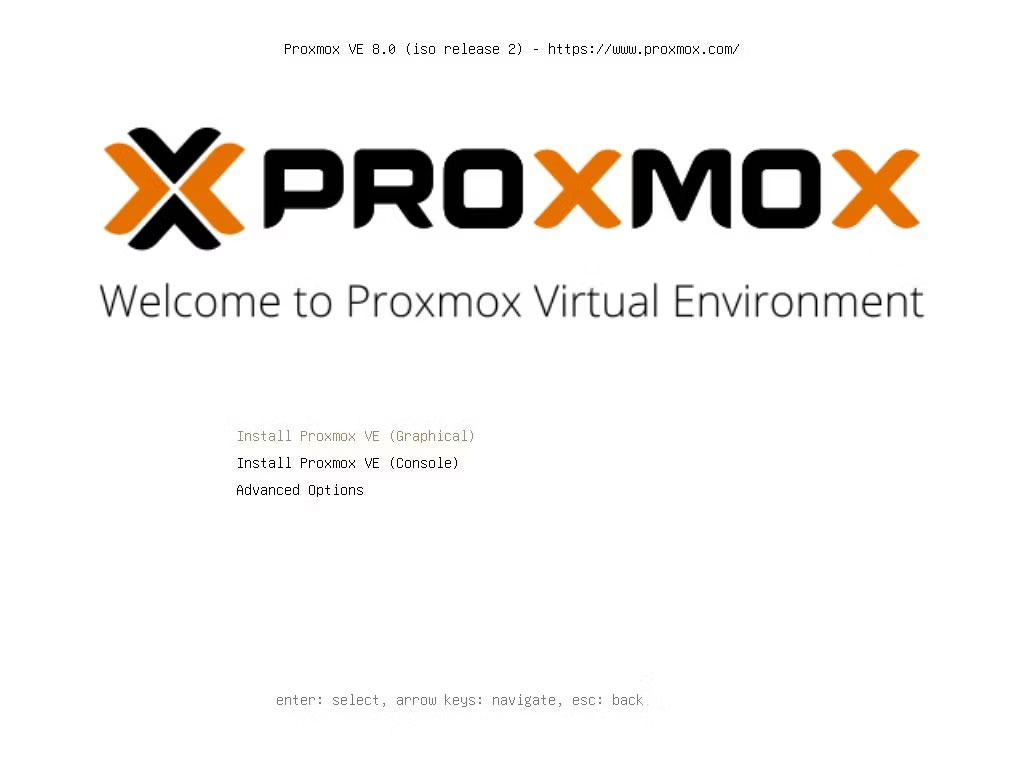
3. Bạn sẽ thấy màn hình chào mừng Proxmox. Ở đây chọn Install Proxmox VE (Graphical) rồi nhấn Enter.
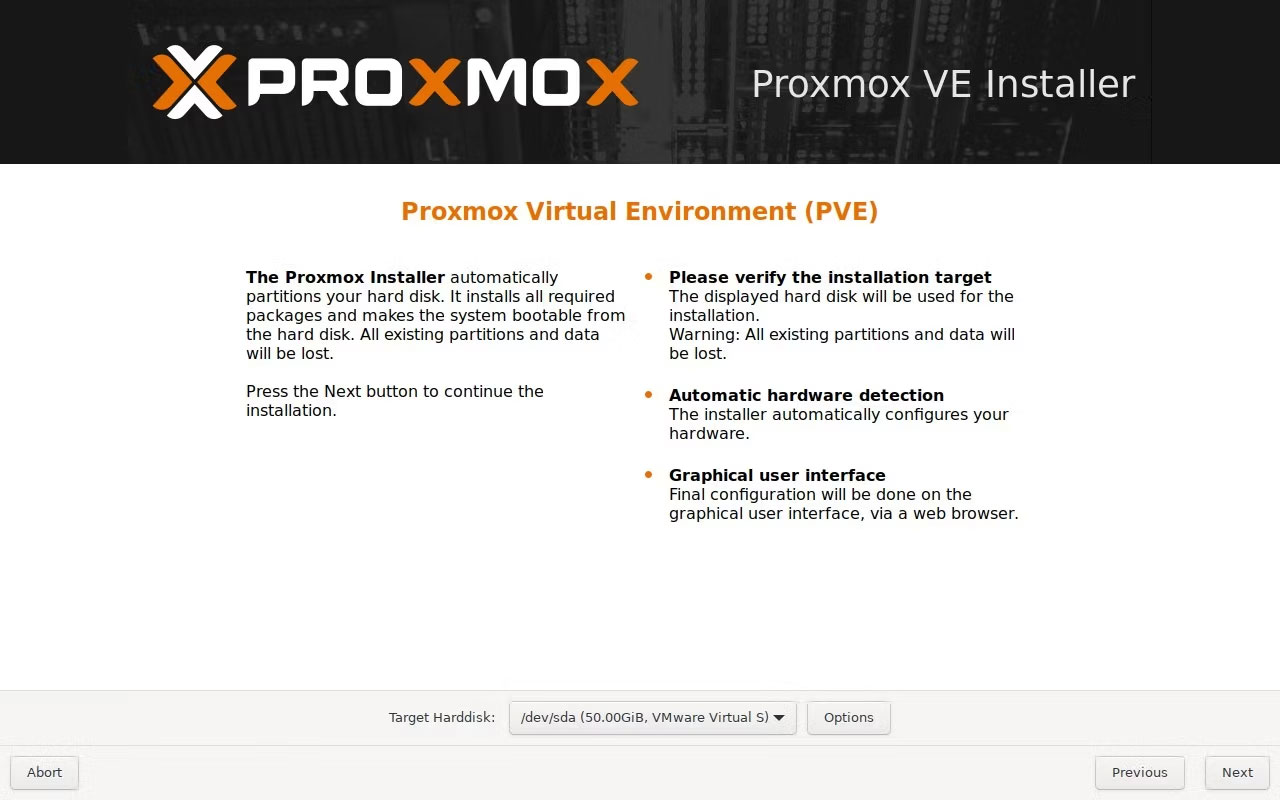
4. Nhấp vào I agree và chọn ổ đĩa đích. Sau đó nhấp vào Next.
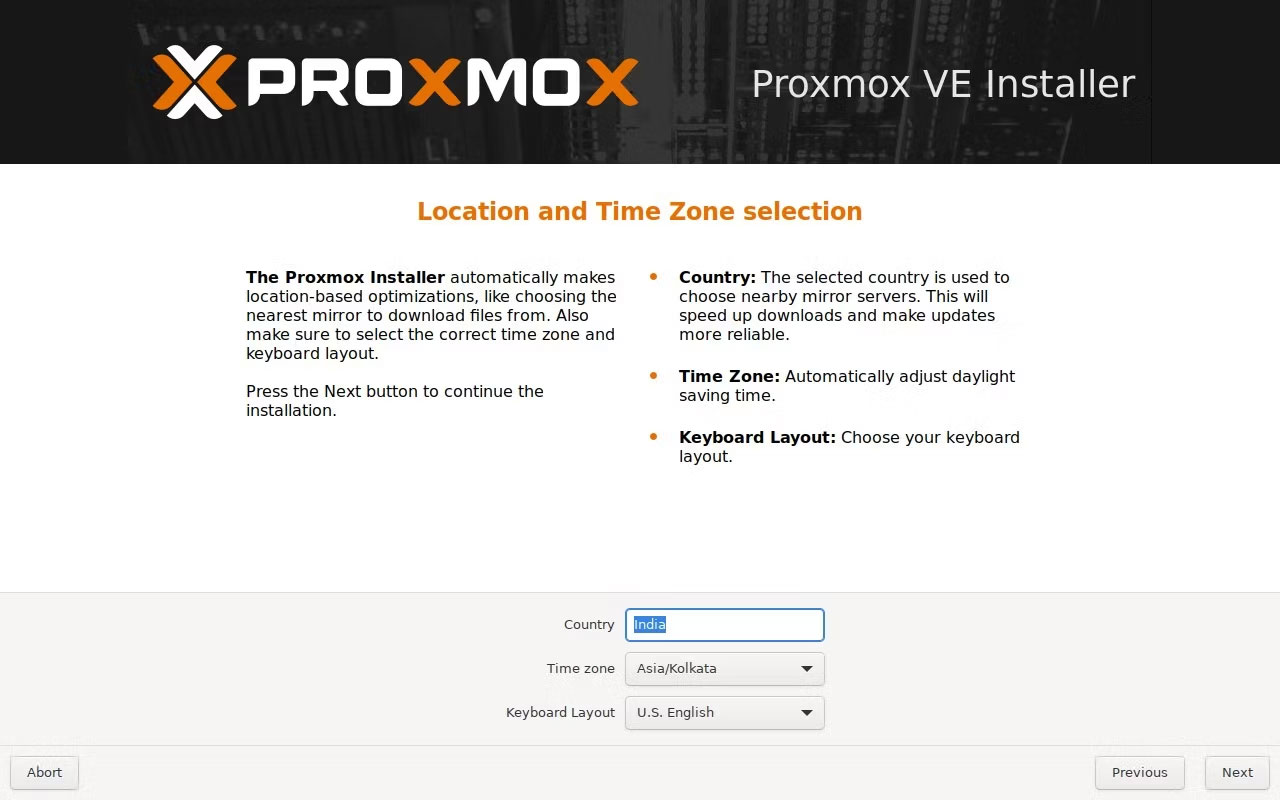
5. Chọn vị trí, múi giờ và bố trí bàn phím. Sau đó bấm vào Next.
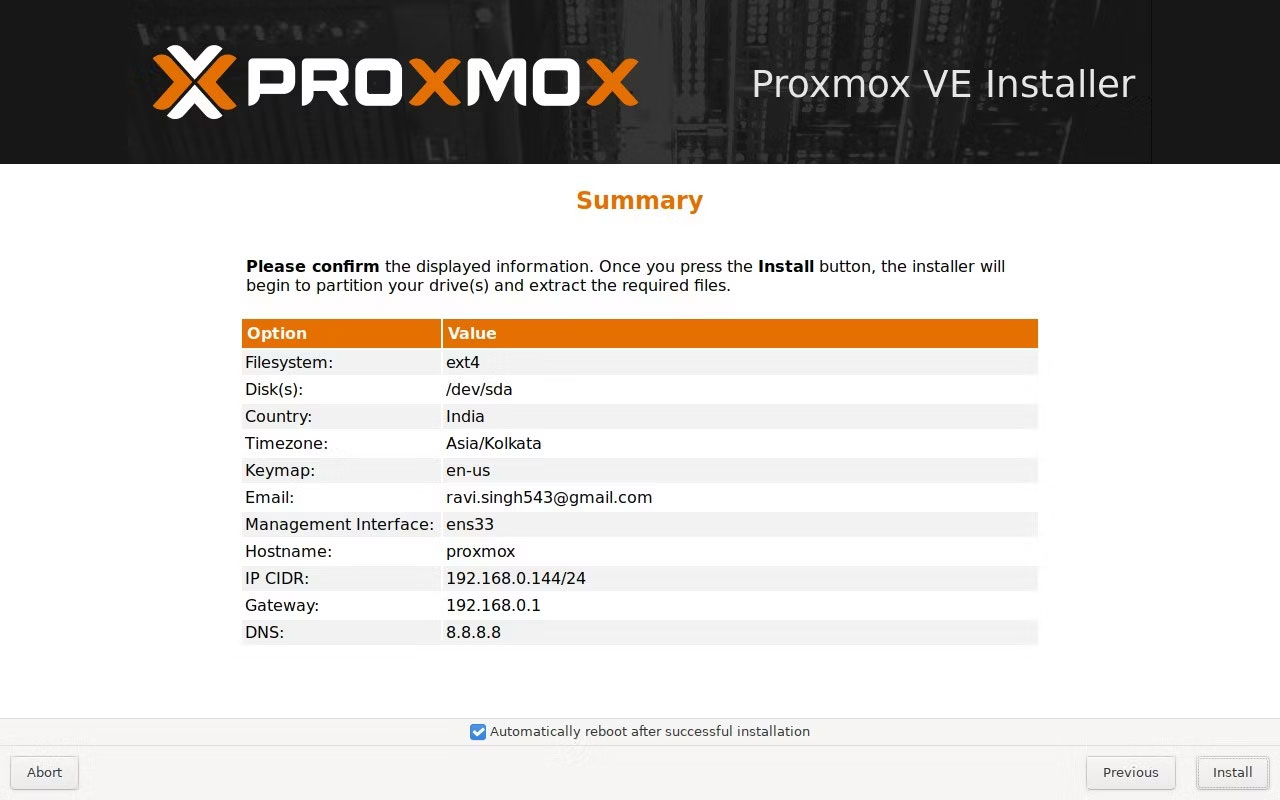
6. Thiết lập mật khẩu (ghi lại hoặc ghi nhớ) rồi nhập ID email của bạn. Tiếp tục bằng cách nhấp vào Next.
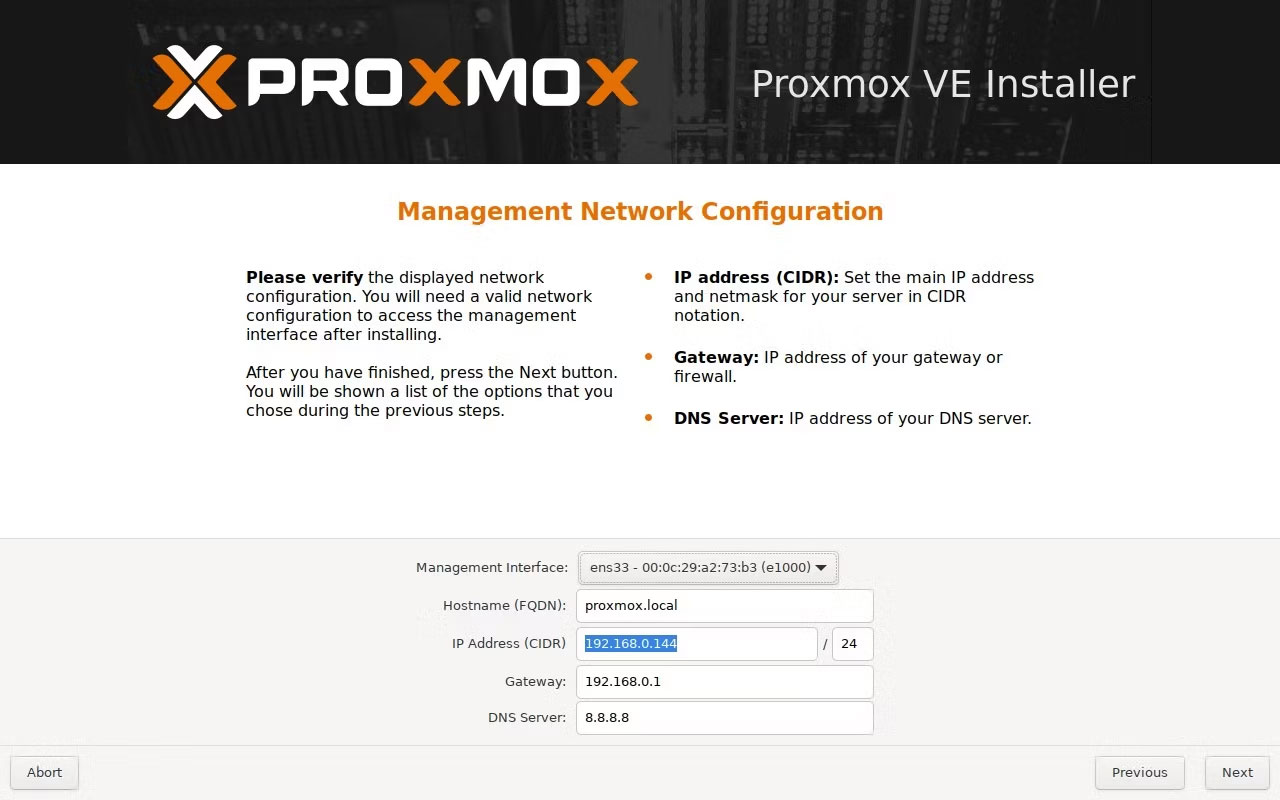
7. Sau đó thiết lập tên FQDN và để mọi thứ khác mặc định. Nhấn Next.
8. Cuối cùng, nhấp vào Install.
Bước 4: Các bước cấu hình sau cài đặt Proxmox
Sau khi cài đặt thành công Proxmox trên Intel NUC hoặc PC x86, bạn có thể truy cập giao diện web Proxmox bằng trình duyệt web ưa thích của mình bằng cách nhập địa chỉ IP của máy chủ Proxmox tại cổng 8006. Ví dụ: https://192.168.0.144:8006.
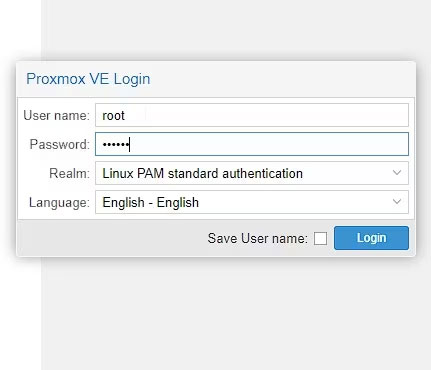
1. Bạn sẽ thấy cảnh báo SSL. Nhấp vào Advanced > Proceed.
2. Nhập root làm tên người dùng và mật khẩu mà bạn đã đặt trong quá trình cài đặt. Nhấp vào Login.
3. Sau khi đăng nhập, bạn sẽ nhận được một thông báo cảnh báo. Nhấp vào OK và bỏ qua nó vì bạn không có giấy phép doanh nghiệp.

4. Nhấp vào node mặc định Proxmox. Trong trường hợp ví dụ, nó được đặt tên là Proxmox trong quá trình cài đặt.
5. Nhấp vào nút Updates ở khung bên trái rồi nhấp vào Refresh.
6. Tiếp theo nhấn vào biểu tượng chữ thập để đóng cửa sổ.
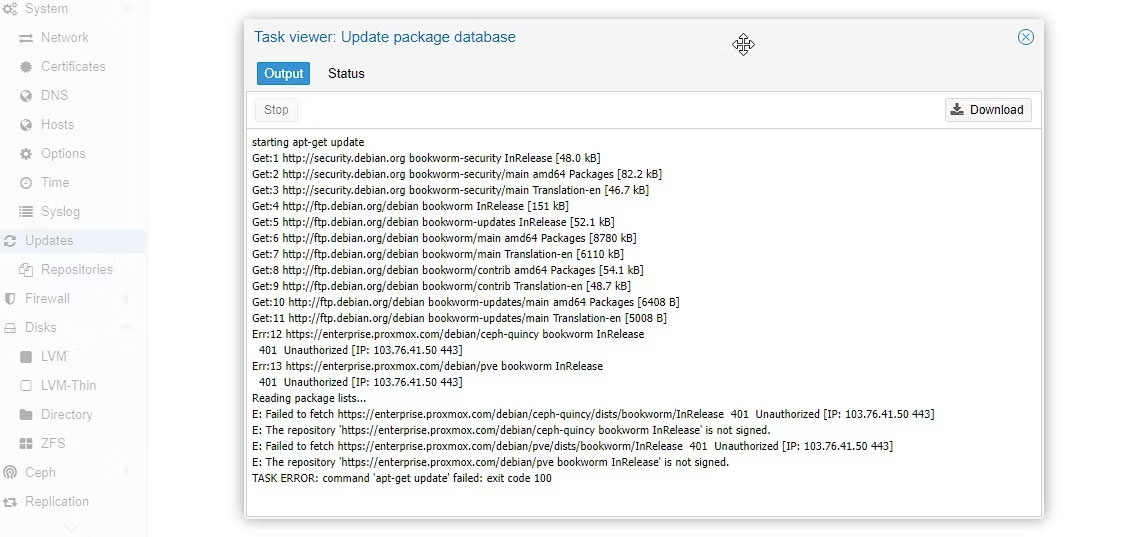
7. Nhấp vào nút Upgrade ở trên cùng (bên cạnh nút Refresh). Điều này sẽ mở ra một cửa sổ terminal mới.
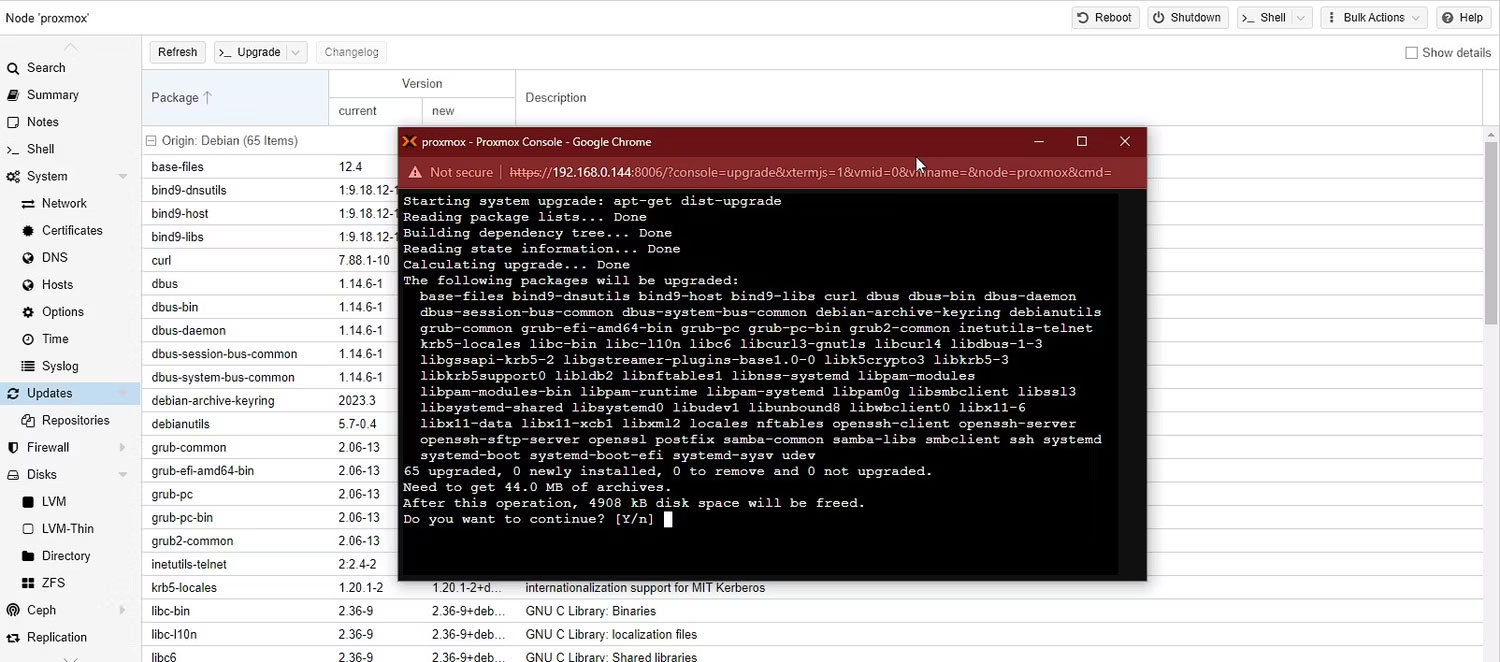
8. Khi được nhắc, hãy nhập Y và nhấn phím Enter để xác nhận và tiếp tục nâng cấp. Việc này có thể mất một lúc để hoàn thành, vì vậy hãy kiên nhẫn.
Bước 5: Tạo VM và cài đặt hệ điều hành trong Proxmox
Với Proxmox, bạn có thể tạo và quản lý máy ảo từ trình duyệt web bằng giao diện web Proxmox. Bạn có thể cài đặt và quản lý nhiều loại hệ điều hành trên các máy ảo này, bao gồm Linux, Windows và FreeBSD.
Để tạo VM và cài đặt hệ điều hành bằng giao diện web Proxmox, hãy làm theo các bước sau:
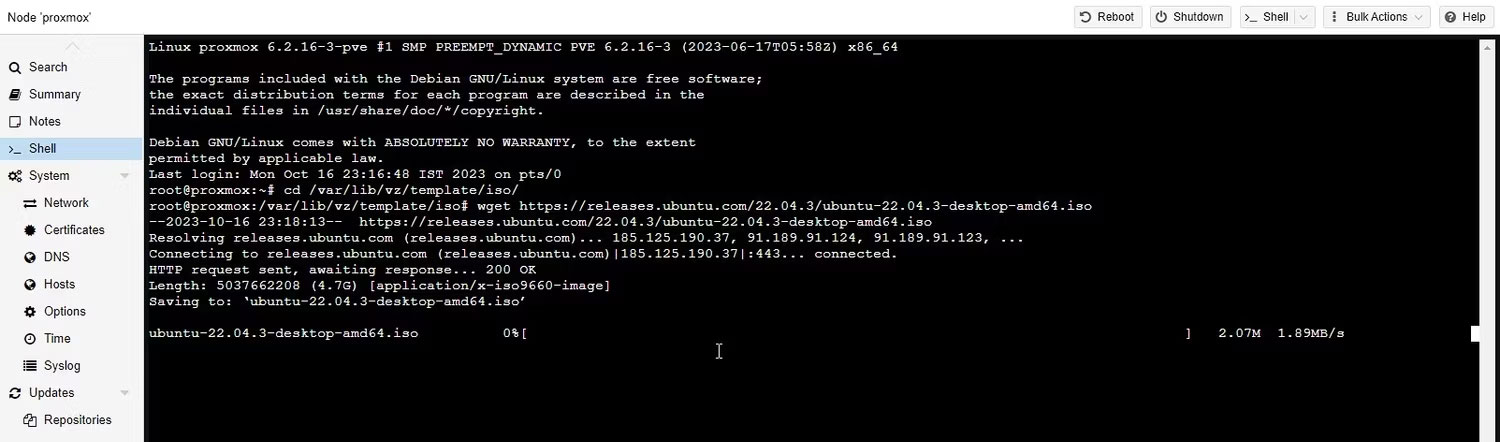
1. Sau khi nâng cấp xong, hãy đóng cửa sổ terminal. Sau đó, nhấp vào Shell.
2. Điều hướng đến vị trí sau. Bạn có thể tải xuống và lưu trữ các file ISO/IMG của hệ điều hành tại vị trí này để thiết lập và cài đặt VM trong Proxmox. Đối với hướng dẫn này, hãy cài đặt Home Assistant trên Intel NUC Proxmox Server.
cd /var/lib/vz/template/iso/
wget https://releases.ubuntu.com/22.04.3/ubuntu-22.04.3-desktop-amd64.iso
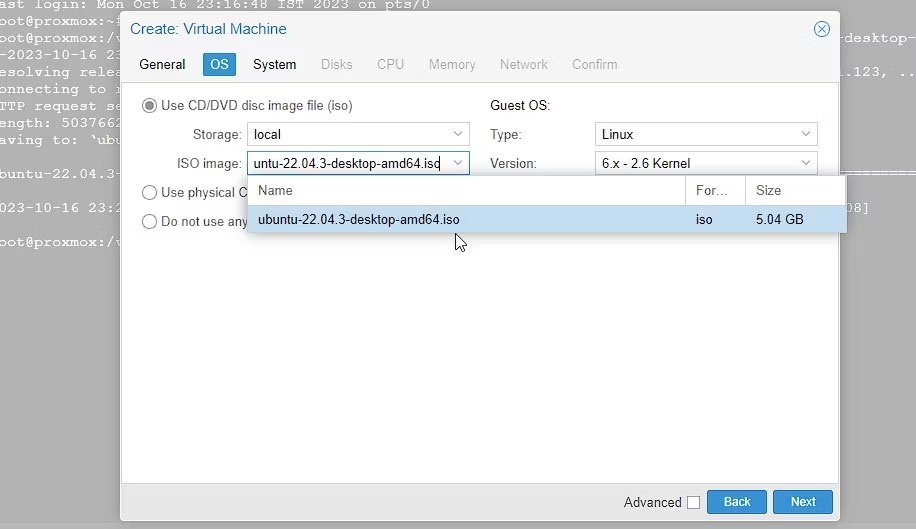
3. Nhấp vào nút Create VM ở góc trên bên phải.
4. Trong phần General, nhập tên cho máy ảo của bạn.
5. Sau đó nhấp vào Next, chọn file ISO Ubuntu trong tùy chọn ISO image và nhấp vào Next lần nữa.
6. Để mọi thứ mặc định trong phần System. Trong Disks, điều chỉnh kích thước ổ đĩa (nếu cần) và nhấp vào Next.
7. Trong phần CPU, chọn lõi xử lý để gán rồi nhấn Next. Tăng bộ nhớ lên kích thước mong muốn hoặc được yêu cầu và nhấn Next.
8. Chọn network adapter. Bạn cũng có thể giữ cài đặt mặc định bằng cách nhấp vào Next > Finish.
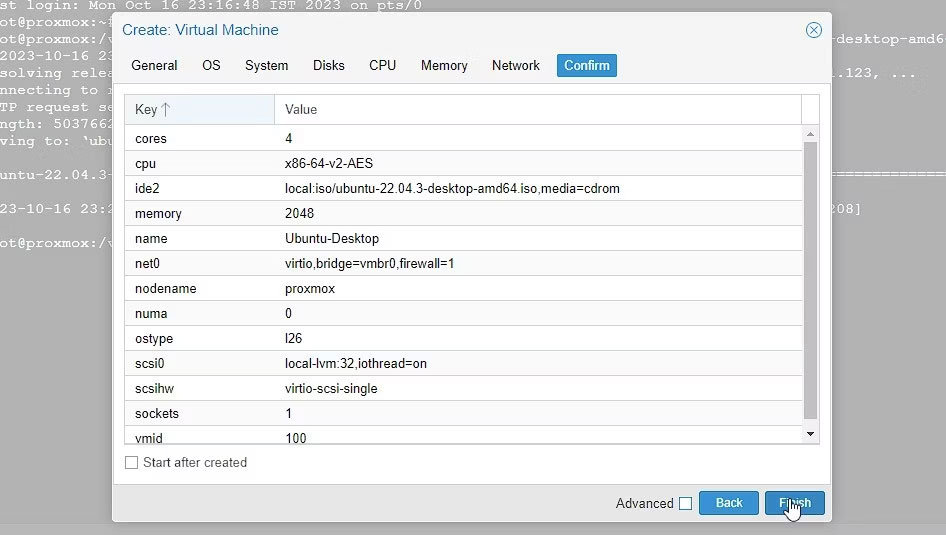
9. Sau khi cấu hình, chọn VM mới và nhấp vào Start.
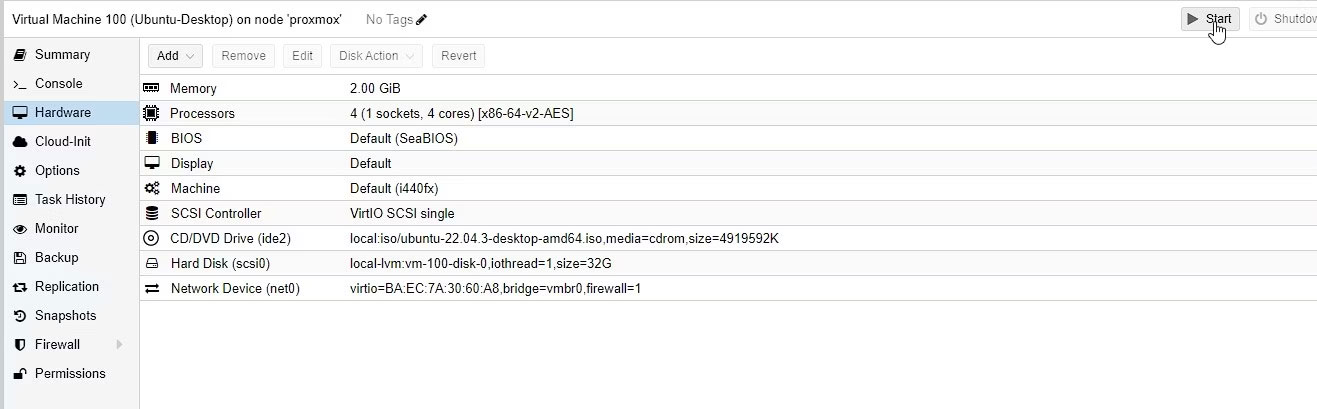
10. Nhấp vào Console để xem, cài đặt và quản lý cài đặt hệ điều hành. Sau khi cài đặt, bạn có thể khởi động Ubuntu VM và sử dụng hệ điều hành trên trình duyệt web từ bất kỳ thiết bị nào trên mạng.
Khi bạn đã tạo một máy ảo, bạn có thể khởi động, dừng hoặc di chuyển nó sang máy chủ Proxmox khác.
Proxmox cung cấp khả năng di chuyển trực tiếp cho phép bạn di chuyển các máy ảo giữa những máy chủ mà không có thời gian ngừng hoạt động. Tính năng này rất hữu ích cho mục đích cân bằng tải hoặc bảo trì phần cứng.
