Cách cài đặt Exchange Server 2019
- Thứ bảy - 27/03/2021 00:49
- In ra
- Đóng cửa sổ này
Tất cả những người ngưỡng mộ Exchange Server và những ai quan tâm đều biết về phiên bản Exchange Server mới nhất, tức là Exchange 2019. Các tính năng nâng cao và những biện pháp bảo mật của nó đang thu hút người dùng Exchange muốn tìm kiếm sự thay đổi. Bài viết này sẽ hướng dẫn bạn quy trình thủ công để cài đặt Exchange Server 2019.
Quy trình cài đặt thủ công Exchange Server 2019
Người dùng hoặc quản trị viên Exchange cần đáp ứng một số yêu cầu trước khi bắt đầu quy trình cài đặt Exchange Server 2019. Các điều kiện tiên quyết chính bao gồm:
Yêu cầu phần cứng
- Bộ xử lý Intel 64-bit (EM64T), bộ xử lý AMD 64-bit
- Dung lượng ổ đĩa trống tối thiểu 30GB
- Bộ nhớ tối thiểu 128GB (cho Mailbox), 64GB (cho Edge Transport)
- Hệ thống file NTFS
- Độ phân giải màn hình 1024 x 768
Yêu cầu phần mềm
Yêu cầu hệ điều hành
- Mailbox và Exchange Transport: Windows Server 2019 Standard/Data Center
- Công cụ quản lý: Windows 10 (64-bit) hoặc Windows Server 2019 Standard/Data Center
Yêu cầu Outlook Client
- Outlook 2013/Outlook 2016/Outlook 2016 cho Mac/Outlook 2019/Outlook (Mac) cho Office 365
Yêu cầu về mạng & máy chủ thư mục
- Active Directory Forests: Windows Server 2012 R2 hoặc các phiên bản mới hơn
- Active Directory Site với Domain Controller có thể ghi, không thể xóa
- Domain Controller: Windows Server 2019 Standard/Windows Server 2016
- Standard/Windows Server 2012 R2 Standard
- DNS Namespace: Contiguous/ Non-Contiguous/Disjoint/ Single label domain
- Hỗ trợ IPv6: Yêu cầu cả IPv4 và IPv6
Khi tất cả các yêu cầu ở trên được đáp ứng, quản trị viên Exchange có thể tiếp tục để chuẩn bị Active Directory.
Đối với các tổ chức nhỏ, chỉ cần tài khoản là thành viên của Schema Admin cũng như các nhóm bảo mật Enterprise Admin để chuyển sang giai đoạn thiết lập Exchange là đủ.
Nhưng đối với các tổ chức lớn hơn có nhiều hộp thư, cần phải chuẩn bị một môi trường Active Directory trước khi thực hiện quá trình thiết lập Exchange.
Chuẩn bị môi trường Active Directory cho Exchange 2019
1. Trước tiên hãy cài đặt .NET framework (4.7.2 hoặc 4.7.1), Visual C++ Redistributable Packages for Visual Studio và Unified Communications Managed API trên hệ thống Exchange của bạn.
2. Sau khi tất cả các yêu cầu phần mềm trên được cài đặt, hãy khởi động lại hệ thống.
3. Khởi chạy Windows PowerShell (với quyền admin). Tại đây, hãy chạy lệnh như bên dưới.
Install-WindowsFeature RSAT-ADDS
4. Bước tiếp theo là chạy một lệnh khác trong Windows PowerShell để cài đặt các yêu cầu Server.
Install-WindowsFeature NET-Framework-45-Features, RPC-over-HTTP-proxy, RSAT-Clustering, RSAT-Clustering-CmdInterface, RSAT-Clustering-Mgmt, RSAT-Clustering-PowerShell, Web-Mgmt-Console, WAS-Process-Model, Web-Asp-Net45, Web-Basic-Auth, Web-Client-Auth, Web-Digest-Auth, Web-Dir-Browsing, Web-Dyn-Compression, Web-Http-Errors, Web-Http-Logging, Web-Http-Redirect, Web-Http-Tracing, Web-ISAPI-Ext, Web-ISAPI-Filter, Web-Lgcy-Mgmt-Console, Web-Metabase, Web-Mgmt-Console, Web-Mgmt-Service, Web-Net-Ext45, Web-Request-Monitor, Web-Server, Web-Stat-Compression, Web-Static-Content, Web-Windows-Auth, Web-WMI, Windows-Identity-Foundation, RSAT-ADDS
5. Bây giờ, hãy mount Exchange Server 2019 Preview Installation Media trên hệ thống.
6. Nhập cmd vào hộp Search, nhấp chuột phải vào Command Prompt và chọn tùy chọn Run as administrator. Trên cửa sổ Command Prompt đã mở, hãy chạy lệnh sau:
Setup.exe /PrepareSchema /IAcceptExchangeServerLicenseTerms
7. Tiếp theo, chạy lệnh cuối cùng này để chuẩn bị domain:
Setup.exe /PrepareAllDomains /IAcceptExchangeServerLicenseTerms
8. Bạn đã chuẩn bị thành công môi trường Active Directory (Schema và Domain) để cài đặt Exchange Server 2019.
Bây giờ, bạn cần chuyển sang thiết lập cài đặt Exchange Server với ứng dụng đã thiết lập trên hệ thống Exchange.
Quy trình cài đặt và thiết lập Exchange Server 2019
Thực hiện các bước sau để hoàn tất cài đặt thiết lập Exchange 2019.
1. Vào Setup.exe, nhấp đúp vào nó để bắt đầu quá trình cài đặt.
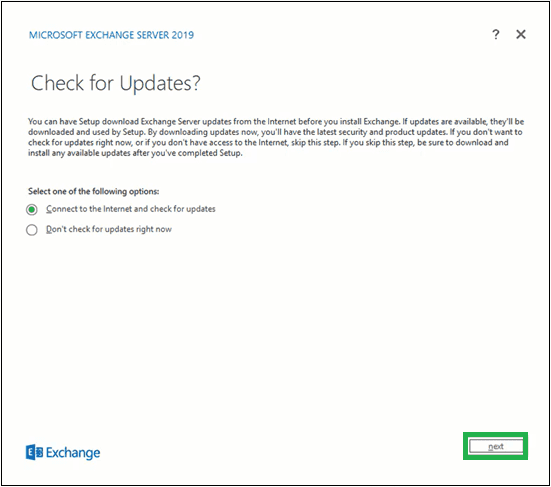
2. Vào cửa sổ Check for updates? tiếp theo, chọn một trong các tùy chọn - Connect to the Internet and check for updates và Don’t check for updates right now tùy theo nhu cầu và nhấp vào Next.
3. Tiếp theo, quá trình sao chép các file Exchange cần thiết để cài đặt Exchange Server sẽ bắt đầu. Hãy xem quá trình!
4. Màn hình Initializing Setup sẽ được hiển thị tiếp theo.
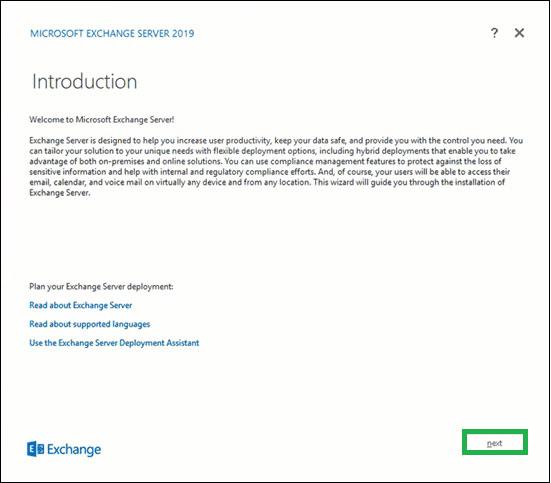
5. Bây giờ, bạn sẽ thấy trang giới thiệu về Exchange Server 2019. Hãy đọc phần giới thiệu ngắn gọn này. Bạn có thể nhấp vào các liên kết được cung cấp để biết thêm thông tin. Nhấn Next để tiếp tục.
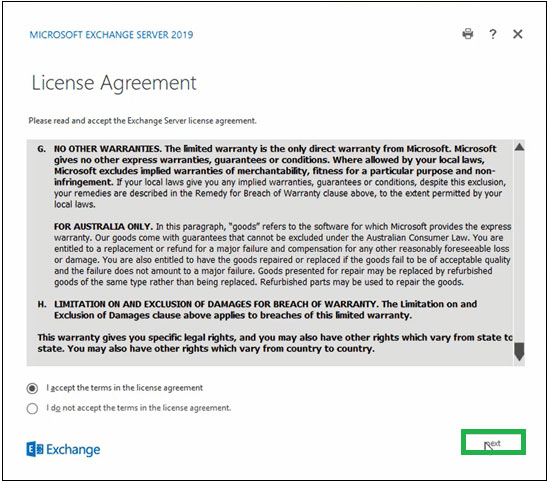
6. Trên trang License Agreement, đọc tất cả các hướng dẫn, chọn tùy chọn chấp nhận những điều khoản trong thỏa thuận cấp phép và nhấp vào Next.
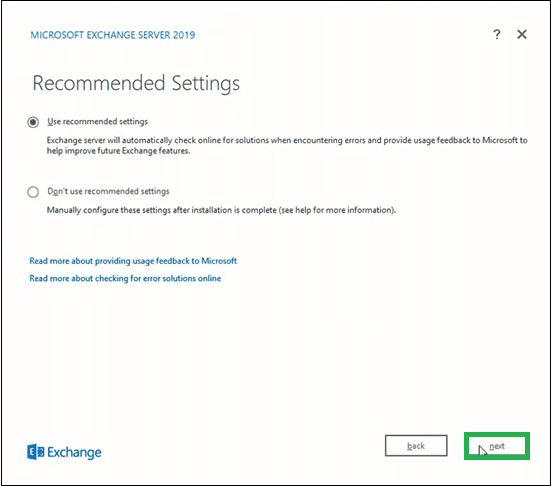
7. Trên trang Recommendation Settings, chọn tùy chọn Use recommendation settings và nhấp vào Next.
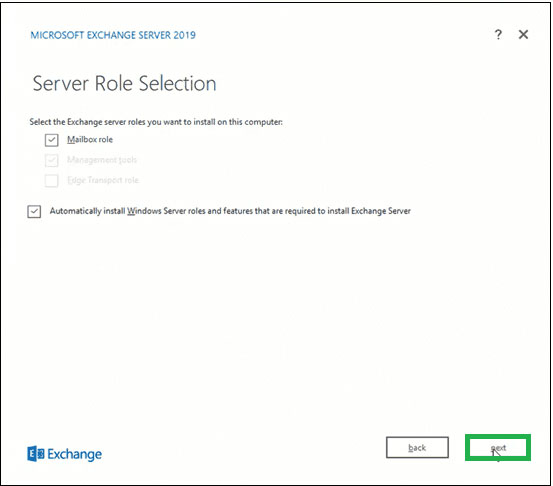
8. Tại đây, chọn tùy chọn Mailbox role trong phần Exchange Server roles và chọn hộp kiểm Automatically install Windows Server roles and features that are required to install Exchange Server. Nhấn Next.
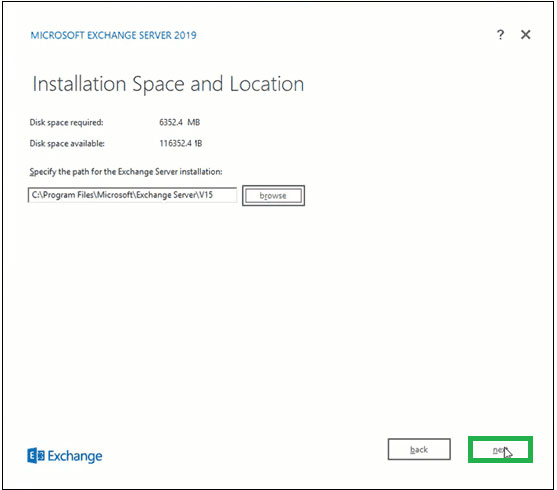
9. Bấm duyệt để chỉ định đường dẫn cho cài đặt Exchange Server hoặc để nó ở đường dẫn đã chọn mặc định. Nhấn Next.
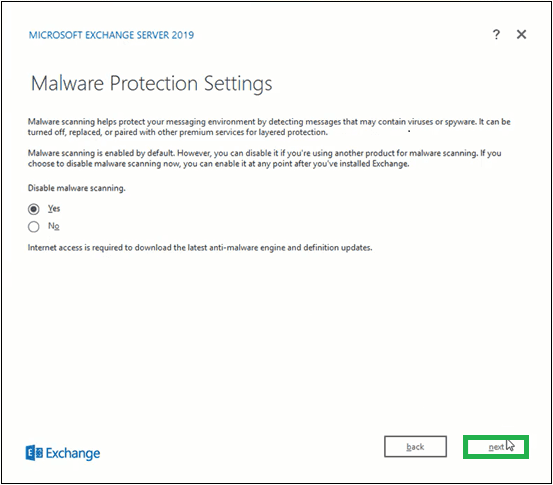
10. Đối với Malware Protection Settings, hãy chọn tùy chọn Yes hoặc No (để tắt tính năng quét phần mềm độc hại) và nhấp vào Next.
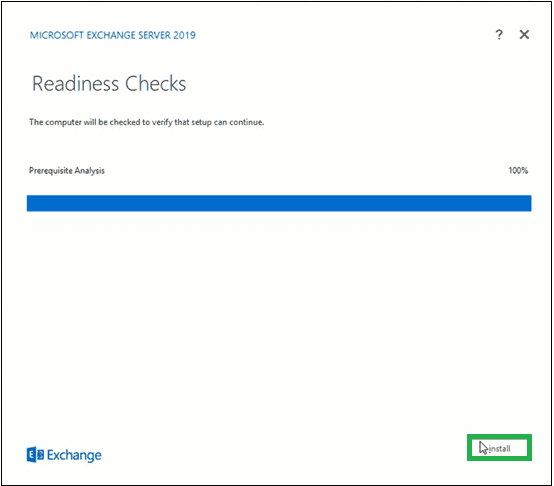
11. Chờ quá trình Readiness Checks hoàn thành để xác minh thiết lập và sau đó nhấp vào Install.
12. Setup Progress sẽ bắt đầu sao chép các file Exchange.
13. Sau khi thiết lập hoàn tất, nó sẽ hiển thị trang Setup Completed.
Để khởi chạy Exchange Server ngay lập tức, hãy chọn hộp kiểm Launch Exchange Administration Center after Finishing Exchange setup. Nhấp vào Finish.
Exchange Server 2019 đã được cài đặt thành công trên hệ thống của bạn. Bằng cách chạy hai lệnh này trong Exchange Management Shell, bạn sẽ nhận được thông tin đầy đủ về Exchange Server mới được cài đặt của mình.
Get-ExchangeServer
Get-ExchangeServer -Identity MailboxName | Format-List
Quản trị viên Exchange 2019 cũng có thể đăng nhập vào Exchange Admin Center để xác nhận cài đặt Exchange Server thành công.
Lưu ý: Quản trị viên Exchange phải tuân theo các tác vụ cài đặt sau cho Exchange Server, chẳng hạn như cung cấp product key Exchange, cài đặt công cụ quản lý Exchange trên máy khách, đăng ký Edge, cấu hình chứng chỉ bảo mật, v.v...
