Cả ổ SSD và thẻ SD đều sử dụng công nghệ lưu trữ flash tương tự nhau để lưu trữ dữ liệu. Tuy nhiên, SSD cung cấp các trình điều khiển nhanh và khả năng chịu lỗi cao hơn, khiến chúng đáng tin cậy hơn nhiều so với thẻ SD. Mặc dù hầu hết Raspberry Pi vẫn đang chạy trên thẻ nhớ microSD, bạn cũng có thể sử dụng ổ SSD ngoài để boot Raspberry Pi của mình.
Dưới đây, bạn sẽ tìm hiểu các bước để kích hoạt khả năng boot USB trên Raspberry Pi, sau đó sử dụng ổ SSD ngoài làm phương tiện để boot Raspberry Pi OS và sử dụng dung lượng còn lại làm bộ lưu trữ vĩnh viễn cho dữ liệu của bạn.
Những thứ bạn sẽ cần
Bạn sẽ cần những thứ sau để kích hoạt khả năng boot SSD trên Raspberry Pi:
- Raspberry Pi (4, 400, 3B+, Zero W hoặc Zero 2 W)
- Thẻ nhớ microSD (tối thiểu 1GB, tối đa 64GB)
- Đầu đọc thẻ nhớ microSD
- Bàn phím và chuột (cả không dây hoặc có dây đều hoạt động) - không bắt buộc nếu bạn muốn kích hoạt khả năng boot SSD trên Raspberry Pi 4 hoặc Pi 400
- Bất kỳ loại SSD ngoài nào (chẳng hạn như M.2, SATA hoặc NVMe/PCIe)
- Hộp đựng USB cho SSD (nếu sử dụng SSD trong)
Boot Raspberry Pi 4 hoặc 400 từ SSD
Boot Raspberry Pi từ ổ SSD và sử dụng nó để lưu trữ vĩnh viễn có thể mang lại những cải tiến đáng kể về hiệu suất và độ tin cậy so với việc sử dụng thẻ nhớ microSD. Để boot Raspberry Pi 4 hoặc Raspberry Pi 400 từ SSD, bạn phải kích hoạt tính năng boot USB bằng cách làm theo các bước sau:
1. Kết nối thẻ nhớ microSD với máy tính khác bằng đầu đọc thẻ.
2. Tải xuống, cài đặt và khởi chạy công cụ Raspberry Pi Imager trên hệ thống Windows, Linux hoặc Mac của bạn.
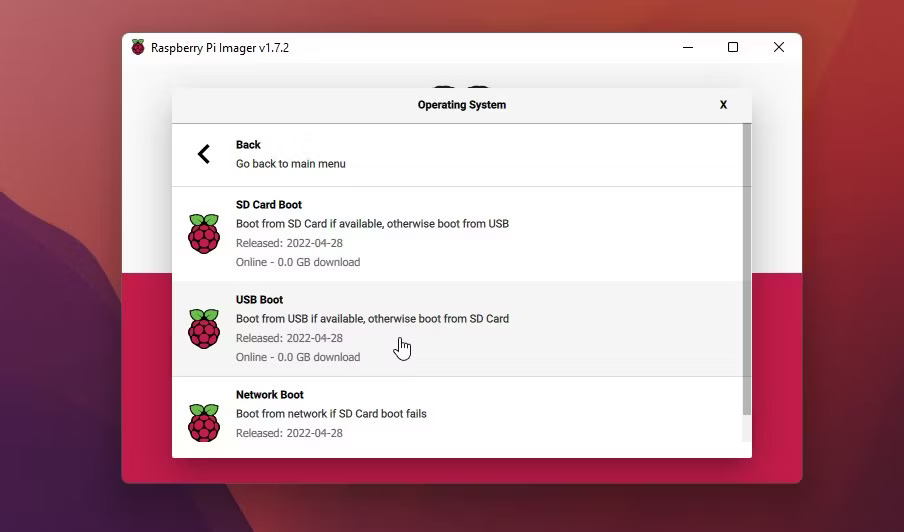
3. Nhấp vào nút Choose OS rồi chọn Misc Utility Images > Bootloader > USB Boot.
4. Nhấp vào nút Choose Storage và chọn thẻ nhớ microSD được kết nối với hệ thống của bạn.
5. Bấm vào Write và đợi quá trình flash hoàn tất. Nó sẽ chỉ mất một vài giây.
6. Sau quá trình flash, thẻ nhớ microSD sẽ tự động được đẩy ra. Ngắt kết nối thẻ nhớ microSD khỏi hệ thống và lắp thẻ vào khe cắm thẻ nhớ microSD của Raspberry Pi 4 hoặc 400.
7. Kết nối nguồn điện với Raspberry Pi để bật nó. Pi sẽ tự động đọc và flash USB bootloader từ thẻ nhớ microSD được kết nối. Việc này mất vài giây.
8. Khi flash thành công, đèn LED màu xanh lục trên Raspberry Pi bắt đầu nhấp nháy đều đặn. Để xác nhận thêm, hãy kết nối cổng HDMI với màn hình. Nếu màn hình hiển thị màn hình màu xanh lục, điều đó cho biết quá trình flash đã hoàn tất.
9. Tắt Raspberry Pi và ngắt kết nối hoặc tháo thẻ nhớ microSD.
Boot Raspberry Pi 3 hoặc Zero từ SSD
Để kích hoạt khả năng boot SSD trên Raspberry Pi 3, Zero W hoặc Zero 2 W, bạn cần flash Raspberry Pi OS tiêu chuẩn trên thẻ nhớ microSD, boot Raspberry Pi và thực hiện một số thay đổi đối với các file cấu hình để kích hoạt USB (SSD) boot. Các bước thực hiện như sau:
1. Lắp thẻ nhớ microSD vào hệ thống và khởi chạy công cụ Raspberry Pi Imager.
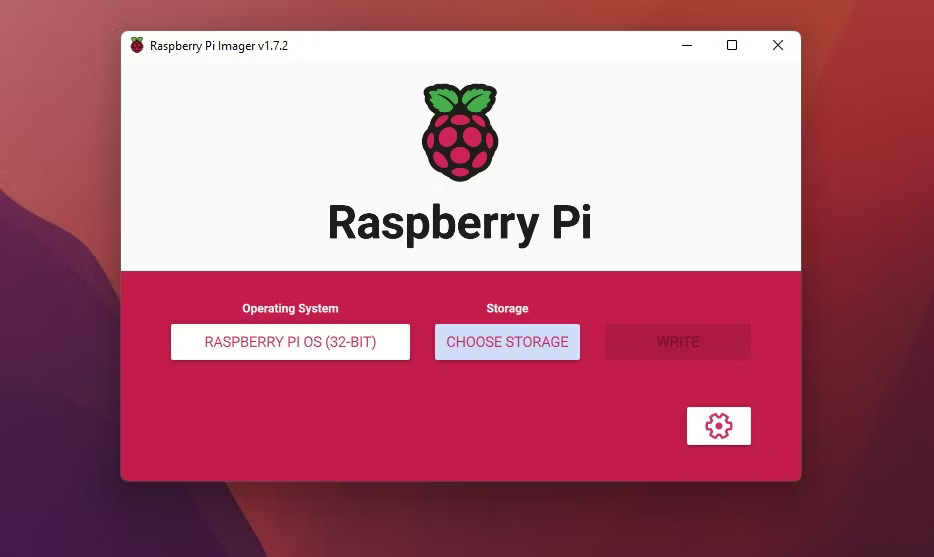
2. Bấm vào Choose OS rồi chọn Raspberry Pi OS (32-bit).
3. Nhấp vào Choose Storage và chọn thẻ nhớ microSD từ các thiết bị lưu trữ có sẵn.
4. Theo tùy chọn, bạn có thể nhấp vào biểu tượng bánh răng để hiển thị các tùy chọn nâng cao, sau đó nhập chi tiết WiFi của mạng và bật SSH.
5. Nhấp vào nút Write.
6. Sau khi quá trình flash hoàn tất, hãy rút thẻ nhớ ra khỏi hệ thống, lắp thẻ vào Raspberry Pi 3, Zero hoặc Zero 2 W và bật nó lên.
7. Kết nối bàn phím và chuột với Raspberry Pi.
8. Sau khi boot, hãy đăng nhập bằng tên người dùng mặc định pi và mật khẩu Raspberry (trừ khi bạn đã thay đổi những thông tin này trong tùy chọn nâng cao Raspberry Pi Imager).
9. Mở cửa sổ Terminal và chạy các lệnh sau.
sudo apt update -y
sudo apt full-upgrade -y
10. Sau khi cập nhật và nâng cấp các gói, hãy chạy lệnh sau trong cửa sổ Terminal.
vcgencmd otp_dump | grep 17
11. Đầu ra sẽ hiển thị mã 17:1020000a, cho biết khả năng boot USB đã bị vô hiệu hóa. Để kích hoạt USB boot, chúng ta cần chỉnh sửa file config.txt bằng cách chạy lệnh sau.
sudo nano config.txt
12. Cuộn xuống cuối file. Đối với dòng cuối cùng, thêm đoạn code sau.
program_usb_boot_mode=1
Nhấn Ctrl + X, gõ Y và nhấn phím Enter để lưu các thay đổi. Ngoài ra, bạn có thể chạy lệnh sau để thêm code cần thiết vào file config.txt và bật tính năng boot USB trên Raspberry Pi 3, Zero hoặc Zero 2 W.
echo program_usb_boot_mode=1 | sudo tee -a /boot/config.txt
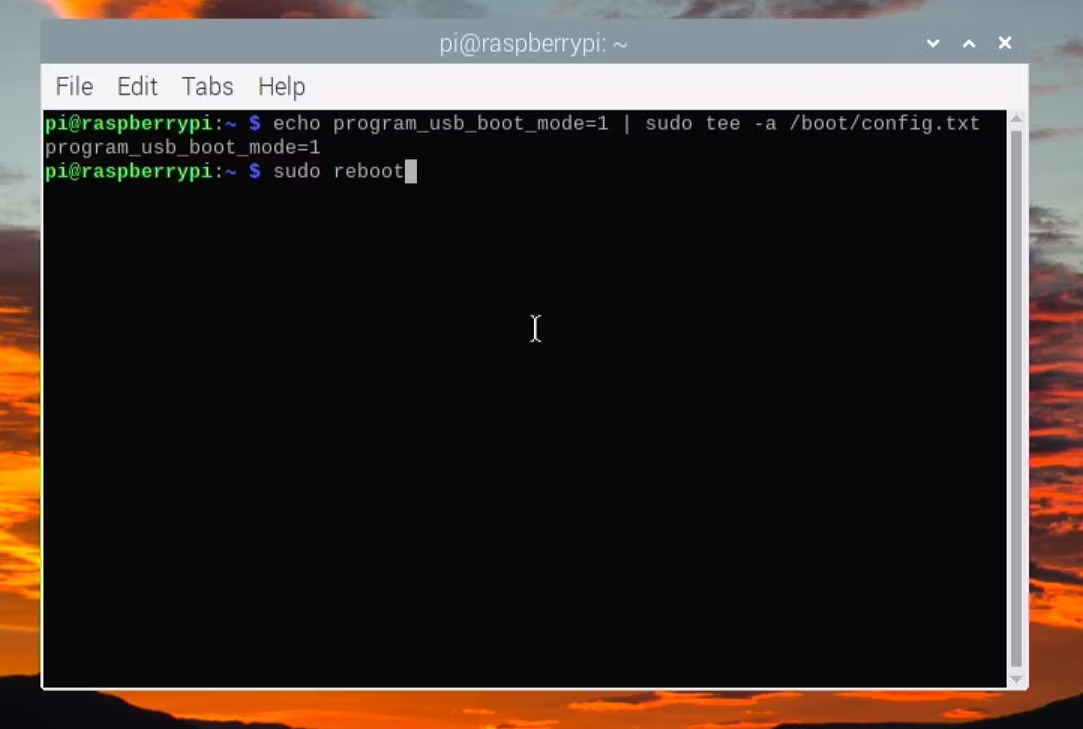
13. Khởi động lại Raspberry Pi rồi chạy lệnh sau để xác nhận xem USB boot có được bật hay không.
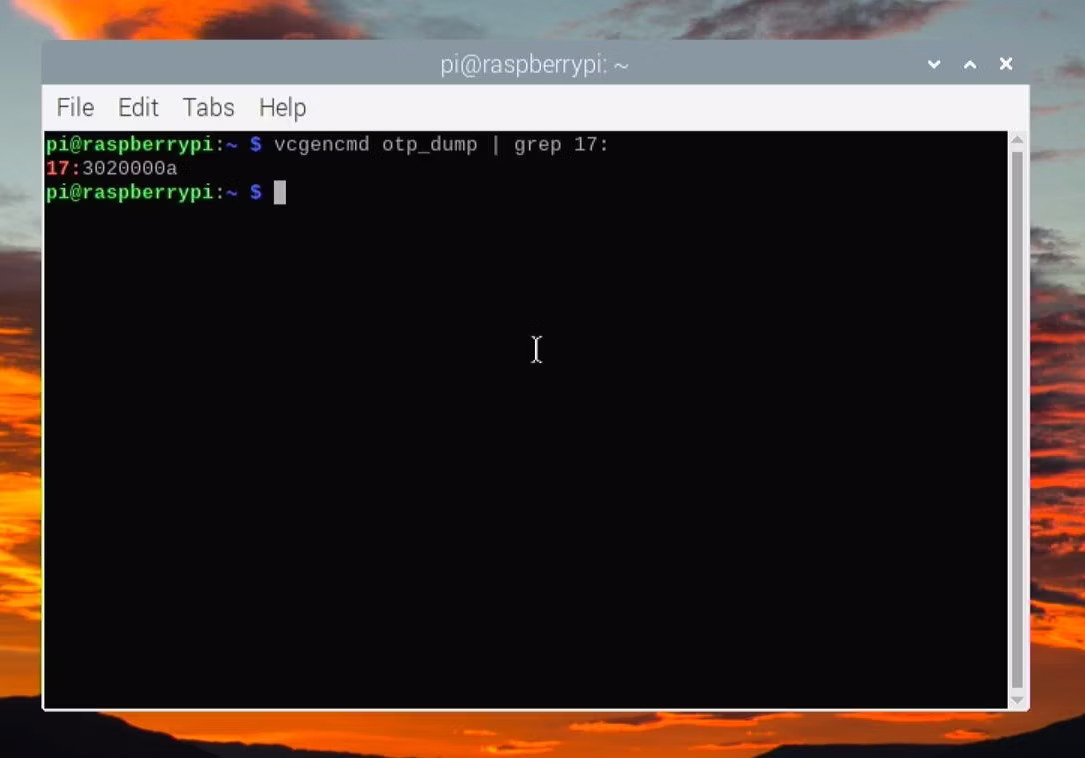
vcgencmd otp_dump | grep 17
14. Nếu đầu ra hiển thị là 17:3020000a, USB boot đã được bật. Bây giờ, bạn có thể tháo thẻ nhớ microSD khỏi Raspberry Pi 3, Zero hoặc Zero 2 W.
15. Sau khi bật boot USB, bạn có thể xóa code khỏi file config.txt bằng trình chỉnh sửa nano hoặc lệnh sau.
sudo sed -i 's/program_usb_boot_mode=1//g' /boot/config.txt
Chuẩn bị SSD Raspberry Pi có khả năng boot
Để boot Raspberry Pi Zero, Raspberry Pi 3, Raspberry Pi 4 hoặc Raspberry Pi 400 qua SSD, bạn phải cài đặt hệ điều hành như Raspberry Pi OS trên SSD bằng cách sử dụng Raspberry Pi Imager (hoặc công cụ Balena Etcher).
Trong trường hợp bạn đang chạy hệ điều hành và service qua thẻ nhớ microSD, bạn có thể sao chép thẻ SD vào ổ cứng USB bằng Balena Etcher.
Sau khi ghi hoặc clone hệ điều hành, bạn có thể kết nối SSD với Raspberry Pi thông qua cổng USB và chạy trên Raspberry Pi. Pi sẽ tự động phát hiện USB và boot hệ điều hành từ SSD. Nếu không phát hiện được thiết bị lưu trữ USB, Raspberry Pi sẽ tiếp tục boot từ thẻ nhớ microSD (nếu được kết nối).
Để chuẩn bị boot SSD, hãy làm theo các bước sau:
1. Khởi chạy công cụ Raspberry Pi Imager và kết nối ổ SSD ngoài với hệ thống Windows, macOS hoặc Linux thông qua cổng USB.
2. Bấm Choose OS để chọn hệ điều hành mong muốn từ danh sách. Nếu bạn muốn flash image hệ điều hành đã tải xuống, bạn có thể sử dụng file hệ điều hành bằng cách nhấp vào tùy chọn Use Custom và sau đó chọn file hệ điều hành từ hệ thống của bạn.
3. Nhấp vào Choose Storage để chọn phương tiện lưu trữ SSD được kết nối.
4. Bấm vào nút Write.
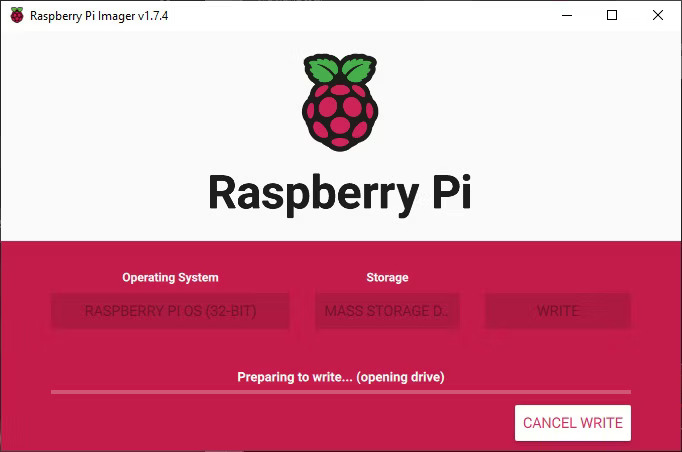
5. Sau khi hệ điều hành được flash trên SSD, hãy tháo ổ SSD khỏi hệ thống một cách an toàn, sau đó kết nối ổ SSD USB với một trong các cổng USB 3.0 hoặc 2.0 trên Raspberry Pi 4/400, Raspberry Pi 3 (hoặc với Zero W hoặc 2 W qua cổng micro-USB qua adapter USBOTG).
6. Kết nối nguồn điện để bật Raspberry Pi.
7. Raspberry Pi sẽ kiểm tra ổ SSD có khả năng boot được kết nối với cổng USB và boot hệ điều hành.
Sử dụng ổ SSD làm bộ lưu trữ vĩnh viễn cho Raspberry Pi
Sau khi boot hệ điều hành từ ổ SSD ngoài, bạn có thể sử dụng dung lượng còn sót lại trong SSD làm bộ nhớ vĩnh viễn để lưu trữ các dữ liệu khác.
Để kiểm tra dung lượng lưu trữ còn trống, hãy chạy lệnh sau trong ứng dụng Terminal.
df -h
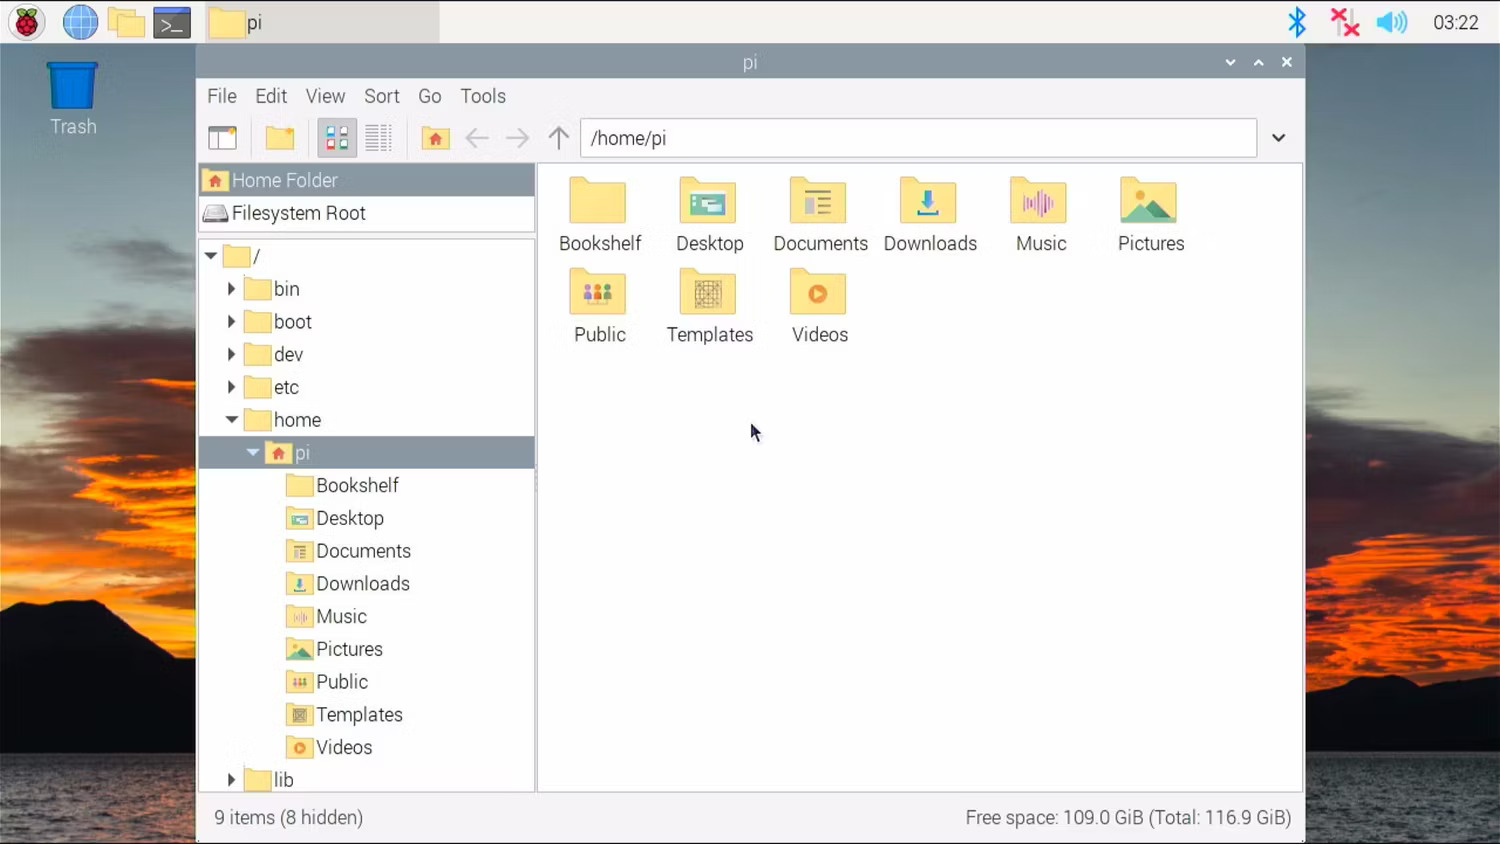
Nếu bạn đang sử dụng phiên bản Desktop của Raspberry Pi OS, hãy mở File Manager và nhấp vào Filesystem Root ở đầu màn hình. Bạn có thể thấy dung lượng lưu trữ có sẵn ở góc dưới bên phải.
Mở rộng hệ thống file
Nếu không thấy hết dung lượng ổ SSD, bạn có thể làm theo các bước sau để mở rộng hệ thống file trên Raspberry Pi.
- Mở Terminal và chạy lệnh sau để cập nhật và nâng cấp các gói và kho lưu trữ.
sudo apt update -y sudo apt upgrade -y - Sau đó gõ sudo raspi-config và nhấn phím Enter.
- Sử dụng các phím mũi tên xuống để di chuyển vùng chọn sang Advanced Options và nhấn phím Enter.
- Di chuyển vùng chọn sang Expand Filesystem và nhấn phím Enter.
- Trên màn hình tiếp theo, chọn OK và nhấn phím Enter.
- Sau đó chọn Finish và nhấn phím Enter.
- Bạn sẽ được yêu cầu khởi động lại Raspberry Pi; chọn Yes và nhấn phím Enter để khởi động lại.
- Sau khi khởi động lại, nhập lệnh df -h để kiểm tra lại dung lượng lưu trữ còn trống. Bạn sẽ thấy bộ lưu trữ SSD hoàn chỉnh có sẵn để sử dụng trên Raspberry Pi 3, 4, Zero W hoặc Zero 2 W.
Cuối cùng, sử dụng lệnh rsync hoặc cp để di chuyển dữ liệu từ thẻ nhớ microSD sang ổ SSD. Đảm bảo kết nối thẻ nhớ microSD với Raspberry Pi.
Giờ đây, bạn đã có bộ lưu trữ SSD nhanh hơn và có thể sử dụng nó để xây dựng bộ lưu trữ đám mây cá nhân có thể truy cập từ mọi nơi hoặc để host một trang web an toàn trên Raspberry Pi.
Bạn cũng có thể xây dựng Raspberry Pi NAS bằng cách cài đặt Samba và sử dụng SSD làm bộ lưu trữ mạng trong mạng gia đình hoặc văn phòng của bạn.
