Cách bookmark thư mục trên Windows 10
- Thứ hai - 28/10/2019 08:08
- In ra
- Đóng cửa sổ này
Nếu sắp xếp các thư mục, bạn sẽ không phải vật lộn để tìm các file quan trọng. Bạn có thể bookmark thư mục yêu thích trong Windows 10 để dễ dàng truy cập. Dưới đây là một vài cách bạn có thể làm điều đó.
1. Tạo shortcut thư mục
Cách tốt nhất để liên kết với thư mục yêu thích của bạn là tạo shortcut. Windows cho phép tạo shortcut đến bất cứ thư mục nào trong File Explorer. Khi click đúp vào shortcut, bạn sẽ được đưa đến ngay đến vị trí của thư mục.
Sau khi tạo shortcut cho thư mục, bạn có thể đặt nó ở nơi thuận tiện để truy cập như desktop hoặc thư mục chứa các shortcut khác.
Để tạo shortcut, click chuột phải vào thư mục thích hợp trên desktop hoặc trong Windows File Explorer và sau đó click vào Create Shortcut.
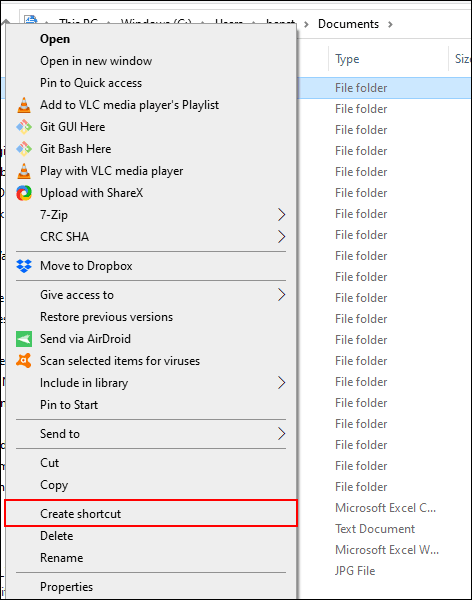
Thao tác này tạo shortcut ở cùng một vị trí với thư mục của bạn, nhưng bạn có thể di chuyển nó thủ công đến vị trí khác.
Ngoài ra, click chuột phải vào thư mục, click vào Send To và sau đó chọn Desktop (Create Shortcut).
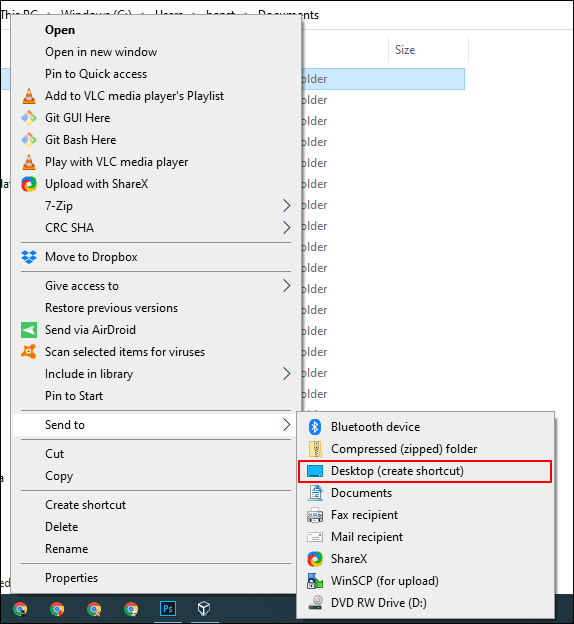
Thao tác này tạo shortcut liên kết đến thư mục bạn chọn và sẽ lập tức xuất hiện trên desktop.
2. Jump list trên thanh Taskbar
Trừ khi ẩn thanh Taskbar nếu không nó sẽ luôn hiển thị. Thanh Taskbar này sẽ cung cấp quyền truy cập ngay các chương trình thường sử dụng. Nếu để Windows File Explorer như một shortcut trên Taskbar, bạn có thể nhanh chóng truy cập vào các thư mục yêu thích với jump list.
Nếu không biết jump list, click chuột phải vào File Explorer trong Taskbar, bạn sẽ thấy danh sách các thư mục thường dùng xuất hiện. Để thuận tiện, bạn có thể ghim các thư mục yêu thích ở trên đầu danh sách.
Theo mặc định, jump list File Explorer hiển thị khoản 12 mục, nhưng bạn có thể tăng số lượng này nếu muốn.
Để thêm một thư mục vào danh sách được ghim này, hãy kéo và thả nó vào shortcut File Explorer trên thanh tác vụ.
Thư mục này sẽ xuất hiện như một mục được ghim trong jump list. Nếu muốn xóa nó, click chuột phải vào shortcut File Explorer, di chuột đến thư mục được ghim và sau đó click vào icon không được ghim xuất hiện ở bên phải.
3. Danh sách Quick Access của File Explorer
Tương tự như jump list thanh tác vụ, Windows File Explorer có một thanh điều hướng ở bên trái với danh sách Quick Access. Bạn có thể ghim thư mục yêu thích ở đây để truy cập nhanh.
Danh sách Quick Access cũng cung cấp các mục vào jump list File Explorer trên thanh tác vụ. Khi ghim một item vào Quick Access, thư mục đó cũng xuất hiện khi bạn click chuột phải vào File Explorer trên thanh tác vụ.
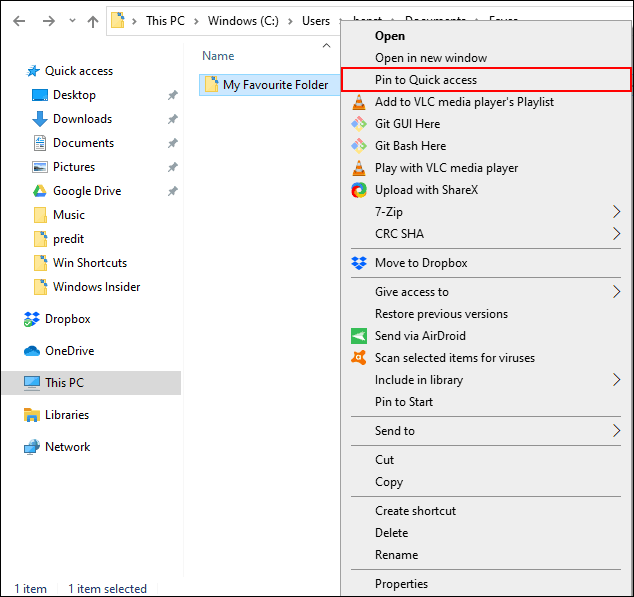
Bạn có thể thêm các mục vào danh sách Quick Access theo một vài cách. Click chuột phải vào thư mục yêu thích và sau đó click vào Pin to Quick Access.
Nếu ở trong File Explorer, bạn cũng có thể thêm thư mục thủ công vào danh sách Quick Access. Để làm điều này, chỉ cần kéo và thả thư mục vào văn bản Quick Access. Thao tác này sẽ ghim thư mục để có thể truy cập bất cứ khi nào.
4. Ghim thư mục vào menu Start
Menu Start Windows 10 không chỉ cung cấp danh sách các chương trình cài đặt. Bạn có thể tùy chỉnh danh sách tile ở bên phải các chương trình đã cài đặt bằng các shortcut đến ứng dụng, cài đặt và thư mục.
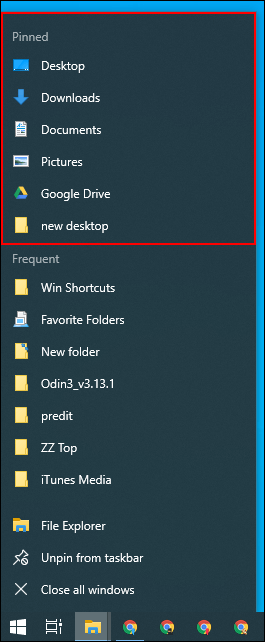
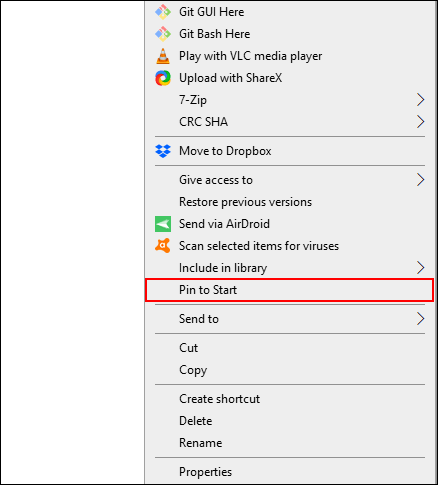
Menu Start là một nơi tốt để bookmark thư mục yêu thích. Mở File Explorer và đặt thư mục bạn muốn bookmark. Click chuột phải vào nó và sau đó click vào Pin to Start.
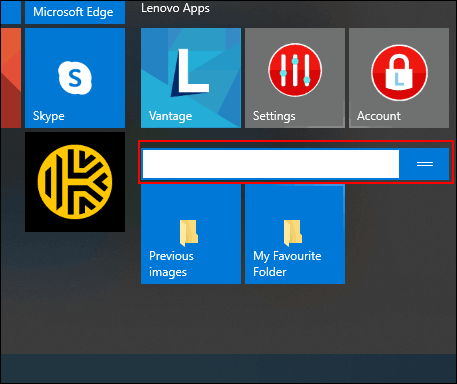
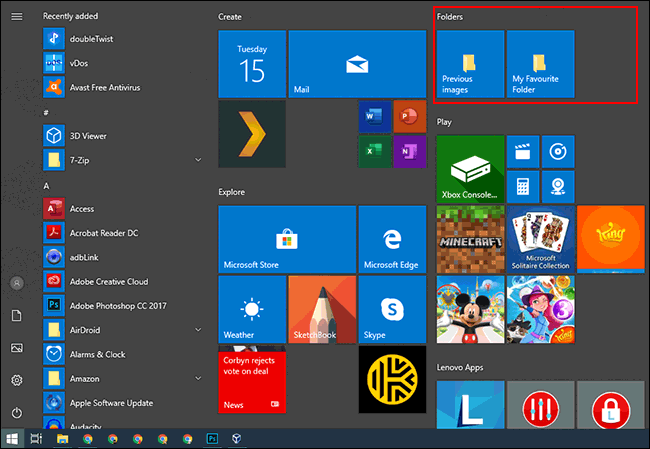
Các thư mục được ghim sẽ xuất hiện dưới dạng các tile ở cuối danh sách. Từ đây, bạn có thể di chuyển các thư mục đến các vị trí nổi bật hơn hoặc tạo một nhóm tile để sắp xếp chúng.
Để làm điều này, di chuột xuống bên dưới danh sách cuối cùng của các mục tile. Bạn sẽ thấy tùy chọn Name Group, click vào nó và sau đó đặt tên cho tile shortcut cho nhóm thư mục.
Khi xong, di chuyển shortcut thư mục vào nhóm đó. Bạn có thể sắp xếp nhóm chứa tile shortcut thư mục đến vị trí thuận tiện.
5. Tùy chỉnh thanh công cụ Taskbar
Thanh công cụ Taskbar là tính năng cũ trên Windows 10, cho phép tùy chỉnh thanh tác vụ với thanh công cụ để có thể truy cập thêm các tính năng hoặc shortcut.
Ví dụ, bạn có thể tạo một thanh công cụ Taskbar tùy chỉnh để dễ dàng truy cập vào tất cả các file trong một thư mục yêu thích.
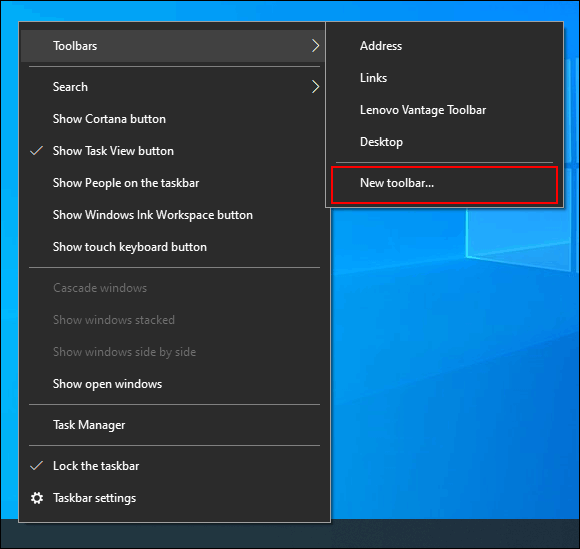
Để tạo thanh công cụ Taskbar tùy chỉnh, click chuột phải vào thanh tác vụ, truy cập menu con Toolbars và sau đó click vào New Toolbar.
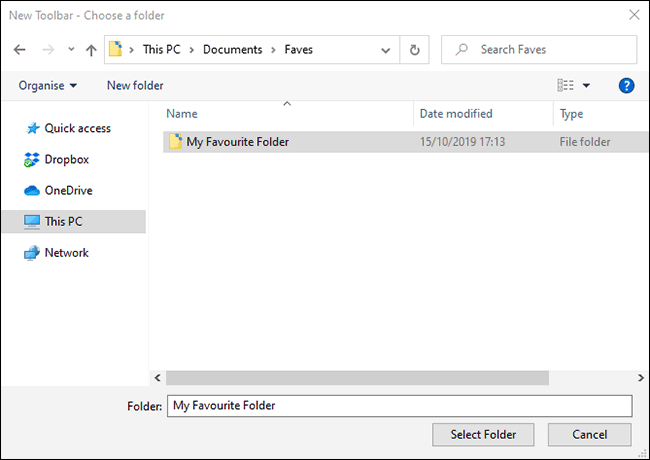
Trong menu chọn, chọn một trong thư mục yêu thích sau đó click vào Select Folder.
Thanh công cụ mới xuất hiện, click vào >> cạnh tên thanh công cụ (trùng tên với thư mục chọn).
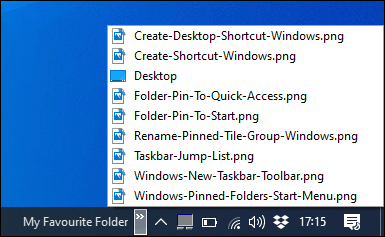
Danh sách tất cả các file và thư mục trong thư mục đó xuất hiện để bạn có thể truy cập một cách dễ dàng.
Bạn có thể tạo một thư mục với shortcut đến vị trí thư mục yêu thích khác và sau đó tạo một thanh công cụ cho thư mục đó. Shortcut sẽ có trên thanh tác vụ. Không giống với danh sách jump list giới hạn, chỉ có 12 mục, thanh công cụ tùy chỉnh có thể chứa nhiều hơn.
6. Thư viện File Explorer
Microsoft quyết định ẩn tab thư viện từ File Explorer nhưng tính năng này vẫn còn. Để sử dụng nó, chỉ cần mang tab thư viện trở lại khung điều hướng.
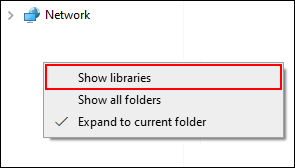
Để kích hoạt lại truy cập thư viện, click chuột phải vào không gian trống của khung điều hướng File Explorer và sau đó click vào Show Libraries.
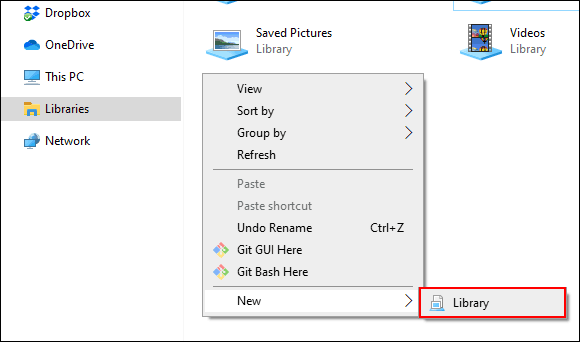
Tiếp theo, click vào tab Libraries xuất hiện trên khung điều hướng. Từ đây, click chuột phải vào không gian trống trong cửa sổ Libraries, truy cập vào menu con New và sau đó click vào Library.
Đặt tên cho thư viện mới, sau đó click đúp vào nó để mở.
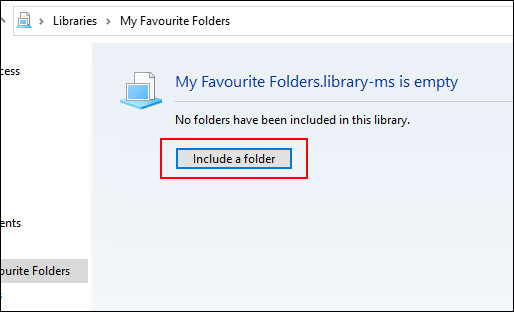
Thư viện mới sẽ không có bất kỳ thư mục nào, vì vậy, click vào Include a Folder và sau đó chọn thư mục muốn thêm.
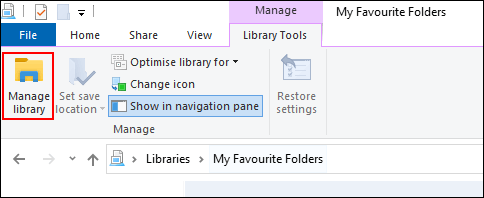
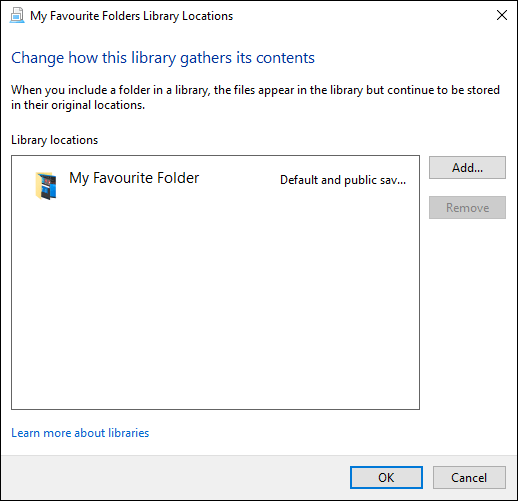
Thư viện của bạn giờ đây hiển thị các thư mục trong danh sách để dễ dàng truy cập. Để thêm hoặc xóa thư mục, click vào Library Tools trong menu trên đầu File Explorer và sau đó click vào Manage Library.
Từ đây, bạn có thể thêm hoặc xóa thư mục. Khi xong, click vào Ok.
Thư mục mới sẽ cập nhật và bạn có quyền truy cập ngay vào thư mục đã chọn.
Chúc các bạn thực hiện thành công!
