Cách bật/tắt tường lửa (Firewall) trên máy tính Windows
- Thứ hai - 03/06/2024 00:06
- In ra
- Đóng cửa sổ này
Firewall là một phần mềm dùng để lọc thông tin ra/vào máy tính hay hệ thống mạng của bạn. Tất cả những thông tin vào máy tính của bạn sẽ phải qua firewall, từ đây firewall sẽ kiểm tra thông tin rồi mới cho phép hoặc từ chối thông tin vào máy tính. Microsoft đã đưa những tính năng firewall vào những hệ điều hành của mình như Windows XP, Vista, Windows 7 và Windows 8.
1. Cách bật tường lửa trong Windows 10
Để bật tường lửa hoặc tắt trên Windows, bạn cần phải đăng nhập vào máy tính với quyền Admin.
Lưu ý: Windows Firewall được bật mặc định trong Windows 10. Bạn không nên tắt Windows Firewall trừ khi đã cài đặt và bật tường lửa của bên thứ ba. Tắt Windows Firewall có thể làm cho máy tính (và mạng, nếu có) dễ bị truy cập trái phép.
1.1. Bật/tắt tường lửa trong Control Panel
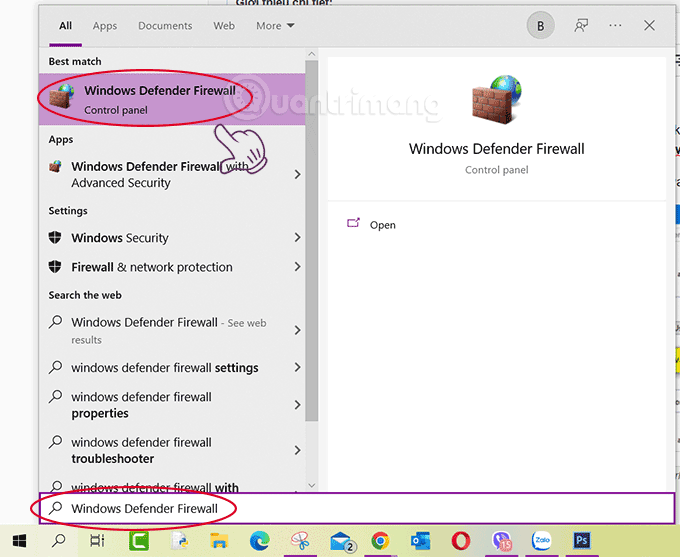
Bước 1: Nhập Windows Defender Firewall vào ô tìm kiếm > nhấp vào kết quả hiện ra với dòng Control Panel bên dưới. Hoặc Mở Control Panel > Windows Defender Firewall
Bước 2: Nhấp vào Turn Windows Firewall on or off ở bảng bên trái:

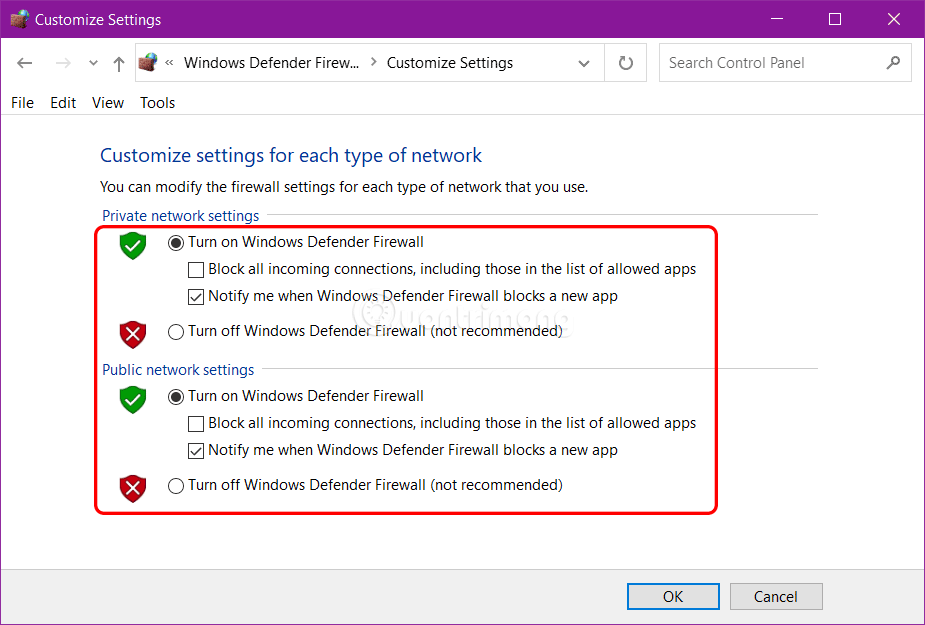
Bước 3: Tích vào tùy chọn Turn on Windows Defender Firewall để bật hoặc Turn off Windows Defender Firewall để tắt tường lửa cho mạng Private và Public tương ứng, rồi nhấn OK.
1.2. Bật tường lửa trong Security and Maintenance
- Mở Control Panel > Security and Maintenance
- Trong tab Security, mục Network firewall nhấp vào Turn on now.

1.3. Bật/tắt tường lửa trong Command Prompt:
Bạn tham khảo hướng dẫn chi tiết trong bài: Hướng dẫn kích hoạt/vô hiệu hóa Windows Firewall bằng Command Prompt
1.4. Bật/tắt tường lửa Windows 10 trong Windows Defender Security
Mở Windows Defender Security Center > Firewall & network protection > nhấp vào Private (discoverable) network hoặc Public (non-discoverable) network, tùy xem bạn muốn tắt hoặc bật tường lửa của mạng nào, sau đó chỉ cần gạt sang On hoặc Off dưới mục Windows Firewall là được. Cẩn thận hơn bạn có thể chọn để chặn/bỏ chặn các kết nối đến trong mục Incoming connections.

1.5. Bật tường lửa từ thông báo
Nhấp vào thông báo (nếu có) từ Windows Firewall để bật Windows Firewall cho tất cả các cấu hình mạng.

2. Bật/tắt firewall trong Windows 7
Sau đây, chúng tôi sẽ hướng dẫn cấu hình firewall trong Windows 7:
Bước 1:
Bạn phải đăng nhập máy tính với quyền administrative, truy cập theo đường dẫn Start > Control Panel > System and Security.

Bước 2:
Trong cửa sổ System and Security, bạn click vào Windows Firewall.

Bước 3:
Ở cột bên trái giao diện, bạn chọn Change notification settings để điều chỉnh cài đặt firewall.

Bước 4:
Tại đây, bạn có thể tùy ý điều chỉnh bật hoặc tắt Firewall cho cả 2 chế độ Private và Public network
 Bước 5:
Để cài đặt theo chế độ đề xuất của Windows, bạn có thể bấm Use recommended settings.

Hoặc trở về mặc định ban đầu thì hãy chọn Restore default và click Yes khi có thông báo xác nhận

Bước 6:
Nếu là một chuyên gia, bạn có thể sử dụng Advance Setting để cấu hình firewall đối với luồng thông tin inbound và outbound tùy thuộc vào nhu cầu của mình.

Bước 7:
Khi nhấn vào Inbound Rules ở bên trái, bạn sẽ thấy một danh sách Inbound Rules được hiển thị. Bạn có thể kích hoạt hoặc vô hiệu hóa kết nối nào bạn muốn bằng cách click chuột phải chọn Enable Rule/Disable Rule

Làm tương tự đối với Outbound Rules đối với các luồng thuông tin đi ra.

3. Bật/tắt tường lửa trong Windows 8/8.1
Bạn nhấp chuột vào Control Panel trên màn hình, nếu không có thì di chuột vào góc trên bên phải, cho đến khi hiện biểu tượng kính lúp như hình:

Nhập Control Panel và nhấp vào biểu tượng hiện ra bên dưới để mở Control Panel, nếu muốn ghim vào Start menu hoặc Taskbar, bạn nhấp chuột phải vào biểu tượng Control Panel và chọn tùy chọn tương ứng.

Trong Control Panel bạn tìm đến và nhấp vào Windows Firewall, cửa sổ Windows Firewall hiện ra với các tùy chọn tương tự như trên Windows 7 (ảnh trong bước 3 bên trên), bạn có thể làm theo các hướng dẫn trong phần bật tắt tường lửa trên Windows 7 để bật tắt tường lửa trong Windows 8, cũng như thay đổi các cài đặt tường lửa liên quan.
Chúc các bạn thành công!
