Cách ẩn, hiện ghi chú trong bảng trên Excel
- Thứ tư - 15/03/2023 00:58
- In ra
- Đóng cửa sổ này
Để có thể làm rõ nội dung hơn, tính năng có sẵn tạo ghi chú hay commet trên Excel và Word sẽ giúp người dùng thực hiện công việc đó. Khi bạn muốn đánh dấu thông tin quan trọng, giải thích nội dung,… nhưng không muốn trình bày nhiều trong cột hoặc dòng có thể tạo ghi chú cho nội dung đó. Và người xem sẽ nhìn thấy ngay khung ghi chú khi mở bảng dữ liệu, thống kê trên Excel.
Tuy nhiên trong trường hợp bảng dữ liệu nhiều ghi chú và toàn bộ các ghi chú đều hiện ra, sẽ gây khó chịu cho người xem. Vì thế, tốt nhất bạn nên ẩn đi những ghi chú đã tạo trên Excel. Bài viết dưới đây sẽ hướng dẫn chi tiết bạn đọc cách ẩn hoặc hiện lại những ghi chú trên Excel.
Hướng dẫn ẩn, hiện ghi chú trên Excel 365
Microsoft Excel 365 đã thay đổi cách làm việc với các comment. Bây giờ bạn có hai tính năng khác nhau để bình luận: Nhận xét và ghi chú.
Loại mà người dùng các phiên bản Excel trước đây từng làm việc cùng bây giờ được gọi là ghi chú. Hoạt động của các ghi chú này vẫn giữ nguyên dưới tên gọi mới. Bạn có thể tạo ghi chú ô hoặc ghi chú dữ liệu.
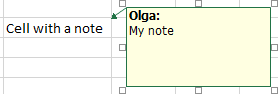
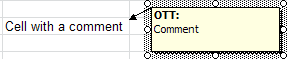
Hình tam giác nhỏ màu đỏ ở góc trên cùng bên phải của ô báo hiệu rằng ô có ghi chú đính kèm:
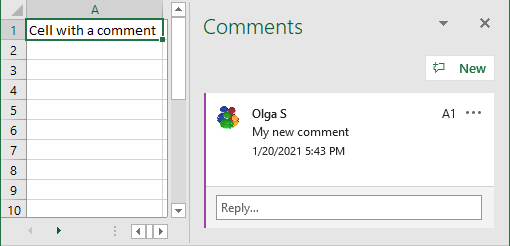
Tính năng nhận xét mới trong Microsoft Excel 365 đề cập đến chức năng cho phép bạn làm việc với các chuỗi nhận xét và thảo luận dữ liệu với những người khác. Khi bạn thêm nhận xét trong ô Excel, chỉ báo nhận xét nhỏ màu tím sẽ được hiển thị:

Để ẩn/hiển thị ghi chú và nhận xét trong Excel 365, hãy làm như sau:
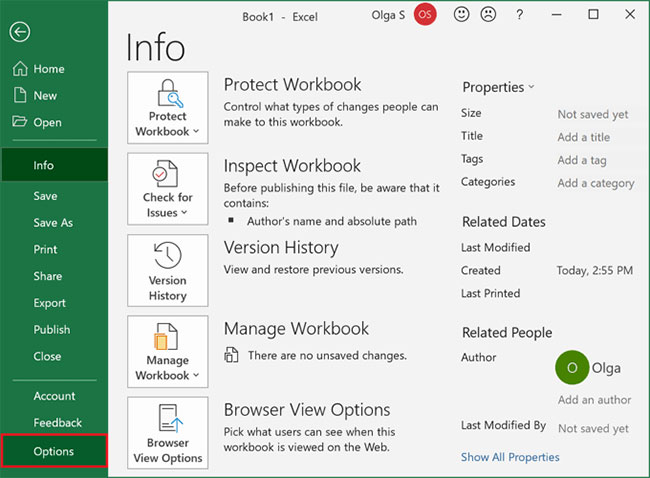
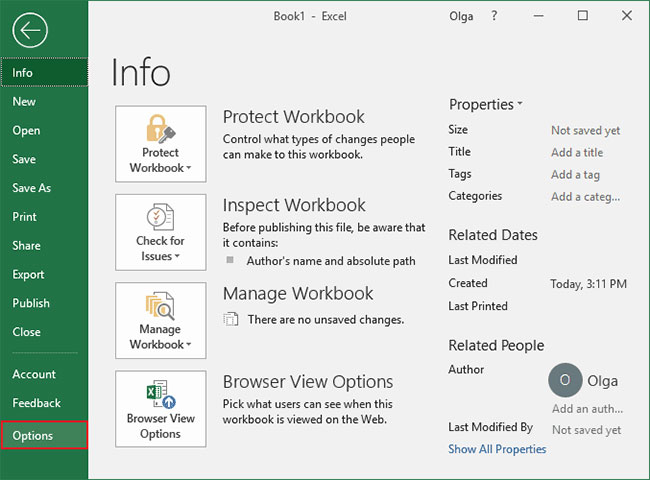
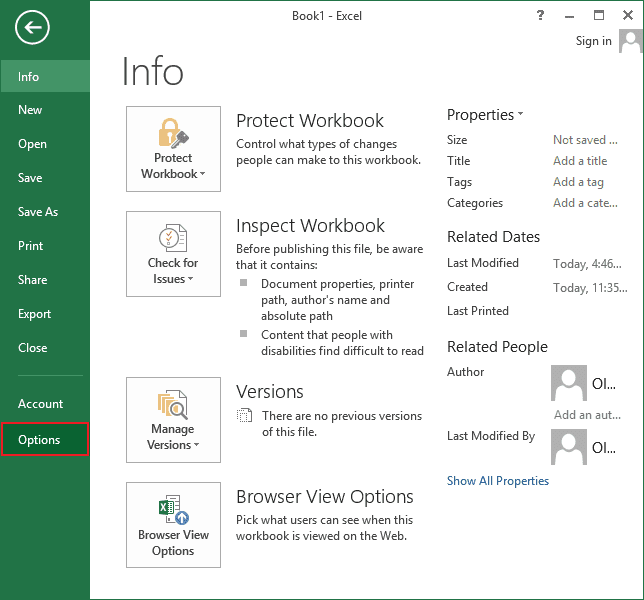
1. Trên tab File, nhấp vào nút Options:
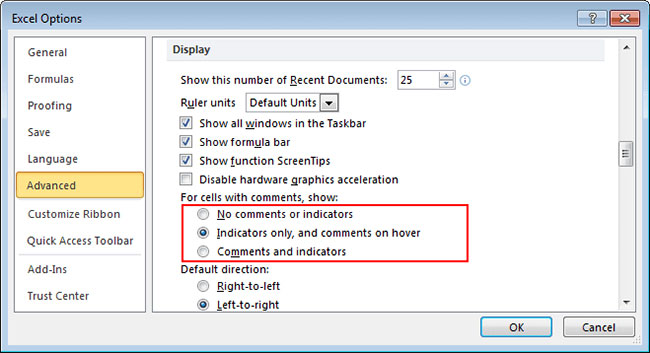
2. Trong hộp thoại Excel Options, trên tab Advanced, cuộn xuống phần Display và chọn tùy chọn:
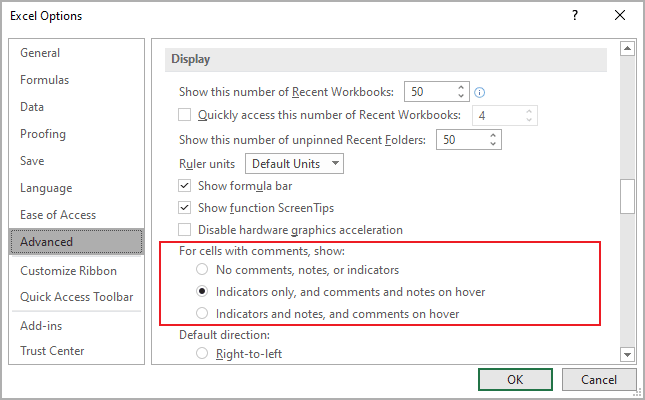
No comments, notes, or indicators để ẩn các chỉ báo:
Ghi chú:
Nhận xét:
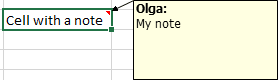
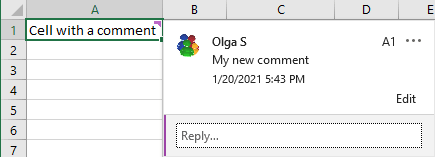
Indicators only, and comments and notes on hover (được sử dụng theo mặc định) để hiển thị tất cả các chỉ báo như chỉ báo nhận xét nhỏ màu tím cho nhận xét và hình tam giác nhỏ màu đỏ cho ghi chú, đồng thời chỉ hiển thị ghi chú và nhận xét khi bạn mở nó
Indicators and notes, and comments on hover để làm cho các chỉ báo, ghi chú và nhận xét luôn hiển thị:
Ghi chú:
Nhận xét:
Lưu ý: Để hiển thị hoặc ẩn:
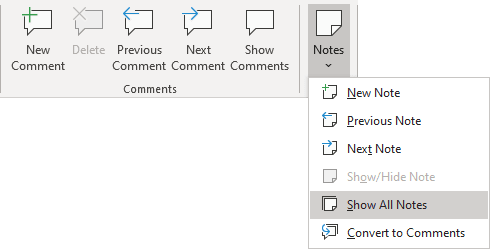
- Tất cả ghi chú, trên tab Review, trong nhóm Notes, bấm vào Show All Notes:
- Tất cả các nhận xét, trên tab Review, trong nhóm Comments, hãy bấm Show Comments:
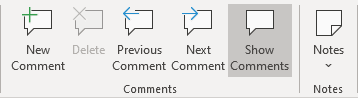
Bằng cách nhấp vào nút Show Comments, bạn sẽ mở bảng Comments với tất cả các chuỗi nhận xét cho bảng tính này.
- Một ghi chú riêng lẻ: Bấm vào ô chứa ghi chú, sau đó trên tab Review, trong nhóm Notes, bấm vào Show/Hide Note:
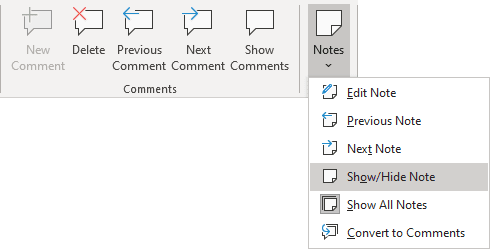
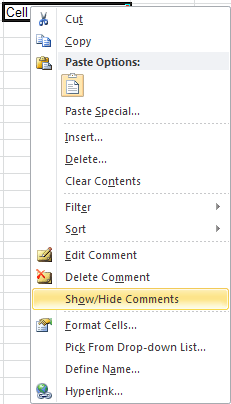
Bạn cũng có thể bấm chuột phải vào ô rồi chọn Show/Hide Note trên menu pop-up.
Hướng dẫn ẩn, hiện ghi chú trên Excel 2016/2019
Để ẩn/hiển thị nhận xét trong Excel 2016, hãy làm như sau:
1. Trên tab File, nhấp vào nút Options:
2. Trong hộp thoại Excel Options, trên tab Advanced, cuộn xuống phần Display và chọn tùy chọn:
No comments or indicators để ẩn các chỉ báo:

Indicators only, and comments on hover để hiển thị tất cả các chỉ báo dưới dạng một hình tam giác nhỏ màu đỏ và chỉ hiển thị nhận xét khi bạn mở nó
Comments and indicators để hiển thị các chỉ báo và nhận xét luôn hiển thị:

Ghi chú:
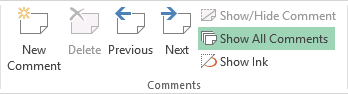
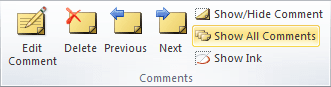
- Để hiển thị/ẩn tất cả các nhận xét, trên tab Review, trong nhóm Comments, hãy bấm vào Show All Comments:
- Để hiển thị một nhận xét riêng lẻ, hãy bấm vào ô chứa nhận xét, sau đó trên tab Review, trong nhóm Comments, hãy bấm vào Show/Hide Comment.
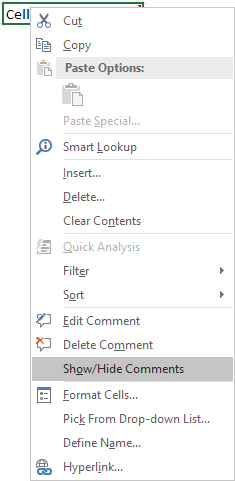
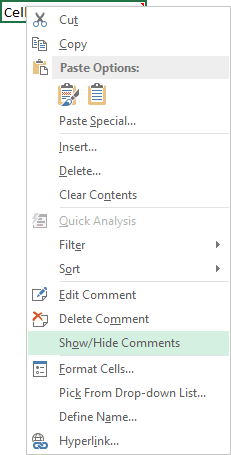
- Bạn cũng có thể bấm chuột phải vào ô, sau đó bấm Show/Hide Comment trên menu shortcut.
Hướng dẫn ẩn, hiện ghi chú trên Excel 2013
Để ẩn/hiển thị ghi chú trong Excel 2013, hãy làm như sau:
1. Trên tab File, nhấp vào nút Options:
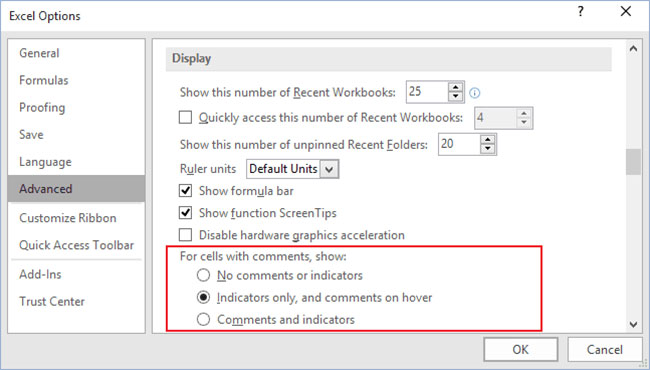
2. Trong hộp thoại Excel Options, trên tab Advanced, cuộn xuống phần Display và chọn tùy chọn:
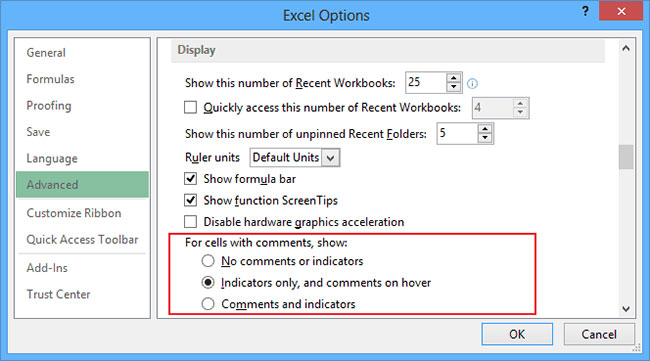
No comments or indicators để ẩn các chỉ báo:

Indicators only, and comments on hover để hiển thị tất cả các chỉ báo dưới dạng một hình tam giác nhỏ màu đỏ và chỉ hiển thị nhận xét khi bạn mở nó
Comments and indicators để hiển thị các chỉ báo và nhận xét luôn hiển thị:

Ghi chú:
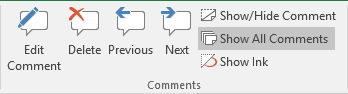
- Để hiển thị/ẩn tất cả các nhận xét, trên tab Review, trong nhóm Comments, hãy bấm vào Show All Comments:
- Để hiển thị một nhận xét riêng lẻ, hãy bấm vào ô chứa nhận xét, sau đó trên tab Review, trong nhóm Comments, hãy bấm vào Show/Hide Comment.
- Bạn cũng có thể bấm chuột phải vào ô, sau đó bấm Show/Hide Comment trên menu shortcut.
Hướng dẫn ẩn, hiện ghi chú trên Excel 2010
Để ẩn/hiển thị ghi chú trong Excel 2010, hãy làm như sau:
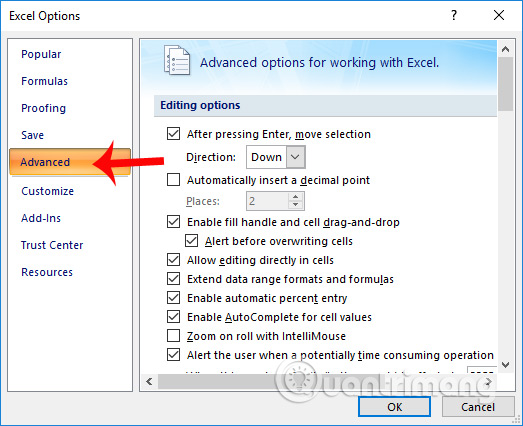
1. Trên tab File, nhấp vào nút Options:
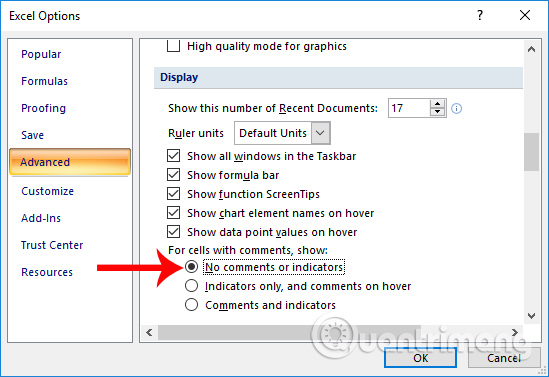
2. Trong hộp thoại Excel Options, trên tab Advanced, cuộn xuống phần Display và chọn tùy chọn:
No comments or indicators để ẩn các chỉ báo:
Indicators only, and comments on hover để hiển thị tất cả các chỉ báo dưới dạng một hình tam giác nhỏ màu đỏ và chỉ hiển thị nhận xét khi bạn mở nó
Comments and indicators để hiển thị các chỉ báo và nhận xét luôn hiển thị:

Ghi chú:
- Để hiển thị/ẩn tất cả các nhận xét, trên tab Review, trong nhóm Comments, hãy nhấp vào Show/Hide Comment:
- Để hiển thị một nhận xét riêng lẻ, hãy bấm vào ô chứa nhận xét, sau đó trên tab Review, trong nhóm Comments, hãy nhấp vào Show/Hide Comment.
- Bạn cũng có thể bấm chuột phải vào ô, sau đó chọn Show/Hide Comment trên menu shortcut.
Hướng dẫn ẩn, hiện ghi chú trên Excel 2007
Bước 1:
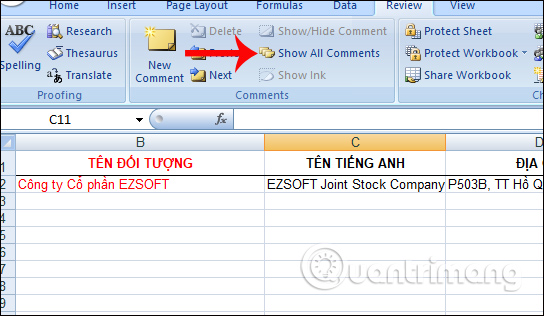
Tại giao diện bảng dữ liệu Excel muốn ẩn đi nội dung ghi chú đã tạo, chúng ta nhấp vào tab Review rồi bỏ chọn tại Show All comment.
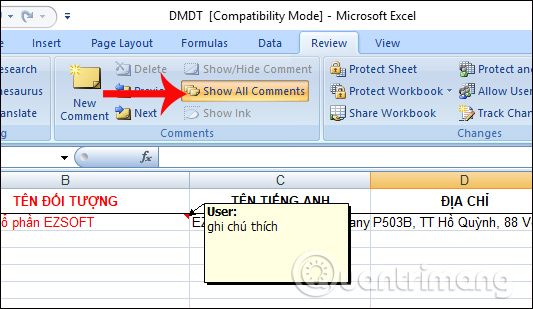
Ngay sau đó, ghi chú đã được ẩn đi trên Excel. Với những dòng hay cột có ghi chú, bạn sẽ nhìn thấy biểu tượng dấu đỏ đánh dấu như hình. Để xem nội dung ghi chú, chi cần di chuột vào vào nội dung đó là được.
Bước 2:
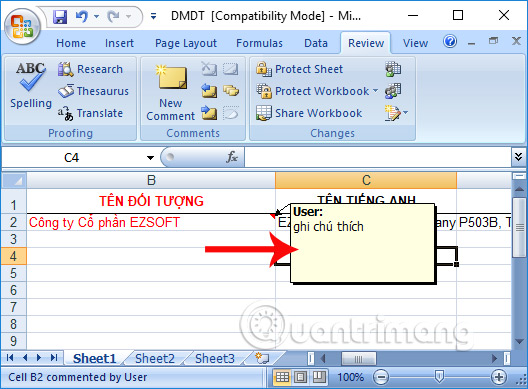
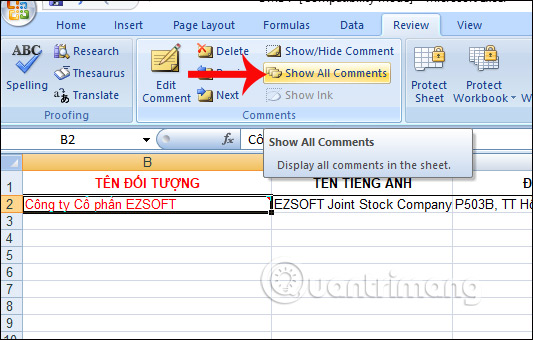
Để hiện lại khung ghi chú đó, chúng ta cũng click vào tab Review và cũng click lại vào Show All comment.
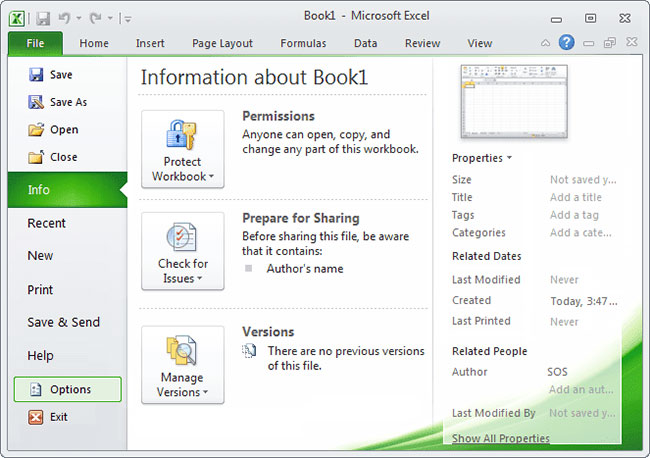
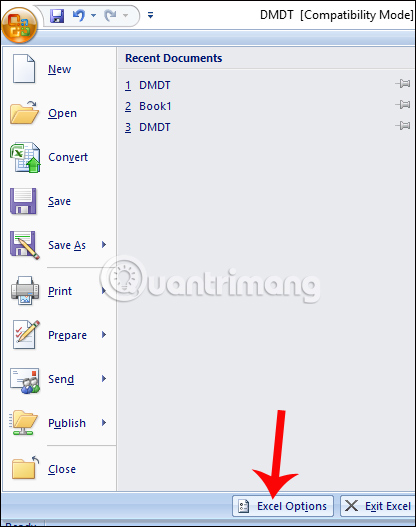
Ngoài ra có một cách khác để thiết lập tính năng ẩn hoặc hiện nội dung chú thích trong Excel, đó là thực hiện trong Excel Options. Cick vào biểu tượng Office ở góc trái trên cùng giao diện, sau đó chọn tiếp Excel Options.
Chuyển sang danh sách tùy chọn. Ở đây người dùng nhấp vào mục Advanced ở danh sách bên trái giao diện.
Nhìn sang nội dung bên phải, kéo xuống mục Display. Bạn tích chọn vào mục No comments or indicators rồi nhấn OK để lưu lại.
Cách làm này sẽ ẩn ghi chú trên bảng dữ liệu Excel, đồng thời không cho xuất hiện biểu tượng dấu đỏ ở những nội dung có kèm chú thích nữa. Để hiển thị lại chúng ta cũng chỉ cần tích chọn vào Show All comment là được.
Trên đây là cách để ẩn hoặc hiện ghi chú trên bảng dữ liệu Excel. Việc tùy chỉnh comment trên Excel rất đơn giản và chúng ta sẽ thực hiện ngay trên tab Review, tính năng sẵn có trên thanh Ribbon. Trong trường hợp người dùng muốn ẩn hoàn toàn ghi chú, bao gồm cả dấu đỏ đánh dấu thì cần thực hiện trực tiếp trong Excel Options theo bài viết bên trên.
Video hướng dẫn ẩn, hiện ghi chú Excel
Hướng dẫn ẩn, hiện ghi chú trên Excel 2003
Để ẩn/hiển thị chi chú trong Excel 2003, hãy làm như sau:
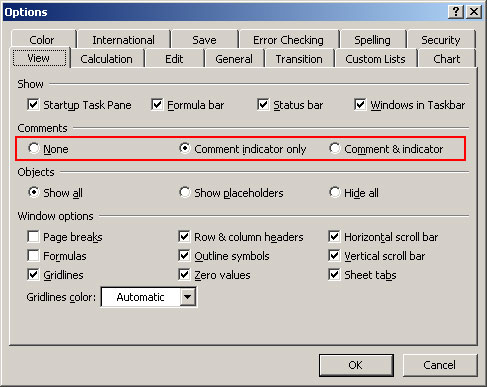
1. Chọn Tools > Options để mở hộp thoại Options.
2. Trên tab View, trong phần Comments, hãy chọn 1 trong 3 tùy chọn:
None để ẩn các chỉ báo:

Comment indicator only để hiển thị tất cả các chỉ báo dưới dạng một hình tam giác nhỏ màu đỏ và chỉ hiển thị nhận xét khi bạn mở nó
Comment & indicator để luôn hiển thị các chỉ báo và nhận xét.
![]()
Chúc các bạn thực hiện thành công!
