8 cách mở Windows Internet Information Services (IIS) Manager
- Thứ ba - 27/12/2022 23:48
- In ra
- Đóng cửa sổ này

Bạn đã bao giờ nghe nói về Windows Internet Information Services (IIS) Manager của Windows chưa? Đó là một công cụ đáng kinh ngạc giúp bạn kiểm tra trang web của mình trước khi host nó trên Internet.
Trong bài viết này, chúng ta sẽ khám phá các cách khác nhau để truy cập công cụ này trong Windows.
1. Mở IIS Manager bằng thanh tìm kiếm của menu Start
Bạn muốn dễ dàng mở bất kỳ ứng dụng nào trên thiết bị Windows của mình? Hãy thử sử dụng thanh tìm kiếm trong menu Start.
Đây là cách bạn có thể truy cập công cụ IIS bằng thanh tìm kiếm của Windows:
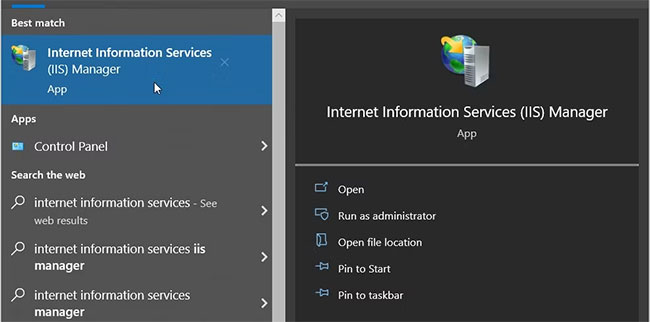
1. Nhấn biểu tượng thanh tìm kiếm Windows trên taskbar hoặc nhấn Win + S để truy cập thanh tìm kiếm.
2. Nhập Internet Information Services và chọn kết quả phù hợp nhất.
2. Mở IIS Manager bằng menu Start
Menu Start là nơi bạn có thể tìm thấy hầu hết các ứng dụng của mình. Vì vậy, hãy xem cách bạn có thể truy cập IIS Manager từ menu Start của Windows:
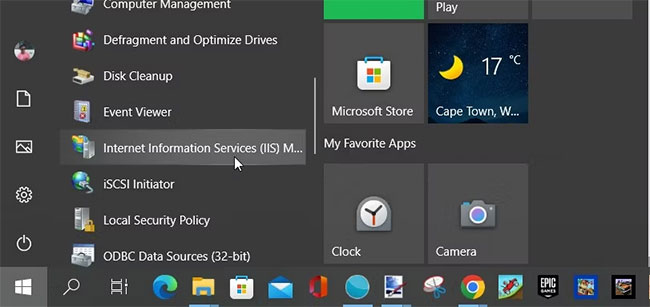
1. Nhấn phím Windows hoặc nhấp vào biểu tượng menu Start trên thanh tác vụ để truy cập menu Start.
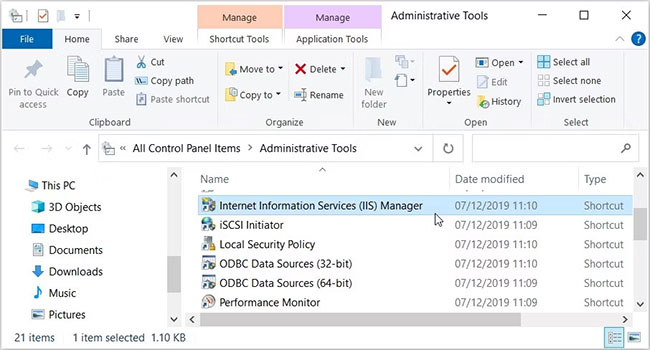
2. Chọn thư mục Windows Administrative Tools từ các mục menu.
3. Định vị và chọn Internet Information Services (IIS) Manager.
3. Mở IIS Manager bằng thanh địa chỉ File Explorer
Bạn muốn dễ dàng định vị đường dẫn thư mục của mình trong khi sử dụng File Explorer? Kiểm tra thanh địa chỉ File Explorer.
Điều thú vị là bạn cũng có thể sử dụng thanh địa chỉ của File Explorer để truy cập nhiều ứng dụng khác nhau.
Dưới đây là các bước để truy cập IIS Manager qua thanh địa chỉ File Explorer:
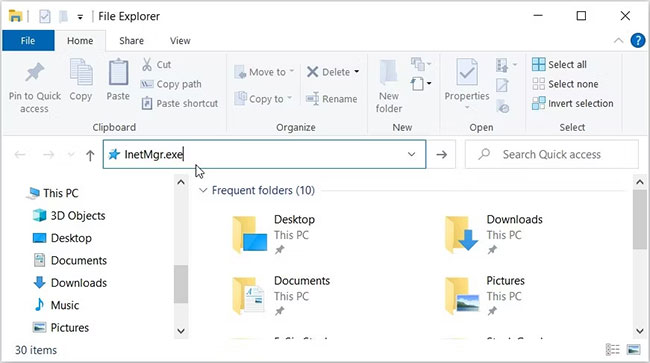
1. Nhấn Win + E để mở File Explorer.
2. Nhập InetMgr.exe vào thanh địa chỉ File Explorer và nhấn Enter.
4. Mở IIS Manager bằng Task Manager
Task Manager rất hữu ích khi phân tích hiệu suất hệ thống hoặc đóng các chương trình có vấn đề trên Windows. Nhưng đó không phải là tất cả - bạn cũng có thể sử dụng công cụ này để mở hầu hết mọi ứng dụng trên thiết bị của mình.
Đây là cách truy cập IIS Manager bằng Task Manager:
1. Nhập Task Manager vào thanh tìm kiếm trong menu Start và chọn kết quả phù hợp nhất.
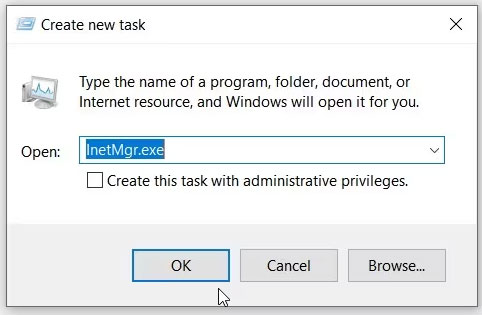
2. Nhấp vào phần File ở góc trên cùng bên phải.
3. Chọn tùy chọn Run new task.
4. Nhập InetMgr.exe vào hộp tìm kiếm và nhấn OK.
5. Mở IIS Manager bằng Control Panel
Control Panel có thể giúp bạn khắc phục sự cố Windows hoặc cấu hình cài đặt hệ thống. Ngoài ra, bạn có thể sử dụng công cụ này để truy cập hầu hết các ứng dụng trên thiết bị của mình.
Hãy xem cách bạn có thể truy cập IIS Manager bằng Control Panel:
1. Nhập Control Panel vào thanh tìm kiếm trong menu Start và chọn kết quả phù hợp nhất.
2. Nhấp vào menu drop-down View by và chọn Large icons.
3. Chọn Administrative Tools từ các tùy chọn.
4. Nhấp đúp vào Internet Information Services (IIS) trên màn hình tiếp theo.
6. Mở IIS Manager bằng Command Prompt hoặc PowerShell
Command Prompt và PowerShell cũng giúp bạn dễ dàng truy cập vào hầu hết các ứng dụng trên thiết bị của mình. Vì vậy, hãy xem các công cụ này có thể giúp bạn truy cập IIS Manager như thế nào.
Đây là cách mở IIS Manager bằng Command Prompt:
1. Nhập Command Prompt vào thanh tìm kiếm trong menu Start.
2. Nhấp chuột phải vào kết quả phù hợp nhất và chọn Run as administrator.
3. Nhập lệnh sau và nhấn Enter.
InetMgr.exe
Bây giờ, đây là các bước để truy cập IIS Manager bằng PowerShell:
1. Nhấn Win + X để mở menu Quick Access.
2. Chọn Windows PowerShell (Admin) từ các tùy chọn.
3. Nhập lệnh sau và nhấn Enter.
InetMgr.exe
7. Mở IIS Manager từ thư mục Windows System32
Bạn có thể truy cập hầu hết các ứng dụng trên Windows bằng cách nhấp đúp vào các file có liên quan trong thư mục System32.
Đây là cách bạn có thể mở IIS Manager từ thư mục System32:
1. Nhấn Win + E để mở File Explorer.
2. Chọn This PC ở phía bên tay trái.
3. Nhấp đúp vào tùy chọn Local Disk (C:) ở phía bên tay phải.
4. Nhấp đúp vào thư mục Windows, cuộn xuống rồi nhấp đúp vào thư mục System32.
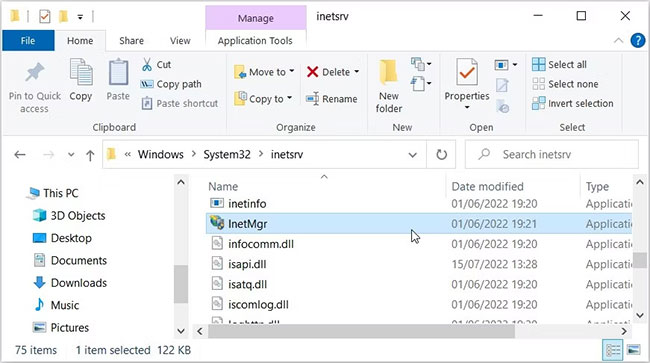
5. Nhấp đúp vào thư mục inertsrv.
6. Định vị và nhấp đúp vào tùy chọn InetMgr.
Bạn muốn làm cho IIS Manager luôn có thể truy cập dễ dàng? Nếu vậy, bạn nên xem xét việc ghim công cụ này vào thanh tác vụ. Để ghim IIS Manager vào thanh tác vụ, nhấp chuột phải vào tùy chọn InetMgr và chọn Pin to taskbar.
8. Mở IIS Manager bằng desktop shortcut
Một trong những cách dễ nhất để truy cập bất kỳ ứng dụng Windows nào là sử dụng shortcut desktop. Vì vậy, hãy khám phá cách bạn có thể tạo desktop shortcut cho IIS Manager:
1. Nhấn Win + D để truy cập Windows desktop.
2. Nhấp chuột phải vào khoảng trống trên desktop.
3. Chọn New > Shortcut rồi nhập %windir%\system32\InetMgr vào hộp Location.
4. Nhấn Next để tiếp tục.
Nhập Internet Information Services (IIS) Manager vào hộp Name rồi nhấp vào nút Finish.
Bây giờ, desktop shortcut của bạn đã sẵn sàng. Để làm mọi việc dễ dàng hơn, bạn nên cân nhắc việc ghim desktop shortcut này vào thanh tác vụ.
