6 bước quan trọng cần thực hiện sau khi cài đặt "sạch" Windows 11
- Thứ ba - 15/07/2025 04:54
- In ra
- Đóng cửa sổ này
Cài đặt "sạch" Windows là một cách tuyệt vời để giữ cho máy tính luôn hoạt động nhanh. Tuy nhiên, mỗi khi bạn làm điều này, một số tính năng quan trọng sẽ được reset về mặc định của Microsoft - bao gồm một số tính năng có thể khóa bạn vĩnh viễn.
6. Sao lưu khóa khôi phục BitLocker
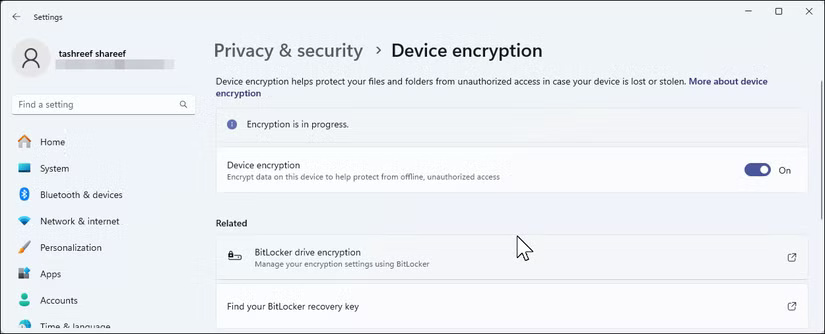
Kể từ Windows 11 24H2, Device Encryption sẽ tự động bật khi bạn cài đặt sạch và đăng nhập bằng tài khoản Microsoft. Tính năng này chỉ áp dụng cho các bản cài đặt mới hoặc máy tính mới được cài đặt sẵn 24H2 - không áp dụng cho những bản nâng cấp. Bạn có thể kiểm tra tính năng này bằng cách vào Settings > Privacy & security > Device encryption.
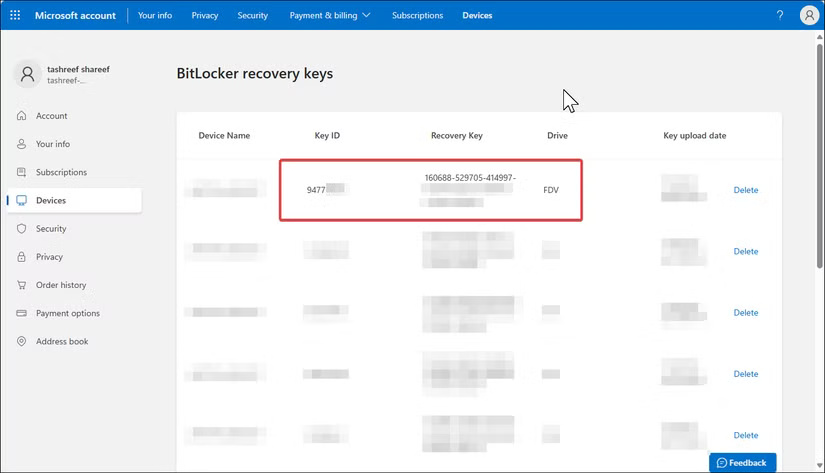
Để tìm và sao lưu khóa khôi phục BitLocker, hãy đăng nhập vào tài khoản Microsoft trực tuyến của bạn và điều hướng đến Devices > Manage BitLocker keys. Bạn sẽ thấy danh sách các khóa khôi phục được liên kết với thiết bị của mình. Mỗi khóa có một ID khớp với ID hiển thị trên máy tính khi cần khóa. Bạn nên in khóa này ra và lưu trữ ở nơi an toàn, hoặc lưu vào USB tách biệt với máy tính. Bạn cũng có thể chụp ảnh bằng điện thoại - chỉ cần đảm bảo rằng ảnh đã được sao lưu ở đâu đó.
Phần mềm mạng máy tính
Nếu không muốn sử dụng mã hóa thiết bị, bạn có thể tắt tính năng này thông qua nút chuyển đổi trong Settings > Privacy & Security > Device encryption. Hãy nhớ rằng làm như vậy là đánh đổi bảo mật để lấy sự tiện lợi, và trên các hệ thống hiện đại, sự khác biệt về hiệu suất của mã hóa thường không đáng kể.
5. Bật System Protection để tạo điểm khôi phục
System Protection là cỗ máy thời gian tích hợp sẵn của Windows dành cho các file và cài đặt hệ thống của bạn. Khi có sự cố xảy ra - có thể bản cập nhật driver làm hỏng âm thanh hoặc cài đặt chương trình làm hỏng các file hệ thống - bạn có thể sử dụng điểm khôi phục để hoàn tác những thay đổi và khôi phục PC về thời điểm trước đó khi mọi thứ hoạt động bình thường.
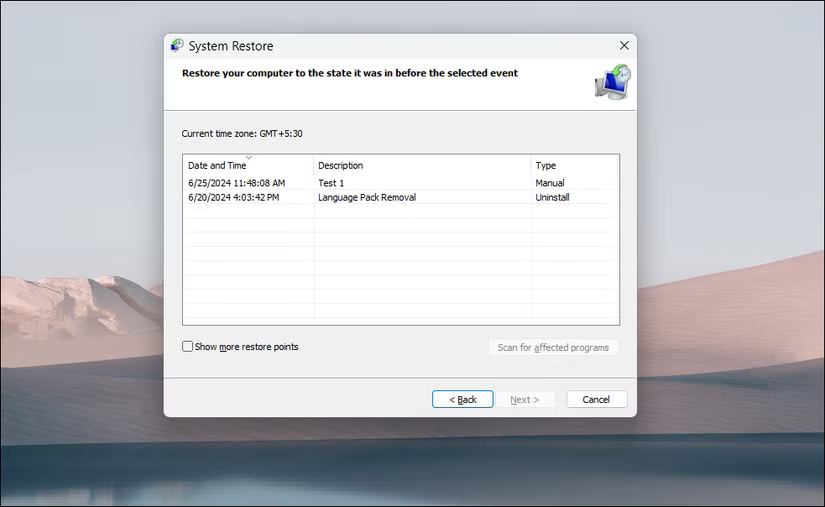
Trước khi có thể tạo điểm khôi phục hệ thống, bạn cần bật System Protection. Để thực hiện việc này, hãy nhấp vào Start, nhập View advanced system settings và mở nó từ kết quả tìm kiếm. Trong hộp thoại System Properties, hãy mở tab System Protection.
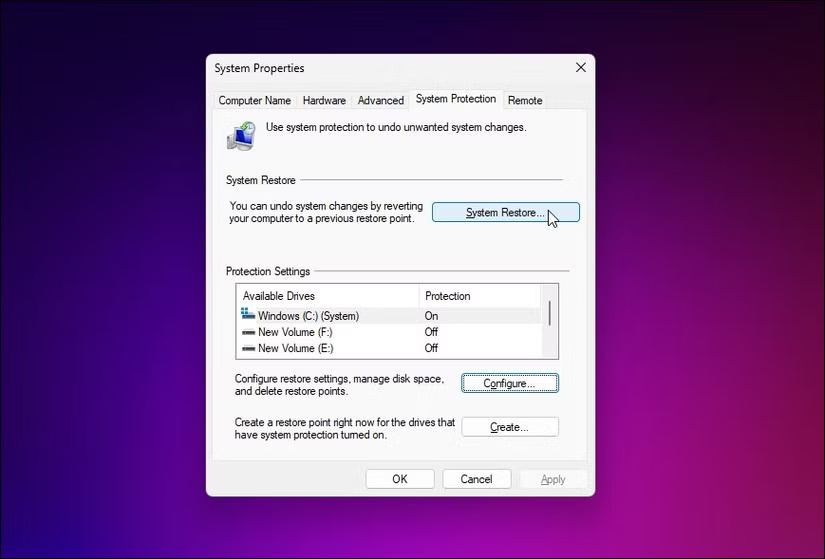
Chọn ổ hệ thống của bạn (thường là C:), nhấp vào Configure và chọn Turn on system protection. Mọi người thường thiết lập nó sử dụng khoảng 5 - 10% dung lượng ổ của mình - đủ cho một vài điểm khôi phục mà không chiếm quá nhiều dung lượng. Nhấp vào Apply để lưu các thay đổi.
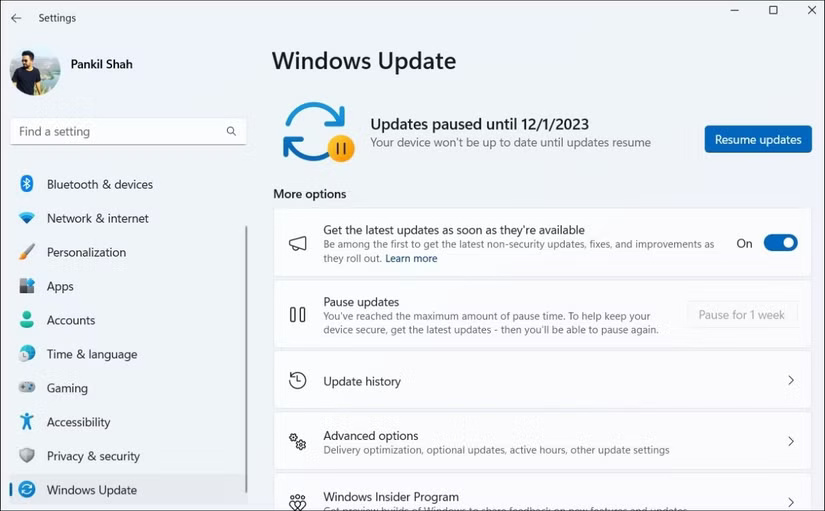
4. Cập nhật Windows và cài đặt driver mới nhất
Windows Update bắt đầu nhắc nhở bạn gần như ngay lập tức sau khi cài đặt mới, nhưng hóa ra những bản cập nhật đầu tiên đó rất quan trọng. Chúng thường bao gồm các bản vá bảo mật, cập nhật driver và sửa lỗi cho những sự cố phát sinh kể từ khi bạn tạo phương tiện cài đặt.
Truy cập Settings > Windows Update và cài đặt tất cả các bản cập nhật đang chờ xử lý. Tiếp tục chạy Windows Update cho đến khi không còn bản cập nhật nào nữa. Quá trình này thường mất ít nhất hai vòng cập nhật với các lần khởi động lại giữa những lần cập nhật. Đừng bỏ qua bước này và nghĩ rằng bạn sẽ làm sau - đã có quá nhiều người gặp phải những sự cố kỳ lạ mà một bản cập nhật đơn giản có thể ngăn chặn được.
Sau khi hoàn tất cập nhật Windows, đã đến lúc xem xét các driver mà Windows Update đã bỏ sót. driver đồ họa của bạn đặc biệt cần được chú ý. Windows cài đặt các driver hiển thị cơ bản hoạt động tốt, nhưng chúng lại rất kém hiệu suất.
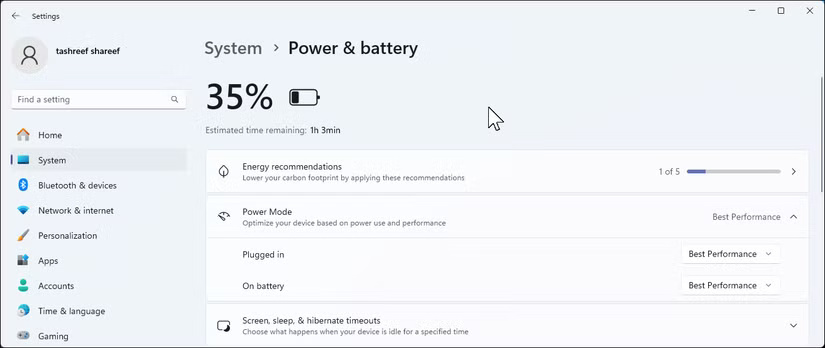
3. Thay đổi cài đặt nguồn
Cài đặt nguồn mặc định của Windows quá bảo thủ nếu bạn muốn hệ thống hoạt động tốt nhất. Khi cài đặt mới, Windows thường mặc định ở Balanced mode, nghe có vẻ hợp lý nhưng lại làm giảm hiệu suất CPU và các thành phần khác để tiết kiệm điện.
Truy cập Settings > System > Power & battery và mở rộng phần Power mode. Đối với desktop và laptop khi cắm điện, hãy chuyển sang Best performance. Đúng là nó sử dụng nhiều điện năng hơn, nhưng hệ thống sẽ hoạt động nhanh hơn đáng kể. Đối với laptop dùng pin, bạn có thể muốn giữ nguyên Balanced mode hoặc thậm chí là Best power efficiency, tùy thuộc vào nhu cầu.
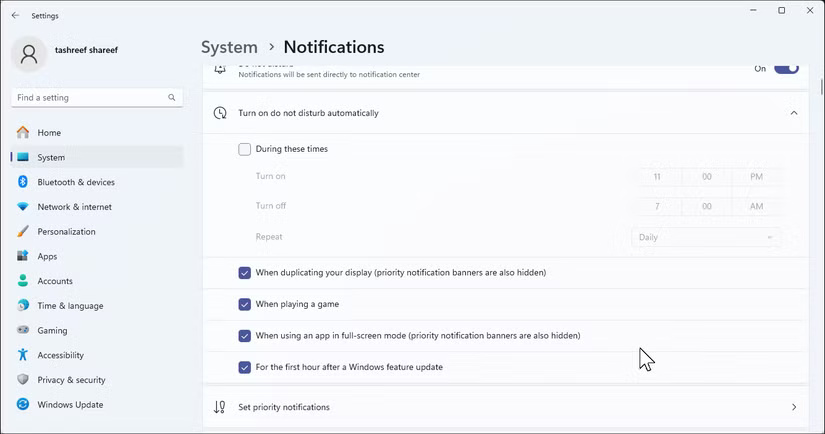
2. Tắt thông báo không cần thiết
Các bản cài đặt Windows 11 mới thường có tới 11 thông báo. Mọi ứng dụng đều muốn thông báo cho bạn điều gì đó, từ cập nhật tin tức đến mẹo về các tính năng mà bạn sẽ không bao giờ sử dụng. Sau vài ngày, tiếng ping liên tục sẽ trở nên khó chịu.
Vào Settings > System > Notifications và bắt đầu cắt giảm. Tắt Show me the Windows welcome experience và Get tips and suggestions ngay lập tức - đây chỉ là những quảng cáo được ngụy trang dưới dạng "mẹo hữu ích". Sau đó, hãy xem qua danh sách ứng dụng bên dưới và tắt thông báo cho bất kỳ mục nào không cần thiết. Hãy giữ lại thông báo cho các ứng dụng liên lạc, lịch và công cụ bảo mật, đồng thời tắt tiếng mọi thứ khác.
1. Xem lại cài đặt quyền riêng tư
Cài đặt quyền riêng tư mặc định của Microsoft khá hào phóng trong việc thu thập dữ liệu. Việc cài đặt mới sẽ cho phép bạn tham gia vào hầu hết mọi thứ: Dữ liệu chẩn đoán, trải nghiệm được cá nhân hóa, theo dõi ID quảng cáo, v.v... Mặc dù một số dữ liệu này giúp cải thiện Windows, nhưng bạn có thể muốn giảm bớt chúng.
Vào Settings > Privacy & security và thực hiện theo từng mục. Trong mục General, hãy tắt tất cả mọi thứ, ngoại trừ Let websites show me locally relevant content. Trong Diagnostics & feedback, hãy chuyển từ Optional diagnostic data thành Required diagnostic data only.
Đừng quên các quyền của ứng dụng - camera, micro, vị trí, v.v... - bạn nên xem xét ứng dụng nào có quyền truy cập vào những gì. Bạn sẽ ngạc nhiên khi biết có bao nhiêu ứng dụng yêu cầu quyền mà chúng thực sự không cần.
