4 cách xóa TPM trên Windows 11
- Thứ ba - 29/08/2023 10:07
- In ra
- Đóng cửa sổ này
Trusted Platform Module (TPM) là một chip bảo mật giúp bảo vệ máy tính của bạn khỏi phần mềm độc hại và các cuộc tấn công khác. Nó đóng một vai trò quan trọng trong quá trình cài đặt Windows 11 và cũng là một phần không thể thiếu của một số tính năng bảo mật như Windows Hello và BitLocker.
Nếu cần xóa TPM vì bất kỳ lý do gì, bạn đã đến đúng nơi. Hướng dẫn này sẽ chỉ cho bạn 4 cách để xóa TPM trên Windows 11.
Khi nào nên xóa TPM và làm như vậy có an toàn không?
Mặc dù TPM bảo vệ dữ liệu nhạy cảm và ngăn chặn các nỗ lực hack được tạo ra thông qua phần cứng máy tính, nhưng dưới đây là một số trường hợp bạn nên xóa TPM trên máy tính của mình.
- Nếu bạn đã kiểm tra máy tính của mình để tìm phần mềm độc hại và nghi ngờ máy tính đã bị nhiễm, việc reset TPM sẽ xóa mọi phần mềm độc hại xâm nhập vào máy tính.
- TPM lưu trữ thông tin quan trọng về driver và ứng dụng được cài đặt trên máy tính của bạn. Do đó, bạn phải reset TPM trước khi bán máy tính để bảo vệ quyền riêng tư của mình.
- Xóa TPM cũng có thể giúp bạn khắc phục sự cố liên quan đến bảo mật, mã hóa và xác thực.
- Bạn nên xóa TPM trước khi cài đặt sạch hệ điều hành mới. Bằng cách này, HĐH có thể triển khai đầy đủ các chức năng dựa trên TPM như chứng thực.
Việc xóa TPM trên máy tính của bạn là hoàn toàn an toàn. Tuy nhiên, hãy nhớ rằng hành động này sẽ xóa tất cả các key mã hóa do TPM tạo ra và dữ liệu được bảo vệ liên quan. Dữ liệu này chứa thông tin liên quan đến smart card ảo hoặc mã PIN đăng nhập.
Do đó, điều quan trọng là phải sao lưu dữ liệu Windows được TPM bảo vệ để ngăn chặn mọi mất mát dữ liệu.
4 cách xóa TPM trên Windows 11
1. Cách xóa TPM bằng TPM Management Console
TPM Management Console cho phép bạn quản lý TPM được cài đặt trên máy tính của mình. Bạn có thể sử dụng nó để bật hoặc tắt TPM, xóa TPM và quản lý key TPM.
Để sử dụng nó để xóa hoặc reset TPM, hãy làm theo các bước sau:
1. Nhấn các phím Win + R cùng nhau để mở hộp thoại Run.
2. Nhập tpm.msc vào thanh tìm kiếm và nhấn Enter.
3. Nhấp vào tùy chọn Clear TPM trong phần Actions.

4. Nhấp vào Restart.
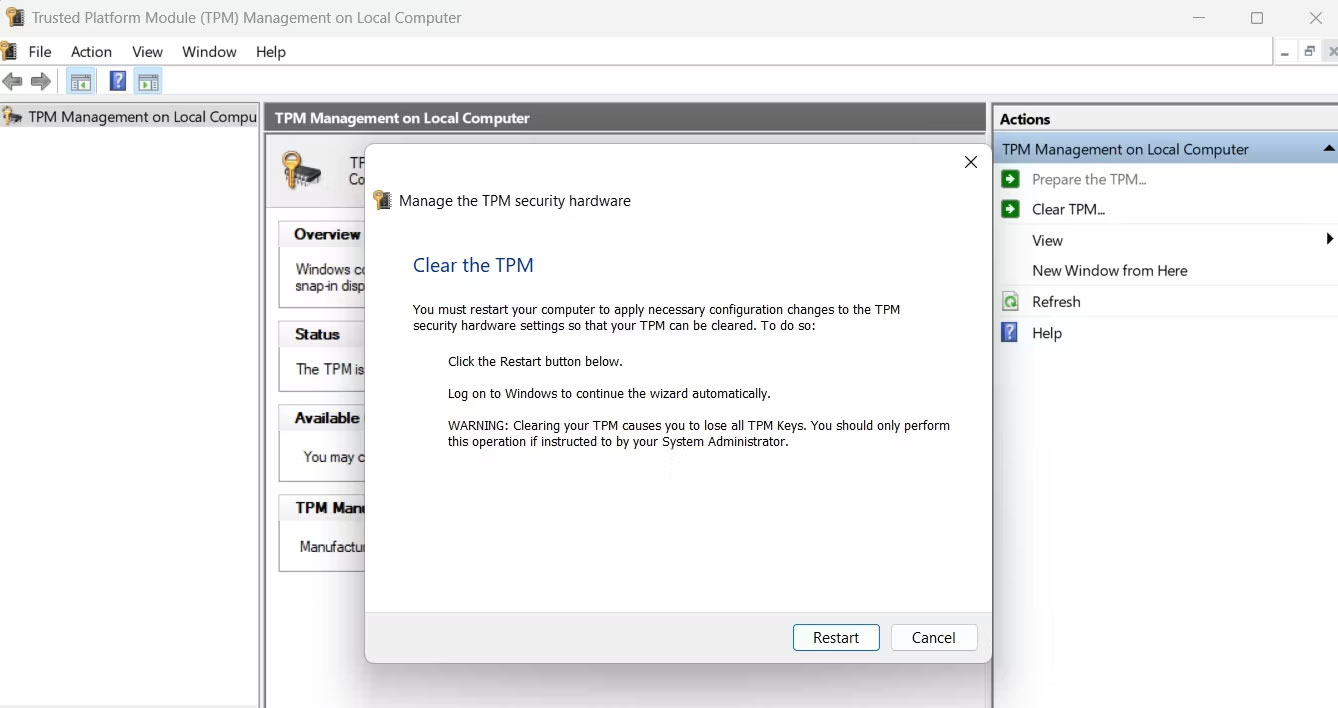
Máy tính của bạn bây giờ sẽ khởi động lại để hoàn tất quá trình thiết reset TPM.
2. Cách xóa TPM bằng ứng dụng Windows Security
Để xóa TPM bằng ứng dụng Windows Security, hãy làm theo các bước sau:
1. Mở menu Start, nhập Windows Security vào thanh tìm kiếm và nhấn Enter.
2. Chọn Device security từ thanh bên trái và nhấp vào Security processor details
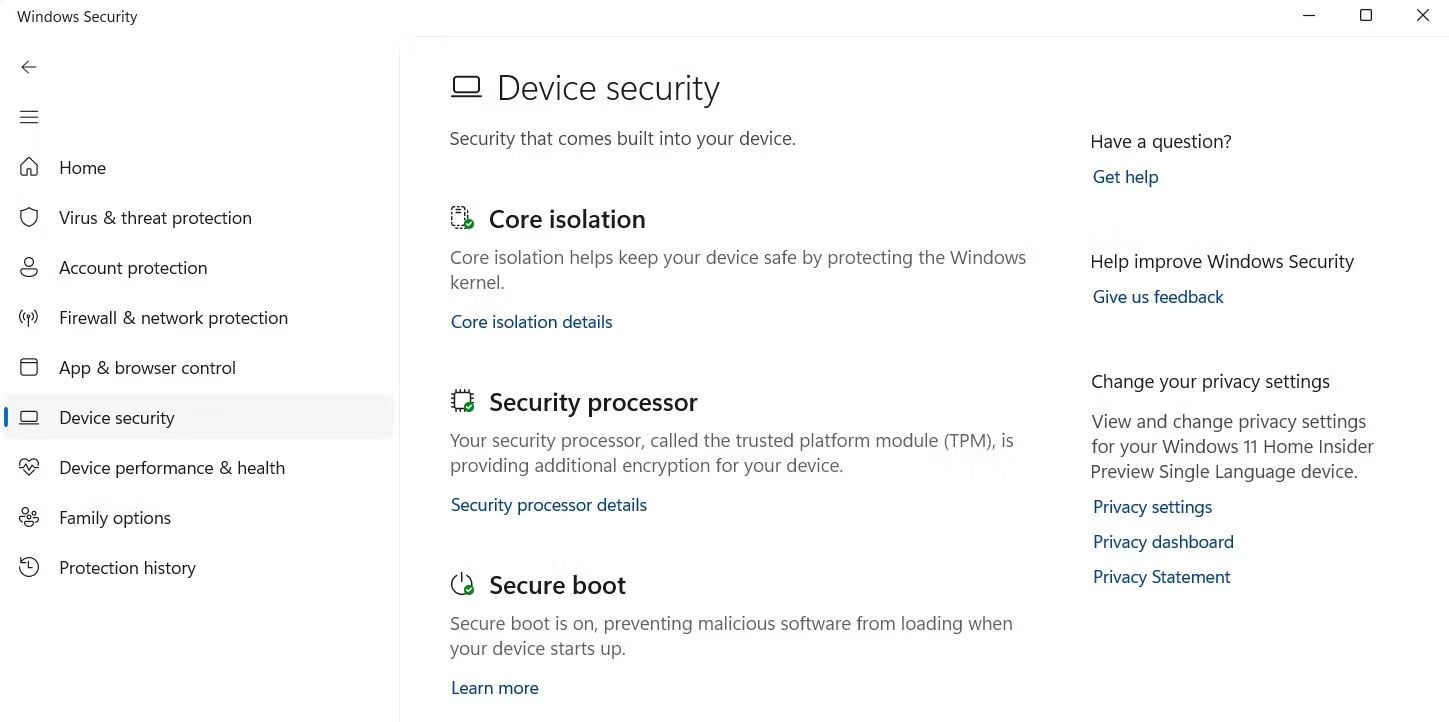
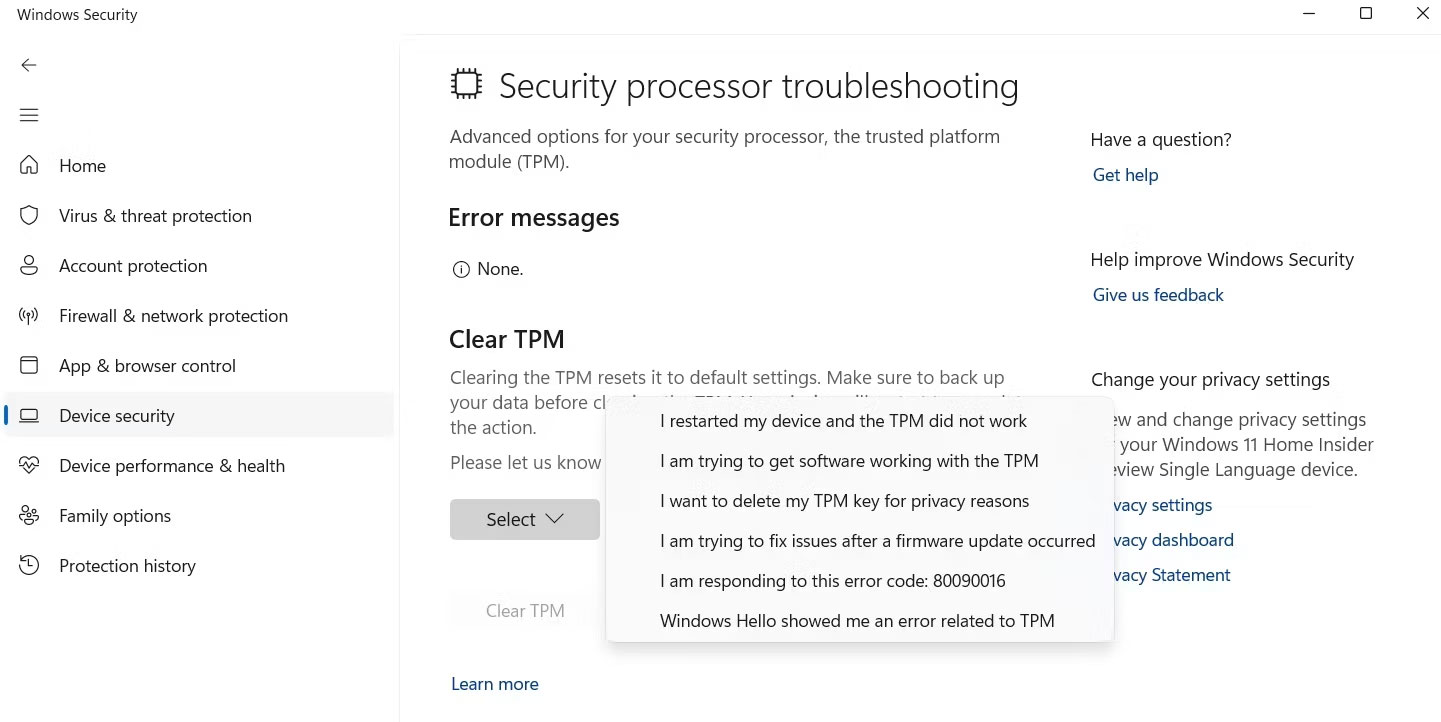
3. Nhấp vào Security processor troubleshooting.
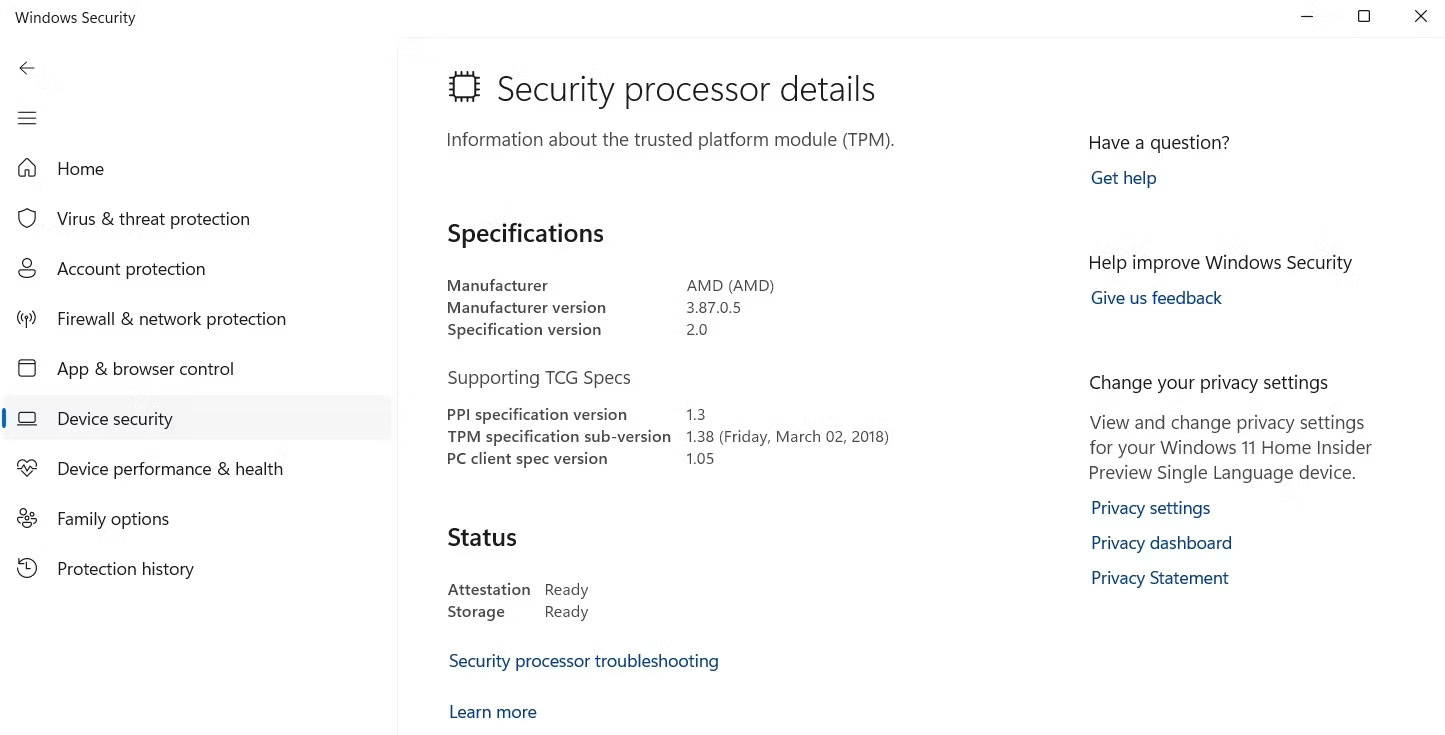
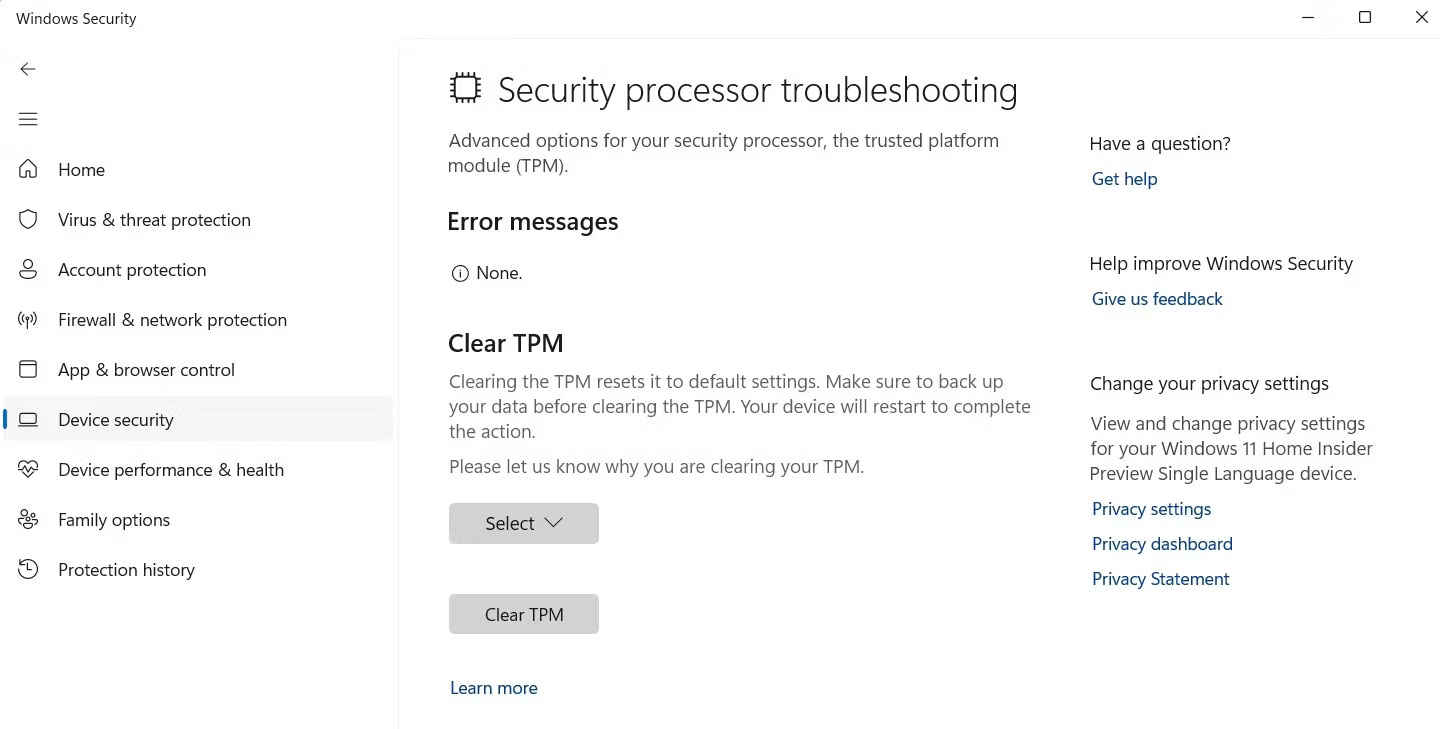
4. Chọn lý do xóa TPM từ menu drop-down Select.
5. Nhấp vào Clear TPM.
6. Nhấp vào Clear and restart.
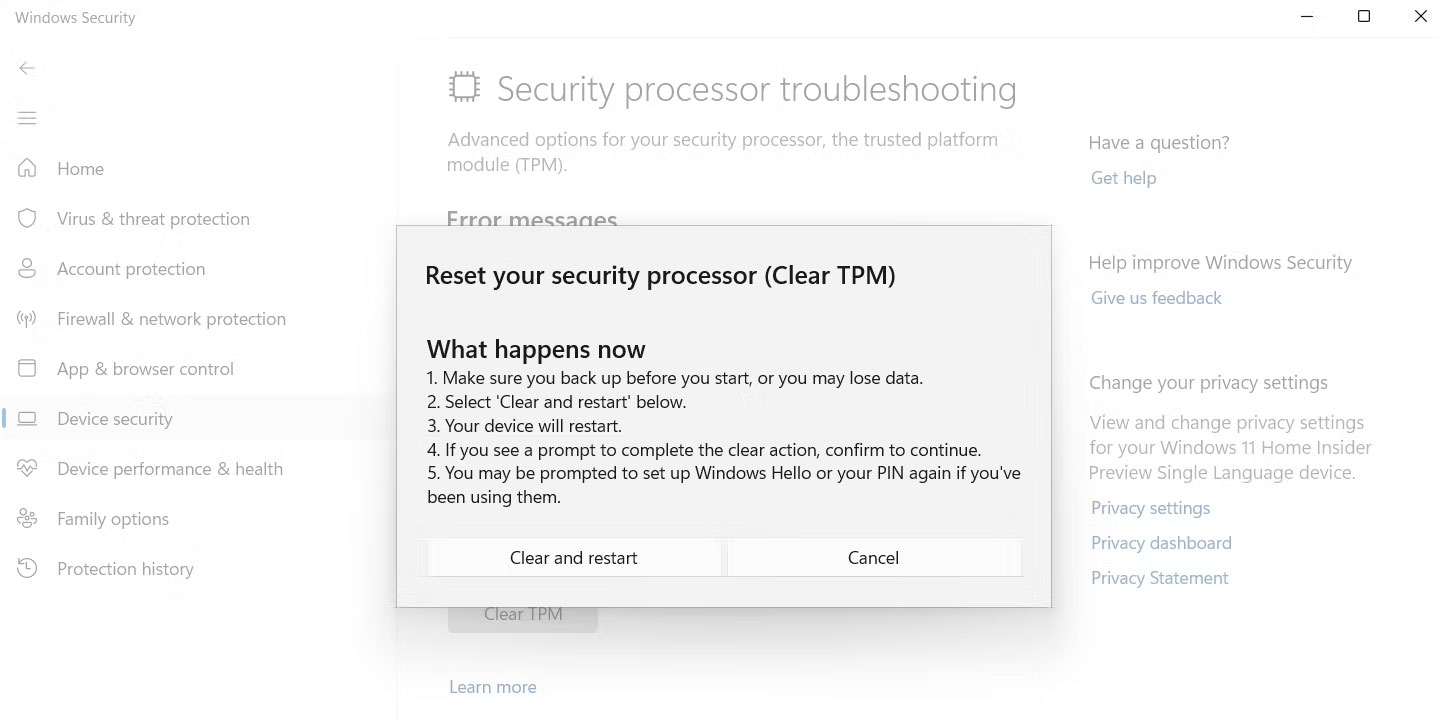
Máy tính của bạn bây giờ sẽ khởi động lại. Sau đó, bạn sẽ phải thiết lập Windows Hello nếu bạn đã từng sử dụng nó trước đây.
3. Cách xóa TPM bằng Windows PowerShell

Windows PowerShell là một công cụ dòng lệnh cho phép bạn thực hiện các thao tác nâng cao trên máy tính của mình.
Để sử dụng PowerShell xóa TPM, hãy mở Windows PowerShell bằng quyền admin, nhập Clear-Tpm và nhấn Enter.
4. Cách xóa TPM thông qua BIOS
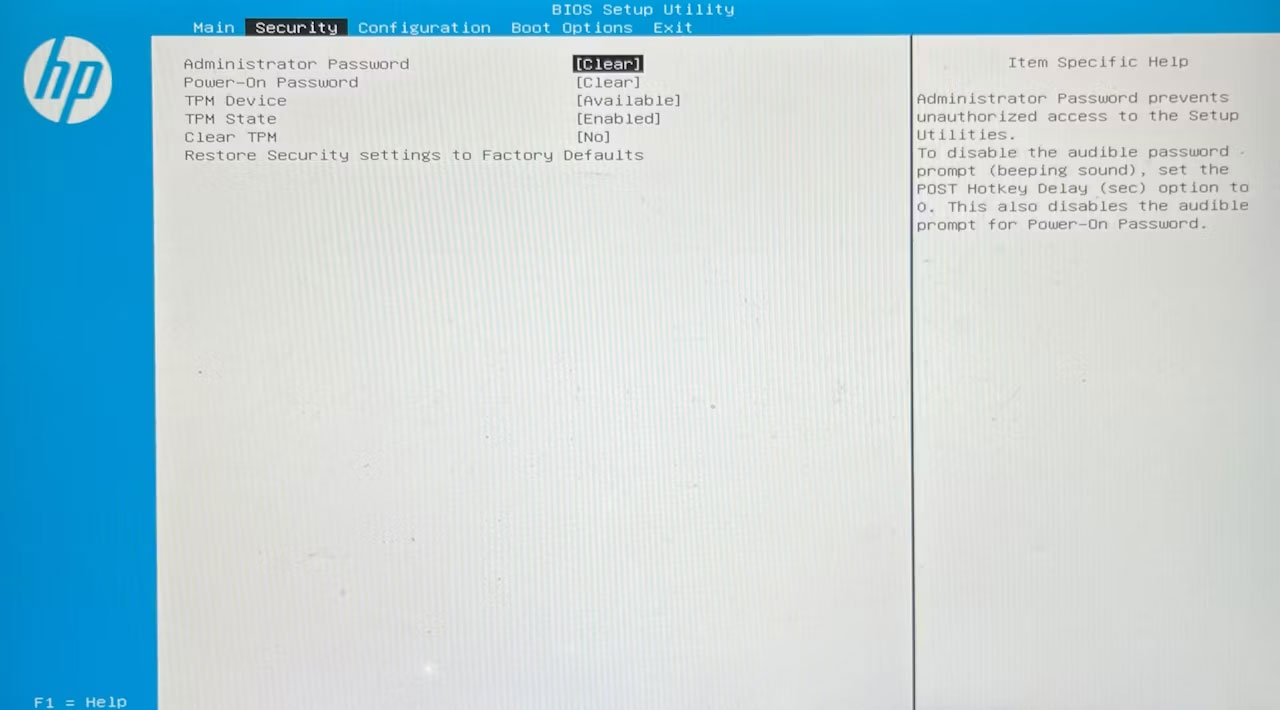
Bạn có thể cấu hình các lớp bảo mật của máy tính, bao gồm TPM từ BIOS. Dưới đây là các bước để reset TPM từ BIOS:
1. Khởi động lại máy tính và nhấn phím BIOS (thường là phím F2 hoặc Del) để truy cập menu BIOS.
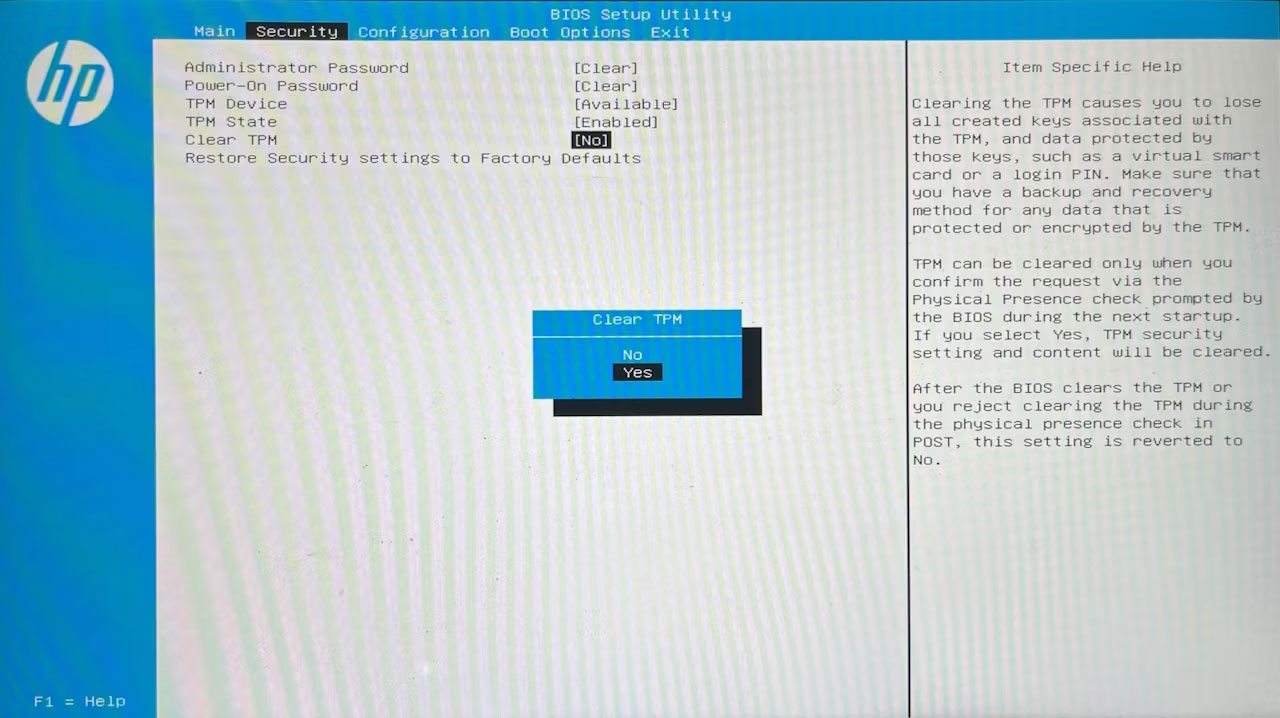
2. Chuyển sang tab Security.
3. Nhấp vào tùy chọn Clear TPM và chọn Yes từ lời nhắc.
4. Chuyển sang Exit tab và chọn Save Changes and Exit. Sau đó, chọn Yes.
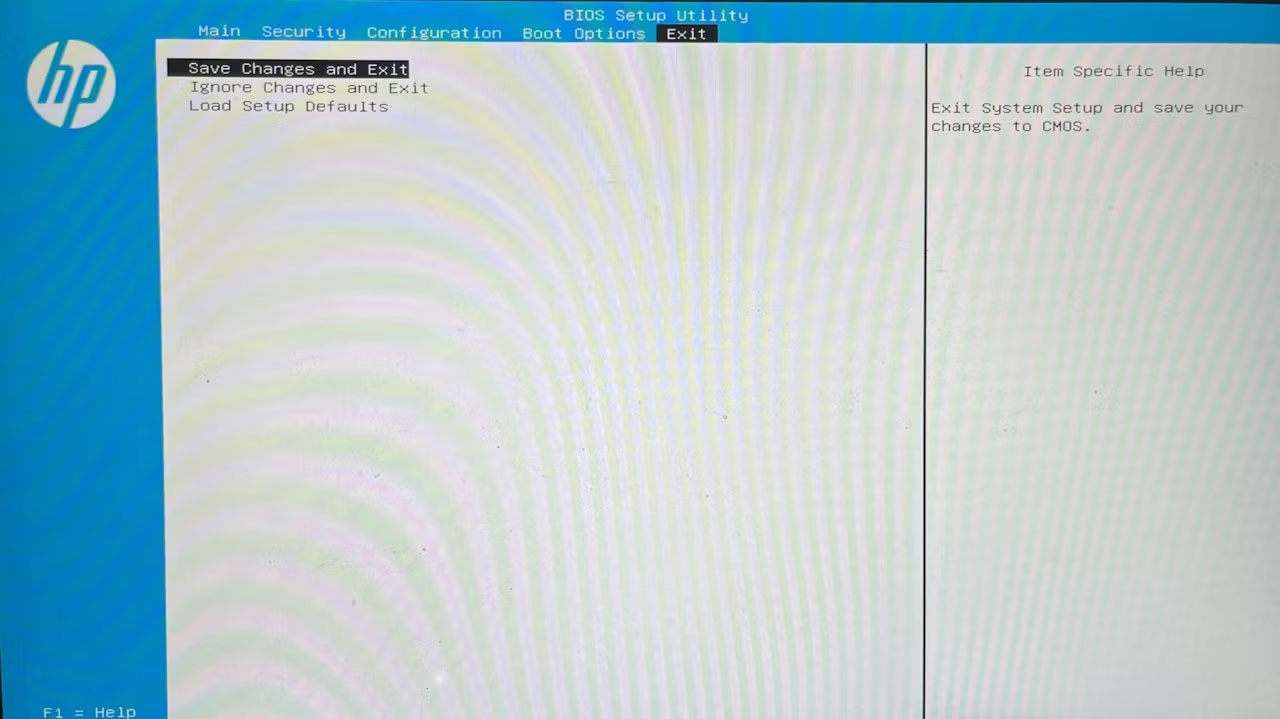
Vậy là xong! Máy tính của bạn sẽ khởi động lại và bạn sẽ có tùy chọn thiết lập mã pin trên màn hình đăng nhập, cho biết rằng bạn đã xóa TPM thành công.
