4 cách tốt nhất kiểm tra dung lượng RAM trên Windows 11
- Thứ bảy - 21/05/2022 00:24
- In ra
- Đóng cửa sổ này
RAM là từ viết tắt của Random Access Memory (Bộ nhớ truy cập ngẫu nhiên). Đây là một loại bộ nhớ được cài đặt trên bo mạch chủ của máy tính để lưu trữ thông tin. Tuy nhiên, không giống như ổ cứng, một thiết bị lưu trữ khác trên PC, bạn sẽ mất bất kỳ dữ liệu nào được lưu trữ trên RAM sau khi tắt máy tính. RAM chỉ lưu trữ tạm thời thông tin từ hệ điều hành Windows và các ứng dụng khác đang chạy trên PC của bạn.
Có một số tình huống nhất định bạn cần biết dung lượng RAM trên PC của mình, chẳng hạn khi bạn cần biết dung lượng RAM của mình có đủ lớn để đáp ứng việc chạy các ứng dụng có mức tiêu thụ bộ nhớ lớn hay không. Khi hệ thống chậm lại, bạn cũng có thể cần phải tìm ra dung lượng RAM để chắc chắn về nguyên nhân. Dưới đây là các cách khác nhau để kiểm tra dung lượng RAM của bạn trên Windows 11.
1. Kiểm tra dung lượng RAM bằng PC Settings
Để kiểm tra dung lượng RAM bằng cách sử dụng PC Settings, hãy thực hiện các bước bên dưới:
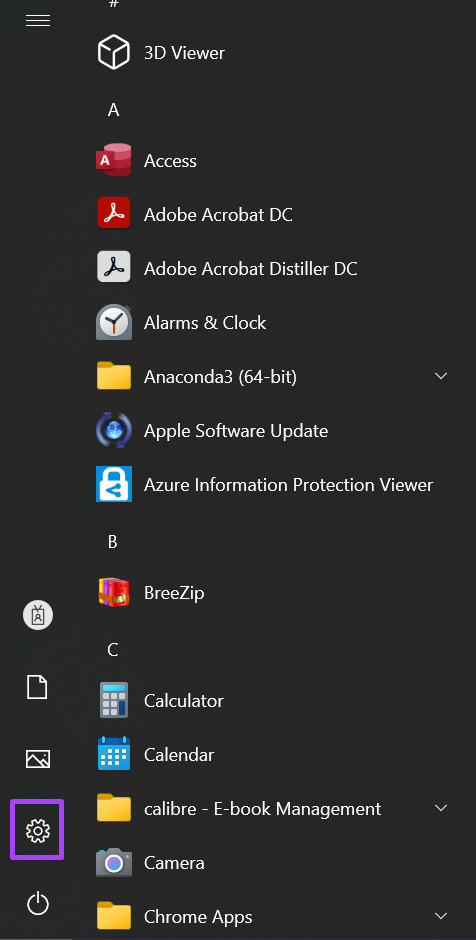
Bước 1: Trên PC, nhấp vào menu Start ở dưới cùng bên trái màn hình.
Bước 2: Nhấp vào biểu tượng bánh răng để khởi chạy Windows Settings.
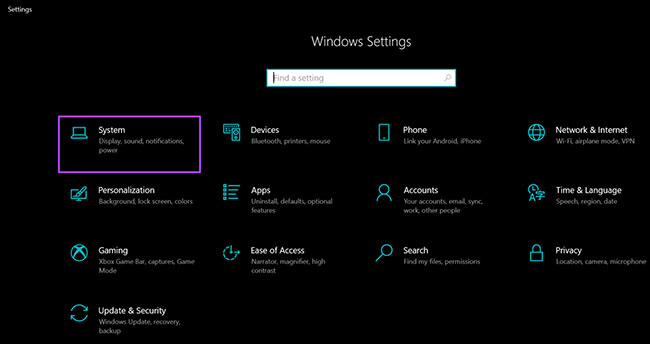
Bước 3: Nhấp vào System từ các tùy chọn hiển thị.
Bước 4: Trên ngăn bên trái của cửa sổ System, cuộn xuống dưới cùng và nhấp vào About từ các tùy chọn được liệt kê.
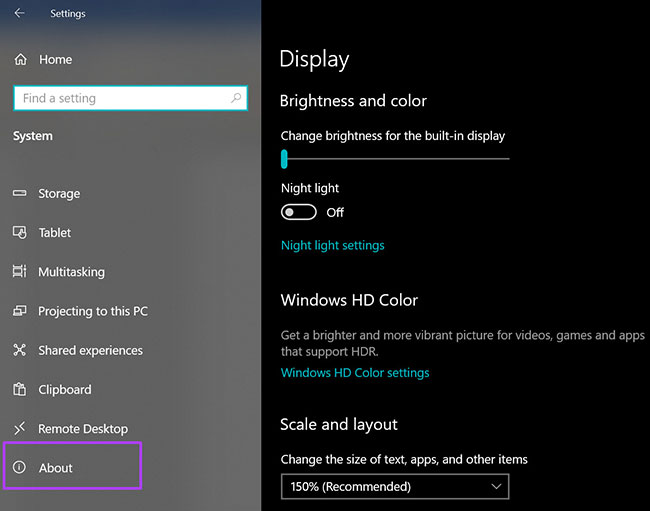
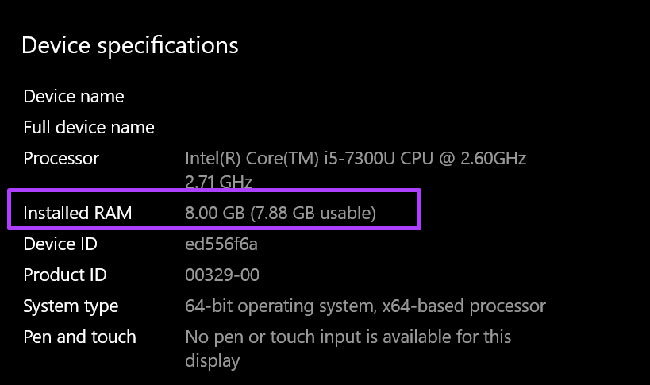
Bước 5: Trong Device Specifications, hãy đọc kỹ để tìm thông tin về dung lượng RAM của bạn.
2. Kiểm tra dung lượng RAM bằng System Information
Dưới đây là cách kiểm tra dung lượng RAM bằng System Information:
Bước 1: Khởi chạy hộp thoại Run bằng cách nhấn đồng thời phím Windows + R trên bàn phím.
Bước 2: Nhập msinfo32 vào trường trống bên cạnh Open.
Bước 3: Nhấp vào OK để mở cửa sổ System Information.
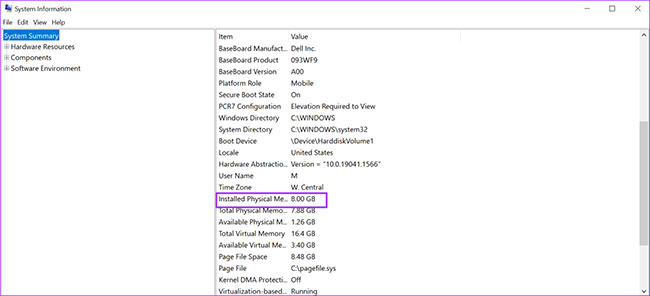
Bước 4: Nhấp vào System Summary trên ngăn bên trái của cửa sổ System Information.
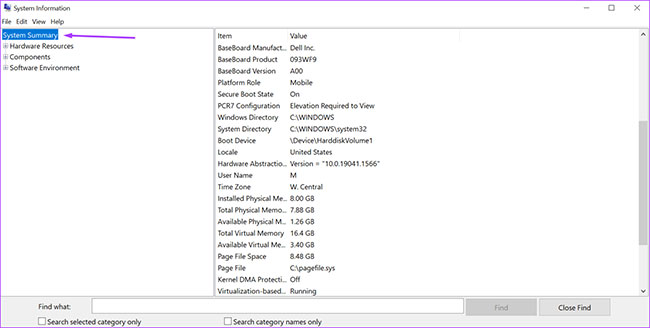
Bước 5: Chuyển đến khung bên phải của cửa sổ System Information và cuộn xuống Installed Physical Memory (RAM). Bạn sẽ thấy kích thước RAM trên PC của mình.
3. Kiểm tra dung lượng RAM bằng Command Prompt
Command Prompt là một cách khác để tìm ra dung lượng RAM của máy tính. Hầu hết mọi người coi quá trình này có chút khó khăn vì nó yêu cầu bạn nhập một lệnh cụ thể. Bài viết đã giúp bạn thực hiện việc này dễ dàng hơn bằng cách tổng hợp các lệnh bạn cần cho quá trình bên dưới:
Bước 1: Trên PC, nhấp vào menu Start ở dưới cùng bên trái màn hình.
Bước 2: Trong trường tìm kiếm, nhập truy vấn cho Command Prompt.
Bước 3: Nhấp vào kết quả tương ứng để khởi chạy Command Prompt.
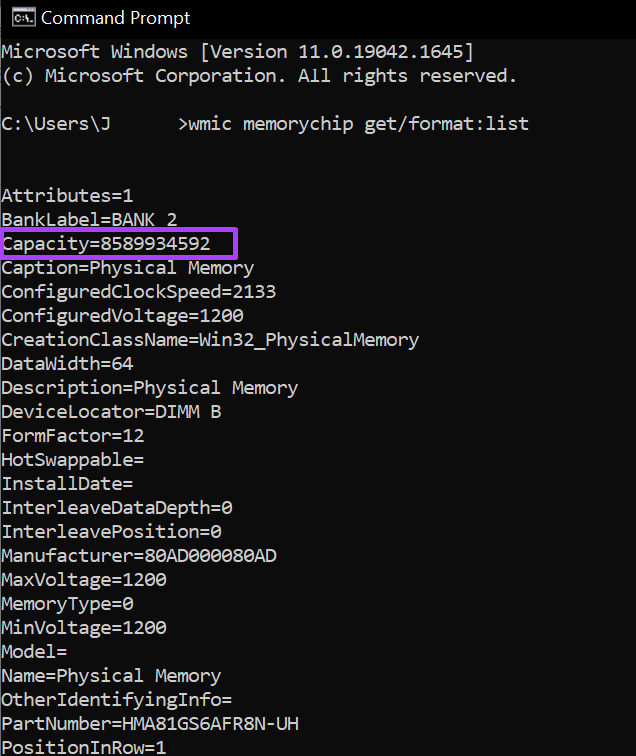
Bước 4: Gõ lệnh sau vào Command Prompt.
wmic memorychip get/format:list
Bước 5: Nhấn Enter trên bàn phím để chạy lệnh.
Bước 6: Từ kết quả, tìm giá trị bên cạnh Capacity, đại diện cho dung lượng RAM của bạn.
Bạn sẽ luôn nhận được một giá trị số sau khi nhập các lệnh trên. Nếu không chắc về ý nghĩa của giá trị số, bạn luôn có thể tiến hành nghiên cứu.
4. Kiểm tra dung lượng RAM bằng Task Manager
Task Manager là một trong những tính năng quan trọng nhất của trên máy tính. Nó là một ứng dụng linh hoạt và cung cấp thông tin về các tiến trình và trạng thái bộ nhớ của máy tính, chẳng hạn như dung lượng RAM, mức sử dụng và tốc độ. Làm theo các bước bên dưới để kiểm tra dung lượng RAM của PC bằng Task Manager:
Bước 1: Nhấp chuột phải vào thanh Taskbar của PC.
Bước 2: Nhấp vào Task Manager từ các tùy chọn được liệt kê.
Bạn cũng có thể khởi chạy Task Manager bằng cách nhấn đồng thời các phím Ctrl + Alt + Delete trên bàn phím.
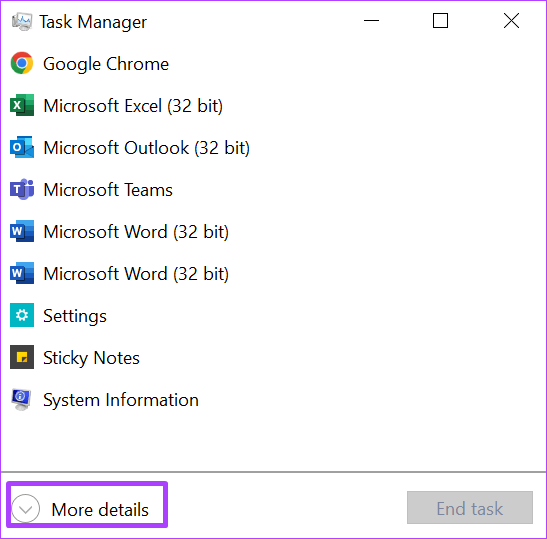
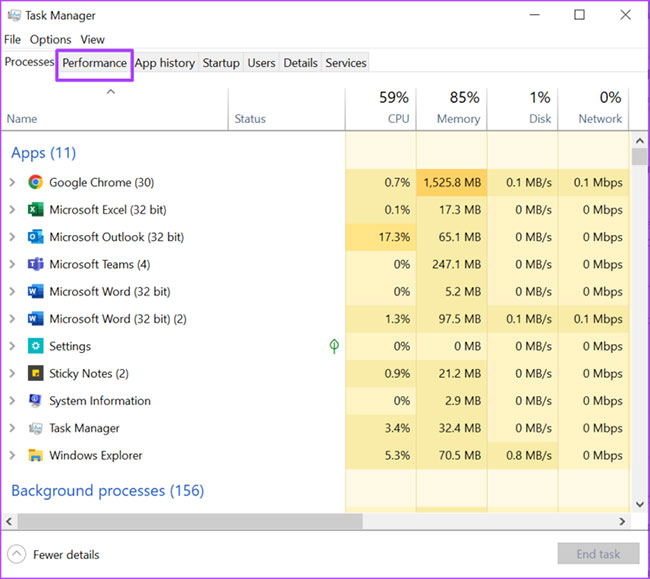
Bước 3: Nếu Task Manager của bạn khởi chạy dưới dạng cửa sổ nhỏ, hãy chuyển đến phía dưới bên trái của cửa sổ và nhấp vào More details để mở rộng.
Bước 4: Từ các tab ở đầu cửa sổ, nhấp vào Performance.
Bước 5: Đặt con trỏ trên thanh bên và nhấp vào Memory để xem tất cả thông tin về RAM của bạn.
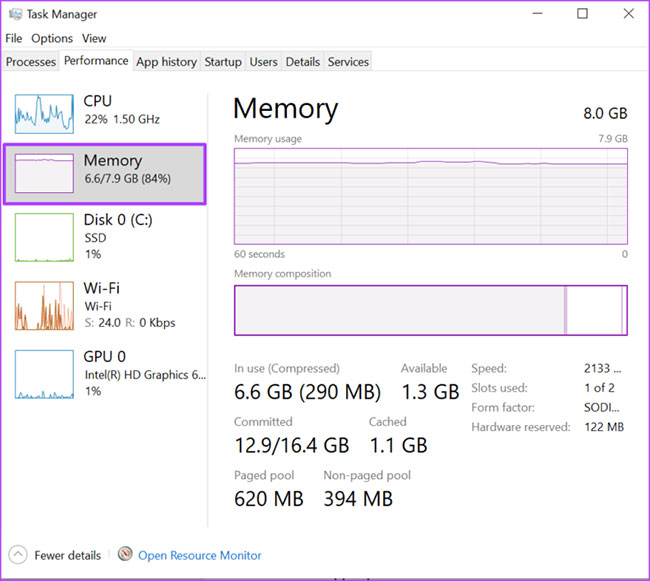
Bước 6: Ở bên phải của ngăn Memory, bạn sẽ thấy dung lượng RAM được nêu ở trên cùng.
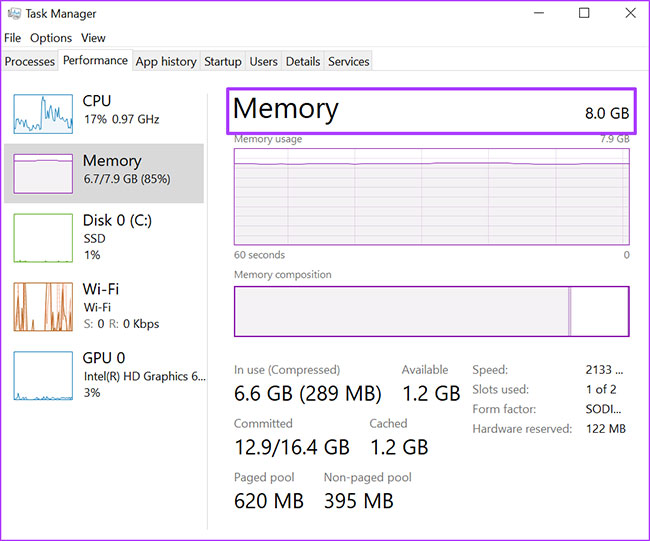
Phần trên của cửa sổ hiển thị dung lượng và loại RAM, trong khi phần dưới hiển thị mức sử dụng RAM, tốc độ, kích thước và model form factor, v.v…
Trên đây là cách kiểm tra dung lượng RAM trên máy tính Windows 11. Một điều cần lưu ý là RAM của PC chỉ lưu trữ dữ liệu tạm thời. Do đó, khi PC của bạn tắt, thông tin sẽ bị mất. Tuy nhiên, đối với ổ cứng hoặc thẻ nhớ trên PC, bạn có thể khôi phục thông tin bị hỏng hoặc bị mất.
