11 cách mở System Restore trên Windows 11
- Thứ sáu - 23/06/2023 00:49
- In ra
- Đóng cửa sổ này
System Restore rất hữu ích khi bạn gặp sự cố sau khi cài đặt ứng dụng hoặc bản cập nhật làm hỏng PC của bạn. Windows tạo các điểm khôi phục và tự động xóa chúng để nhường chỗ cho các điểm khôi phục mới. System Restore ngăn bạn ngay lập tức sử dụng các phương pháp khôi phục khác như reset hoặc cài đặt lại Windows có thể ảnh hưởng đến dữ liệu và ứng dụng của bạn. Dưới đây là 11 cách để khởi chạy công cụ đáng tin cậy này trên Windows 11.
1. Sử dụng menu Start
Menu Start là phương tiện phổ biến nhất để truy cập các ứng dụng và công cụ Windows. Tích hợp tìm kiếm cải tiến và theo dõi khởi chạy ứng dụng hiển thị các ứng dụng và cài đặt mà bạn truy cập hầu hết thời gian. Làm theo các bước sau:
1. Nhấn phím Win để mở menu Start.
2. Nhập System Restore và nhấn phím Enter. Sau đó bấm vào nút Open System Restore.
3. Nhấp vào nút Next để xem và chọn từ danh sách các tùy chọn có sẵn.
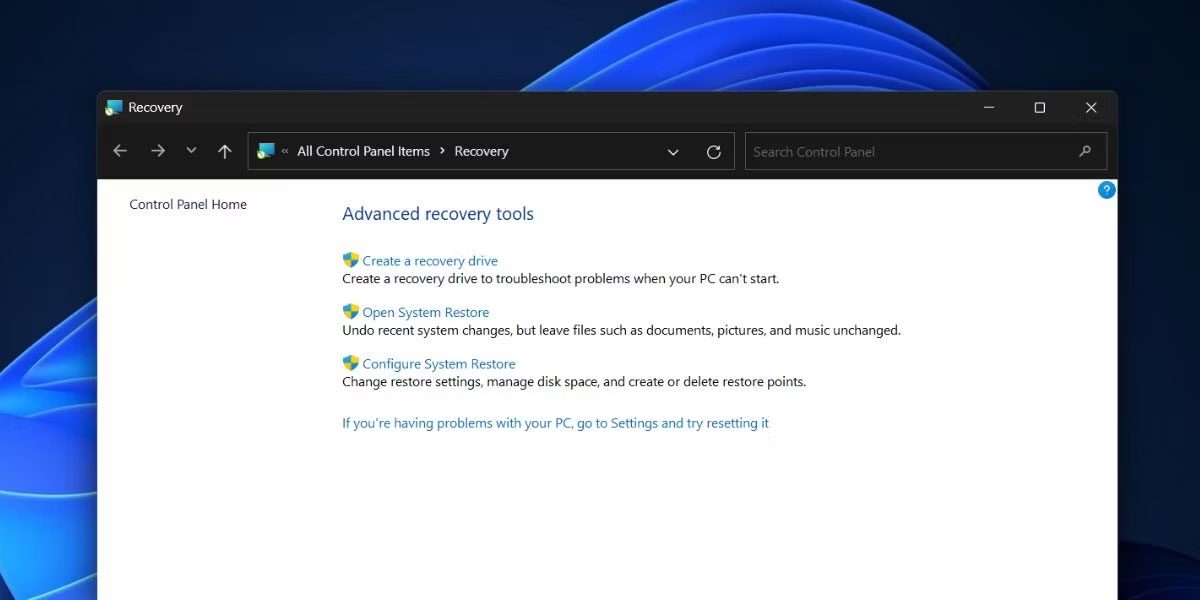
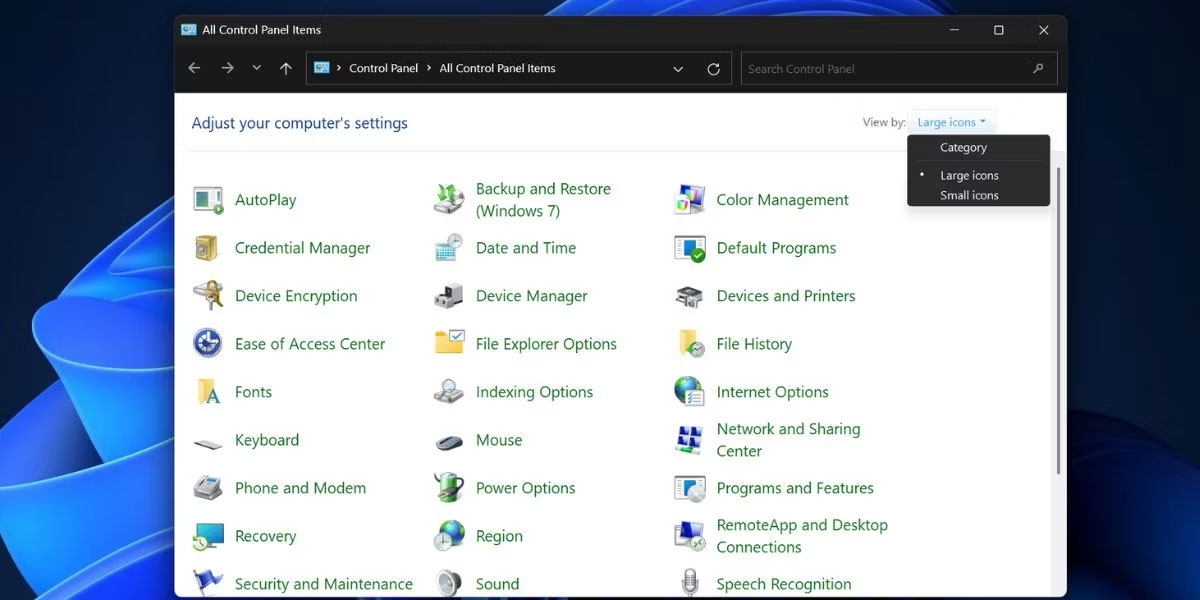
2. Sử dụng Control Panel
Control Panel chứa tất cả các công cụ và cài đặt của Windows, giúp bạn dễ dàng tìm thấy chúng. Ngay cả tìm kiếm Windows cũng trỏ đến cửa sổ Control Panel của các tùy chọn Recovery. Đây là cách thực hiện:
1. Nhấn phím Win, nhập Control Panel, rồi nhấn phím Enter.
2. Nhấp vào danh sách drop-down View by: và chọn tùy chọn Large icons.
3. Bây giờ, bấm vào tùy chọn Recovery.
4. Cuối cùng, nhấp vào nút Open System Restore.
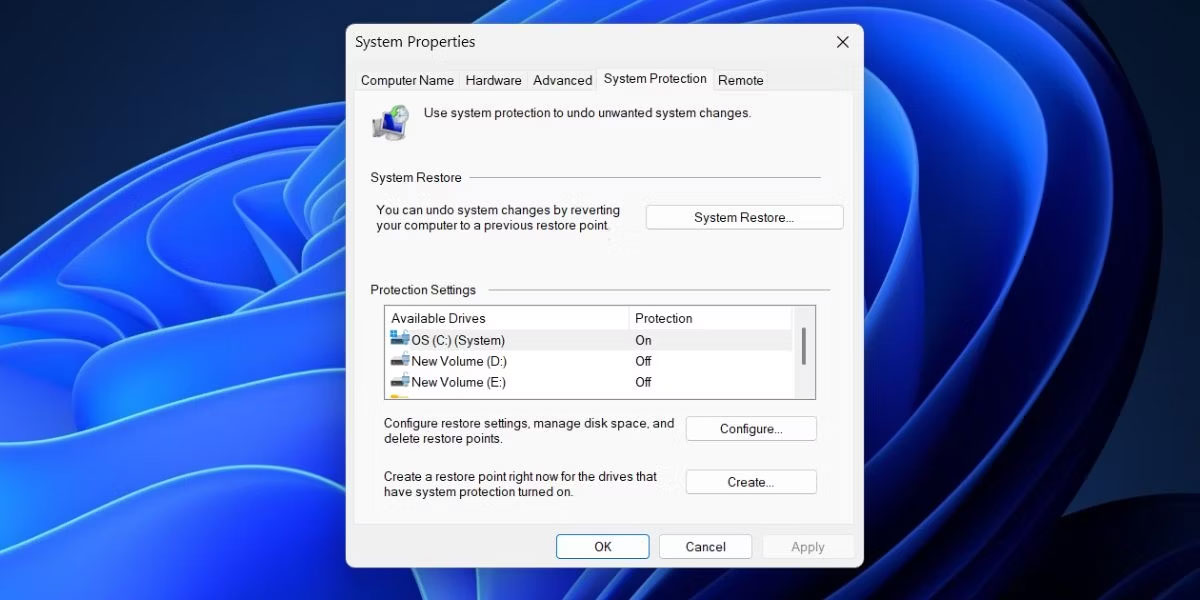
3. Sử dụng cửa sổ Advanced System Properties
Bạn có thể nhanh chóng truy cập System Restore bằng cửa sổ Advanced System Properties. Làm theo các bước sau:
- Nhấn phím Win, nhập sysdm.cpl, rồi nhấn phím Enter.
- Bây giờ, hãy chuyển sang tab System Protection.
- Nhấp vào nút System Restore để khởi chạy công cụ.
4. Sử dụng ứng dụng Settings
Microsoft vẫn đang cố gắng đưa mọi thứ từ Control Panel đến ứng dụng Settings. Nhưng ngay cả khi tìm kiếm System Restore trong Control Panel cũng trỏ đến ứng dụng Settings, bạn sẽ không tìm thấy công cụ ở đó. Thay vào đó, bạn phải tìm kiếm System Restore bên trong ứng dụng Settings. Đây là cách thực hiện:
1. Nhấp chuột phải vào nút Start để mở menu Power User. Nhấp vào tùy chọn Settings.
2. Chuyển đến thanh tìm kiếm ở phía trên bên trái và nhấp vào nó.
3. Nhập Restore và nhấp vào kết quả tìm kiếm Recovery. Nó sẽ đưa bạn đến danh sách các tùy chọn khôi phục có sẵn của Control Panel.
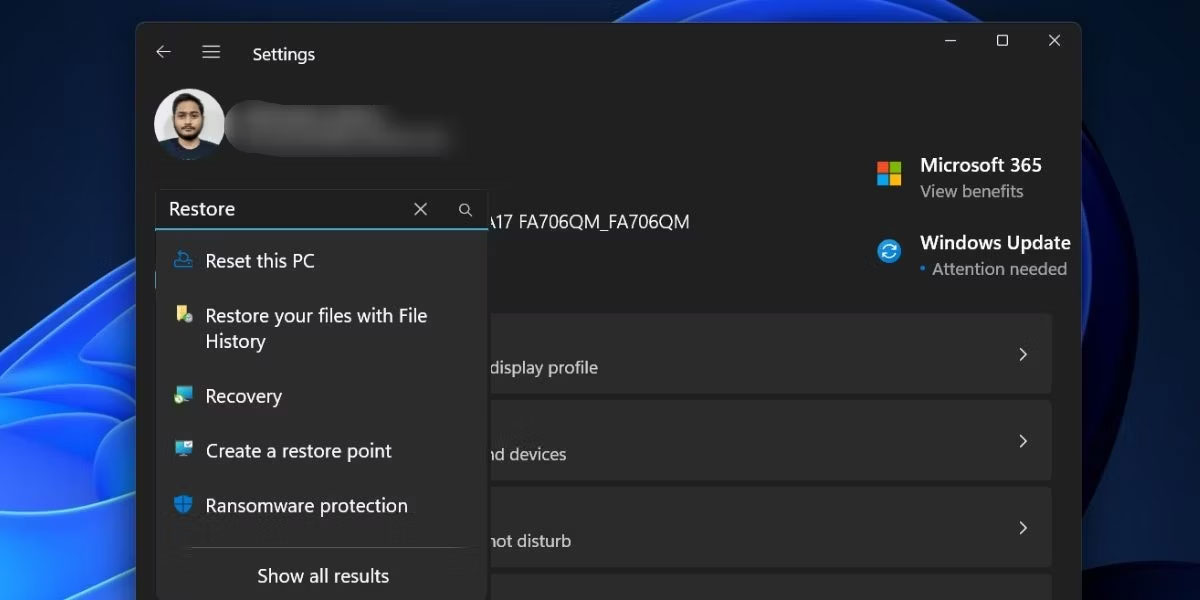
4. Bây giờ, nhấp vào nút Open System Restore.
5. Sử dụng hộp thoại Run
Hộp thoại Run hỗ trợ code ngắn cho phép bạn truy cập ứng dụng nhanh hơn (miễn là bạn biết đúng code). Bạn thậm chí có thể mở các vị trí file bằng công cụ này. Làm theo các bước sau:
1. Nhấn Win + R để mở hộp thoại Run. Nhập rstrui vào hộp văn bản.
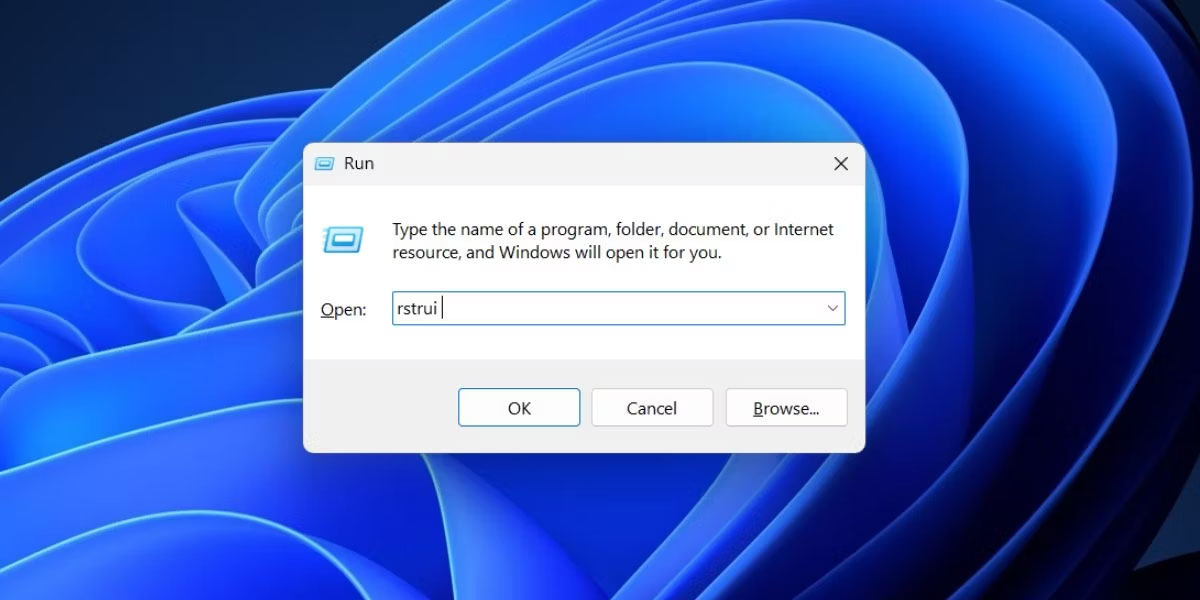
2. Nhấp vào nút OK để mở công cụ System Restore.
6. Sử dụng shortcut được ghim trên Taskbar
Nếu tìm kiếm System Restore trong menu Start, bạn sẽ không tìm thấy tùy chọn trong ngăn bên phải để ghim ứng dụng vào menu Start hoặc Taskbar. Nhưng bạn có thể ghim file ứng dụng của công cụ vào Taskbar bằng cách truy cập vị trí thư mục của nó. Đây là cách thực hiện:
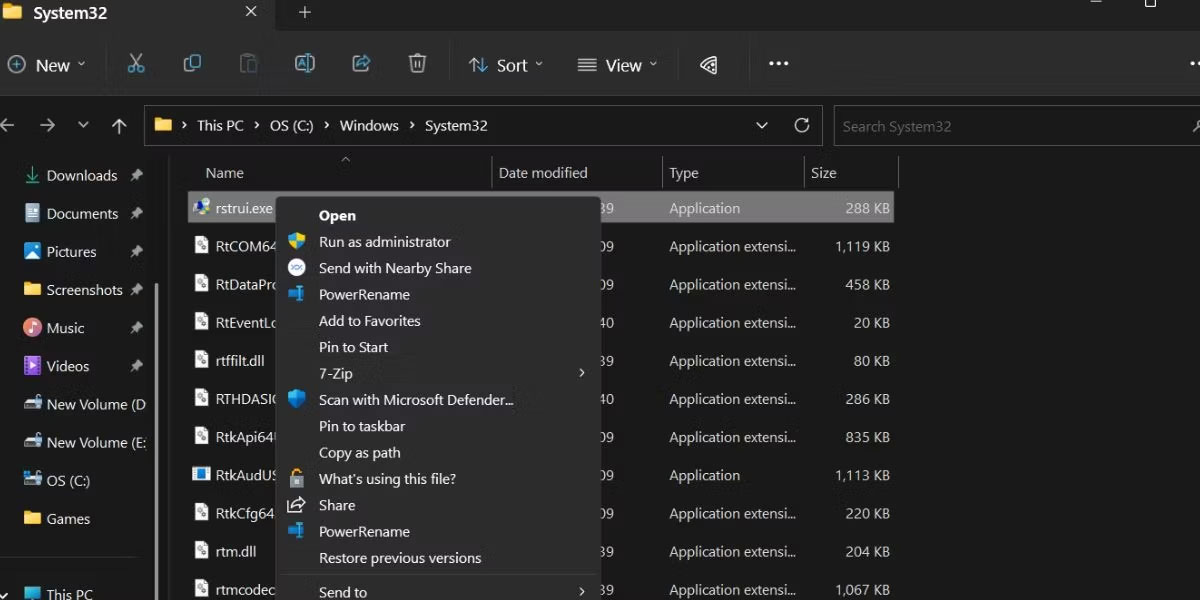
1. Nhấn phím Win, gõ rstrui và nhấp vào tùy chọn Open file location ở bên phải.
2. Tìm ứng dụng rstrui.exe trong thư mục và nhấp chuột phải vào ứng dụng đó. Chọn Show more options từ menu ngữ cảnh.
3. Nhấp vào tùy chọn Pin to taskbar.
4. Biểu tượng System Restore sẽ xuất hiện trên Taskbar. Bạn có thể thay đổi vị trí của nó trên Taskbar bằng cách nhấp và kéo nó theo một trong hai hướng.
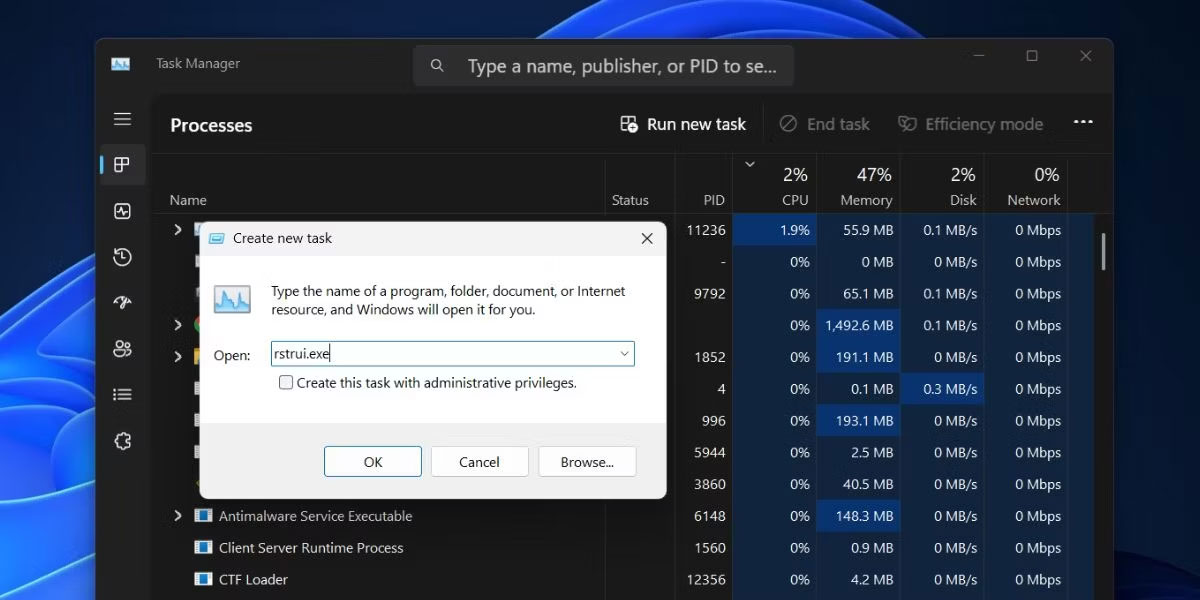
7. Sử dụng Task Manager
Nếu ứng dụng Control Panel không mở trên PC Windows của bạn, bạn có thể sử dụng Task Manager để khởi chạy tiện ích System Restore. Đây là cách thực hiện:
1. Nhấn các phím Ctrl + Shift + Esc cùng một lúc để mở Task Manager.
2. Nhấp vào nút Run new task.
3. Nhập rstrui.exe và nhấp vào nút OK để khởi chạy công cụ System Restore.
4. Đóng cửa sổ Task Manager.
8. Sử dụng File Explorer
System Restore, giống như tất cả các công cụ khác của Windows và applet Control Panel, nằm trong thư mục System32. Vì vậy, bạn có thể sử dụng File Explorer để truy cập công cụ. Làm theo các bước sau:
1. Nhấn Win + E để mở File Explorer.
2. Chuyển đến khu vực trên cùng và nhấp vào thanh địa chỉ. Dán đường dẫn sau và nhấn phím Enter: C:\Windows\System32
3. Nhấn vào thanh tìm kiếm và gõ rstrui rồi nhấn phím Enter để tìm kiếm.
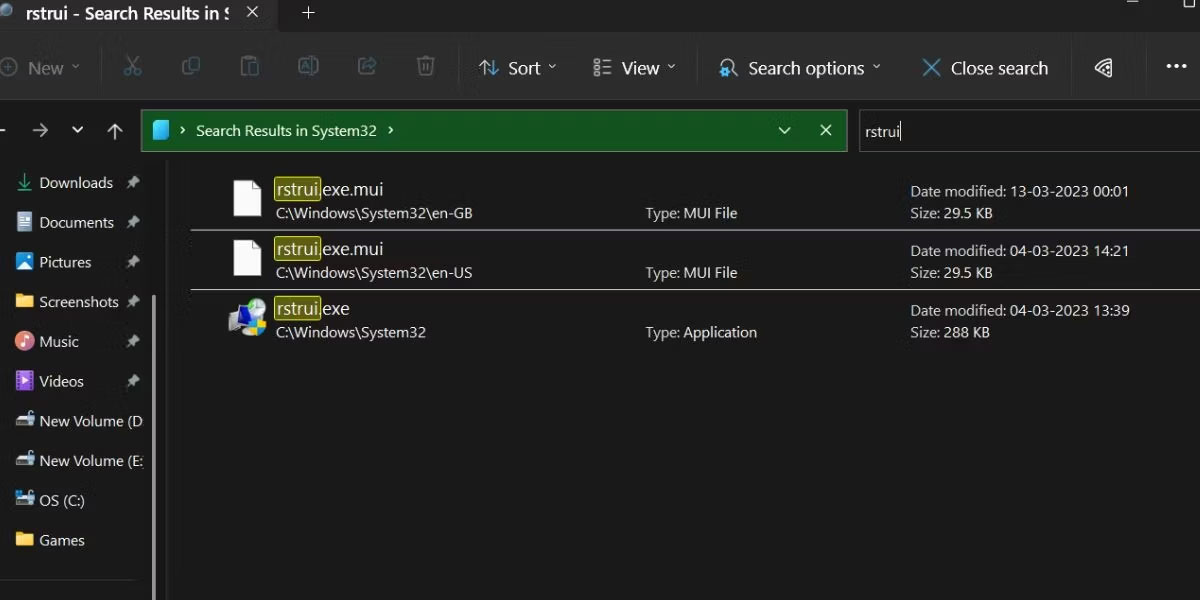
4. Nhấp đúp vào file rstrui.exe để mở công cụ.
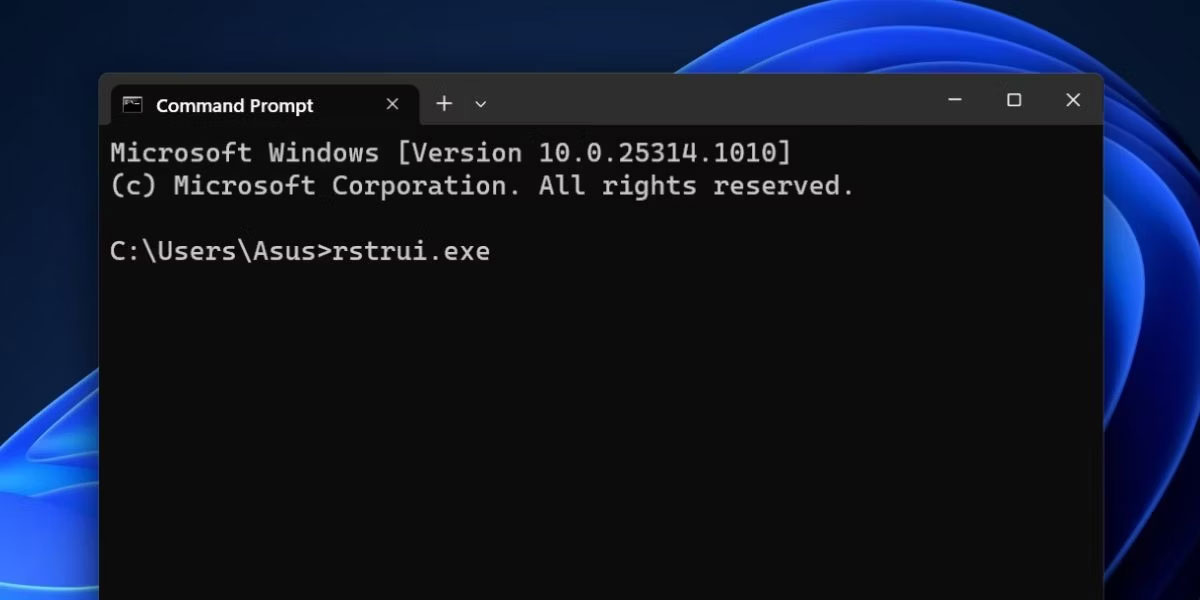
9. Sử dụng CMD hoặc PowerShell
Những người yêu thích terminal không thích ý tưởng điều hướng qua các menu để mở một chương trình. Nếu bạn là một trong số đó, đây là cách bạn có thể mở tiện ích System Restore trong Windows 11 bằng Command Prompt hoặc PowerShell:
1. Nhấn Win + R để mở hộp thoại Run. Nhập cmd hoặc Powershell vào hộp văn bản và nhấn phím Enter.
2. Bây giờ, gõ lệnh sau vào terminal và nhấn phím Enter: rstrui.exe
3. Ngoài ra, bạn có thể sử dụng cmdlet start-process trong PowerShell để khởi chạy công cụ: start-process rstrui.
4. Đóng cửa sổ Command Prompt hoặc PowerShell.
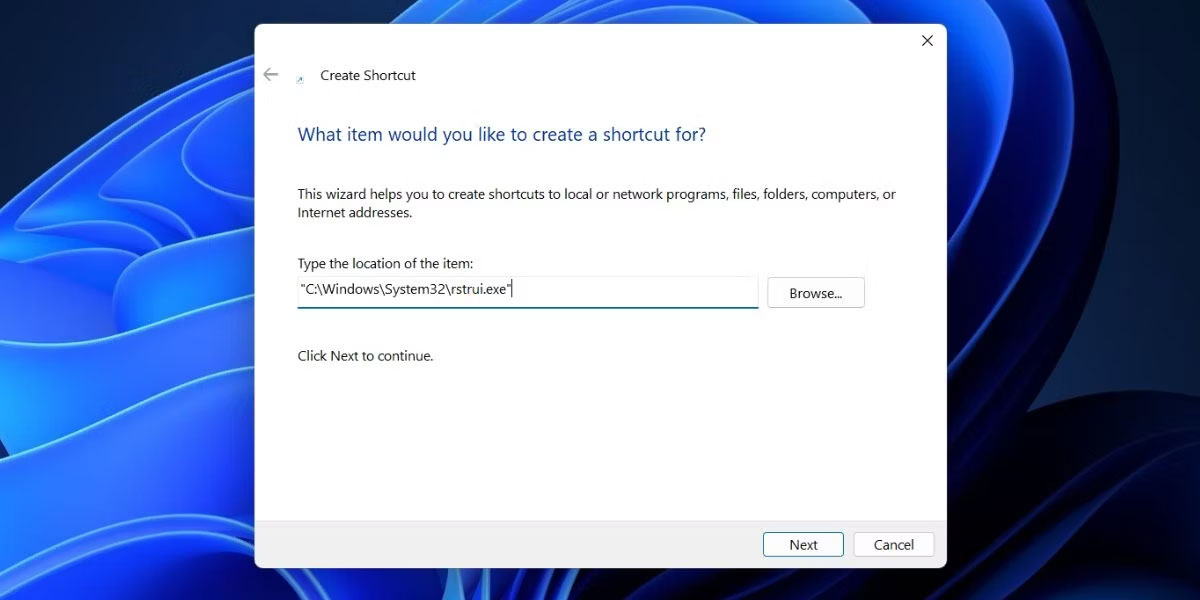
10. Sử dụng desktop shortcut
Desktop shortcut là một trong những phương pháp dễ dàng nhất để mở các ứng dụng và chương trình thường dùng. Bạn có thể tạo shortcut Windows thủ công cho tiện ích System Restore rồi khởi chạy nó bất cứ khi nào bạn muốn. Làm theo các bước sau:
1. Nhấn Win + D để chuyển sang desktop.
2. Nhấp chuột phải vào vùng trống trên desktop không có biểu tượng.
3. Chọn tùy chọn New > Shortcut từ menu ngữ cảnh.
4. Windows sẽ tạo shortcut và mở cửa sổ tùy chỉnh của nó.
5. Nhấp vào hộp văn bản và dán đường dẫn sau: "C:\Windows\System32\rstrui.exe"
6. Nhấp vào nút Next.
7. Bây giờ, hãy lưu shortcut với tên System Restore và nhấp vào nút Finish.
8. Nhấp đúp vào shortcut vừa tạo để khởi chạy System Restore.
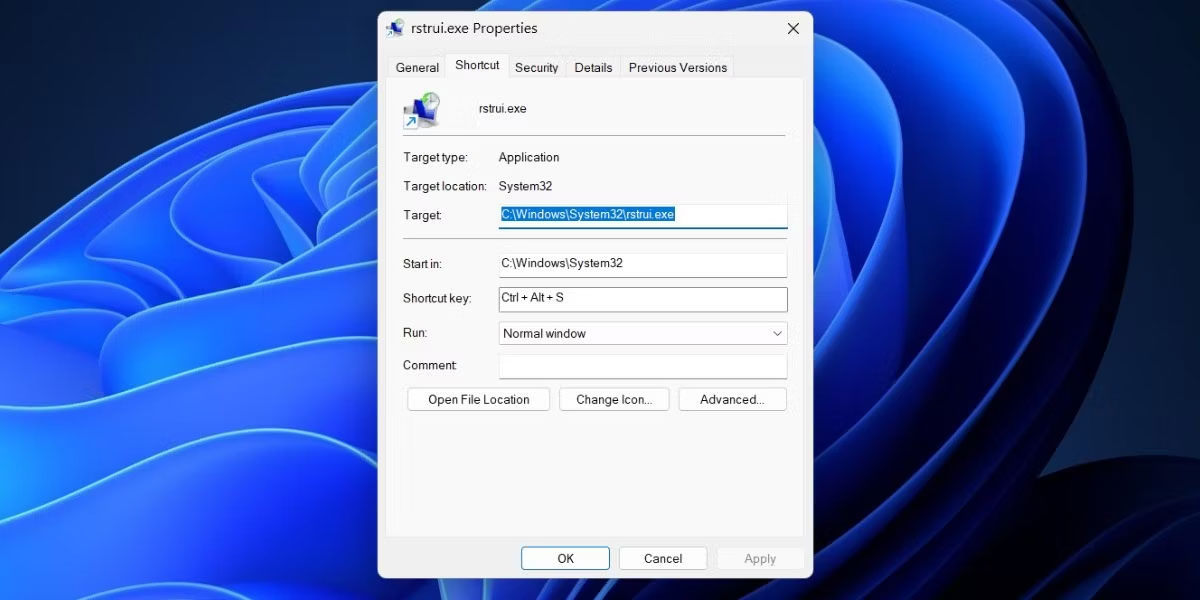
11. Sử dụng phím tắt
Phương pháp cuối cùng trong danh sách là ánh xạ tổ hợp phím trên bàn phím tới shortcut mới được tạo. Vì vậy, bạn có thể nhấn các phím được ánh xạ và khởi chạy công cụ bất cứ khi nào bạn muốn. Làm theo các bước sau;
1. Nhấn Win + D để chuyển sang desktop.
2. Tìm shortcut System Restore mới được tạo và nhấp chuột phải vào nó. Chọn tùy chọn Properties từ menu ngữ cảnh.
3. Chuyển đến trường Shortcut key. Bạn có thể ánh xạ một tổ hợp bắt đầu bằng Ctrl + Alt + một phím khác. Có những phím được dành riêng cho các phím tắt hệ thống và bạn không thể sử dụng chúng.
4. Nhấn các phím Ctrl + Alt + S cùng một lúc để gán tổ hợp phím bạn chọn. Bạn có thể sử dụng bất kỳ phím nào khác thay cho phím “S”.
5. Nhấp vào nút Apply và sau đó nhấp vào nút OK.
6. Chuyển sang desktop hoặc bất kỳ cửa sổ nào khác và nhấn tổ hợp phím được chỉ định. Tiện ích System Restore sẽ xuất hiện.
