10 cách mở applet Control Panel Windows Firewall trong Windows 11
- Thứ tư - 01/11/2023 10:03
- In ra
- Đóng cửa sổ này
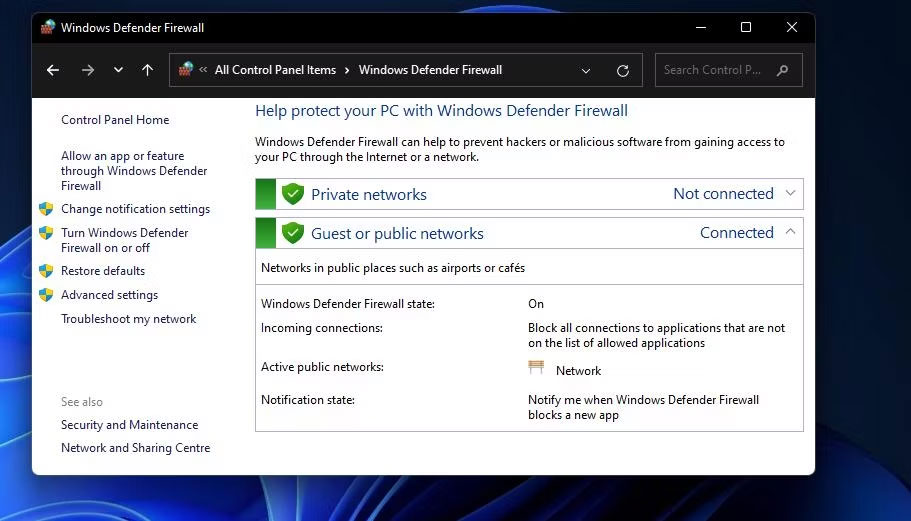
Tường lửa của máy tính là một công cụ mạng giám sát lưu lượng truy cập Internet đến và đi trên PC. Windows Defender Firewall (WDF) là tường lửa tích hợp của Windows 11, chặn phần mềm không được phép truy cập Internet.
Đôi khi người dùng cần cấu hình phần mềm nào được phép thông qua Windows Defender Firewall với các tùy chọn ứng dụng được phép. Một số người dùng thậm chí có thể cần phải tạm thời tắt WDF vì mục đích khắc phục sự cố. Để thay đổi cài đặt của tường lửa đó, bạn cần mở applet Control Panel của nó. Dưới đây là một số cách bạn có thể mở applet Control Panel Firewall trong Windows 11.
1. Cách mở Windows Defender Firewall bằng Control Panel
Bạn có thể mở ứng dụng Windows Defender Firewall theo cách thủ công từ trong Control Panel. Đó không phải là phương pháp trực tiếp nhất nhưng vẫn là một cách để mở applet firewall. Đây là cách mở applet firewall từ trong Control Panel trong Windows 11.
1. Mở menu Start và nhấp vào All apps.
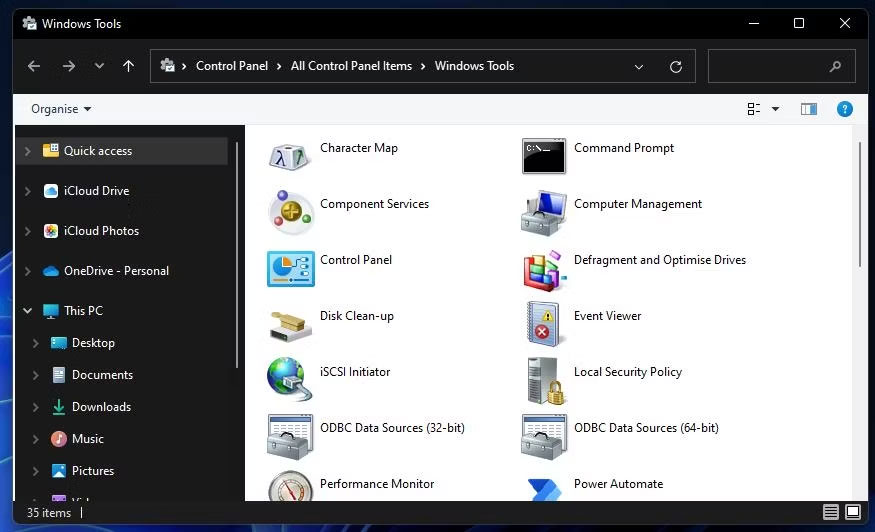
2. Cuộn menu Start xuống thư mục Windows Tools. Nhấp vào Windows Tools để mở nó.
3. Nhấp đúp vào Control Panel trong thư mục để mở cửa sổ của nó.
4. Nếu Control Panel mở ở chế độ xem danh mục, hãy nhấp vào menu View by và chọn Large icons.
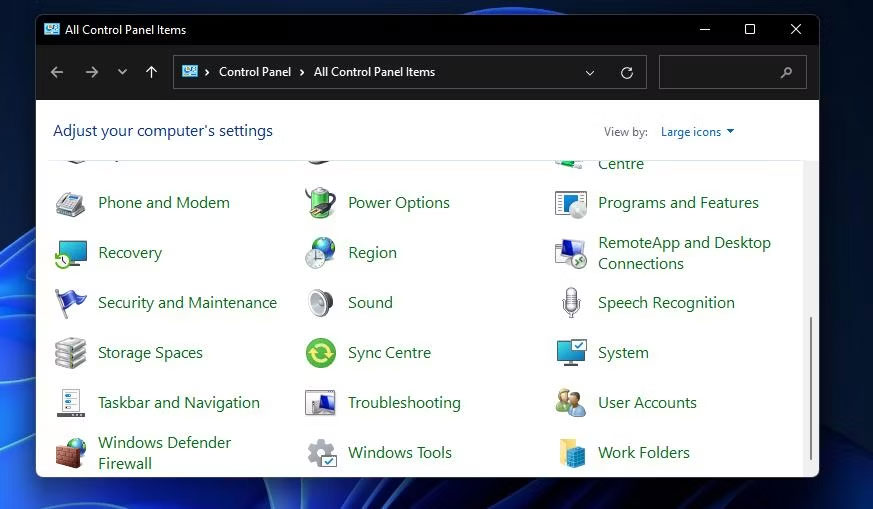
5. Sau đó nhấp vào Windows Defender Firewall để mở applet Control Panel đó.
2. Cách mở Windows Defender Firewall bằng Run
Hộp thoại Run cung cấp phương pháp 3 bước nhanh hơn để mở Windows Defender Firewall. Bạn có thể mở applet Control Panel của tường lửa bằng cách nhập nhanh lệnh applet vào hộp Open. Đây là ba bước để mở Windows Defender Firewall bằng Run.
1. Nhấn các phím Windows + R trên bàn phím cùng lúc để khởi chạy Run.
2. Nhập lệnh Run control firewall.cpl trong hộp văn bản Open.
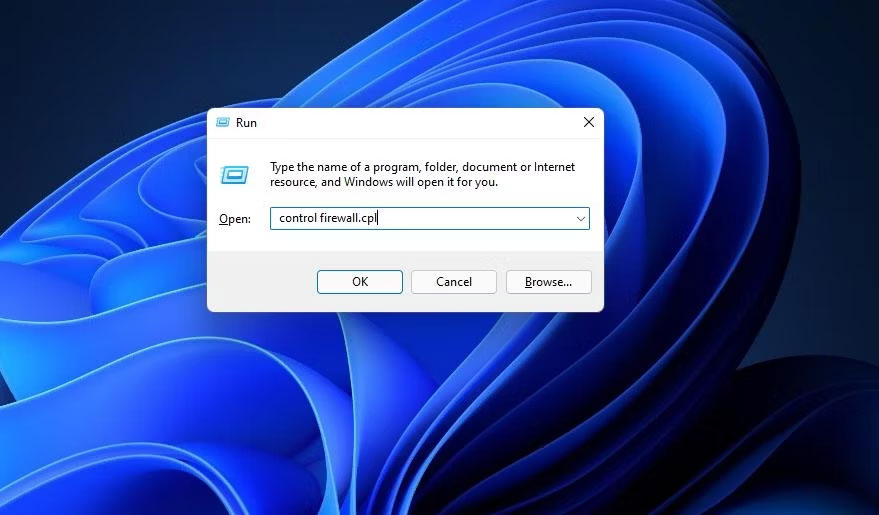
3. Nhấp vào tùy chọn OK để hiển thị Windows Defender Firewall.
3. Cách mở Windows Defender Firewall bằng công cụ tìm kiếm
Công cụ tìm kiếm của Windows 11 luôn hữu ích trong việc mở các tiện ích hệ thống tích hợp và phần mềm của bên thứ ba. Chỉ cần nhập tên của thứ bạn cần mở vào hộp tìm kiếm. Sau đó, bạn có thể chọn mở những gì mình đang tìm kiếm từ đó. Bạn có thể mở applet Control Panel Windows Defender Firewall bằng hộp tìm kiếm như sau.
1. Nhấn nút kính lúp của công cụ tìm kiếm để mở tiện ích.
2. Gõ từ khóa Windows Defender Firewall vào hộp tìm kiếm.
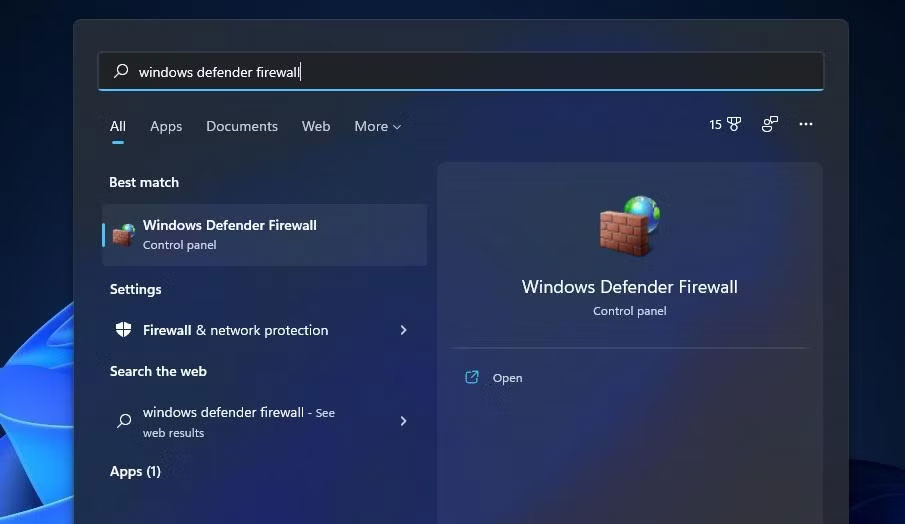
3. Nhấp vào Windows Defender Firewall để mở nó.
4. Cách mở Windows Defender Firewall bằng Windows Terminal
Lệnh Run control firewall.cpl được chỉ định trong phương pháp hai cũng hoạt động khi được nhập vào Command Prompt và PowerShell. Do đó, bạn có thể mở ứng dụng tường lửa bằng Windows Terminal, ứng dụng này kết hợp cả hai trình thông dịch dòng lệnh đó. Đây là cách bạn có thể mở Windows Defender Firewall bằng Windows Terminal.
1. Nhấp chuột phải vào nút Start để chọn Windows Terminal (Admin).
2. Tiếp theo, nhấp vào nút Open a new tab ở đầu Windows Terminal để hiển thị menu bên dưới.
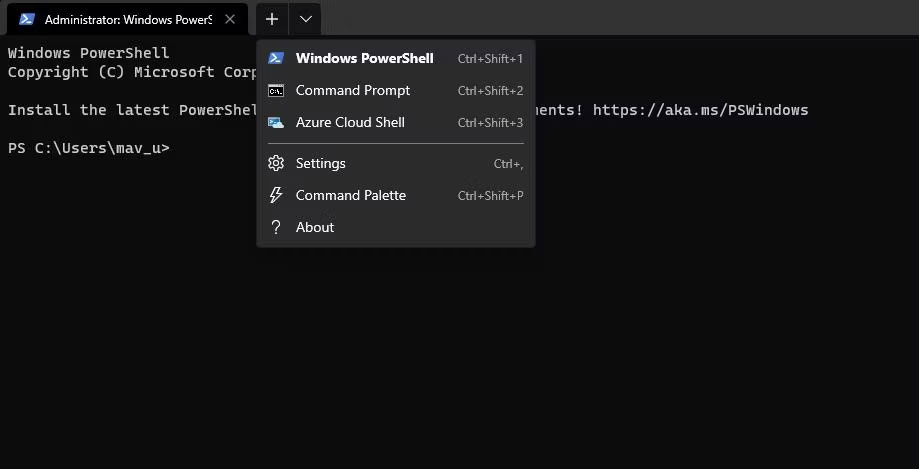
3. Chọn Command Prompt hoặc Windows PowerShell ở đó.
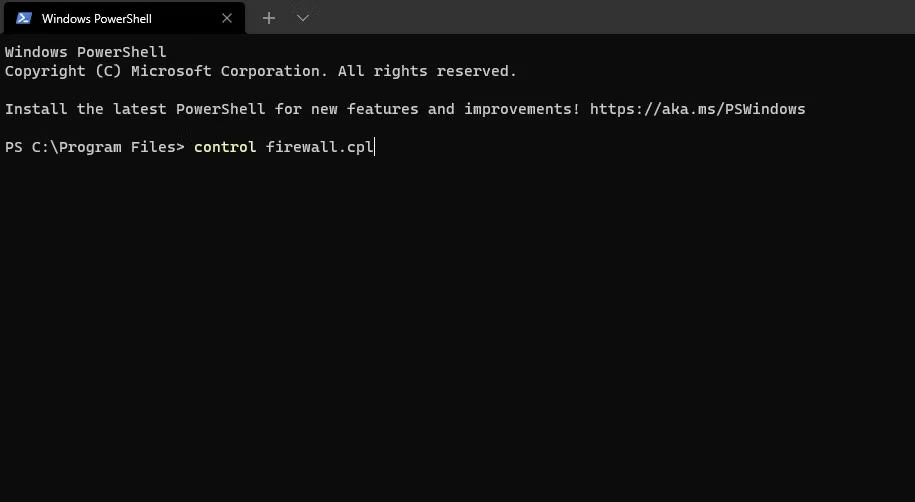
4. Sau đó nhập control firewall.cpl trong tab Command Prompt hoặc Windows PowerShell và nhấn phím Enter.
5. Cách mở Windows Defender Firewall bằng Task Manager
Task Manager kết hợp công cụ Create new task giống như Run. Công cụ đó cho phép bạn chạy các quy trình mới. Bạn có thể truy cập applet Windows Defender Firewall bằng cách tạo một tác vụ mới như sau:
1. Nhấp vào bất kỳ vùng trống nào trên thanh tác vụ của Windows 11 bằng nút chuột phải và chọn Task Manager.
2. Tiếp theo, nhấp vào File trên thanh menu của Task Manager.
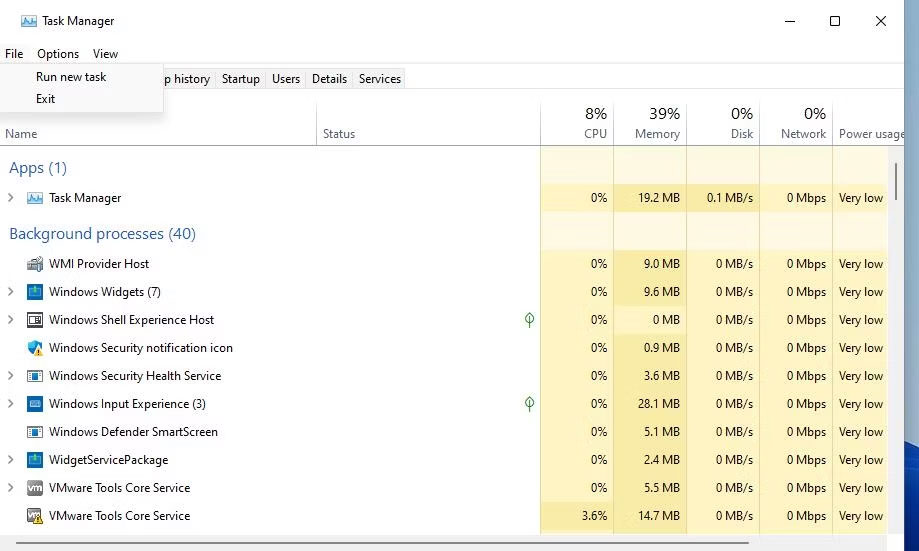
3. Chọn Run new task để hiển thị hộp thoại lệnh Create new task.
4. Nhập control firewall.cpl bên trong hộp Open của cửa sổ Create new task.
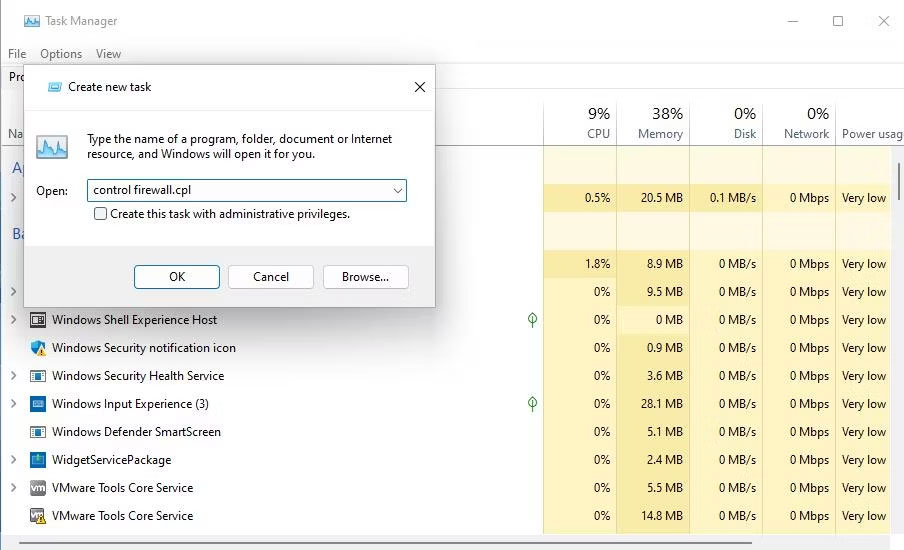
5. Nhấn OK để hiển thị applet Windows Defender Firewall.
6. Cách mở Windows Defender Firewall bằng Settings
Mặc dù Windows Defender Firewall là một applet của Control Panel nhưng có một cách để bạn có thể truy cập nó từ Settings. Đây là cách bạn có thể mở Windows Defender Firewall thông qua Settings:
1. Nhấp vào Start và shortcut ứng dụng Settings trên menu mở ra.
2. Nhập từ khóa Windows Defender Firewall bên trong hộp tìm kiếm Settings.
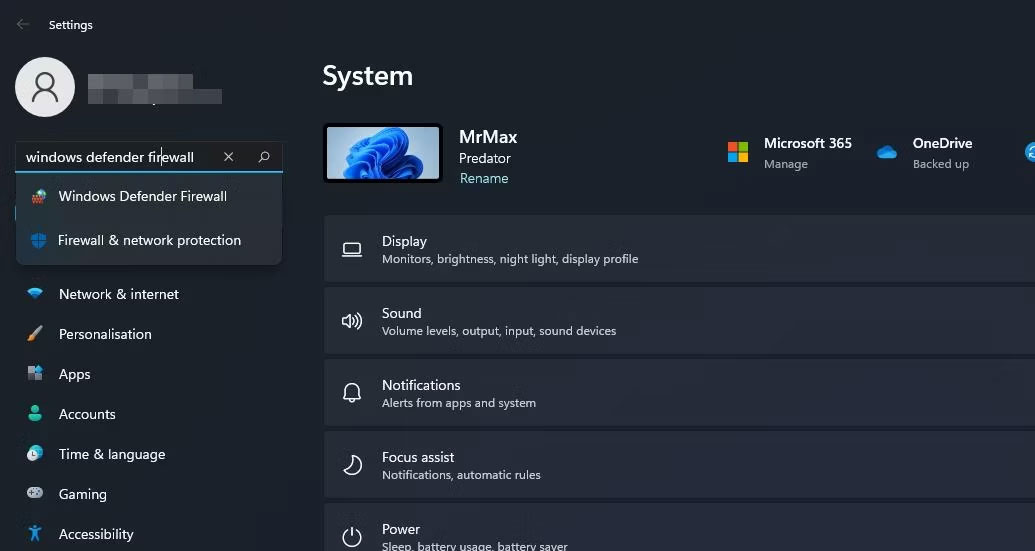
3. Chọn kết quả tìm kiếm Windows Defender Firewall.
7. Cách mở Windows Defender Firewall bằng Windows Security
Ứng dụng Windows Security bao gồm các cài đặt tường lửa thay thế. Ứng dụng đó cũng bao gồm các tùy chọn điều hướng để truy cập các phần của applet Control Panel Windows Defender Firewall. Bạn có thể sử dụng các tùy chọn điều hướng đó để truy cập applet WDF từ Windows Security như sau:
1. Nhấp đúp vào biểu tượng chiếc khiên trong khu vực khay hệ thống của Windows 11 để mở ứng dụng bảo mật. Bạn cũng có thể cần phải nhấp vào mũi tên nhỏ Show hidden icons để xem biểu tượng khay hệ thống của Windows Security.
2. Chọn tab Firewall & network protection trong Windows Security.
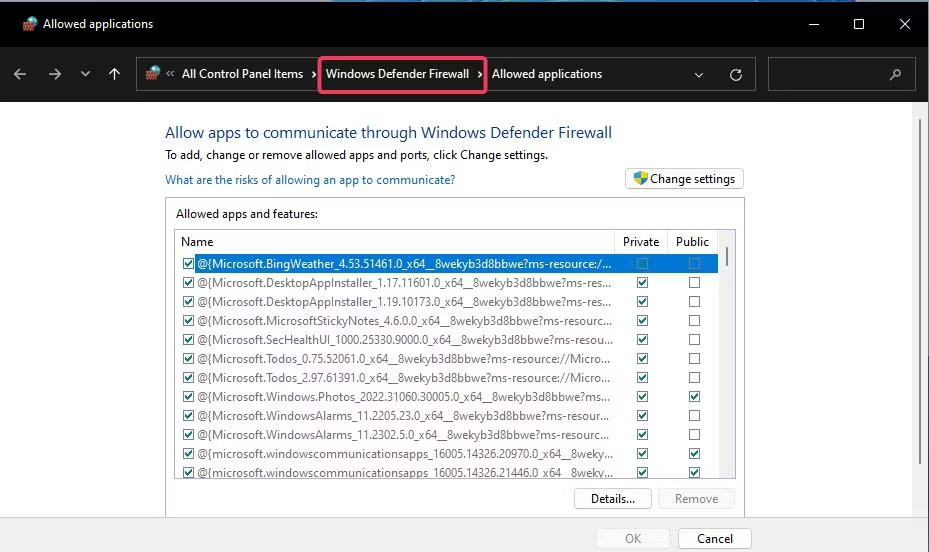
3. Nhấp vào tùy chọn điều hướng Allow an app through firewall.
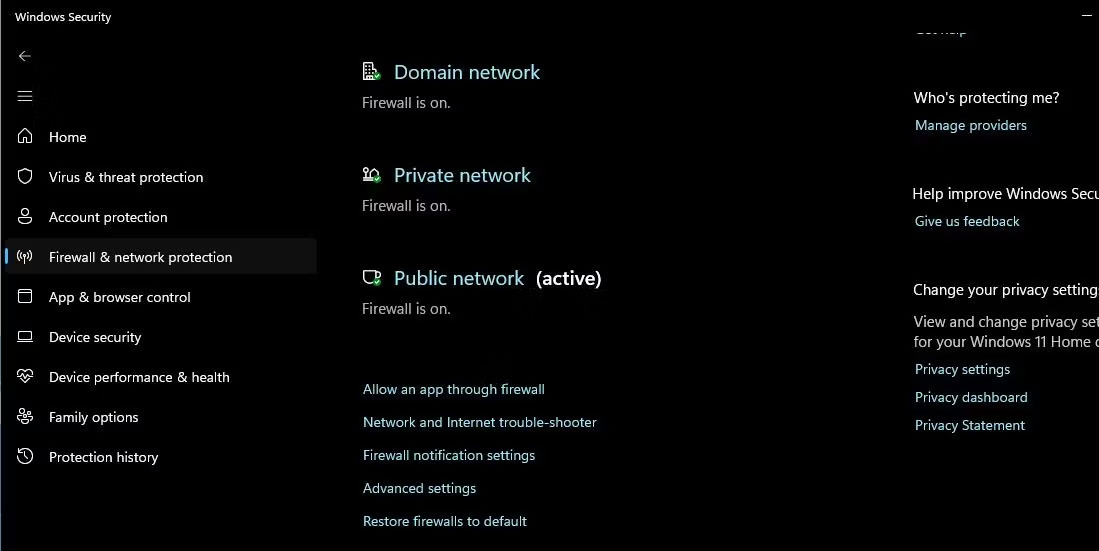
4. Phần danh sách ứng dụng được phép của ứng dụng Windows Defender Firewall sẽ mở ra. Bạn có thể truy cập màn hình chính của applet bằng cách nhấp vào Windows Defender Firewall trong thanh điều hướng của Control Panel.
Ngoài ra, bạn có thể nhấp vào Restore firewalls to default trên cùng tab Firewall & network protection. Làm như vậy sẽ mở tùy chọn Restore defaults trong Windows Defender Firewall Control Panel. Windows Security có các liên kết điều hướng đó đến ứng dụng WDF vì nó không bao gồm những tùy chọn để cài đặt lại tường lửa hoặc cho phép các ứng dụng vượt qua nó.
8. Cách mở Windows Defender Firewall bằng desktop shortcut
Bạn có thể làm cho Windows Defender Firewall truy cập trực tiếp từ desktop bằng cách tạo shortcut cho nó ở đó. Sau đó, bạn sẽ có thể mở tường lửa nhanh hơn một chút bằng shortcut đó bất cứ khi nào bạn cần sửa đổi cài đặt của nó. Đây là các bước để thêm shortcut Windows Defender Firewall vào desktop.
1. Nhấp vào vị trí nào đó trên desktop bằng nút chuột phải để chọn New > Shortcut.
2. Nhập control firewall.cpl vào hộp vị trí mục như trong ảnh chụp màn hình ngay bên dưới.
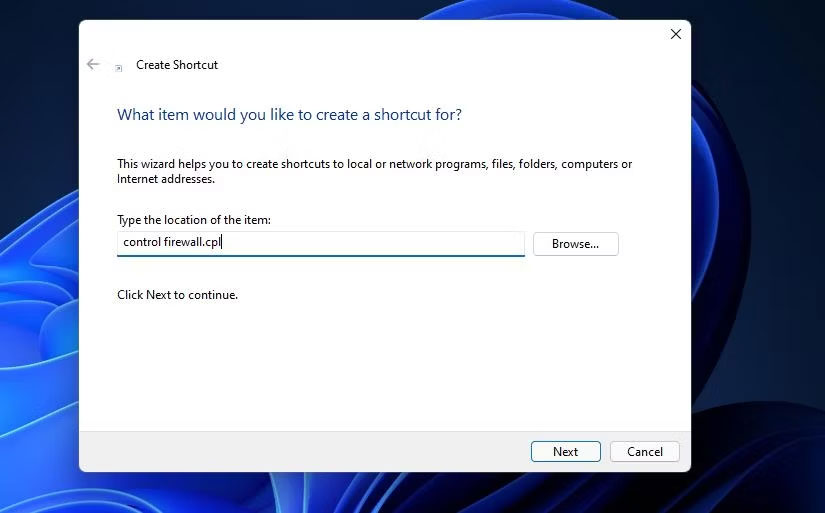
3. Nhấn nút Next để chuyển sang bước đặt tên.
4. Xóa nội dung trong hộp văn bản, sau đó nhập Windows Defender Firewall vào đó.
5. Nhấp vào Finish để thêm biểu tượng Windows Defender Firewall vào desktop.

6. Hãy tiếp tục và nhấp đúp vào shortcut Windows Defender Firewall để hiển thị applet Control Panel của nó.
9. Cách mở Windows Defender Firewall bằng phím tắt
Nếu thích khả năng truy cập bằng hotkey, bạn cũng có thể thiết lập phím tắt cho Windows Defender Firewall. Thiết lập desktop shortcut cho tường lửa như đã nêu trong phương pháp trước là giai đoạn đầu tiên cho việc này. Khi thực hiện xong việc đó, bạn có thể áp dụng hotkey cho desktop shortcut WDF như thế này.
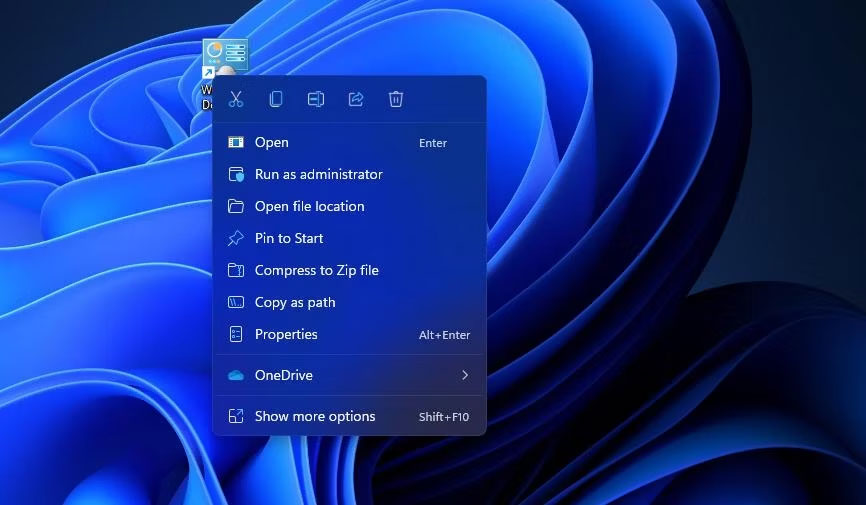
1. Nhấp chuột phải vào shortcut Windows Defender Firewall mà bạn đã thêm vào desktop và chọn Properties.
2. Nhấp vào bên trong hộp Shortcut key trên cửa sổ thuộc tính.
3. Nhấn F (viết tắt của firewall) để thiết lập hotkey Ctrl + Alt + F.
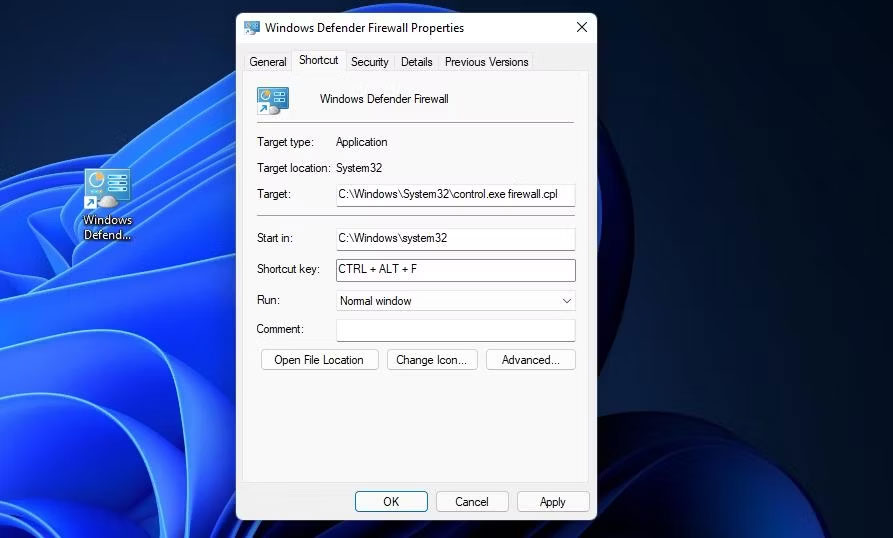
4. Chọn Apply để lưu shortcut mới.
5. Nhấn OK trên cửa sổ thuộc tính.
Bây giờ, nhấn Ctrl + Alt + F cùng lúc để mở Windows Defender Firewall. Bạn luôn có thể thay đổi hotkey đó bằng cách nhấn một phím khác trong hộp Shortcut key. Lưu ý rằng việc xóa desktop shortcut Windows Defender Firewall cũng sẽ xóa hotkey được áp dụng cho nó.
10. Cách mở Windows Defender Firewall bằng shortcut menu ngữ cảnh
Menu ngữ cảnh của desktop là một nơi khác mà bạn có thể mở Windows Defender Firewall từ đó. Tuy nhiên, trước tiên bạn cần thêm shortcut tường lửa vào menu chuột phải của desktop. Bạn có thể thêm tùy chọn Windows Firewall vào menu ngữ cảnh bằng Winaero Tweaker như thế này.
1. Mở trang chủ Winaero Tweaker trong trình duyệt Windows.
https://winaero.com/winaero-tweaker/
2. Nhấn vào Download Winaero Tweaker trên trang chủ.
3. Nhấn Win + E, sau đó mở thư mục chứa file ZIP Winaero Tweaker đã tải xuống.
4. Nhấp đúp vào file winaerotweaker.zip để mở nó.
5. Nhấp vào Extract all ở đầu File Explorer.
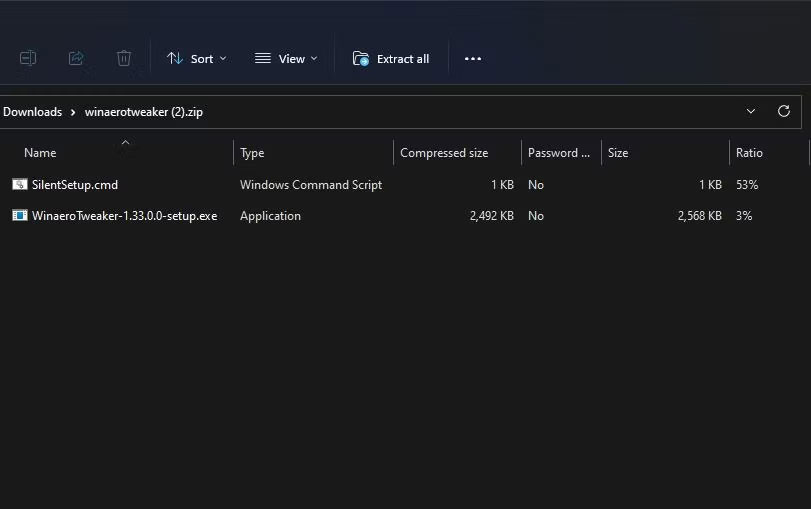
6. Tùy chọn Show extracted files có thể sẽ được chọn theo mặc định. Tuy nhiên, nếu không, hãy chọn tùy chọn đó.
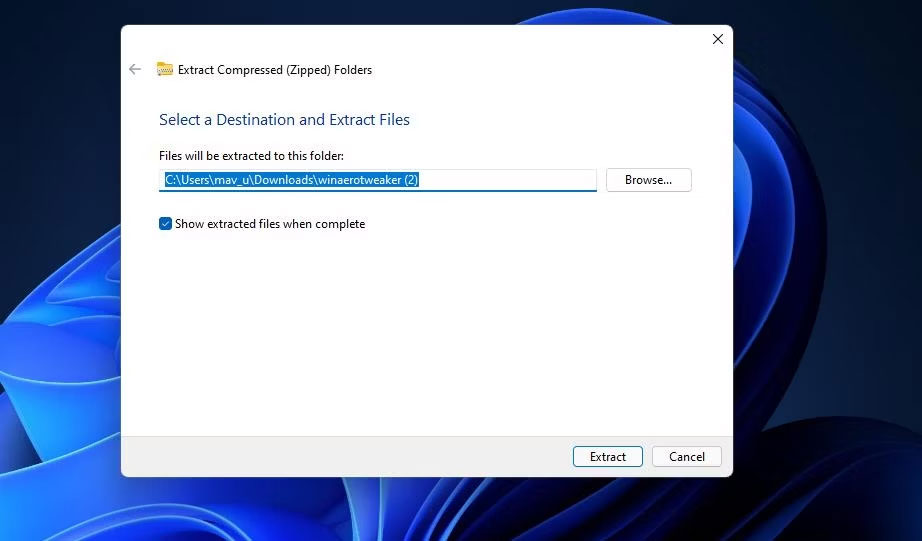
7. Nhấn nút Extract để mở thư mục Winaero Tweaker đã được giải nén.
8. Nhấp đúp vào file WinaeroTweaker-1.33.0.0-setup.exe ở đó để hiển thị trình cài đặt cho phần mềm.
9. Chọn các tùy chọn Normal mode và I accept the agreement trong trình hướng dẫn thiết lập và nhấp vào Next để tiếp tục.
10. Nhấp vào Browse, chọn thư mục cài đặt và nhấn nút OK.
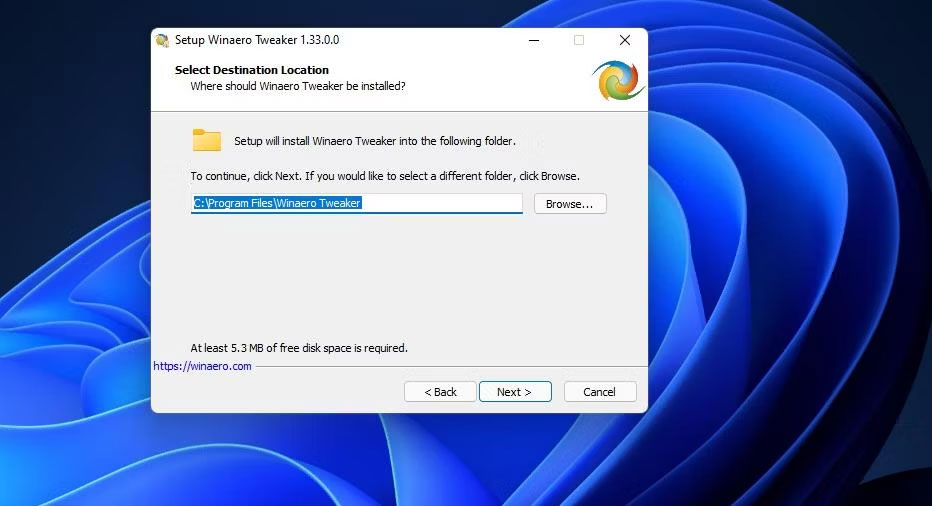
11. Sau đó nhấn nút Next vài lần nữa để đến tùy chọn Install. Bấm vào nút Install để hoàn tất.
12. Mở cửa sổ Winaero Tweaker.
13. Nhấp đúp vào danh mục Context Menu để mở rộng nó.
14. Sau đó chọn tùy chọn Firewall Context Menu của Winaero Tweaker được hiển thị ngay bên dưới.
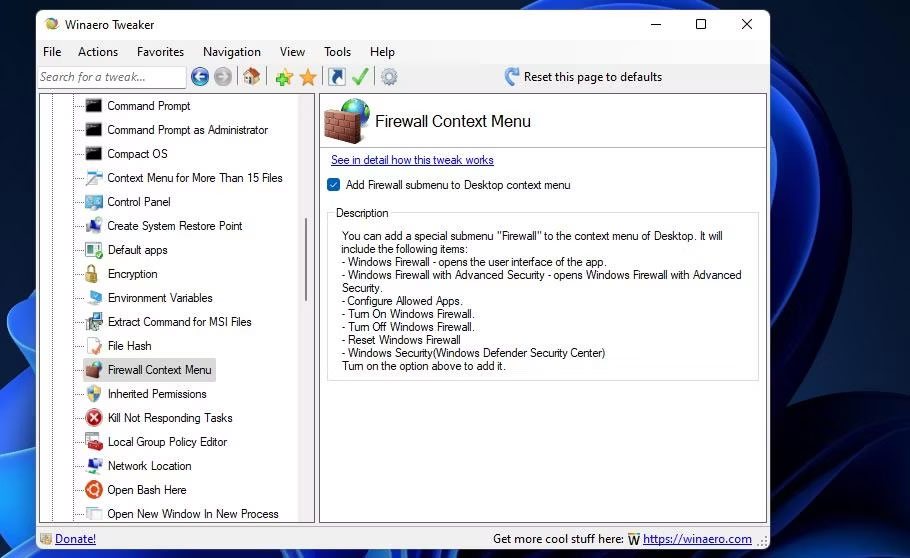
15. Chọn hộp kiểm Add Firewall submenu to Desktop context menu.
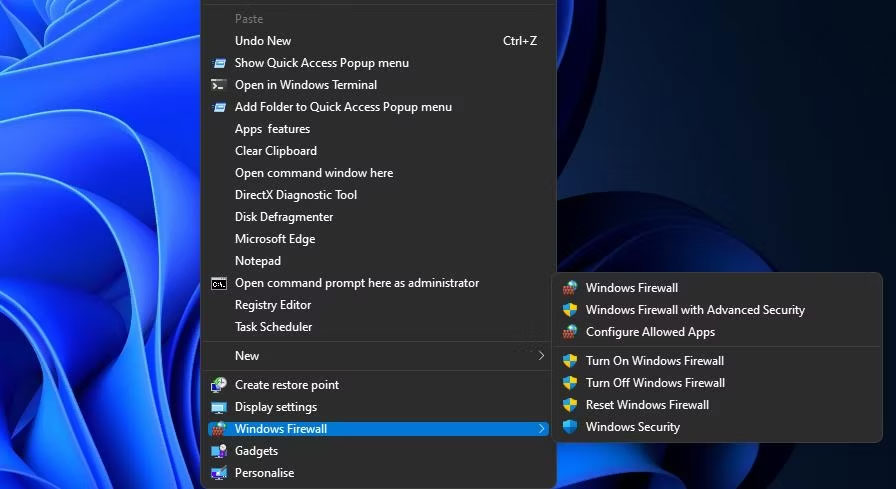
Bây giờ, hãy đóng Winaero Tweaker. Nhấp chuột phải vào desktop và chọn Show more options để xem menu ngữ cảnh cổ điển. Di chuyển con trỏ qua menu con Windows Firewall ở đó. Sau đó nhấp vào Windows Firewall để hiển thị applet Control Panel đó.
Bạn sẽ nhận thấy menu con Windows Firewall bao gồm nhiều shortcut. Ở đó, bạn có thể chọn mở Windows Defender Firewall với Advanced Security. Menu con đó cũng bao gồm các tùy chọn để bật/tắt tường lửa và reset nó.
