10 cách khắc phục tùy chọn Bluetooth bị mất trong Windows 11
- Thứ năm - 28/11/2024 23:19
- In ra
- Đóng cửa sổ này
Tùy chọn Bluetooth đã biến mất trên máy tính Windows 11 của bạn? Điều này có thể xảy ra vì một số lý do, bao gồm trục trặc tạm thời, driver Bluetooth bị hỏng và sự cố với hệ điều hành Windows. Nếu bạn không chắc chắn về nguyên nhân gây ra sự cố, sau đây là một số mẹo hữu ích.
1. Chạy trình khắc phục sự cố Windows phù hợp
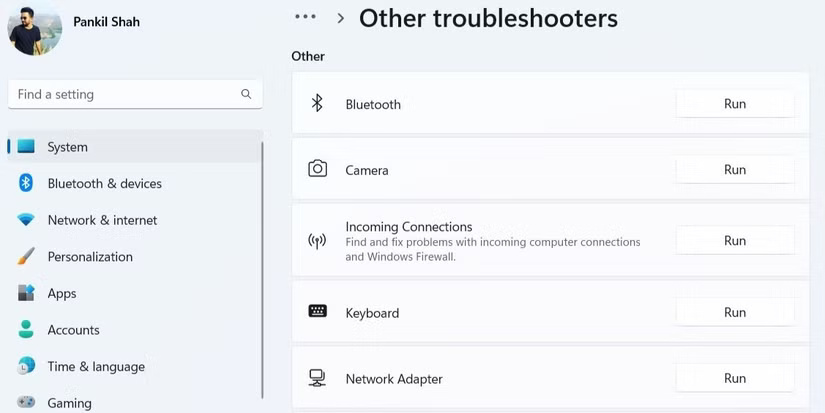
Trình khắc phục sự cố Windows là các tiện ích tích hợp có thể giúp bạn chẩn đoán và giải quyết nhiều sự cố cấp hệ thống. Bạn có thể chạy trình khắc phục sự cố Bluetooth, cho phép Windows khắc phục mọi sự cố liên quan đến Bluetooth phổ biến. Sau đây là cách thực hiện:
- Nhấn Win + I để khởi chạy ứng dụng Settings.
- Trong tab System, nhấp vào Troubleshoot.
- Chọn Other troubleshooters.
- Nhấp vào nút Run bên cạnh Bluetooth.
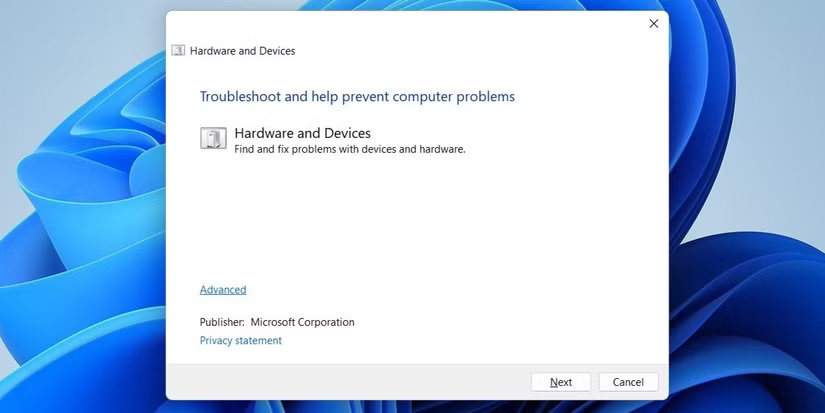
Windows sẽ quét máy tính của bạn để tìm mọi sự cố và cố gắng khắc phục chúng. Ngoài ra, bạn có thể chạy trình khắc phục sự cố Hardware and Devices để quét máy tính và tìm mọi sự cố phần cứng. Để thực hiện:
- Nhấn Win + R để mở hộp thoại Run.
- Nhập msdt.exe -id DeviceDiagnostic vào trường Open và nhấn Enter.
- Trong cửa sổ Hardware and Devices, nhấp vào Next và làm theo hướng dẫn trên màn hình để chạy trình khắc phục sự cố.
2. Thực hiện Power Cycle (khởi động lại bắt buộc)
Đôi khi, giải pháp hiệu quả nhất lại đơn giản đến ngạc nhiên. Thực hiện Power Cycle có thể giải quyết nhiều sự cố khác nhau với PC Windows do trục trặc tạm thời. Để thực hiện Power Cycle:
- Tắt máy tính và rút phích cắm khỏi nguồn điện.
- Nhấn và giữ nút nguồn trong 30 đến 60 giây để xả hết điện còn lại trên thiết bị.
- Để máy tính ở chế độ chờ trong vài phút.
- Kết nối máy tính với nguồn điện, sau đó bật lại.
3. Kiểm tra cửa sổ Quick Settings
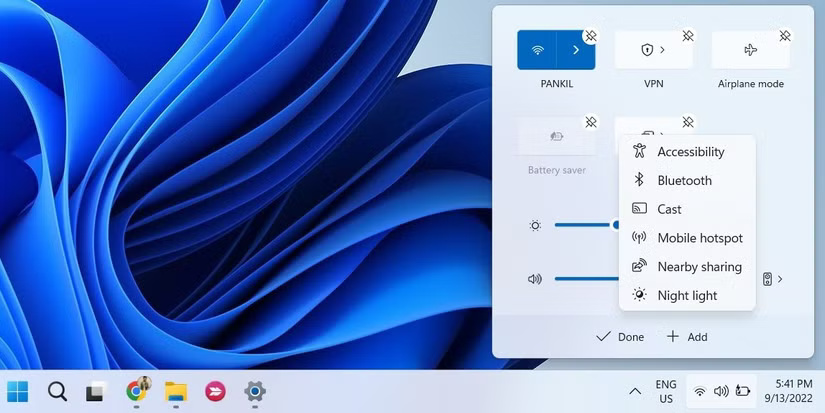
Cửa sổ Quick Settings trong Windows 11 cung cấp quyền truy cập vào nhiều cài đặt thường dùng, bao gồm cả Bluetooth.
Nếu bạn không tìm thấy nút chuyển đổi Bluetooth trong cửa sổ Quick Settings, có thể bạn đã vô tình xóa nút này. Sau đây là cách khôi phục nút này.
- Nhấn Win + A để mở cửa sổ Quick Settings.
- Nhấp vào biểu tượng bút chì để chỉnh sửa cửa sổ Quick Settings.
- Nhấp vào Add và chọn Bluetooth từ danh sách để thêm vào bảng điều khiển.
4. Tắt Fast Startup
Theo mặc định, tính năng Fast Startup được bật trên hầu hết các máy tính Windows. Mặc dù tính năng này giúp giảm thời gian khởi động trên Windows, nhưng đôi khi có thể gây ra sự cố, chẳng hạn như tùy chọn Bluetooth biến mất khỏi PC của bạn. Bạn có thể thử tắt tính năng Fast Startup để xem có khắc phục được sự cố không.
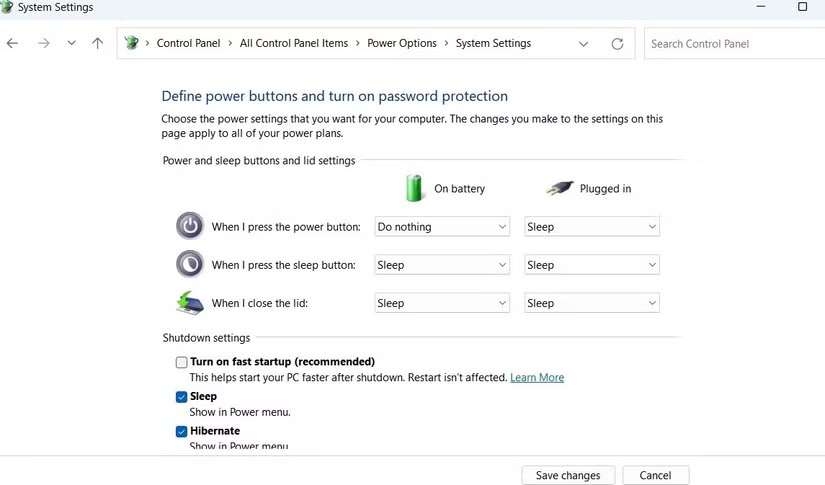
Sau đó, hãy khởi động lại PC và kiểm tra xem Bluetooth có xuất hiện và hoạt động như mong đợi không.
5. Kiểm tra cài đặt Bluetooth
Biểu tượng Bluetooth có thể không xuất hiện trên thanh tác vụ hoặc khay hệ thống nếu trước đó bạn đã xóa biểu tượng. Sau đây là cách bạn có thể ghim lại biểu tượng Bluetooth vào thanh tác vụ Windows.
- Mở menu Start và đi tới Settings > Bluetooth & devices.
- Vào mục Devices và nhấp vào More Bluetooth Settings.
- Đánh dấu vào ô có nội dung Show the Bluetooth icon in the notification area.
- Nhấn Apply > OK.

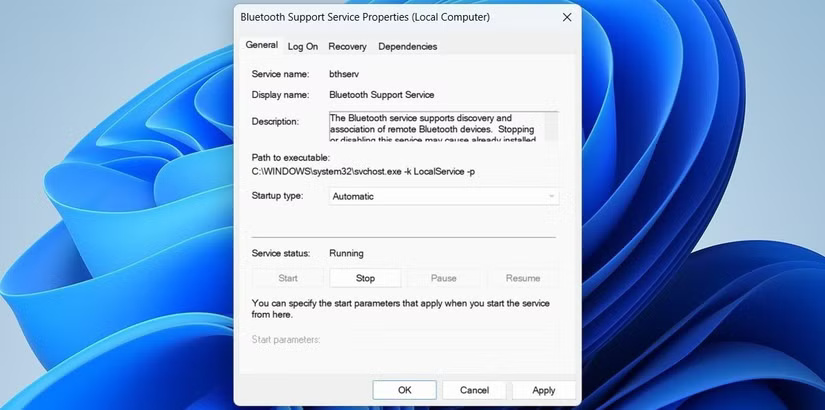
6. Cấu hình Bluetooth Support Service
Bluetooth Support Service là một chương trình nhỏ chạy trong nền để cho phép Bluetooth hoạt động trên Windows. Sự cố Bluetooth của bạn có thể do service không chạy. Sau đây là cách khắc phục.
- Nhấn Win + R để mở hộp thoại Run.
- Nhập services.msc vào trường văn bản và nhấn Enter.
- Nhấp đúp vào Bluetooth Support Service để mở thuộc tính của service.
- Sử dụng menu drop-down bên cạnh Startup type để chọn Automatic.
- Nhấn Apply để lưu thay đổi.
Khởi động lại PC một lần nữa và kiểm tra xem tùy chọn Bluetooth có xuất hiện không.
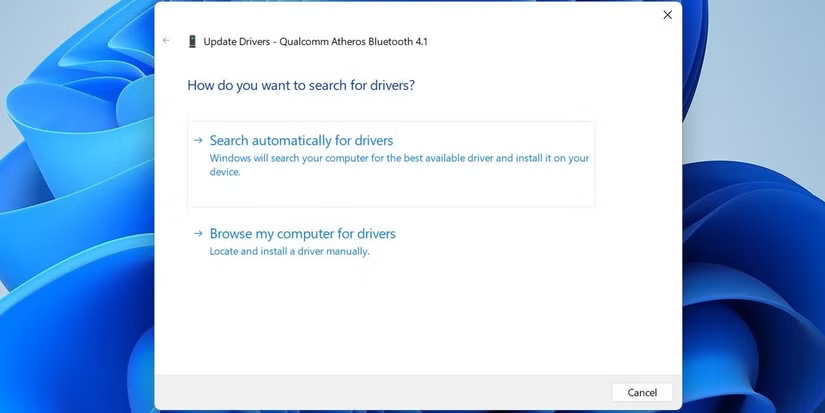
7. Cập nhật hoặc cài đặt lại driver Bluetooth
Driver Bluetooth bị trục trặc hoặc hỏng trên PC cũng có thể là nguyên nhân gây ra sự cố. Nếu có vẻ như vậy, hãy cập nhật driver Bluetooth. Để thực hiện, hãy làm theo các bước sau:
- Nhấp chuột phải vào biểu tượng Start và chọn Device Manager từ danh sách.
- Mở rộng phần Bluetooth, nhấp chuột phải vào Bluetooth adapter và chọn Update driver.
- Chọn Search automatically for drivers và cho phép Windows cài đặt driver khả dụng tốt nhất.
Lưu ý: Nếu mục Bluetooth bị mất trong Device Manager, hãy truy cập trang web của nhà sản xuất Bluetooth adpater để tải xuống driver và cài đặt thủ công.
Nếu việc cập nhật driver không có tác dụng, bạn sẽ phải cài đặt lại driver Bluetooth. Để thực hiện việc này, hãy mở lại Device Manager, nhấp chuột phải vào driver Bluetooth, sau đó chọn Uninstall device.
Sau khi xóa, hãy khởi động lại PC. Windows sẽ cài đặt driver Bluetooth bị thiếu trong quá trình khởi động và tùy chọn Bluetooth sẽ xuất hiện trên PC của bạn.
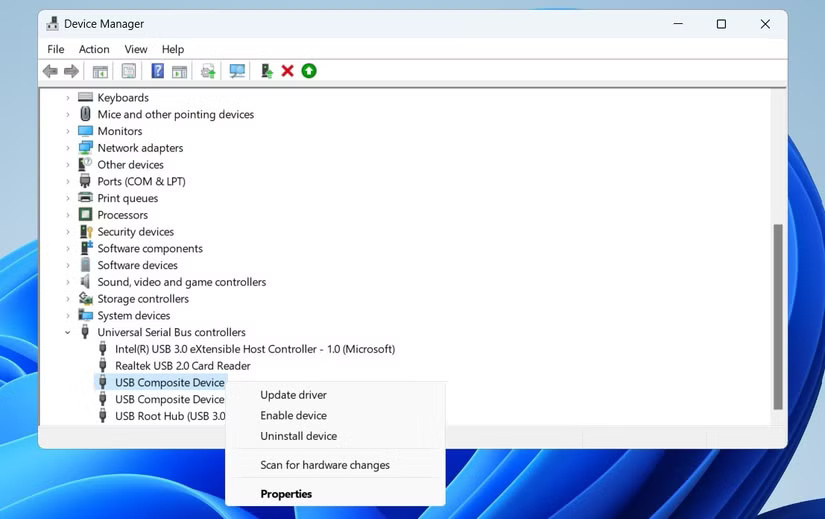
8. Tắt và bật lại driver USB có vấn đề
Một số người dùng trên bài đăng của Microsoft Community báo cáo rằng họ đã khôi phục chức năng Bluetooth bị thiếu trên máy tính của mình bằng cách tắt và bật lại driver USB. Bạn cũng có thể thử.
- Mở Device Manager bằng menu tìm kiếm.
- Mở rộng Universal Serial Bus controllers.
- Tìm bất kỳ mục nào có hình tam giác cảnh báo màu vàng. Nhấp chuột phải vào mục đó và chọn Disable device.
- Chọn Yes để xác nhận.
- Nhấp chuột phải vào driver USB một lần nữa và chọn Enable device.
9. Chạy quét SFC và DISM
Các sự cố Bluetooth cũng có thể phát sinh nếu những file hệ thống quan trọng bị thiếu trên máy tính của bạn. Windows bao gồm một số công cụ có thể giúp bạn thay thế bất kỳ file hệ thống nào bị thiếu hoặc bị hỏng bằng phiên bản được lưu trong cache của chúng. Sau đây là cách chạy chúng.
- Nhấn Win + X và chọn Terminal (Admin) từ danh sách.
- Chọn Yes khi lời nhắc User Account Control (UAC) xuất hiện.
- Trong console, hãy chạy lệnh sau:
sfc /scannow
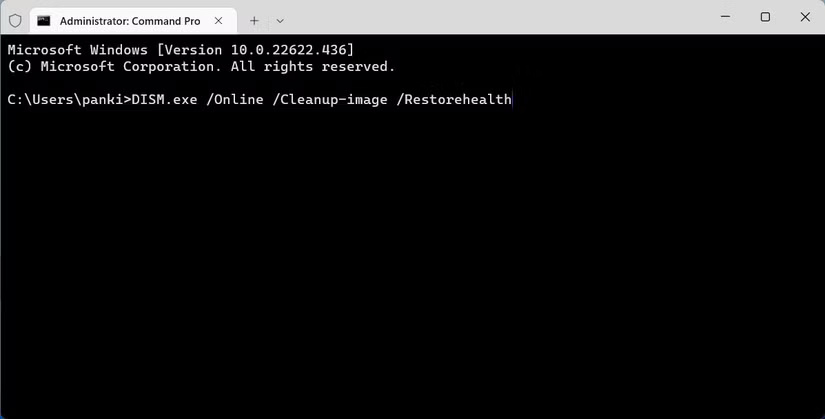
Đợi quá trình quét hoàn tất, sau đó chạy quét DISM (hoặc Deployment Image Servicing and Management).
DISM.exe /Online /Cleanup-image /Restorehealth
Sau khi quá trình quét hoàn tất, hãy khởi động lại PC và kiểm tra xem sự cố có còn không.
10. Khởi động vào Safe Mode
Khi bạn khởi động Windows vào Safe Mode, nó sẽ chạy mà không có bất kỳ driver và chương trình không cần thiết nào. Điều này có thể giúp bạn xác minh xem sự cố có phải do driver hoặc chương trình của bên thứ ba chạy trong nền hay không.
Windows 11 cung cấp một số tùy chọn để khởi động vào Safe Mode. Bạn có thể sử dụng bất kỳ phương pháp nào bạn thích để vào Safe Mode và xem tùy chọn Bluetooth có xuất hiện không. Nếu có, thì lỗi là do chương trình hoặc dịch vụ của bên thứ ba. Trong trường hợp đó, bạn sẽ phải xóa mọi ứng dụng hoặc chương trình đã cài đặt gần đây để khắc phục sự cố.
Bluetooth là một tính năng thiết yếu trên bất kỳ máy tính Windows nào, vì vậy, bạn sẽ cảm thấy bực bội khi nó đột nhiên biến mất. May mắn thay, bạn có thể tự khắc phục bằng các mẹo được đề cập ở trên.
